Installing TrueNAS to Create an iSCSI Target
TrueNAS is a software solution that allows you to transform a computer into a NAS (network-attached storage) server. There are two editions: full-featured paid TrueNAS Scale for enterprises (based on Debian Linux) and free TrueNAS Core (based on FreeBSD) formerly known as FreeNAS.
TrueNAS can be used to deploy shared storage for VMware ESXi hosts and Hyper-V servers. This blog post explains how to install TrueNAS Core and configure an iSCSI target that can be used in different scenarios, including shared storage for VMware vSphere.

TrueNAS Installation System Requirements
TrueNAS Core (FreeNAS) minimum hardware requirements are:
- CPU: 64-bit processor (Intel or AMD)
- RAM: 8 GB
- Boot Device: USB flash drive (16 GB recommended)
- Storage: At least one additional disk drive for data storage
- Network: One or more Ethernet ports
Notes on requirements:
- The requirements for installing TrueNAS Core that are listed above are general guidelines and the actual hardware needs may vary based on factors such as the size of your storage environment, the number of users, and the intended use case.
- TrueNAS is flexible and can run on various hardware configurations, including custom-built systems, servers, and purpose-built storage appliances.
- TrueNAS supports a variety of network interface cards (NICs), storage controllers, and hardware components. However, it’s crucial to ensure compatibility, especially for components that require drivers in FreeBSD.
- The boot device is used to store the operating system, and using a reliable USB flash drive or SSD is recommended.
- For optimal performance and reliability, consider using ECC (error-correcting code) RAM, especially in environments where data integrity is critical.
- Always refer to the official TrueNAS documentation for the specific version you plan to install, as system requirements and recommendations may be updated with new releases.
- It is recommended that you use multiple disk drives to ensure storage redundancy.
How to Install TrueNAS Core on a VMware VM
Let’s configure an iSCSI target on TrueNAS Core using the virtual environment of the VMware home lab we deployed in one of our blog posts. TrueNAS Core installed on a VM will be used to create an iSCSI target in this example. The iSCSI target is then connected as a shared datastore to the ESXi host.
TrueNAS Core is a free distribution based on the FreeBSD operating system, which provides a web interface for creating and managing network shares. VMware hypervisors support FreeBSD as a guest OS.
NOTE: The process of installing TrueNAS Core of configuration is identical to installing the previous version FreeNAS.
Download the ISO installation image from the official site and place it, for more convenience, in the D:\VMware Home Lab\ directory, where VMs and installation images are located. In this guide, the latest stable release of TrueNAS Core is used (TrueNAS-13.0-U6.1.iso as of the time of writing).
- Open VMware Workstation and create a new VM with the following parameters:
- Hard disk 1: 10 GB
- Hard disk 2: 20 GB
- Hard disk 3: 20 GB
- CD/DVD: Using file D:\VMware Home Lab\TrueNAS-13.0-U6.1.iso
- Network adapter: Host Only network
- Memory: 8 GB
- CPU: 1 processor
- The VM name: TrueNAS13-0
- Power on the VM, boot from the TrueNAS Core ISO installation image, and install TrueNAS Core on the VM. The installation process is straightforward – answer the questions provided by the installation wizard.
- Select 1 Install/Upgrade and hit OK to proceed.

- Select a virtual disk to install an operating system. Install TrueNAS Core on the 10-GB disk.

- Read the warning and hit Yes to erase the selected disk and continue.

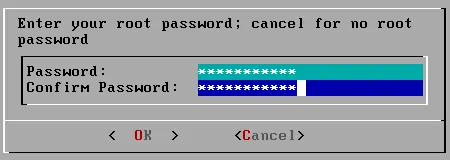
- Enter and confirm the root password. This password will also be used to log in to the web interface of TrueNAS Core. Remember the root password you specify.
- Select the BIOS or UEFI mode to use for operating system boot.

- When you see the message that the TrueNAS installation has succeeded, hit OK and reboot the TrueNAS13-0 virtual machine.

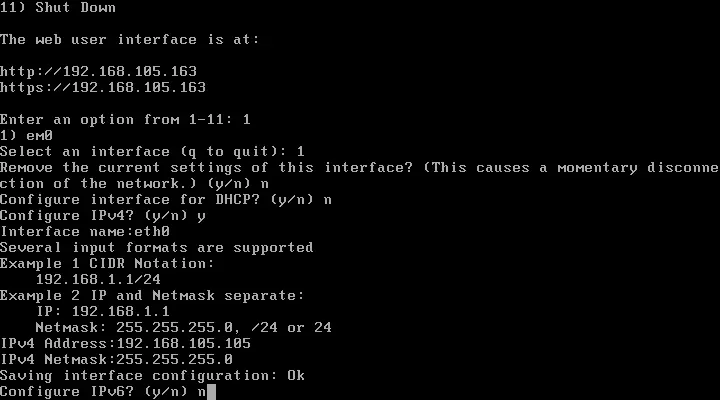
- Check the network settings of TrueNAS Core. The IP address is obtained via DHCP (192.168.105.134). Press 1 (Configure Network Interfaces) in the main menu and set a static IP address such as 192.168.105.105. The web server interface link is displayed in the TrueNAS console interface.

- Select an interface: 1
- Remove the current settings of this interface? n
- Configure interface for DHCP? n
- Configure IPv4? y
- Interface name: eth0
- IPv4 address: 192.168.105.105
- IPv4 netmask: 255.255.255.0
- Configure IPv6? n
Set Up an iSCSI Target on TrueNAS Core
Once the TrueNAS installation has been finished and network settings have been configured, you can set up an iSCSI target on TrueNAS Core.
- Enter the address of the TrueNAS Core web interface in your browser. In this example, http://192.168.105.105 is the address. Then select the legacy web interface and enter the root username and the password you have specified during the TrueNAS installation. Click Log in.

- Click Storage > Pools and then click Add to create a new storage pool.
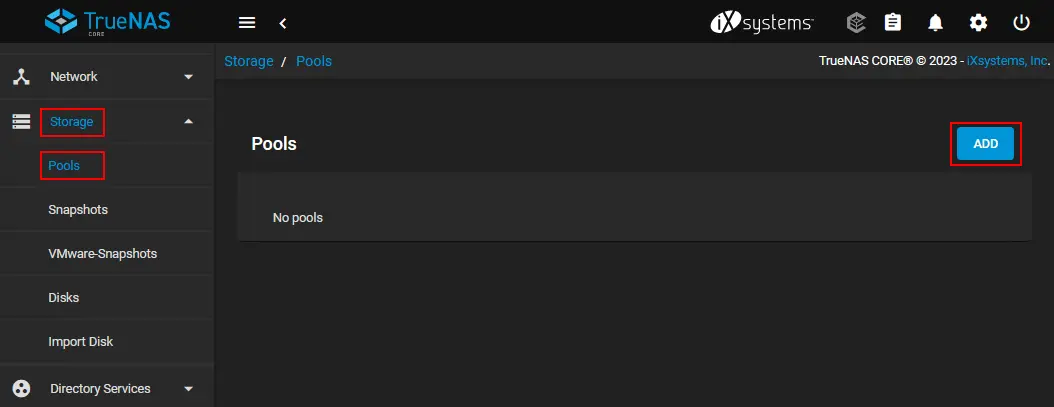
- Select the Create new pool option and click Create Pool.

- Configure a new pool:
- Enter a pool name, for example, iscsipool01.
- Select the two virtual disks, which were added to the TrueNAS VM configuration in the Available disks section. In our case, we use two 20-GB disks. Using two disks allows you to provide redundancy.
- Click the right arrow → in the web interface to add these two selected disks to the pool.

- Make sure that the selected disks are displayed in the Data VDevs section. We select the Mirror option for layout to have the software RAID1.
- Click Create.

- Read the warning message, select the Confirm checkbox to confirm the action, and click Create Pool.

- A new pool has been created in TrueNAS. Next, we need to add a zvol. This is a feature of the Zettabyte File System (ZFS) for creating a raw block device over ZFS that allows you to use a zvol as an iSCSI extent.
Click the three dots icon for your storage pool and hit Add Zvol in the menu that opens.

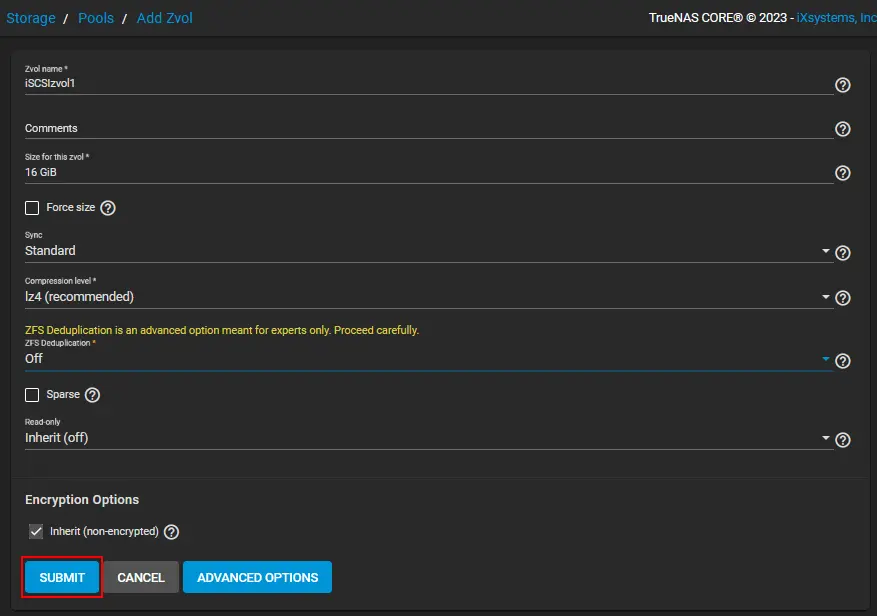
- In this example, the configured parameters of a zvol are:
- Zvol name: iSCSIzvol1
- Size for this Zvol: 16 GB (you should not use more than 80% of your available space for your zvol). 16 GB is equal to 80% of 20 GB.
- Sync: Inherit (standard)
- Compression level: Inherit (lz4)
- ZFS deduplication: Inherit (off)
Click the Save button to create a new zvol.
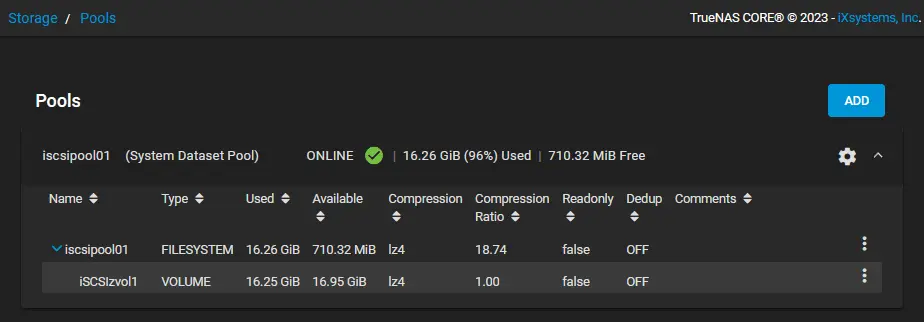
- A zvol has been created and is displayed under the pool in Storage > Pools.
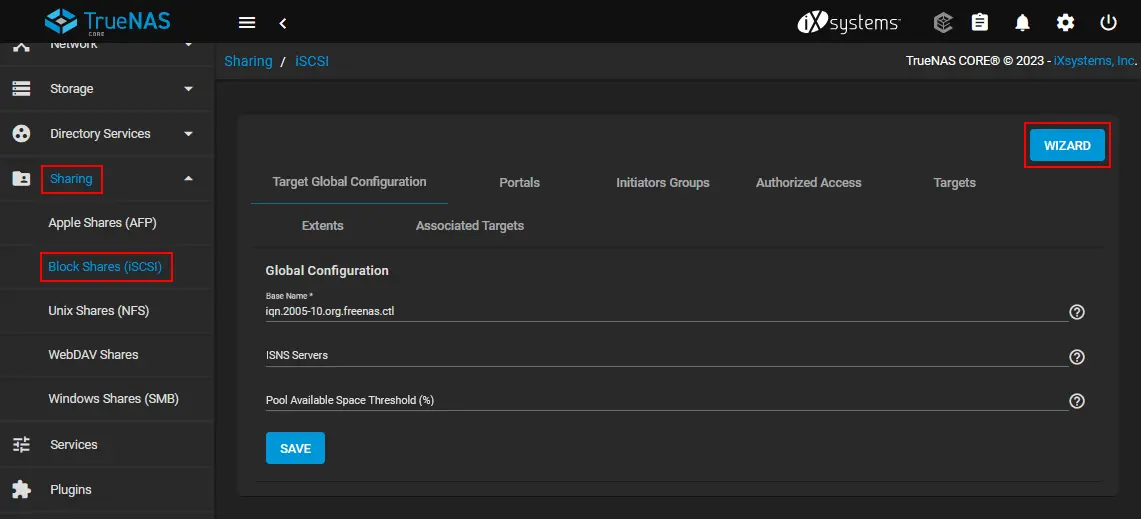
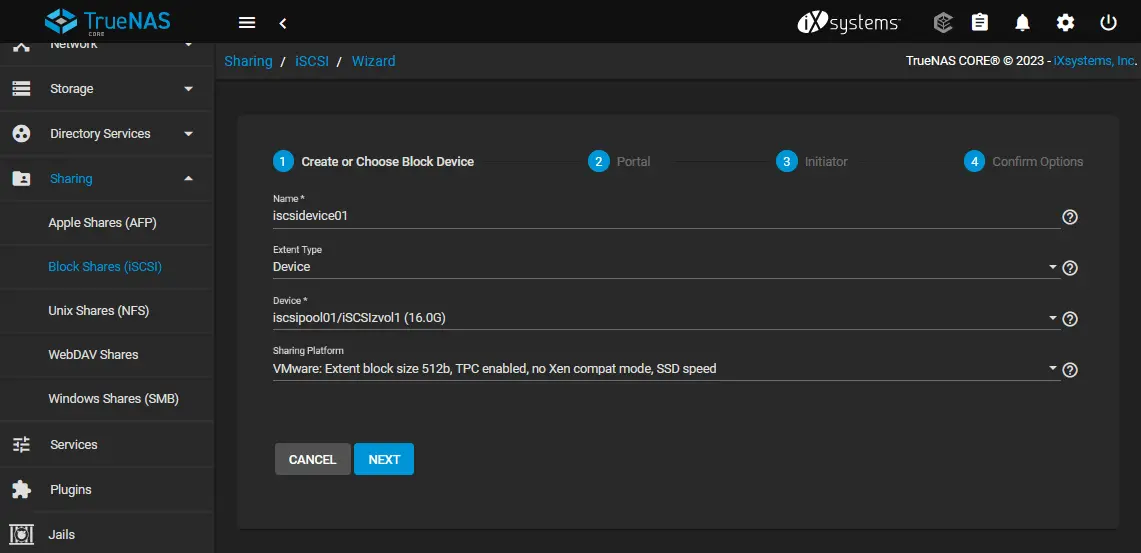
- Go to Sharing > Block Shares (iSCSI) and click Wizard to create a new iSCSI share.
- Create or Choose Block Device. We use the following parameters:
- Name: iscsidevice01
- Type: Device
- Device: iscsipool01/iscsizvol01
- What are you using this for: VMware: Extent block size 512b, TPC enabled, no Xen compat mode, SSD speed
Click Next at each step of the wizard to continue.
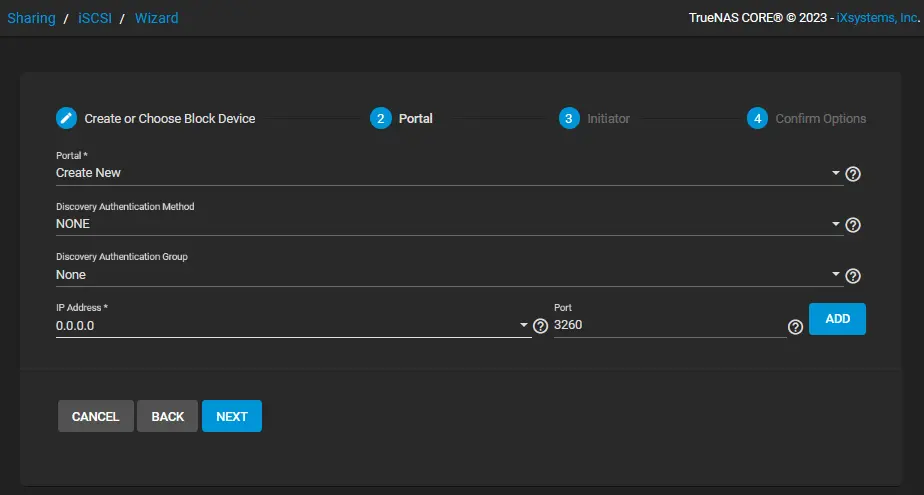
- Portal. Set the needed parameters for a portal. In our example, the parameters are the following:
- Portal: Create New
- Discovery Auth Method: NONE
- Discovery Auth Group: None
- IP: 0.0.0.0 (Allows access from any IP address. If you want to use a more secure approach, you can define custom trusted IP addresses).
- Port: 3260 (is used by default)
- Initiator. At this step, you can configure access for iSCSI initiators. We leave the default values. Click the ? icon to read tips.

- Confirm Options. Verify the configuration for your iSCSI target and click Submit.

- Click Enable service when you see a pop-up message.

- You can edit settings for iSCSI shares if needed. On the Sharing > Block Shares (iSCSI) page, you can select the Initiators tab and click Add.
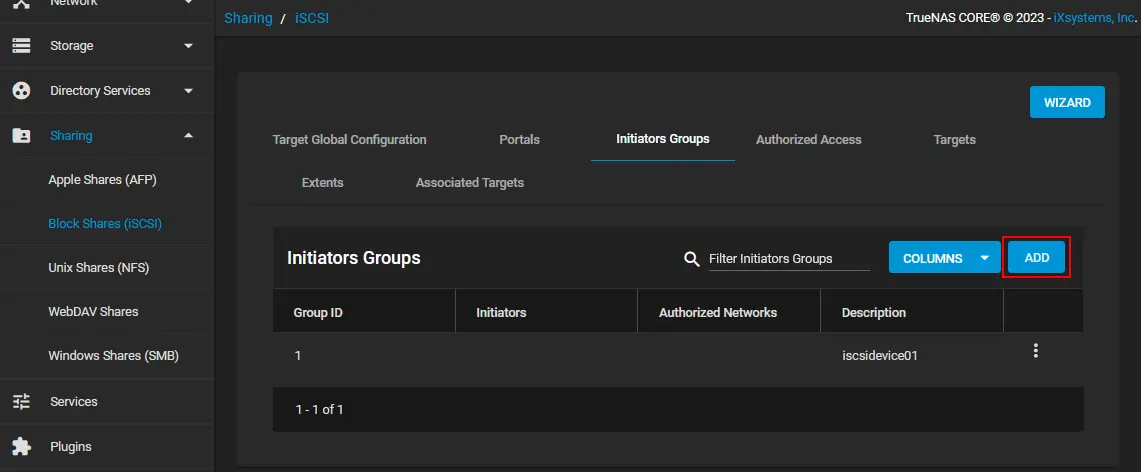
- Select the Allow Initiators checkbox.

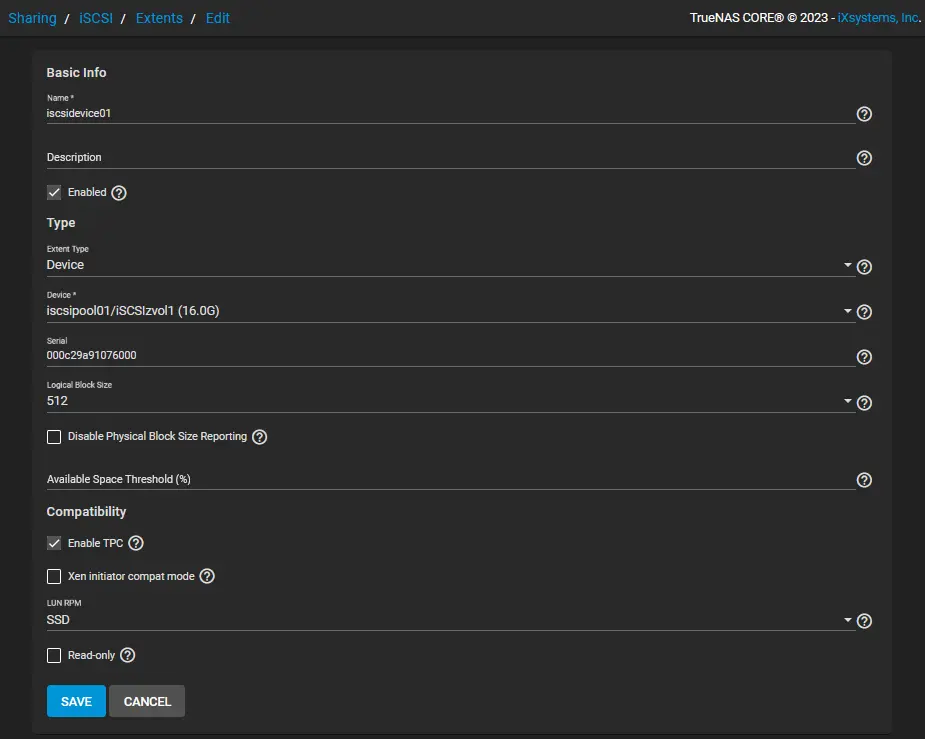
- You can also edit the Extent settings if needed.
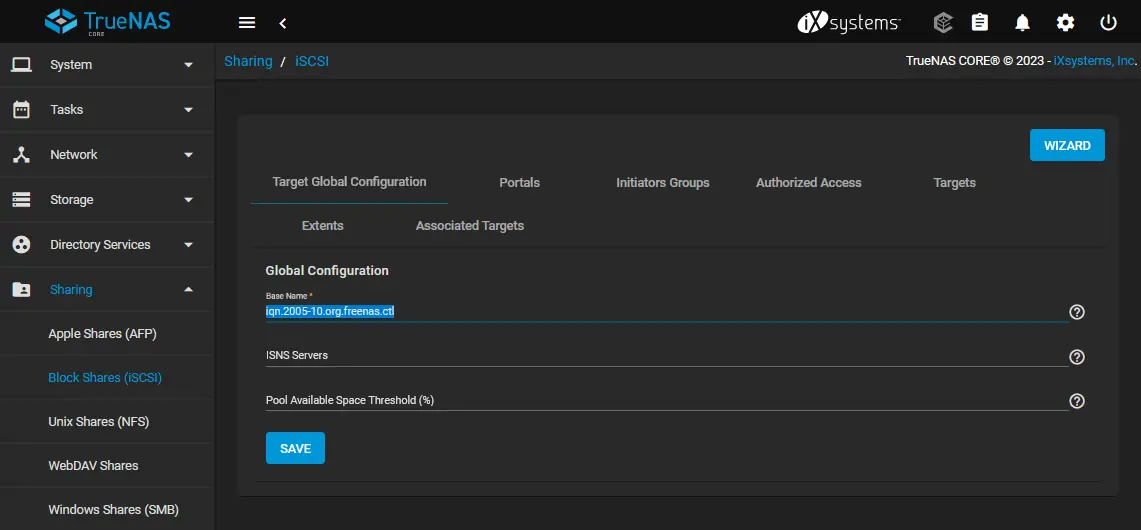
- Once the iSCSI target has been configured, you can connect this iSCSI target to ESXi hosts. Remember the base name of the iSCSI target that is displayed in the Sharing > Block shares (iSCSI) > Target Global Configuration tab. In this case, iqn.2005-10.org.freenas.ctl is the Base Name that would be used in the explained VMware home lab for connecting the iSCSI Target to an ESXi host as a shared datastore.
Now, you can configure an iSCSI initiator on an ESXi host or another machine and connect to the iSCSI target configured on TrueNAS Core.
Conclusion
Installing TrueNAS Core is affordable and the installation process is straightforward. To configure an iSCSI target, you have to create a storage pool, create a zvol, add extents, and configure allowed IP addresses. The configuration is made in a user-friendly web interface. You can also use TrueNAS Core to configure file shares such as SMB and NFS and use them to store backups with NAKIVO Backup & Replication or create a TrueNAS backup appliance.