How to Install Office 365 ProPlus on a Remote Desktop Services Server
You can install Office 365 ProPlus on a Remote Desktop Services (RDS) server to allow multiple users to use Office 365. These users connect remotely to a Windows Server machine that is configured as a terminal server. A terminal server may be part of a virtual desktop infrastructure (VDI). In Office 365 ProPlus, there are two scenarios of RDS deployment for shared usage – on a shared virtual machine (VM) and on a remote desktop server. This blog post explains how to install Office 365 ProPlus on a Remote Desktop Services server.

About Office 365 ProPlus
Before getting into the installation process, let’s explore some of the capabilities of Office 365 ProPlus.
What is Office 365 ProPlus?
Office 365 ProPlus is the full version of Microsoft Office 365. The system requirements for this version are similar to those of other MS Office versions. However, Office 365 ProPlus is not web-based: it is installed locally on a user’s computer. There are also differences in deployment and licensing compared with traditional standalone non-subscription versions of MS Office. An internet connection is required at least once per month to check the status of the license subscription. Office 365 ProPlus is a subscription plan that allows you to install Office 365 ProPlus on up to five machines with a single license.
What year is Microsoft Office 365 ProPlus?
Office 365 ProPlus is updated regularly. As of March 2020, the latest version of Office 365 Pro Plus is v.1912 released in 2020. The first version was released in 2016 and was called Office 365 ProPlus 2016.
What is the difference between Office 365 and Office Professional Plus?
MS Office Professional Plus (2016, for example) is a traditional version of Microsoft Office that is licensed on a perpetual basis (a device-based model) but is updated until the support period ends. Office 365 uses a subscription licensing method (a user-based model) and is updated until you pay for subscription. Office 365 offers different editions for subscription, including ProPlus, E1, E3, E5, etc. Note that Office 365 ProPlus in not the only edition that supports desktop virtualization. Office 365 ProPlus, Office 2016 ProPlus and Office 2016 Standard are recent versions that support terminal environments.
Requirements
The main requirements to install Office 365 ProPlus on a remote desktop server are:
- A supported version of a terminal server (RDS-Remote Desktop Server); a supported Windows version for Office 365 – Windows 8.1, Windows Server 2016 and newer
- A configured terminal server (remote desktop server)
- A supported version/edition of Office 365 (that supports desktop virtualization)
- Office 365 ProPlus license (Office 365 subscription plan with ProPlus)
- Office Deployment Tool
- An internet connection
When your environment meets the requirements, you can go to Office 365 ProPlus remote desktop configuration.
Configuration
Installing Office 365 ProPlus on a terminal server requires the use of command line and editing the XML configuration file that will be used during installation. You can install Office 365 ProPlus by using the workflow below.
It is recommended that you uninstall all previous versions of Microsoft Office from the computer before you install Office 365 ProPlus on that machine.
Creating the directory
Create the directory to store the files needed for the installation process.
C:\temp\Office365install\
If you need to deploy Office 365 ProPlus on multiple servers, you can share this directory (for example, \\server_name\Office365install\) and use this single shared directory for installation.
Downloading Office Deployment Tool
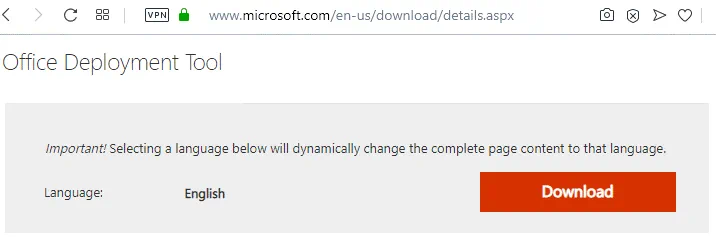
Download the Office Deployment Tool (ODT) from the Microsoft website by using the links below:
In this example, we’re using Office 365 Deployment Tool 2016.
ODT supports shared computer activation. When shared computer activation is enabled, you can install Office 365 without performing its activation. Later, a user signs into the computer on which Terminal Services are running. Then, they can access Office 365 using shared computer activation. Office 365 will check the license and will activate Office 365 temporarily until the user logs out. When another user logs into Office 365 installed on a terminal server, the activation for the previous user that logged out is cancelled. This approach allows you to use the resources of the terminal server more flexibly and effectively.
The installer file of Office Deployment Tool is downloaded:
officedeploymenttool_12325-20288.exe
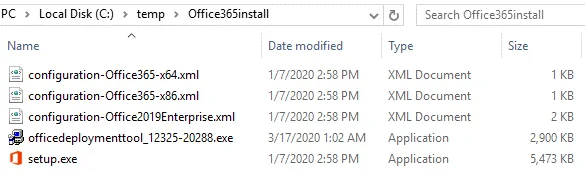
Run the file with administrative privileges. Accept the license agreement and select a directory to which you want to extract files. In our case, the files will be extracted to the same directory:
C:\temp\Office365install
Now you see setup.exe and three xml files.
Configuring the installation
You have to create a custom xml file in the directory where setup.exe is located. In this example, the name of the configuration file is config.xml and this file controls the installation process. Edit this xml file in the text editor such as Notepad or Notepad++. The configuration below is ready for use. However, you can modify the configuration according to your needs.
<Configuration>
<Add SourcePath=”C:\temp\Office365install”
OfficeClientEdition=”64″ Channel=”Current”>
<Product ID=”O365ProPlusRetail”>
<Language ID=”en-us” />
</Product>
</Add>
<Display Level=”None” AcceptEULA=”TRUE” />
<Property Name=”SharedComputerLicensing” Value=”1″ />
<Logging Level=”Standard” Path=”%temp%” />
</Configuration>
In the configuration above, the Product ID is O365ProPlusRetail. You can also install additional Office software by adding similar sections with the following parameters:
- VisioProRetail – Microsoft Office Visio
- ProjectProRetail – Microsoft Office Project
- AccessRuntimeRetail – Microsoft Office Access
- LanguagePack – a language pack for Microsoft Office
For example, to install Visio, add the following section to the xml configuration file:
</Product>
<Product ID=”VisioProRetail”>
<Language ID=”en-us” />
</Product>
Note that these two strings must be added to the default configuration to install Office 365 ProPlus in remote desktop environments:
<Display Level=”None” AcceptEULA=”TRUE” />
<Property Name=”SharedComputerLicensing” Value=”1″ />
If you shared a directory where installation files are stored, use that shared directory that is accessible for multiple servers instead of the local directory of this server. In our example C:\temp\Office365install would be changed to \\server_name\Office365install\ for this purpose.
The display level is set to None for enabling the silent installation of Office 365 ProPlus to avoid the activation of Office before installation is done. With the silent mode, you will not see any elements of the user interface, not even the progress bar, during the installation process. If you set Display Level=”Full”, you will be able to see installation progress.
Installing Office 365 ProPlus
Run CMD as Administrator (Start > CMD).
Go to the directory where the files of Office Deployment Tool are stored:
cd C:\temp\Office365install
Run the following command to download Office 365ProPlus installation files:
setup.exe /download config.xml
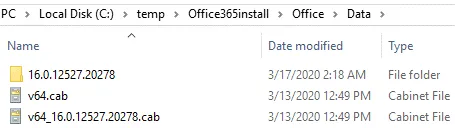
Wait for a few minutes. The time needed to download the files depends on the speed of your internet connection. When the cursor moves to a new line and allows you to run a new command, it means that the downloading process has been completed. If you run the same command later, for example, in two months, the installation files will be updated.
You can see a subfolder that is named Office in the Office365install directory. You can check the folder properties and its size to make sure that the files have been downloaded properly.
Now run the next command to extract and configure files and install Office 365 ProPlus on an RDS Server.
setup.exe /configure config.xml

Wait until installation is done.
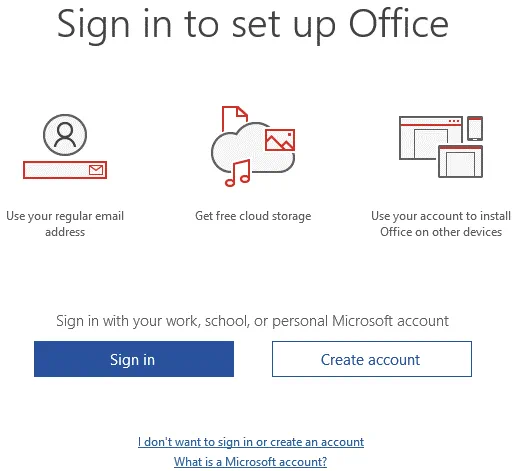
Now log into the terminal server with a remote desktop client and run the needed Office 365 ProPlus application. Enter the Office 365 credentials associated with the subscription plan – otherwise most features will be locked.
Troubleshooting
Sometimes the following error can occur:
This copy of Microsoft Office 2016 cannot be used on a computer running Terminal Services. To use Office 2016 on a computer running Terminal Services, you must use a Volume License of Office.
If the method explained above didn’t help you install Office 365 ProPlus on a remote desktop server, try to edit some registry values on that server.
- Open the registry editor (Win+R > regedit) and go to this path:
HKEY_LOCAL_MACHINE\SOFTWARE\Microsoft\Office\ClickToRun\Configuration - Add the SharedComputerLicensing key and set its value to 1.
- Press Win+R and run gpedit.msc to open the local group policy editor.
- Edit the policy or create this policy if it doesn’t exist:
Computer Configuration\Policies\Administrative Templates\Microsoft Office 2016 (Machine)\Licensing Settings - Edit the value: Use shared computer activation
- And set its state to Enabled
To Conclude
Microsoft Office can be installed on machines running Windows and macOS. The web version of Office 365 can be used from anywhere on any machines that have a web browser. If you install Office 365 ProPlus on a remote desktop server, users can get Microsoft Office applications from any machine and any place where they have network access to the terminal server. A subscription plan with a per-user and a not per-machine licensing model is to be used in this case.