How to Build a Backup Appliance with Synology NAS: A Complete Guide
NAS devices are now popular because they are portable and provide wide functionality for data storage among other features. Synology is one of the most popular NAS manufacturers. The company offers a wide range of different NAS models and classes for both home and business users. Many people use NAS for backup storage and often configure a backup appliance based on the NAS device. The main advantage of backup appliances is that backup storage and backup software are on the same device.
NAKIVO Backup & Replication is a data protection solution that can be deployed on leading NAS brands to create a powerful backup appliance. This blog post explains how to build a backup appliance with Synology NAS on NAKIVO Backup & Replication.
Before You Begin
The workflow for creating a backup appliance includes the following main steps:
- Check requirements
- Download the installer
- Install the package of NAKIVO Backup & Replication on NAS
- Initial configuration – configure Inventory, Transporters, and Backup Repositories
- Create and run backup jobs
After building the all-in-one backup appliance, you can back up data to the NAS without using CIFS (SMB) or NFS protocols. When using a Synology-based backup appliance with NAKIVO Backup & Replication, you free your production hardware resources.
Requirements
NAKIVO Backup & Replication can be installed on a list of Synology NAS devices with x86-64 and ARM architecture. Note that there are limitations for NAS devices with ARM architecture. If you use a NAS with ARM architecture, the onboard Transporter on the ARM-based NAS will not support VMware vSphere infrastructures, and you have to deploy an additional Transporter to be able to back up data from VMware ESXi hosts and vCenter servers.
The minimum requirements to install NAKIVO Backup & Replication on NAS are:
- Full solution (Director and Transporter): dual-core CPU, 1 GB of RAM, 10 GB of disk space
- Transporter only: dual-core CPU, 512 MB of RAM, 5 GB of disk space
You can find the full list of officially supported NAS devices in the NAKIVO help center. We recommend that you use one of the supported Synology NAS models to create a NAS backup appliance with NAKIVO Backup & Replication.
In this tutorial, I’m using Synology DS220+. This is an affordable Synology NAS for many users who want to store data and deploy a backup appliance.
Note: Read this blog post to learn more about Synology NAS models.
Installing NAKIVO Backup & Replication Automatically
You can install NAKIVO Backup & Replication on Synology NAS automatically by using Package Center in Synology DSM (Disk Station Manager). This method is the fastest method to install NAKIVO Backup & Replication.
- Open a web interface of your Synology NAS and log in to DSM with administrative permissions.
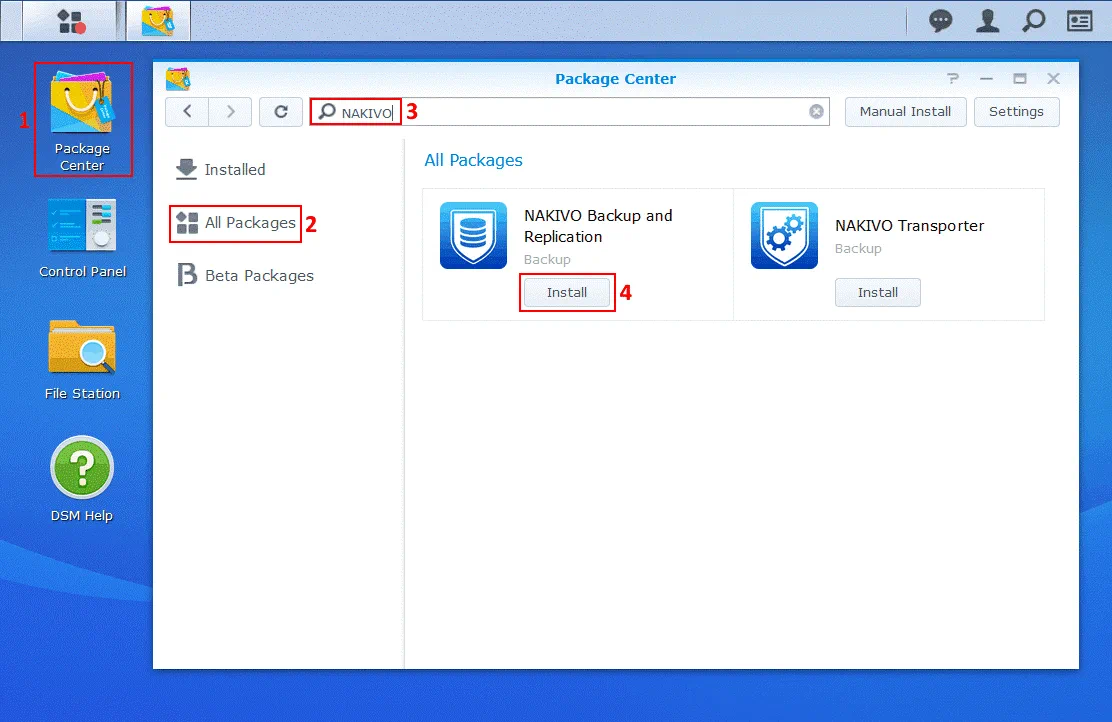
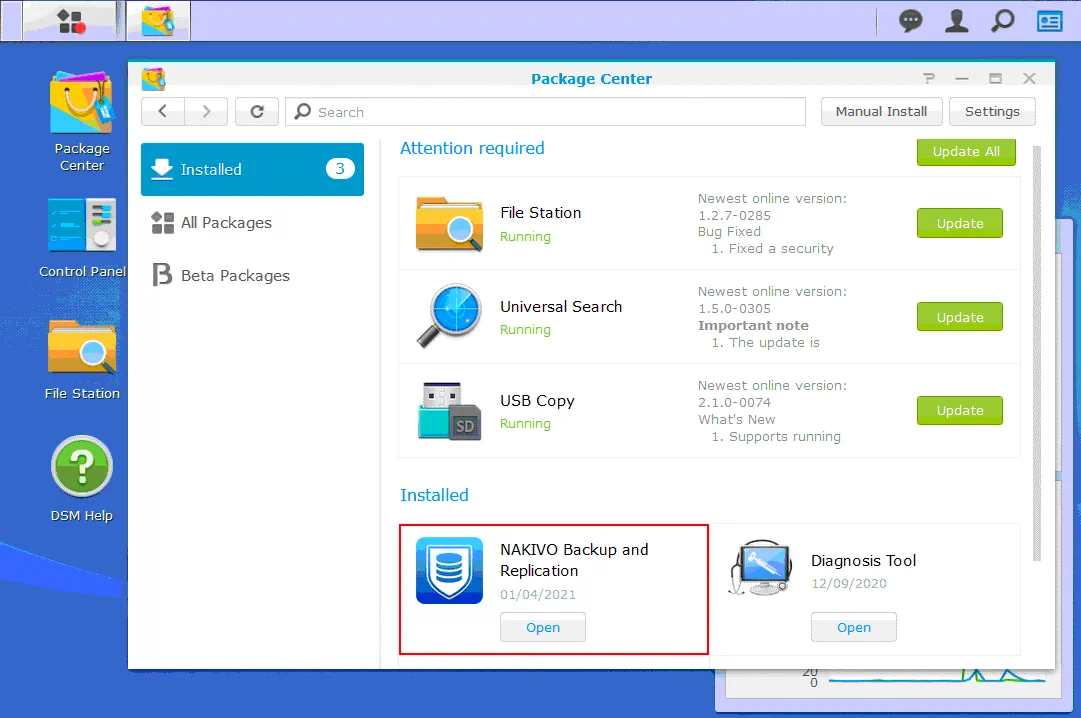
- Click the Package Center icon on the desktop.
- In the Package Center window, select All packages and type NAKIVO into the search box. Two packages should appear – the full solution of NAKIVO Backup and Replication and NAKIVO Transporter. Here, you can choose to install a Synology package with either all NAKIVO Backup & Replication components (Director, Transporter, Backup Repository) or a Transporter only.
- If you have already installed the full solution on another device in your infrastructure, you will need to install a Transporter only. This action will allow you to create a backup repository with Encryption and Network Acceleration being enabled on this NAS device.
- Select NAKIVO Backup and Replication and click Install to install all components of NAKIVO Backup & Replication.
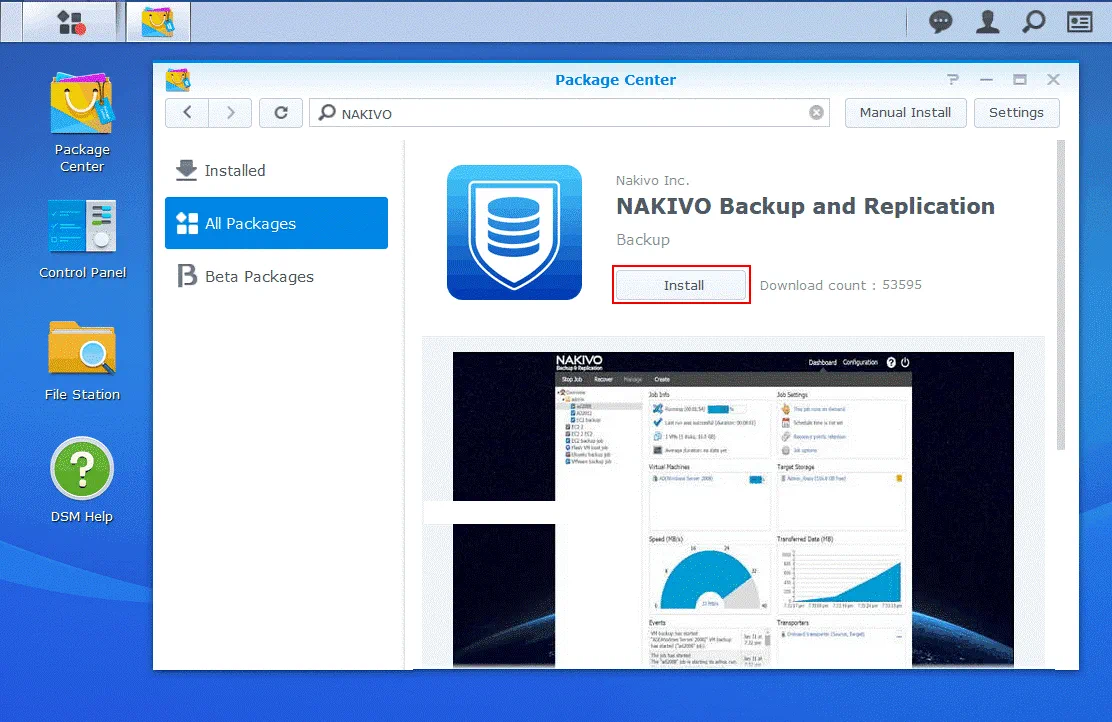
- Package details are displayed now. Click Install once again.
- Read the EULA (End User License Agreement), and select the I accept the terms of the license agreement checkbox. Hit Next to continue.
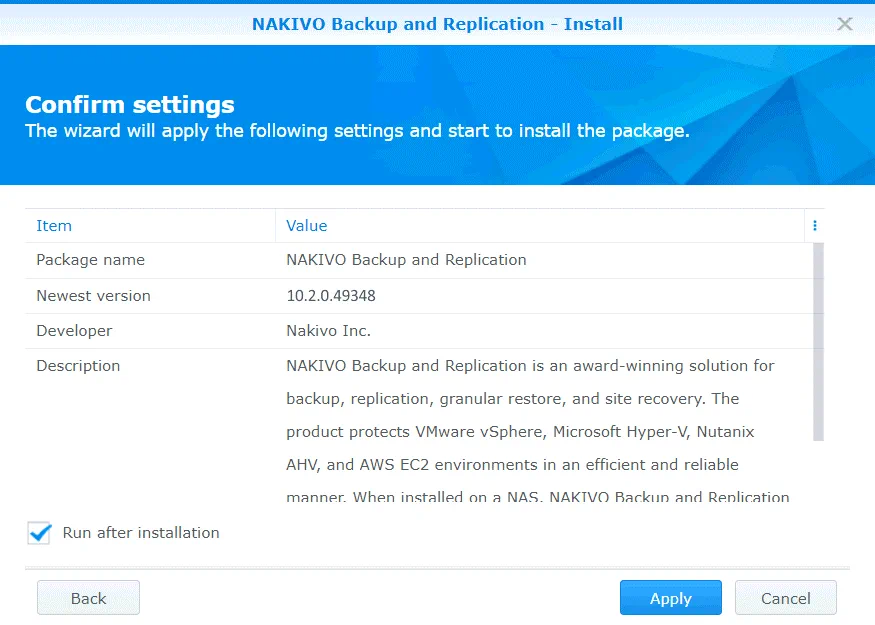
- Select the Run after installation checkbox. Click Apply to confirm settings and start installation.
Wait for a while until the package is installed. If for any reason you cannot use this method to install NAKIVO Backup & Replication, read the section below and learn how to install the product manually.
Installing NAKIVO Backup & Replication Manually
- Download the installation package of NAKIVO Backup & Replication from the official website.
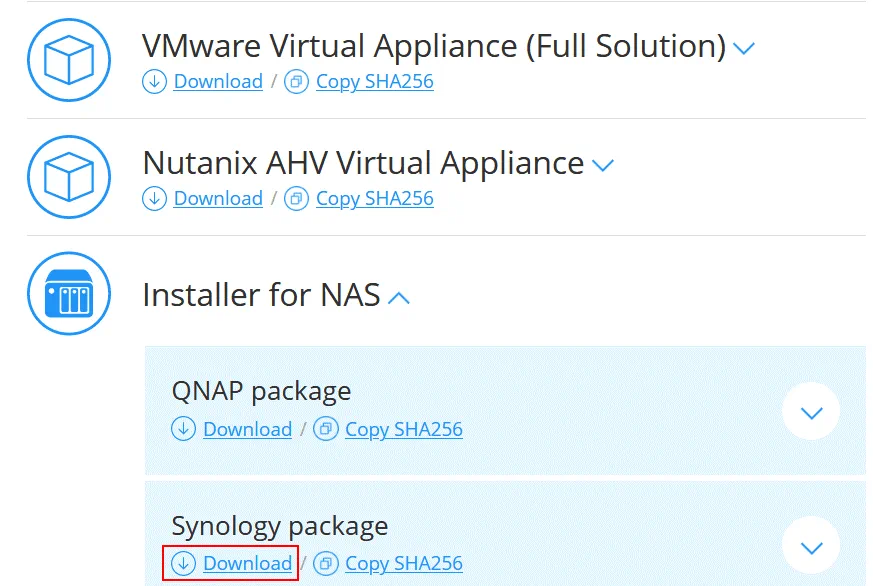
- Go to Installer on NAS > Synology package, and click Download.
- Save the installer file to a custom location on your computer. I downloaded the NAKIVO_Backup_Replication_v10.1.0_Synology.spk file.
- Open the web interface of your Synology NAS. In this example, the IP address of the Synology NAS is 10.10.10.39, and the address of the web interface of DSM (Synology Disk Station Manager) is:
https://10.10.10.39:5001
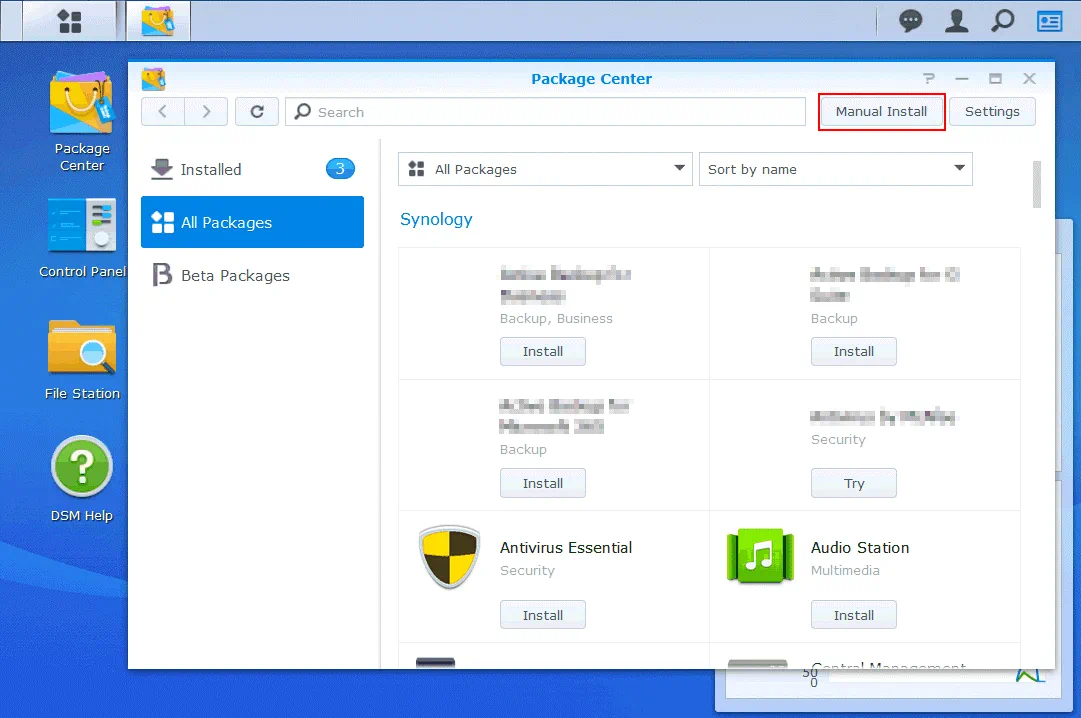
Note: It is recommended that you update DSM and other software installed on your NAS to patch known security vulnerabilities and prevent a malware infection. Read the blog post about protecting NAS devices against ransomware. - Open Package Center (a shortcut is displayed on Desktop of DSM by default).
- Click All Packages, then click Manual Install.
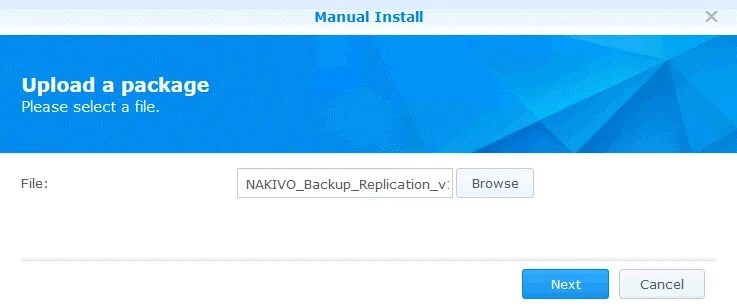
- Upload the package. Click Browse, and select the installation file you have downloaded. I browse for the file called NAKIVO_Backup_Replication_v10.1.0_Synology.spk in my case.
- A notification message is displayed:
This package does not contain a digital signature. Are you sure you want to continue? - Click Yes.

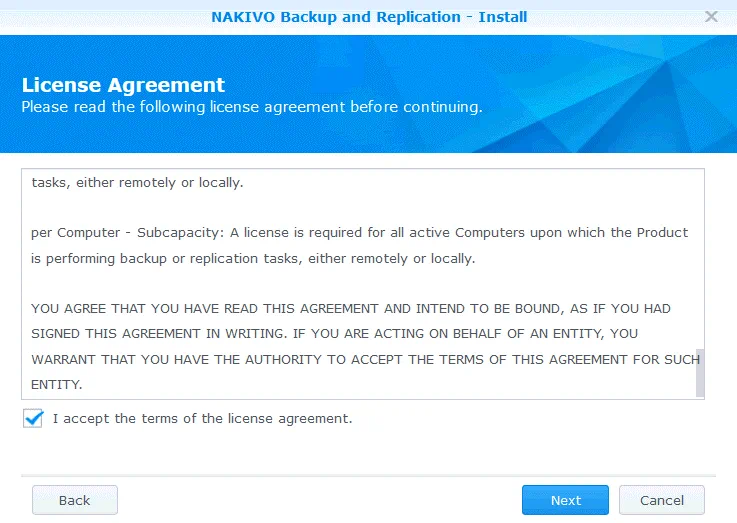
- The license agreement is displayed. Read the End User License Agreement, select the I accept the terms of the license agreement checkbox, and hit Next.
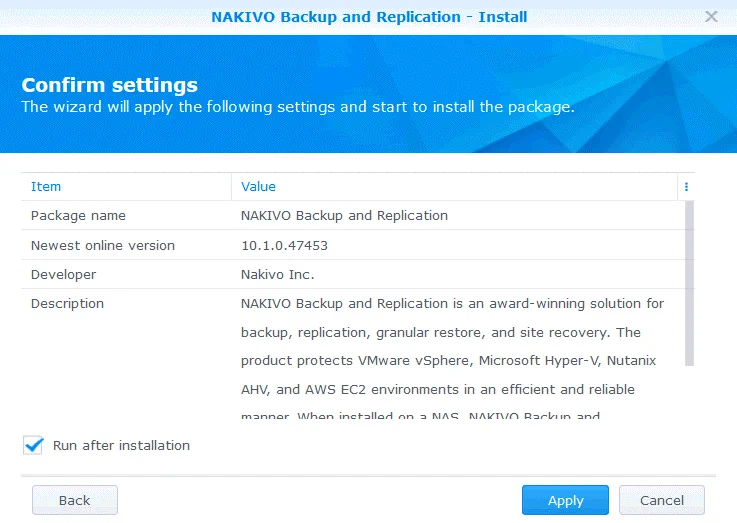
- Confirm settings. Check your configuration for package installation, select the Run after installation checkbox, and hit Apply.
NAKIVO Backup & Replication is now installed on your Synology NAS, and you can see the appropriate icon in the Installed section of Package Center of DSM. The product is installed in the NAS Apps folder.
Initial Configuration
Open the web interface of NAKIVO Backup & Replication. Use the IP address of your Synology NAS device on which NAKIVO Backup & Replication is installed and port 4443. I’m using the following link in this example:
https://10.10.10.39:4443
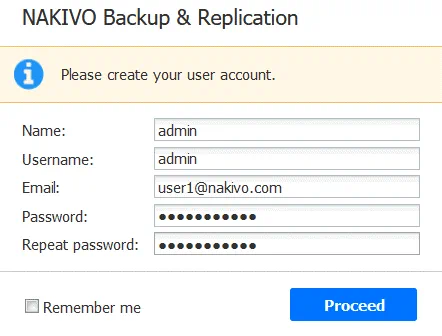
Enter your name, username, email address, and password. This information is needed to log in to the web interface of NAKIVO Backup & Replication. Hit Proceed when ready.
After a fresh installation of NAKIVO Backup & Replication, a wizard opens directing you to add Inventory items, Transporters, and create Backup Repositories.
1. Inventory. Click Add New, and enter the needed items to the inventory. In this example, I’m adding VMware vCenter with ESXi hosts to the inventory by selecting the VMware vCenter or ESXi host entry in the menu. You can add all the platforms that are supported by NAKIVO Backup & Replication for data backup.

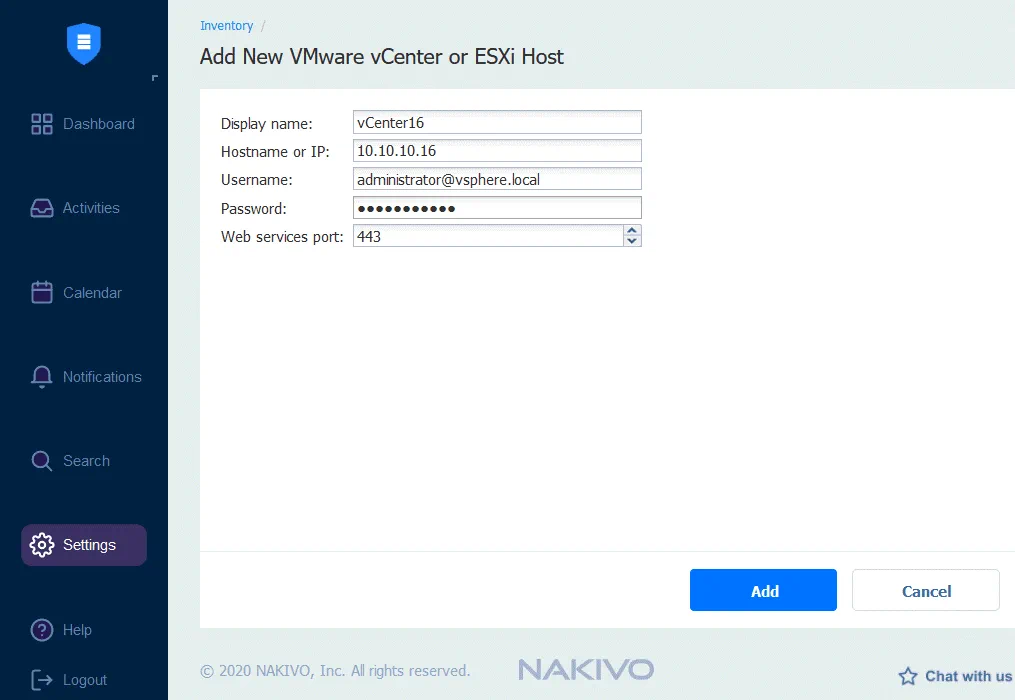
Once the VMware vCenter or ESXi host is selected, we need to enter the required data to add the vCenter or ESXi host to the inventory. On the screenshot below, you can see how to add vCenter. The required information is:
Displayed name: Enter a name to be displayed in the inventory of NAKIVO Backup & Replication.
Hostname or IP: Enter the IP address of your vCenter server or ESXi host. If your ESXi hosts are managed by vCenter, it is recommended that you add vCenter. ESXi hosts managed by vCenter are added to the inventory automatically.
Username: Enter a username with administrative permissions to be used to manage your vCenter or ESXi host.
Password: Enter the password for the administrative account you defined in the previous field.
Web services port: 443 is the default port. Use this default port if you have not changed web services configuration on vCenter.
Hit Add to save configuration and add vCenter to the inventory.
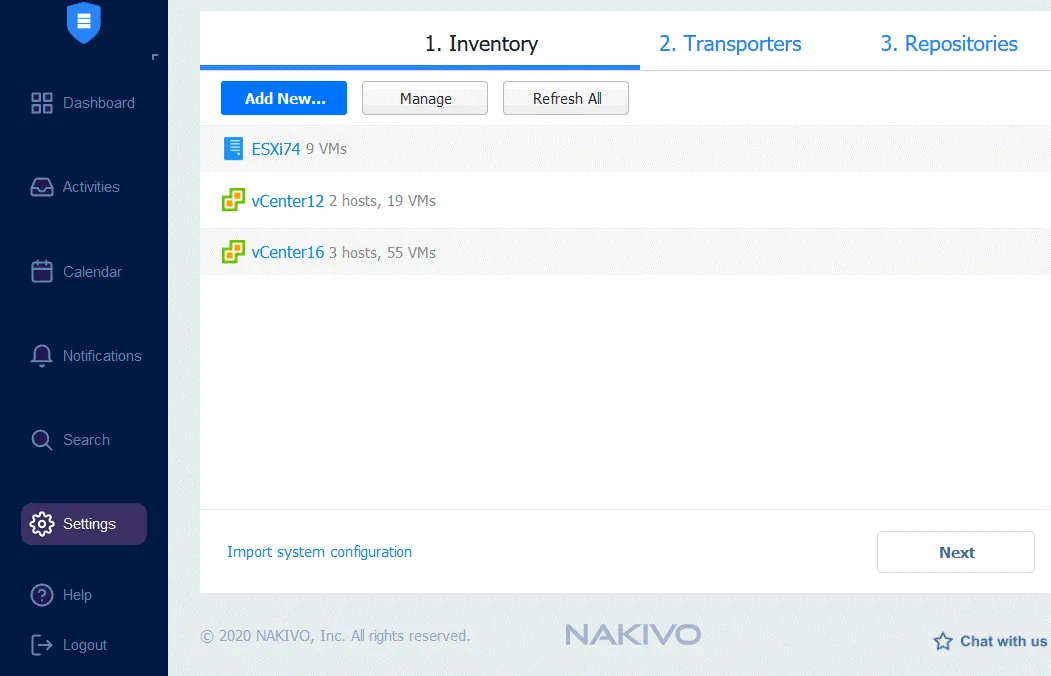
On the screenshot below, you can see that I’ve added two vCenter servers and one standalone ESXi host to the inventory.
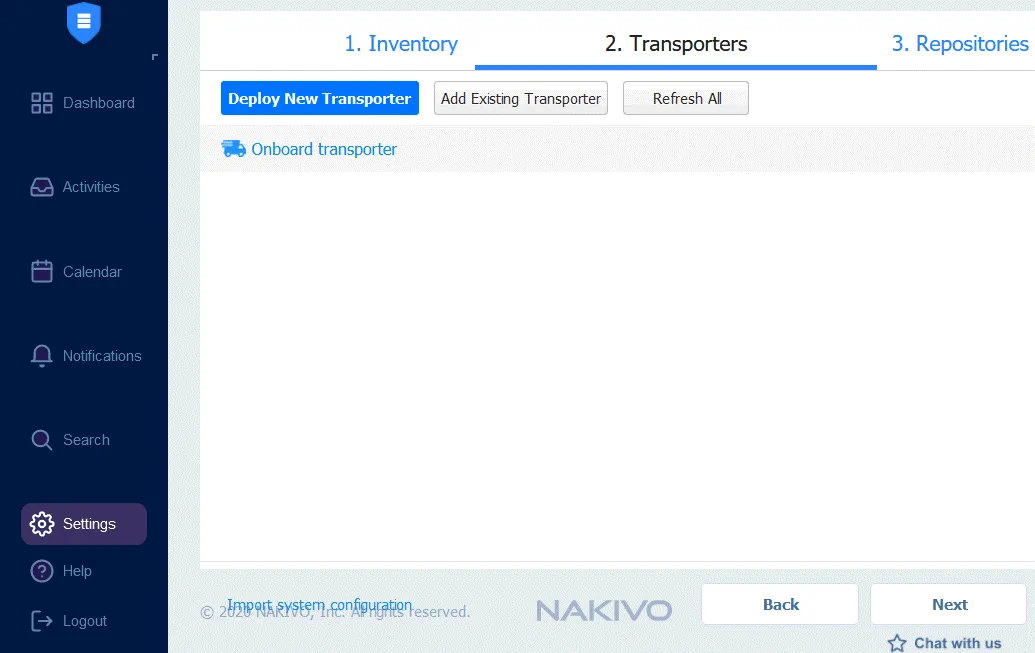
 2. Transporters. The Onboard Transporter is added by default. As I’m using Synology 220+ NAS, which has the x86-64 CPU (not an ARM architecture CPU), I can use the default configuration with the Onboard Transporter. If your NAS has the ARM architecture processor, you should deploy an additional Transporter to work with VMware infrastructure. When your Transporter configuration is ready, click Next to continue.
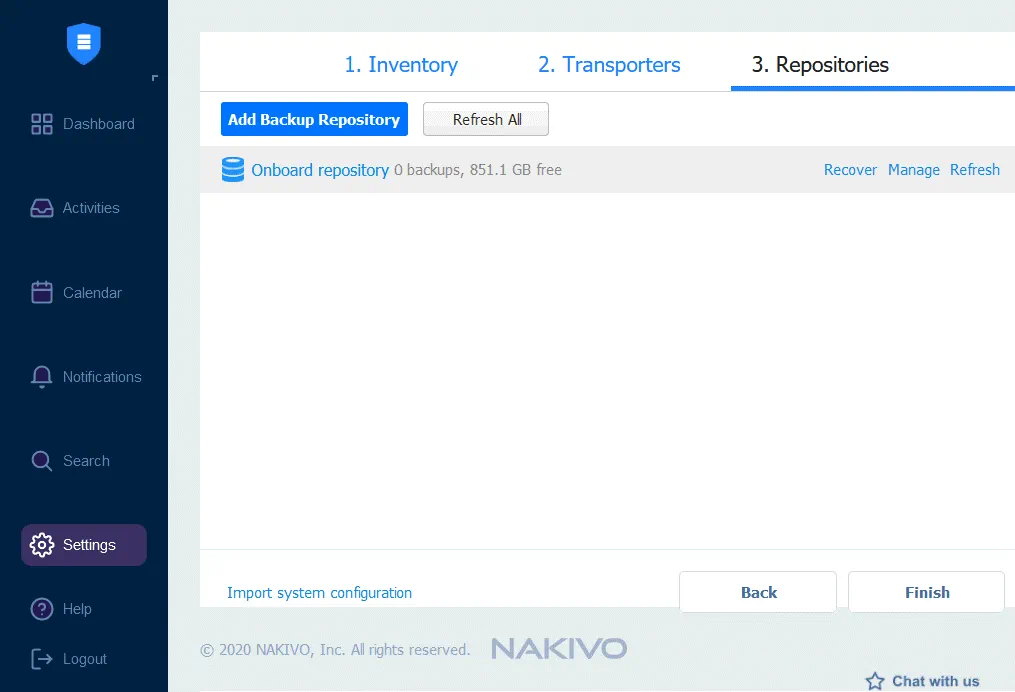
 3. Repositories. At this point, you can create a new Backup Repository or add an existing Backup Repository. If the Onboard Repository is not created by default, create a new Onboard Repository to store backups on your backup appliance. The location of our Backup Repository on NAS is /volume1/NAKIVO_Repository
By default, the Onboard Repository is created in the root folder of the data share with the most free space.
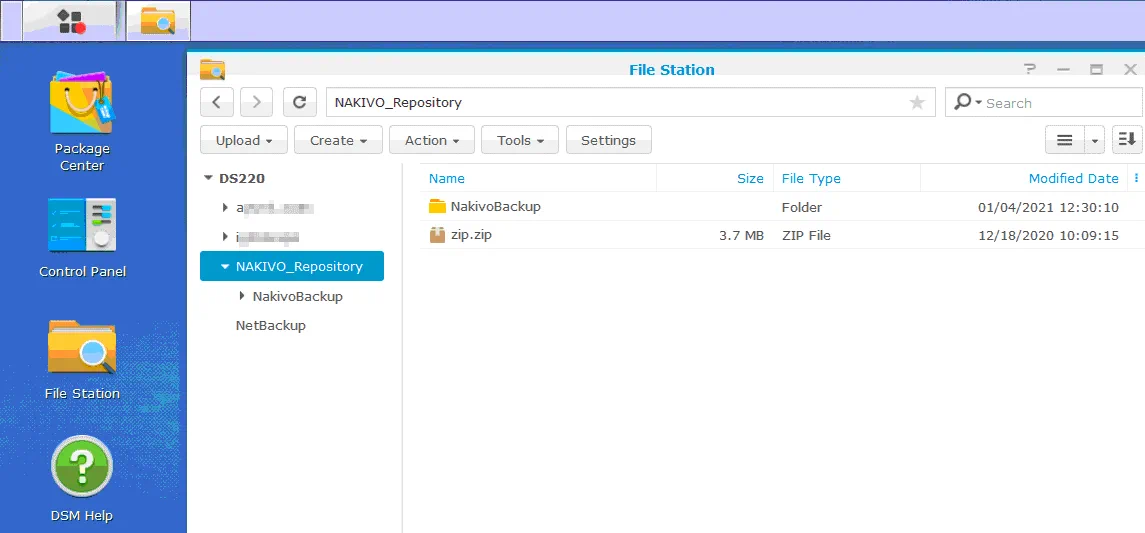
Once your Onboard Repository is created, you can see the directory of the repository in File Station of your Synology NAS.
On the screenshot below you can see the Backup Repository located in the /NAKIVO_Repository/NakivoBackup folder.
Creating a backup job
Now you can start creating backup jobs in NAKIVO Backup & Replication. As I’ve added a VMware infrastructure to the inventory, I’m going to back up VMware vSphere VMs.
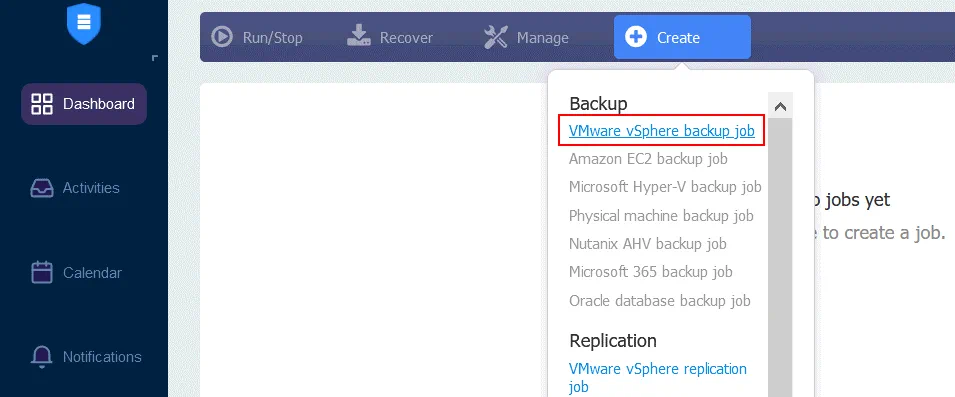
Go to the Dashboard, and click Create > VMware vSphere backup job to create and configure a backup job for VMware vSphere virtual machines.
A new backup job wizard for VMware vSphere opens.
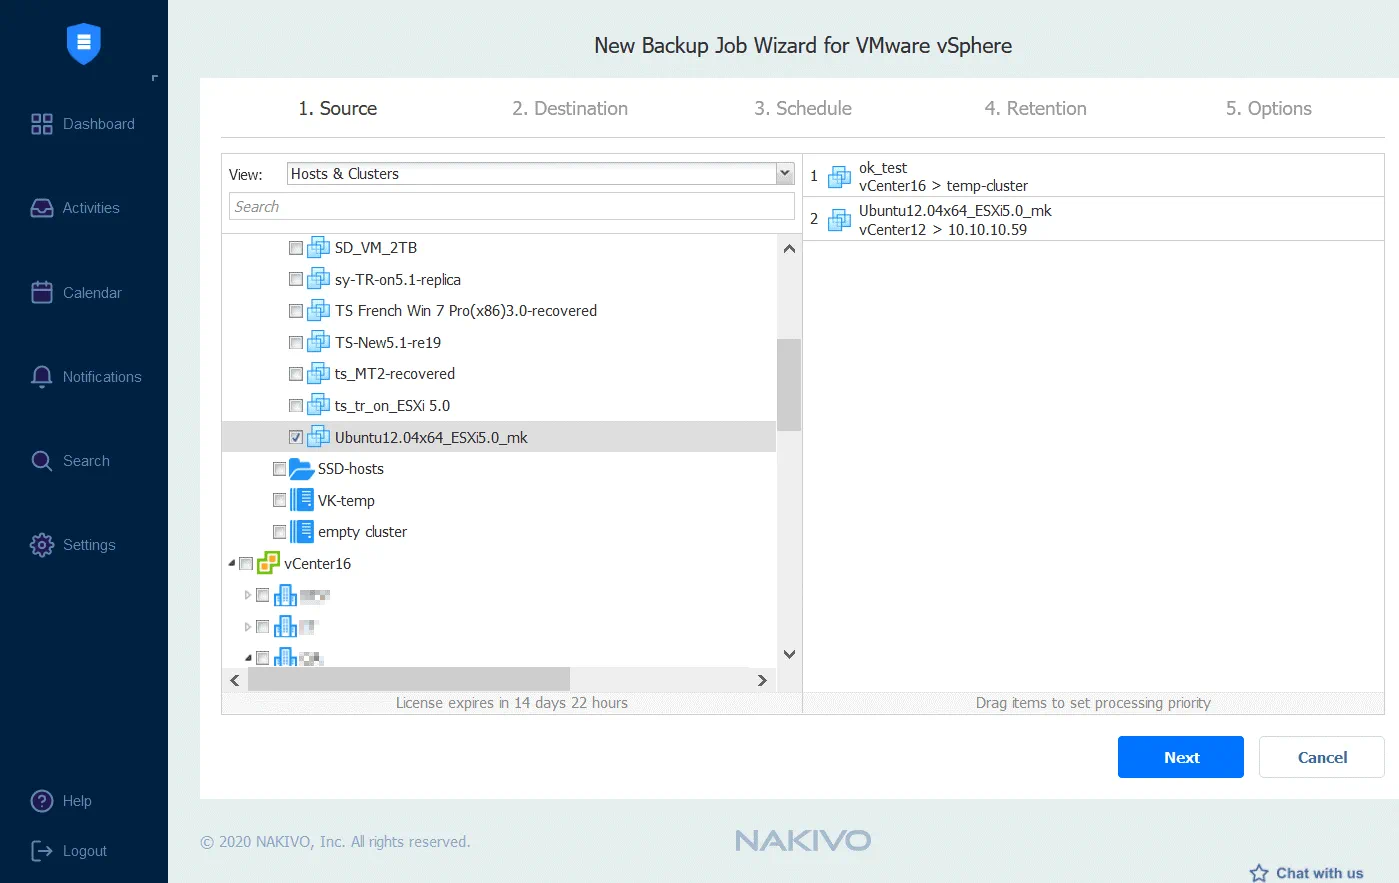
1. Source. Select virtual machines, VM folders, ESXi hosts or clusters that you want to back up. You can select items to add to the inventory. Hit Next at each step of the wizard to continue.
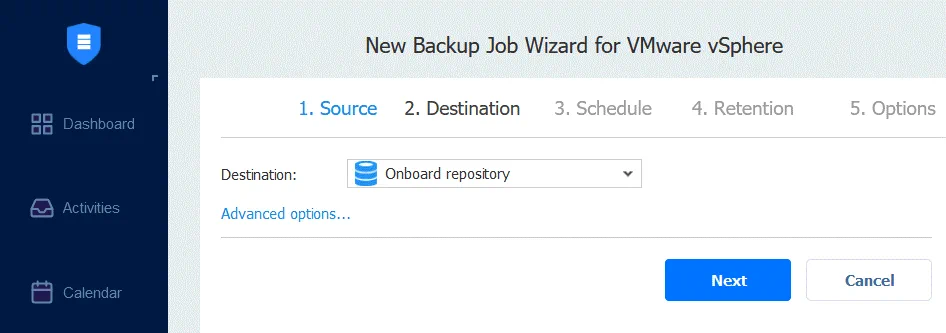
 2. Destination. Select the Onboard Repository that is located on your NAS backup appliance to store backups.
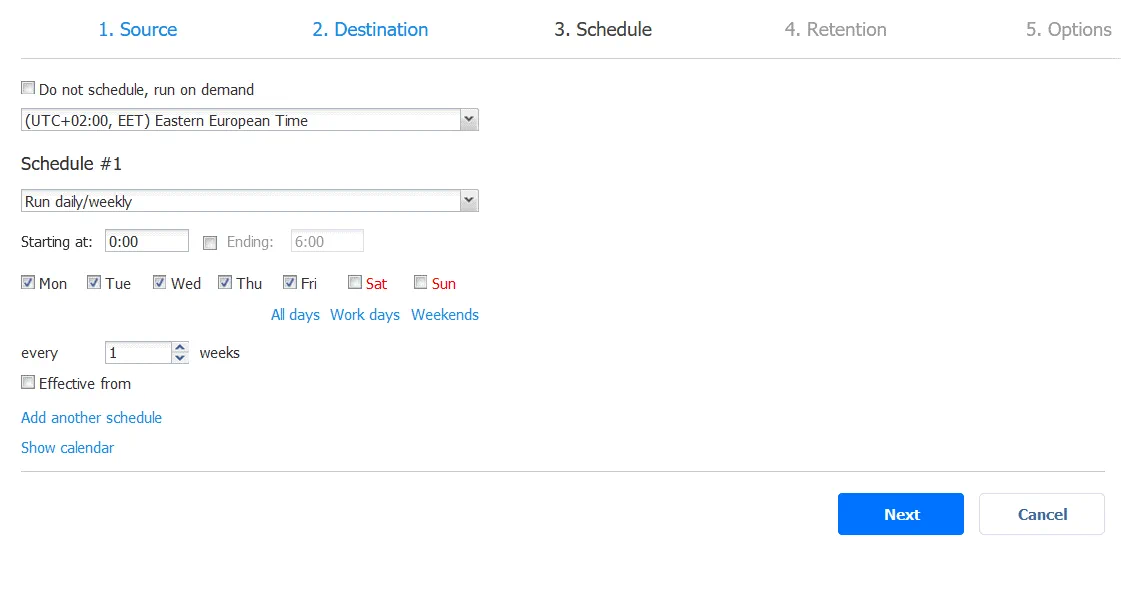
3. Schedule. Configure scheduling settings to run backup jobs automatically and periodically.
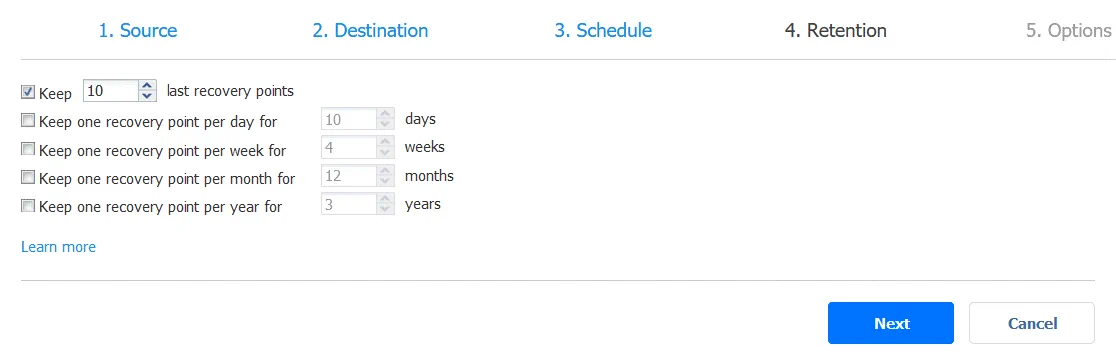
4. Retention. Configure retention settings. These settings allow you to select how many recovery points are kept for the specified period of time. NAKIVO Backup & Replication uses the GFS retention scheme for more flexible data recovery and rational storage usage.
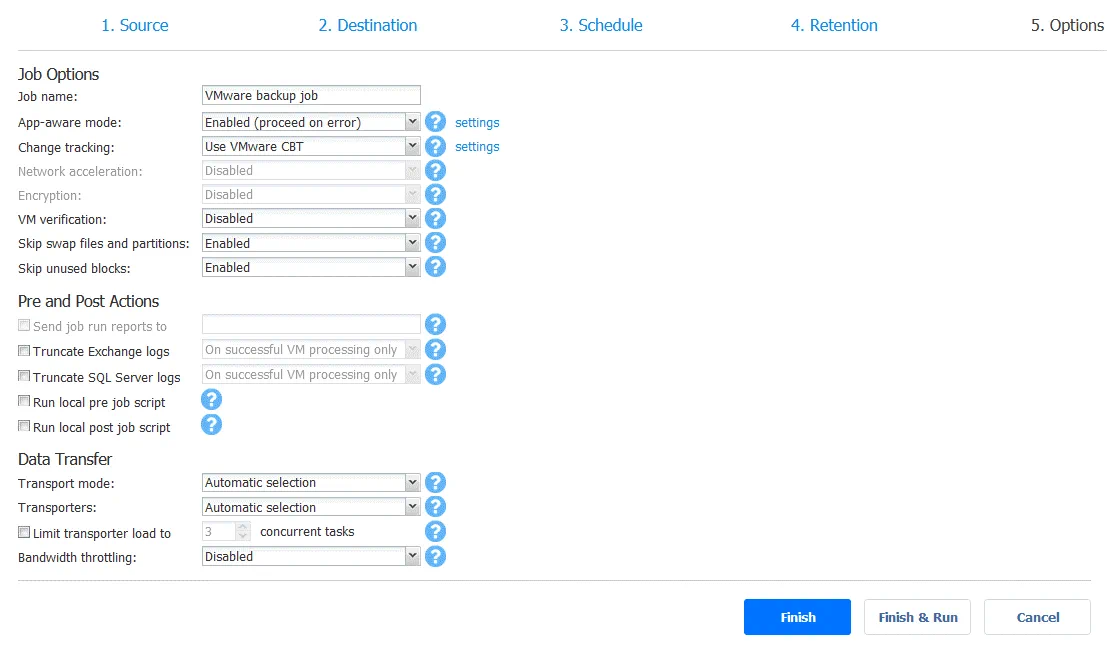
5. Options. Define the job options, such as job name, application-aware mode, change tracking, VM verification, etc. See a full list of supported features on this page. Once you have configured all needed job options, hit Finish to save job settings or Finish & Run to save settings and run the job.
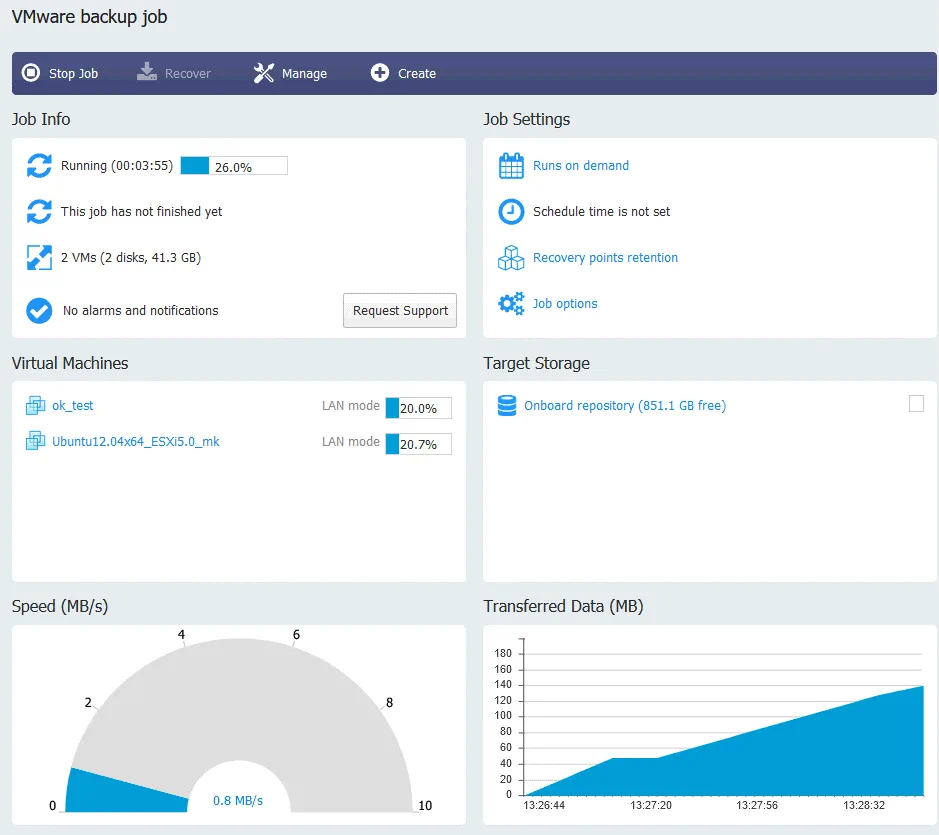
In the Dashboard, you can select your running job and see the progress and statistics for the job.
In this example, I have explained how to back up VMware vSphere virtual machines. But you can use your backup appliance based on Synology NAS and the NAKIVO backup solution to back up:
- Microsoft Hyper-V VMs
- Amazon EC2 instances
- Oracle RMAN
- Physical Linux and Windows machines
- Microsoft 365 apps and services, including Exchange Online, OneDrive for Business, and SharePoint Online
Configuration for these environments is similar to configuring the solution for VMware vSphere VMs – you should add items to the inventory, deploy a Transporter if needed, create backup jobs, and back up data to a repository located on your backup appliance or somewhere else.
Conclusion
It is convenient to use NAS for backup storage combined with NAKIVO Backup & Replication. When you have a NAS device to store backups and install the backup software on the same NAS device, you have an all-in-one backup appliance. This blog post has explained how to create a powerful and cost-effective backup appliance based on Synology NAS and NAKIVO Backup & Replication. The installation process is not difficult and, as a result, you combine the advantages of both products and protect your data in the best way.