The Different Methods to Back Up NAS Drives
NAS devices are convenient for storing large amounts of data and accessing shared data over the network. Given that NAS devices have their own operating systems provided by the respective vendor, the NAS storage backup methods may differ from methods used for traditional servers and computers.
This blog post explains how to back up a NAS device and what methods are available.
What Is NAS Backup
NAS backup is the process of copying data from disks installed in network-attached storage (NAS) to another storage device or medium to prevent potential data loss. NAS devices are often used as the backup destination, but NAS storage backup, that is, backing up the data stored on NAS devices, is highly recommended and necessary.
Why You Need NAS Storage Backup
On most NAS devices, you can install two or more disk devices. Depending on the number of installed disk devices (2 disk devices and higher), you can configure RAID (redundant array of independent disks) such as RAID 1, RAID 10, RAID 5, and RAID 6 to mitigate the consequences of hardware failure of one or more disks depending on the RAID configuration. Although this can help prevent complete data loss, there are other scenarios where backups are the only way to recover data.
- Hardware failures other than disk issues, such as failure of the power supply or RAM used by NAS, can lead to data loss.
- Ransomware can be devastating for files stored on NAS, and the risk of infection by ransomware is higher when multiple users have access to a file share configured on NAS.
- Accidental or intentional file deletion by one of the users having access to the NAS file share can be a cause of data loss.
- Natural disasters such as floods, hurricanes, tornadoes, earthquakes, etc., can damage equipment, including NAS.
- You can also encounter situations when disk drives installed in NAS are healthy, and data stored on them is not corrupted, but the NAS device is not working. Attaching NAS disks from the broken NAS (especially if the disks were members of RAID) to another computer to read the data is time-consuming and inefficient, especially if you need to access critical files quickly.
Backing up NAS storage to another storage device or medium allows you to minimize data loss and access critical data faster if a NAS device is not working properly.
How to Back up a NAS Device: 4 Backup Types
There are multiple NAS drive backup types based on the destination and the data transfer protocol used:
- Backup to a USB disk
- NAS to NAS backup
- Backing up NAS to cloud
- NDMP backup
Note that 3 of the 4 backup methods covered in this post are implemented over the network (except for the USB disk method).
1. Backup to a USB disk
NAS devices usually have one or multiple USB ports to attach USB storage devices. You can connect a USB hard disk drive (HDD) to such a port and back up the needed data from the NAS to this USB disk drive. This operation is manual by using the web interface provided by the NAS vendor to manage the NAS device.
Advantages:
- Easy to implement
Disadvantages:
- If the size of a volume on a NAS (such as a volume based on RAID, or JBOD (just a bunch of disks, without redundancy) is larger than the size of a USB disk, you cannot fit all NAS storage backup data into the USB disk. For example, you have a volume based on four 16-TB disks, and the maximum size of your SATA disk connected via USB adapter is 16 TB.
- This method is not automated. You need to connect a USB storage device to the NAS each time you need to create a backup copy.
2. NAS to NAS backup
NAS to NAS backup, which also includes backing up data from NAS devices to other types of servers, involves configuring backup storage on a NAS device or another server. Copying data from the primary NAS to the destination backup server can be performed by using a file share with the supported file sharing protocol on one of these.
For this type of backup, you need to connect one NAS to a file share created on another NAS and copy the needed files to perform NAS storage backup. These actions can be performed in the native NAS web interface. As a result, you get an exact copy of the files.
By using a specialized backup solution, you can create a backup repository of a special format on the destination NAS or server to be used as backup storage. In this case, you can use advanced features such as automation, change tracking for incremental backups, compression, and encryption.
Advantages:
- Ability to increase storage capacity on the destination device
- A variety of options for NAS storage backup over the network
- Backup automation options
Disadvantages:
- The need for health monitoring and periodic maintenance
3. Backing up NAS to cloud
Cloud vendors provide easily scalable storage, which is convenient when backing up NAS data, often growing at an exponential rate. There is no such limit when backing up NAS files to a USB HDD.
Advantages:
- Destination storage space limits can be increased, which allows you to back up all needed data.
- Cloud storage is usually reliable and fault-tolerant that can protect your data well against disasters.
Disadvantages:
- You need to pay for public cloud storage, usually per GB, and egress fees may apply.
4. NDMP backup
NDMP (Network Data Management Protocol) is a network protocol developed to control communications between storage systems deployed on different machines, including NAS devices. This protocol is adapted to back up NAS and file servers over the network. There are two types of traffic for NDMP connections:
- Control traffic used by backup applications to manage data transferring
- Data traffic used to transfer data from a source device to the target device over the network
Standardized backup agents is another NDMP feature that simplifies the development and configuration of backup software. Using standard interfaces for NAS data backup is another advantage of the open NDMP standard. NDMP is optimized for backing up files. NDMP supports backing up NAS data directly to a backup server or tape.
Advantages:
- NDMP is an open standard protocol.
- The specification is standardized for different NAS devices and backup applications.
- Backup traffic can be offloaded to avoid bottlenecks.
- You get the option of centralized backup data management.
Disadvantages:
- A data format for NAS backups is not specified and can be set differently by NAS vendors. It can cause incompatibility between different NAS platforms for cross-platform data backup.
Note: You can read more about NAS devices and learn how to select the right Synology NAS model or QNAP NAS device.
Agent-based and Agentless NAS Storage Backup
There are two approaches for NAS storage backup when using network backup methods: agent-based backup and agentless backup.
Agentless backup
Agentless backup involves connecting to a file share from a backup server or NAS and copying files over the network. A common case is connecting to a file share via SMB or NFS. This approach is easy to implement, but there is a disadvantage. You cannot create application-aware NAS storage backup when copying files by accessing the file share. This is because applications installed on servers or user computers can open and write data to shared files stored on NAS. These files, in turn, cannot be copied while open to avoid data inconsistency.
One of the ways to copy all shared files and have a consistent copy is to temporarily shut down applications used to open them. Alternatively, you can end sessions for the opened files. However, this scenario may not be convenient for large or multi-user environments when performing NAS storage backup. Writing custom scripts to preserve consistency including closing open-file sessions requires a lot of effort.
Agent-based backup
The method using an agent involves installing a special agent (that can be a component of the backup application) on the source file server or NAS device (whose data you need to back up). Using agents and creating snapshots allows you to freeze the files in a consistent state until the shared files are copied and the NAS storage backup is completed. This approach is intended to simplify the creation of application-aware backups when backing up NAS drives.
Backing Up a NAS Share with NAKIVO
Let’s start with the agentless backup method and explain how to back up a NAS shared folder with NAKIVO Backup & Replication. Note that the solution uses the SMB and NFS protocols (not NDMP) to transfer data, and you can use this method to back up any other SMB or NFS shared folder in Windows or Linux.
Below we outline the steps, but first here’s a video with a detailed walkthrough of how to create a backup of a NAS in NAKIVO Backup & Replication:
Adding the file share to the solution inventory
First, you need to add the file share (which you want to back up) to the inventory.
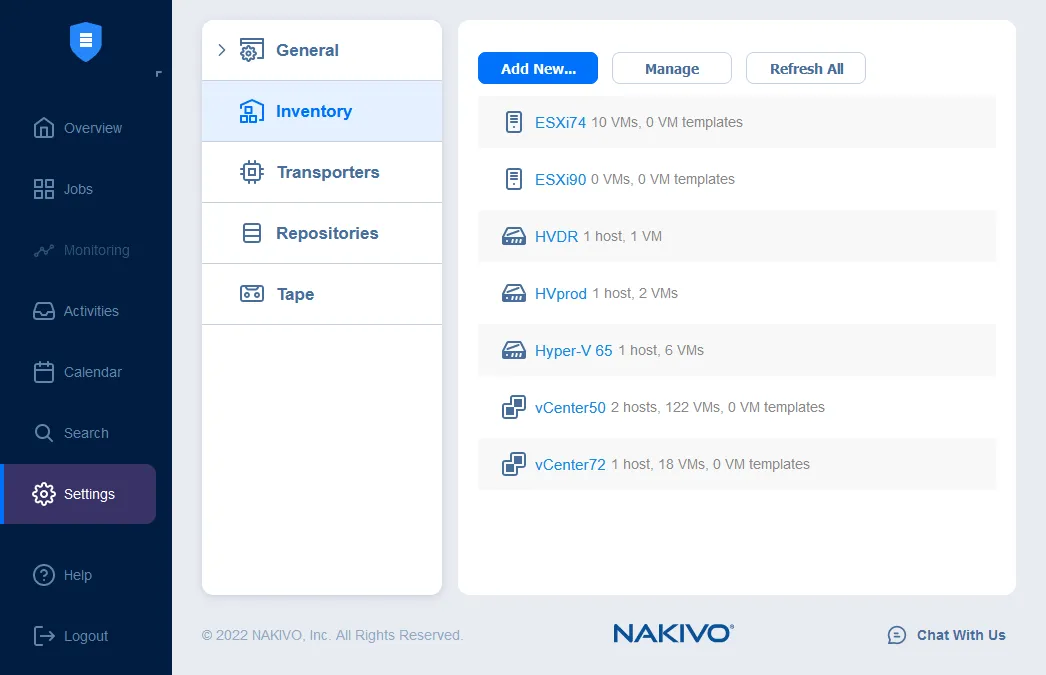
- Go to Settings > Inventory and click Add New.
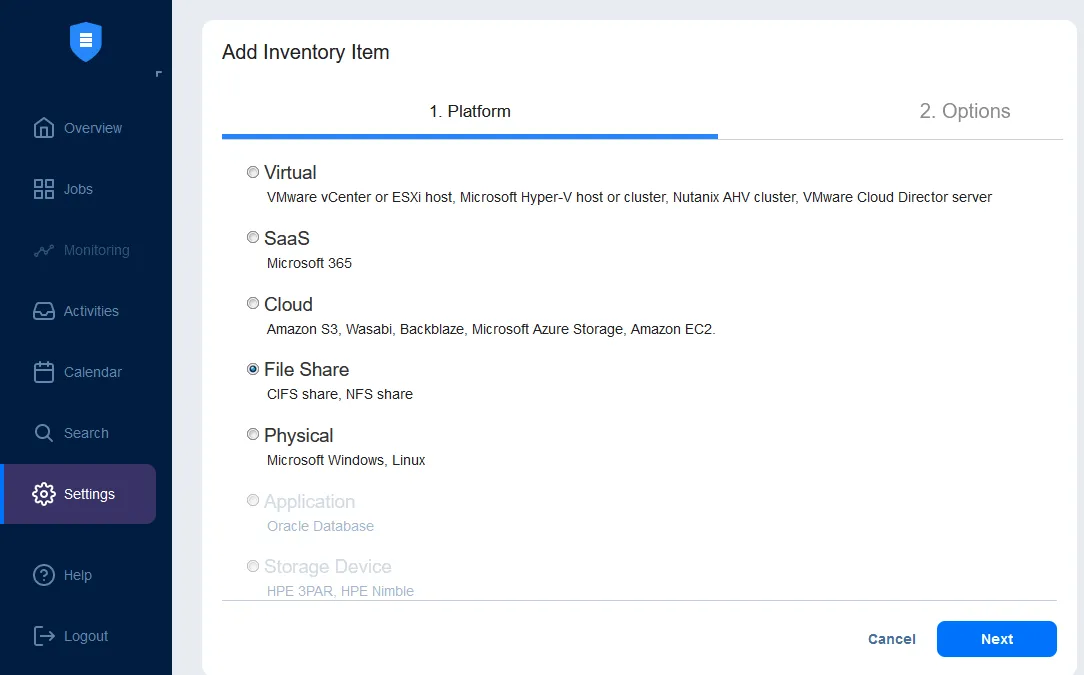
- On the Add Inventory Item page, select File Share as the platform for backing up a NAS file share. Click Next to continue.
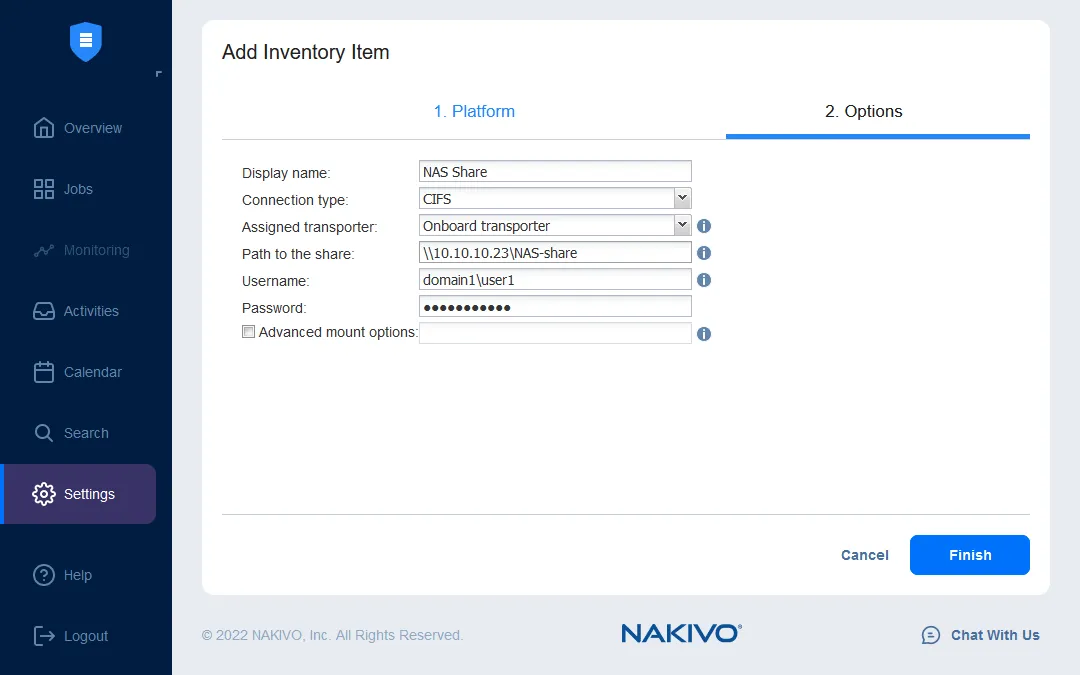
- On the Options screen, enter the display name, connection type, and assigned transporter. Enter the username and password to access the file share. We are backing up a NAS file share accessed via SMB protocol and entering a full username in the domain\username format (because our user is a domain member).
 :
Click Finish to save settings.
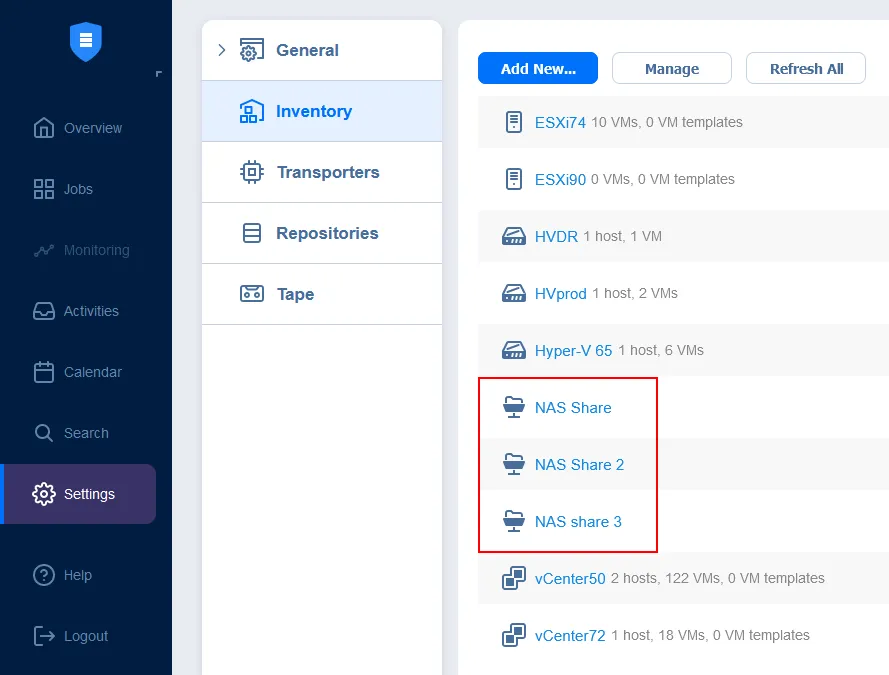
- Once you have added the file share to Inventory, you can see the added items in the list. You can add multiple file shares and back them up at once.
Creating a backup job
Now we can create a backup job for NAS storage backup and other shared folders backup.
Go to the Jobs dashboard and click Create > File share backup job.
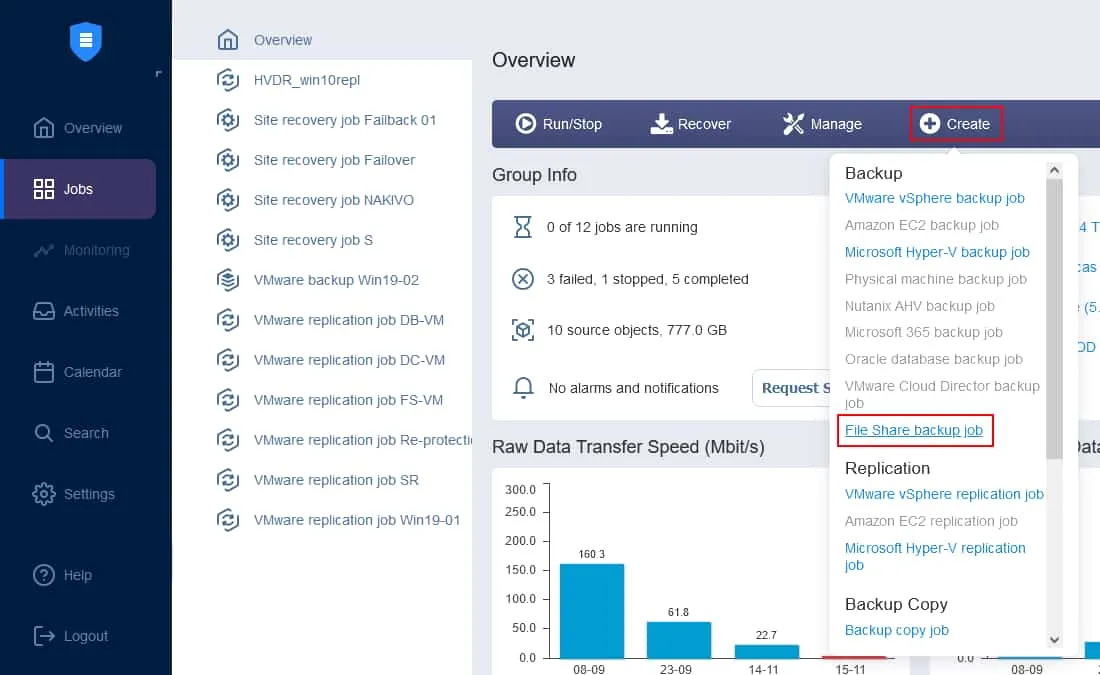
The New Backup Job Wizard for file share opens.
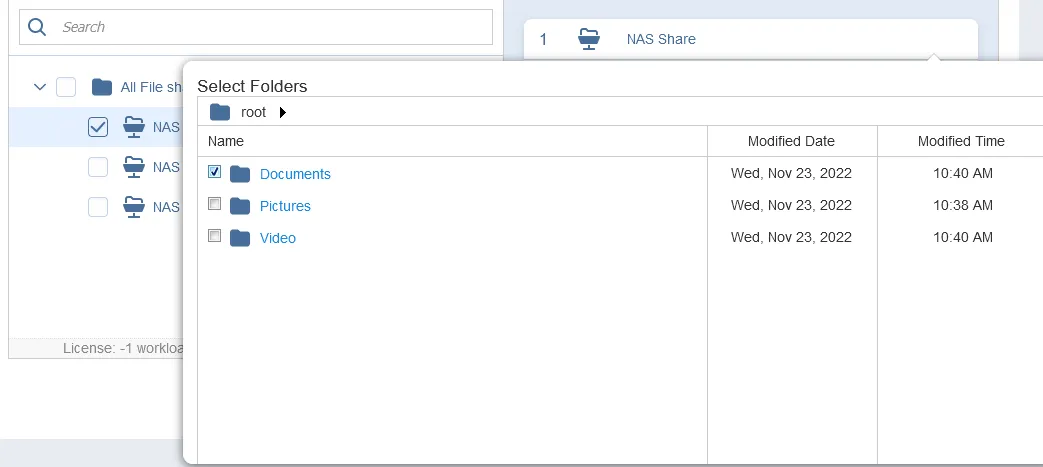
- Source. Select one or multiple file shares from the inventory you have added before. After selecting a file share, you can click the Edit icon if you want to select only specific folders inside the file share to back up.
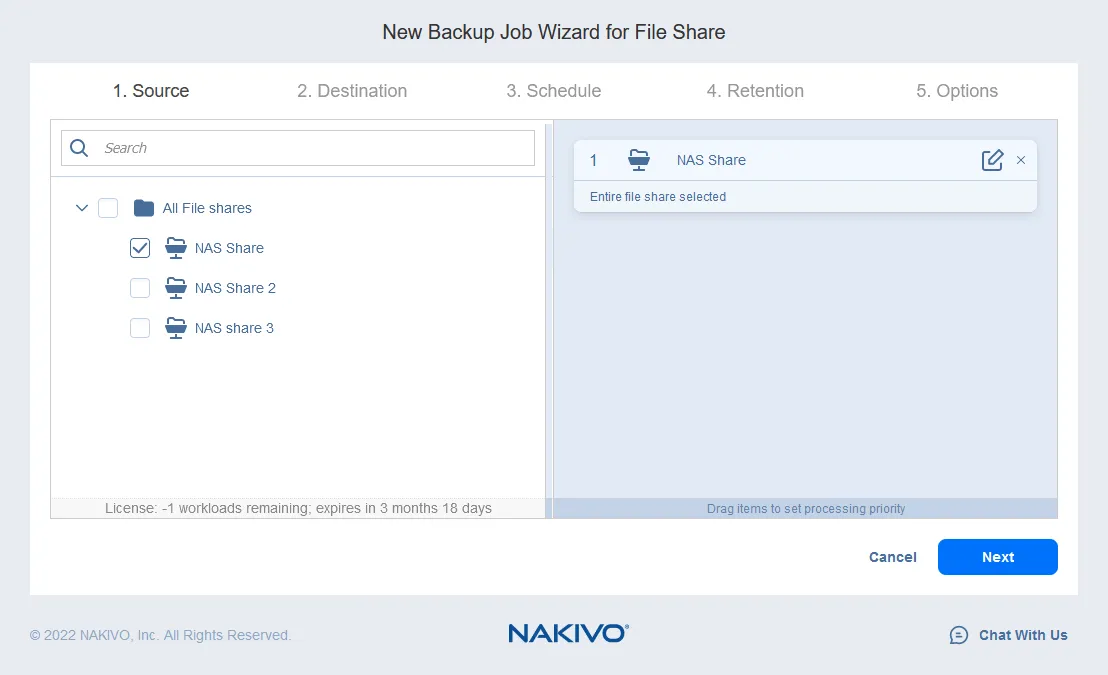
You can select one or multiple folders. After selecting everything you need, click Next to continue.
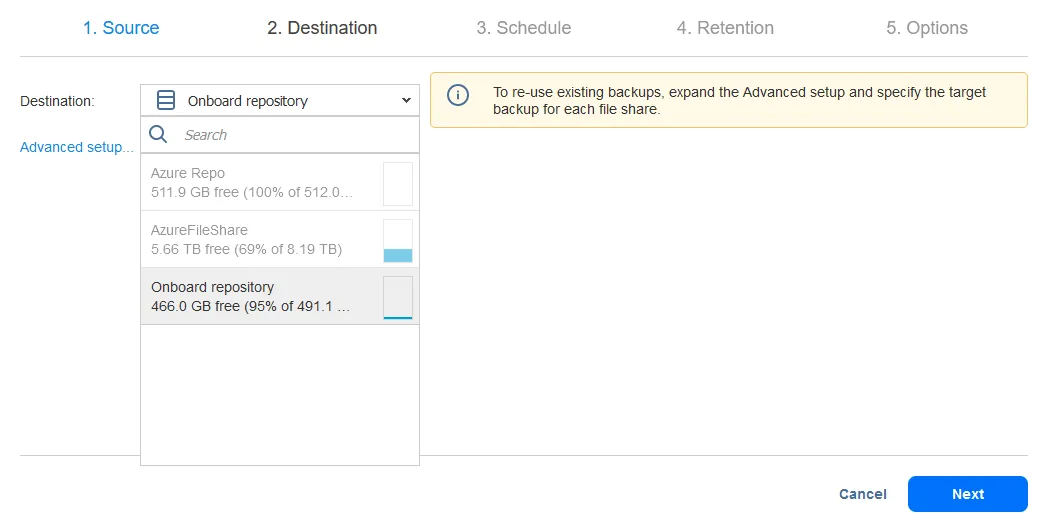
- Destination. Select a backup repository where you want to save your NAS storage backup created by copying data from the NAS file share.
- Schedule. You can automate the backup process by backing up a NAS file share based on a schedule.

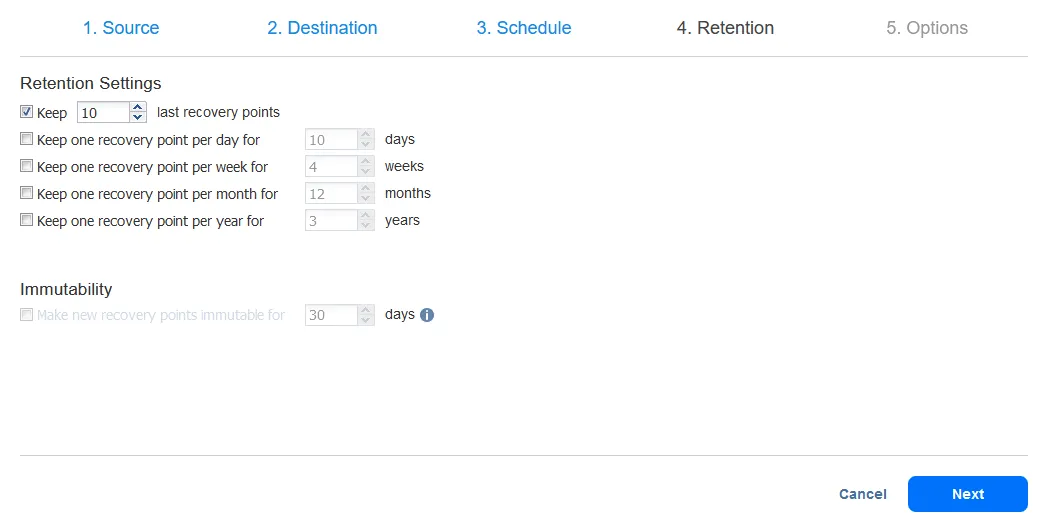
- Retention. Select the number of recovery points to retain to fit your retention scheme. You can use the GFS retention scheme.
Note: NAKIVO Backup & Replication v.10.8 contains the new retention settings approach that includes the schedule step. The scheduling and retention steps in the walkthrough apply to solution versions 10.7 and earlier.
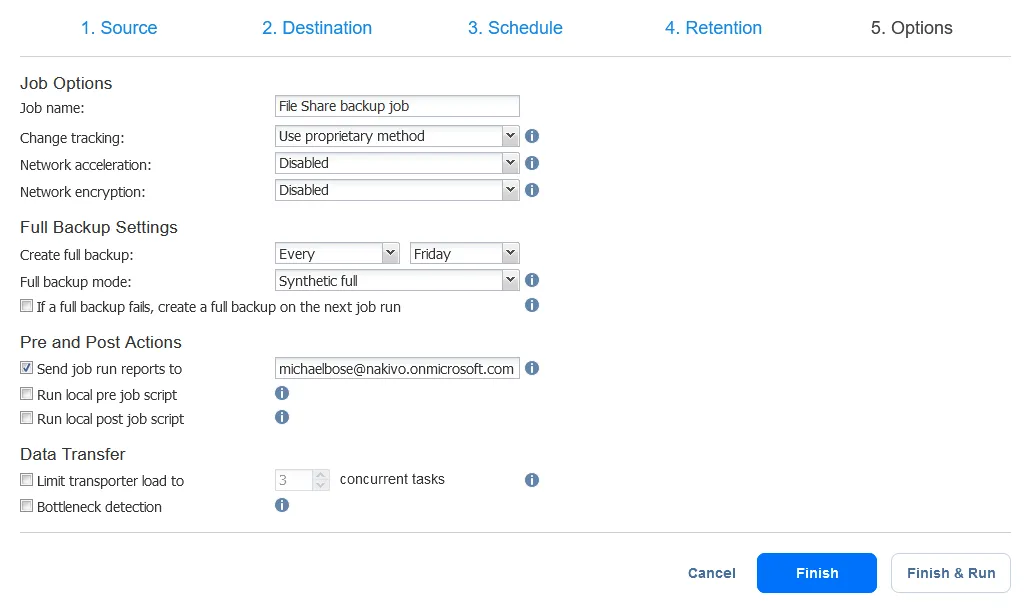
- Options. Enter the job name, for example, File share backup job or NAS drive backup. Select the change tracking method for incremental backups, and select the compression level and encryption. You can also select how often to create a full backup and which full backup mode to use.
Click Finish or Finish & Run to save job settings and start backing up a NAS shared folder.
The NAKIVO solution supports backing up file shares and storing backups on file shares (via the SMB and NFS protocols). Thus, you can also perform NAS to NAS backup with the NAKIVO solution.