How to Back Up OneDrive for Business: 3 Methods
Companies all around the world are increasingly relying on cloud storage services to keep their data safe and accessible at all times. OneDrive for Business provides powerful storage, file sharing and collaboration capabilities.
However, data stored in OneDrive can be corrupted or lost because of human error or ransomware infection, which can easily spread across the network especially if accounts are synced to offline folders. Organizations can avoid data loss and ensure business continuity by regularly backing up OneDrive files and folders.
This post explains how you can create OneDrive for Business backups using three different methods. Read on to find out the details and learn the best approach to ensuring that your cloud data can be recovered in any scenario.

Why Back Up OneDrive for Business
Microsoft’s Shared Responsibility Model states that Microsoft is only responsible for the availability of its services. It is up to the users to protect the data they create and share on Microsoft 365 applications, including data stored in OneDrive for Business, against different types of data loss threats. These threats include:
- Human error: This is the most common cause of data loss. Employees might accidentally delete OneDrive files, share sensitive data with unauthorized users or write unwanted changes to a document.
- Ransomware attacks: Malware and ransomware infections can access OneDrive for Business files through a compromised computer and encrypt or corrupt data. The bigger the number of users, the higher the risk.
- Intentional deletion: Malicious actors like disgruntled employees might intentionally delete important files which can cause different kinds of problems for your organization.
Backing up OneDrive for Business and storing this data in a safe location allows you to easily recover files in case of any disruptive incident.
Native Microsoft Recovery Features and Their Limitations
Microsoft does not provide tools specifically designed to protect OneDrive for Business data. However, you can find several built-in Microsoft 365 features that offer data recovery in certain scenarios.
Recycle Bin
Deleted files or folders in OneDrive for Business are sent to the recycle bin, where they are retained for a maximum of 93 days before being permanently removed. Keep in mind that files can be manually deleted before the retention period expires or automatically disposed of when the available space is totally consumed.
The recycle bin allows you to restore recently deleted items to their original location. It is important to note that you can send a request to Microsoft support within 14 days after the files have been permanently deleted. If the data can be recovered, then the entire OneDrive folder is restored, and the existing data is overwritten. In this case, recovering individual files or choosing which version of the data to restore is not an option.
Versioning
When you enable versioning in OneDrive for Business, you can save multiple versions of the same document. In addition, you can:
- Track the history and changes of every version
- View and compare different versions
- Revert to a previous version when you need to
Versioning is not a reliable data protection tool since the feature can be disabled. Moreover, some Microsoft 365 subscription plans do not offer unlimited storage. This means that you might need to upgrade your plan or incur additional storage costs if you plan on storing a large number of versions.
Retention policies and eDiscovery
Microsoft 365 subscribers can set retention policies to preserve critical business data for a specified period of time. Specific retention policies can be automatically assigned to different content types.
Similar to retention policies, eDiscovery allows you to retain documents. Instead of sending edited or deleted files to the recycle bin, they are stored in the Preservation Hold Library during the configured retention period. You can recover the data by using the search capabilities to find the files you need and then exporting them to a local computer.
Note: Retention policies and eDiscovery are available in more expensive subscription plans, such as Microsoft 365 Enterprise E5, A5 and G5.
Retention policies and eDiscovery are primarily used for archiving purposes to ensure legal and regulatory compliance. However, they do not provide reliable protection since you need to manually configure the retention rules.
In addition, data can be automatically removed from the Preservation Hold Library. Once the retention period expires, deleted files are sent to the recycle bin where they are no longer indexed. This means that you cannot find them using the eDiscovery search capabilities and you risk losing critical data permanently.
All the tools mentioned above do not guarantee data recoverability in case of a disruption. According to Microsoft’s service level agreement (SLA), you should regularly back up data stored in Microsoft 365 apps using the following data protection techniques.
3 Methods to Back Up OneDrive for Business Backup
You can back up OneDrive for Business using one of the three methods explained below.
Copying files manually
This is the simplest approach to protecting OneDrive data. You can manually download your files to a local disk attached to your computer or copy them to an external hard drive. The recovery process would also have to be done manually.
| Advantages | Disadvantages |
|
|
While home OneDrive users can easily copy their files manually, large organizations with a high volume of data should automate the OneDrive for Business backup process using a streamlined solution designed to handle SaaS data.
Using the OneDrive sync client
The OneDrive sync client is an application that you install on Windows. It allows you to configure synchronization from selected local folders to OneDrive and vice versa. This way, you automatically store your files on-premises and in the cloud at the same time.
You can copy synchronized files found in a local folder to an external hard drive thus creating a backup of your OneDrive for Business data.
| Advantages | Disadvantages |
|
|
Keep in mind that the OneDrive sync client is not a backup tool. It is essentially a collaboration application that allows multiple users to access and work on the same OneDrive files from anywhere. Make sure you have enough disk space on your computer since synchronized files are not compressed. In addition, cloud storage can be limited depending on your Microsoft 365 subscription plan.
Using third-party data protection software
The most reliable method to back up OneDrive for Business is using a dedicated data protection solution. Microsoft provides an API to simplify integration with third-party tools providing backup services for Microsoft 365 data.
| Advantages | Disadvantages |
|
|
It is safe to say that specialized backup applications provide the most effective SaaS data protection for organizations, especially since they can streamline backups for thousands of users.
How to Back Up OneDrive for Business with NAKIVO Backup & Replication
NAKIVO Backup & Replication is a comprehensive data protection solution that allows you to perform Microsoft 365 backup and recovery for OneDrive for Business, Teams, SharePoint Online and Exchange Online. To use NAKIVO Backup for OneDrive for Business, follow the steps below.
Adding a Microsoft 365 account to Inventory
Add the Microsoft 365 account to the inventory in NAKIVO Backup & Replication.
Creating a backup repository
All Microsoft 365 data, including OneDrive for Business backups, are stored in a dedicated SaaS repository. Complete the steps in the wizard to create the SaaS backup repository.
Creating a Microsoft 365 backup job
You can now start a OneDrive for Business backup job. In the solution’s web interface, open the Dashboard and click Create then Microsoft 365 backup job.
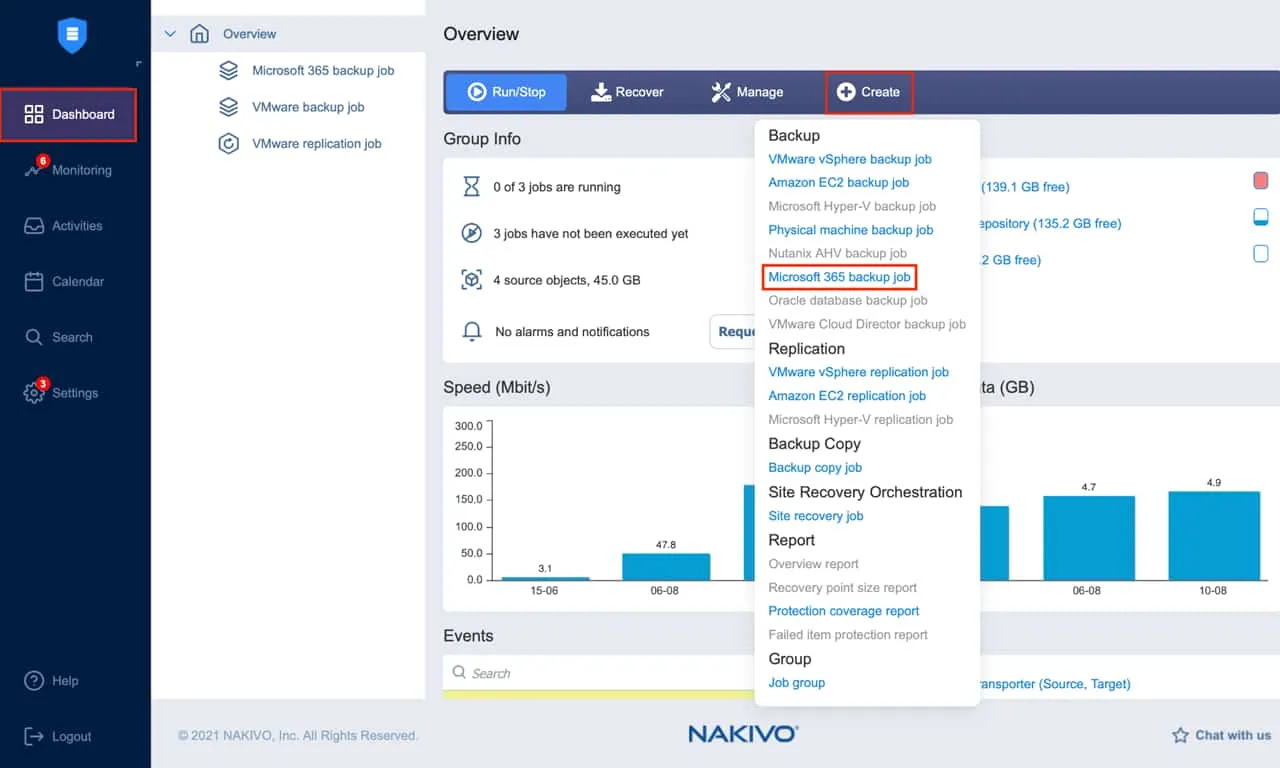
The Microsoft 365 backup job wizard consists of five steps:
- Source: You can view all the items that you can add to your backup job in the left pane on this page. Search for one or multiple accounts and select the ones you want to back up.Confirm your selection and move to the next page by clicking Next.
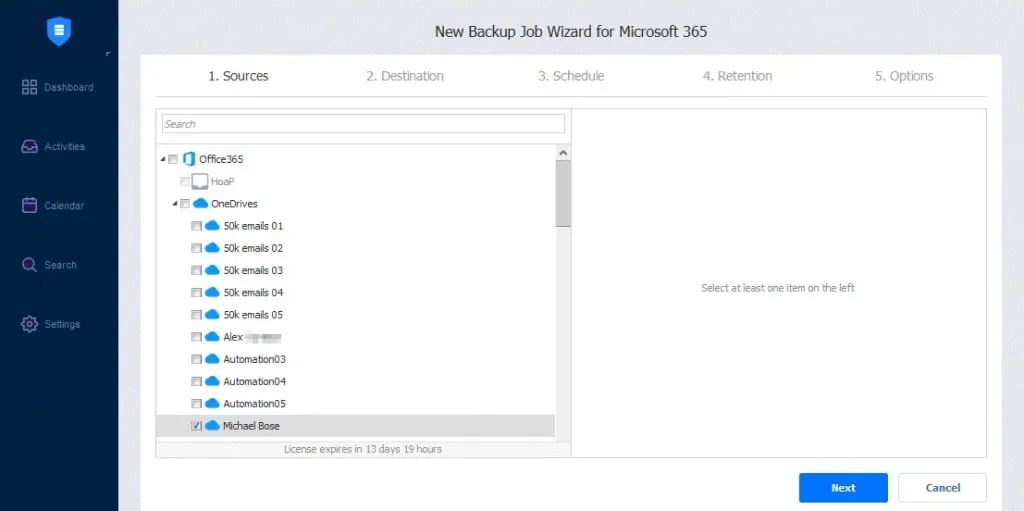
-
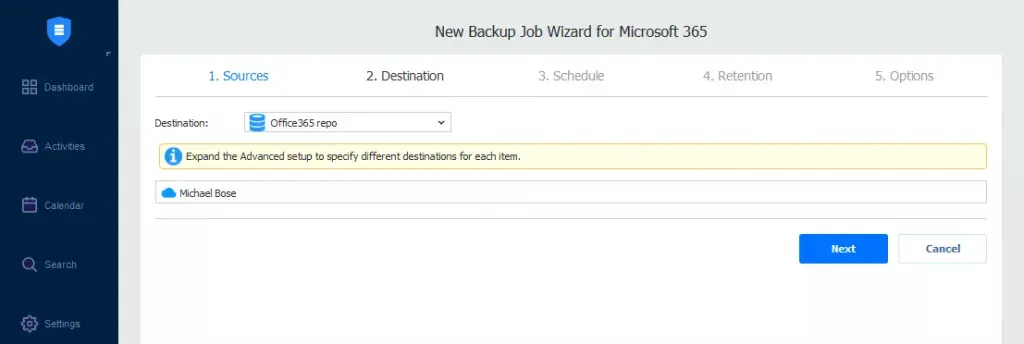
- Destination: Specify the SaaS backup repository you want to use as a storage location for OneDrive for Business backups.
- Setting a single backup repository for all items: Select the backup repository from the Destination drop-down list.
- Setting different backup repositories for each item: Click Advanced setup and choose a location for each account.
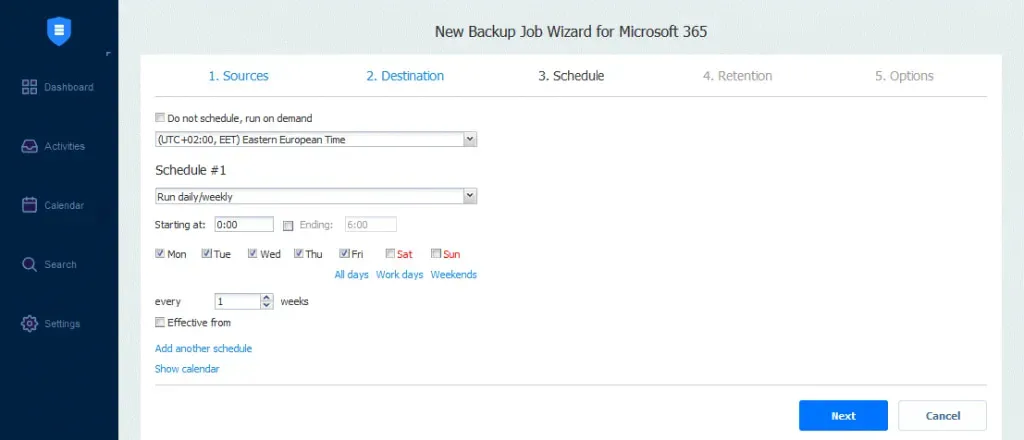
- Schedule: Here you can choose whether to run the backup job manually or schedule it on a daily, weekly, monthly or yearly basis. You can also run backup jobs after each other automatically.
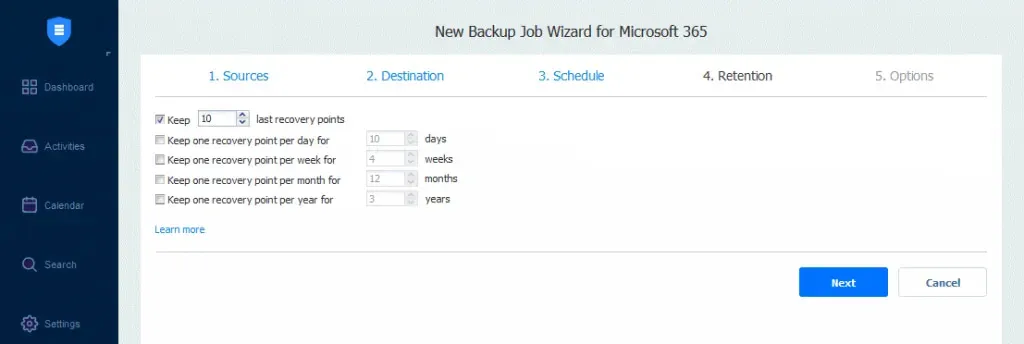
- Retention: NAKIVO Backup & Replication creates a recovery point for every item in the backup repository after each job. You can choose how many points you want to preserve using the grandfather-father-son (GFS) backup rotation scheme. This allows you to recover the entire account or individual items.
- Options: Add the job name and enable specific actions before a backup job begins or after it is complete. You can also receive backup reports and run custom pre- and post-job scripts.
Click Finish or Finish & Run to complete the job creation wizard.
How to Recover OneDrive for Business Data with NAKIVO Backup & Replication
The process below explains how you can recover your data after safely backing up OneDrive for Business.
In the solution’s web interface, click Recover then Microsoft 365 to start the recovery process.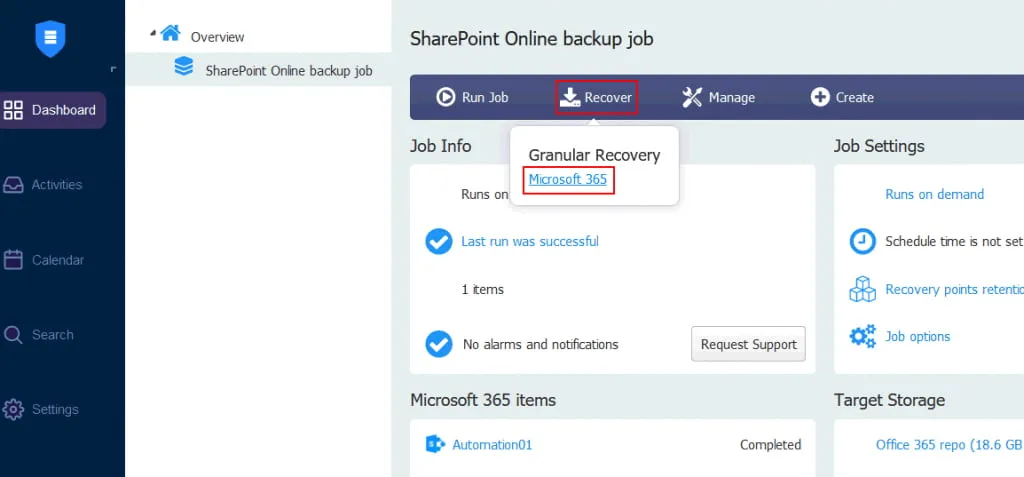
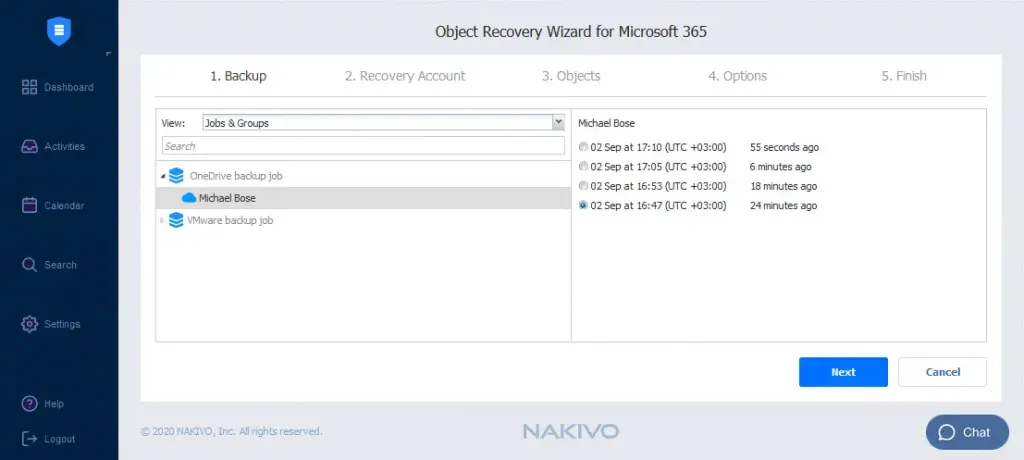
There are four steps in the Object Recovery wizard:
- Backup: All the items that you can restore are displayed in the left pane. Choose a backed up OneDrive account and select the recovery point.
Once done, click Next.
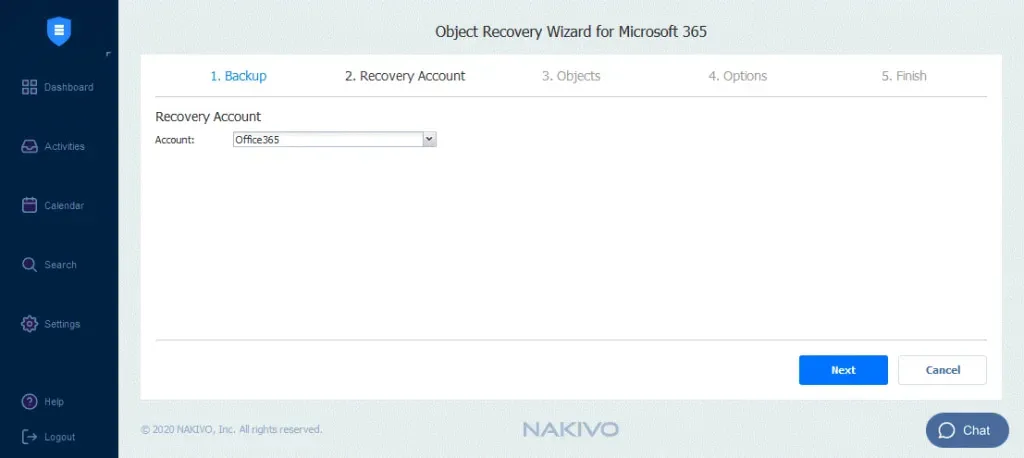
- Recovery account: From the drop-down list, select the Microsoft 365 account to which you want to recover your items.
Click Next to go to the next page.
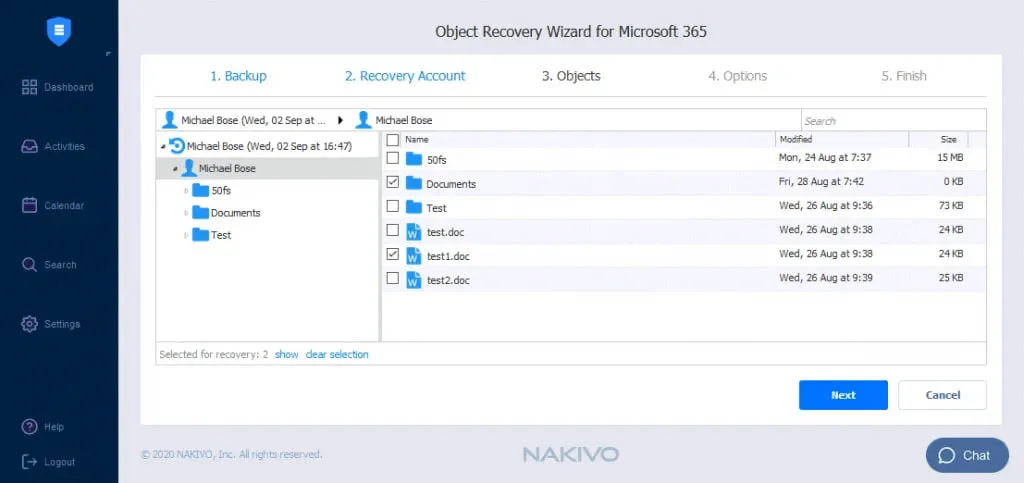
- Objects: Search for and choose the objects you want to recover.
Click Next to proceed.
- Options: On this page, configure the following parameters:
- Recovery type: Choose to recover to the original location or to a different OneDrive folder.
- Overwrite behavior: Select to either rename recovered item if such item exists, skip recovered item if such item exists or overwrite the original item if such item exists.
Note: If the selected recovery account is different from the original account, you cannot recover to the original location.

Start the recovery process by clicking Recover and wait until the data is completely restored.

- Destination: Specify the SaaS backup repository you want to use as a storage location for OneDrive for Business backups.