Configuring ADFS for Office 365: A Step-By-Step Guide
Office 365 is a web suite of enterprise-grade productivity applications offered on a subscription basis. As soon as you pay for the subscription plan, Office 365 is ready to use. But you can always configure additional features. One such feature that may be useful for companies using Microsoft Office 365 and Active Directory Domain Services is Active Directory Federation Services (ADFS) for Office 365. ADFS offers advantages for authentication and security such as single sign-on (SSO).
Add an extra level of safety and security with Microsoft Office 365 cloud data backup. Try NAKIVO Backup & Replication. This is an all-in-one solution delivering complete protection for your virtual, physical, cloud, and SaaS infrastructures, while saving you time, effort, and money.

What Is ADFS used for?
Active Directory Federation Services (ADFS) is a Single Sign-On (SSO) and web-based authentication solution by Microsoft. With SSO, users can use a single set of credentials (username and password) to access several related but independent applications or websites. ADFS allows users to access applications that are not compatible with standard Active Directory Windows authentication. ADFS is a Windows Server OS component, for example, Windows Server 2016 provides ADFS v.4.0 (ADFS 2016 is the same as ADFS 4.0). Users can use a single set of credentials to access services and applications that are integrated with Active Directory through SSO, as well as access native Windows services. ADFS can be used as an alternative to cloud identity and can help solve problems related to password management. After configuring ADFS for Office 365, users will be able to use their Windows domain username and password to access Office 365 applications.
Moreover, ADFS uses the claims-based Access Control Authorization model to secure applications by using federated identity. Federated identity management allows users to use the same identification data to get access across multiple networks/services of the organization.
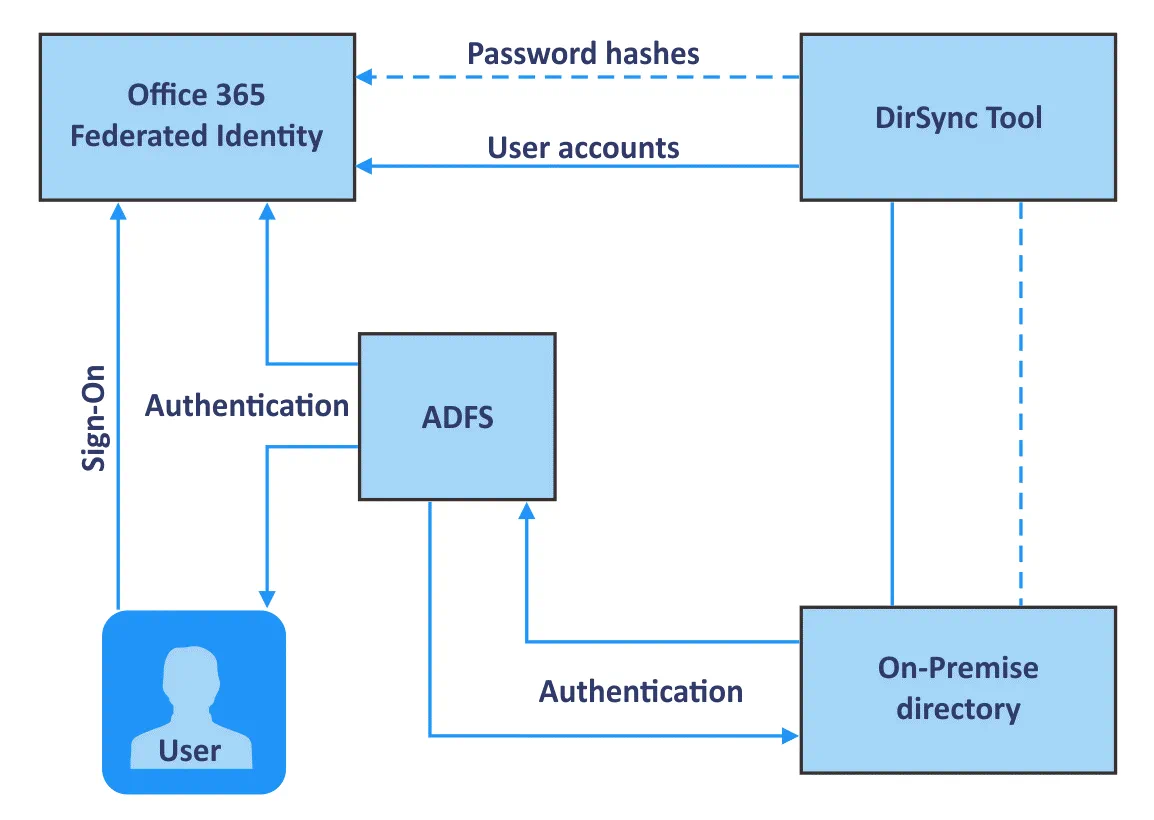
How does ADFS work with Office 365?
First, a user should follow the URL provided by ADFS.
The user is then authenticated via Active Directory of an organization.
After authentication, ADFS provides an authorized access to the user.
The user’s web browser forwards the claim to the target application, such as Office 365, and this application either grants or denies access.
ADFS with Windows Server 2016 also provides SSO with Azure MFA and allows you to sign in with Microsoft Passport.
Requirements for Office 365 ADFS Setup
For Office 365 ADFS setup, you need the following in your environment:
- Active Directory Domain Controller (Windows Server 2016 or later)
- Active Directory Federation Servers joined to the same domain
- DNS configured to resolve domain names to IP addresses
- A service account for ADFS in the Active Directory Domain
- A valid SSL certificate
- A web browser that supports SSL certificates
- JavaScript and cookies are enabled in a web browser
- TCP 443, 49443 ports for inbound connections area enabled
How to Set Up ADFS for Office 365
Let’s explore how to set up ADFS on Windows Server 2016.
Domain Controller. First of all, you must have an Active Directory Domain Controller (ADDC). As this article is about configuring ADFS for Office 365, we will not get into deploying a domain controller. You can find out about the principle for installing a domain controller in The Complete Guide to VMware Clustering. In this example, we have a domain controller running Windows Server 2016 whose full name is win2016dc@officedomain.net (hostname – win2016dc, domain name – officedomain.net).
A domain user. Create a user with administrative privileges in a domain for ADFS. In this example, the adfssrv user is created before going on to configure ADFS.
Adding the ADFS role
Now you have to install the ADFS role on your Windows Server machine. In this blog post, this role is installed on the domain controller running Windows Server 2016 by using the graphical user interface (GUI) and the workflow is demonstrated with a large number of screenshots. However, it is possible to use PowerShell as an alternative if you like the command line interface.
In Server Manager (a window that is opened by default when Windows Server 2016 boots), click Add roles and features. The Add Roles and Features Wizard window opens in which you have to configure a few steps.
Before You Begin. This is an introductory step which you can skip.
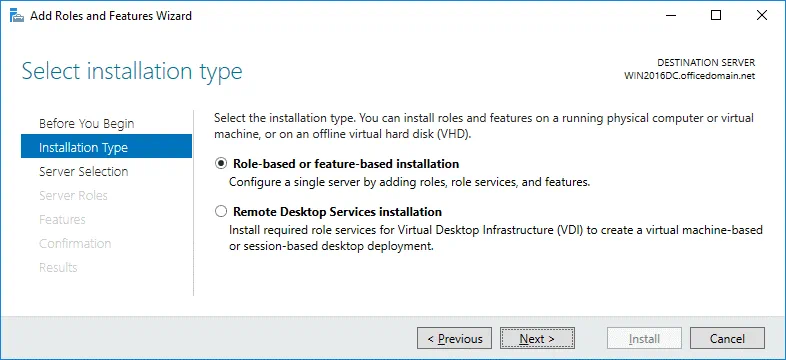
Installation Type. Select Role-based or feature-based installation. Hit Next for each step of the wizard to continue.
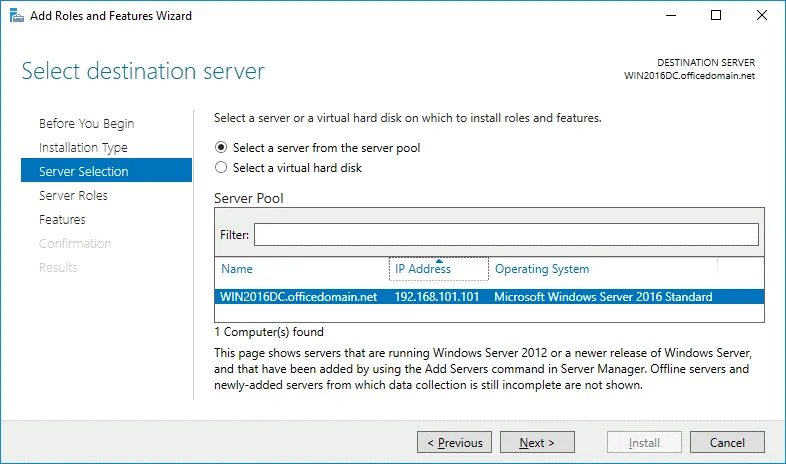
Server Selection. Select a server from the server pool: WIN2016DC.officedomain.net (is selected by default in our case because we have only one server).
Server Roles. Select the checkbox next to Active Directory Federation Services. 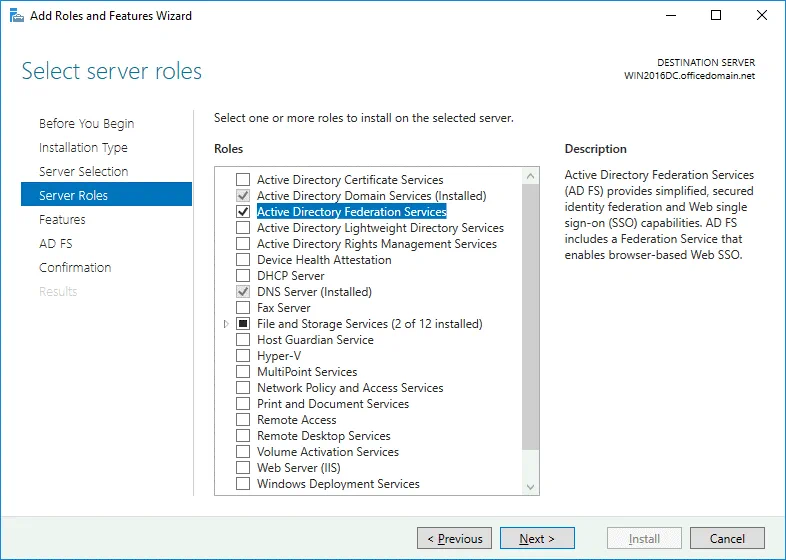
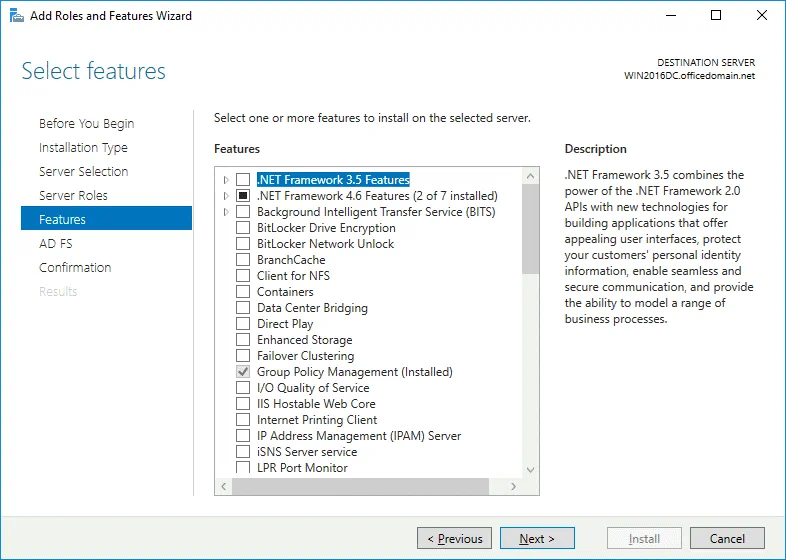
Features. The features needed for installing Active Directory Federation Services such as .NET Framework are selected.
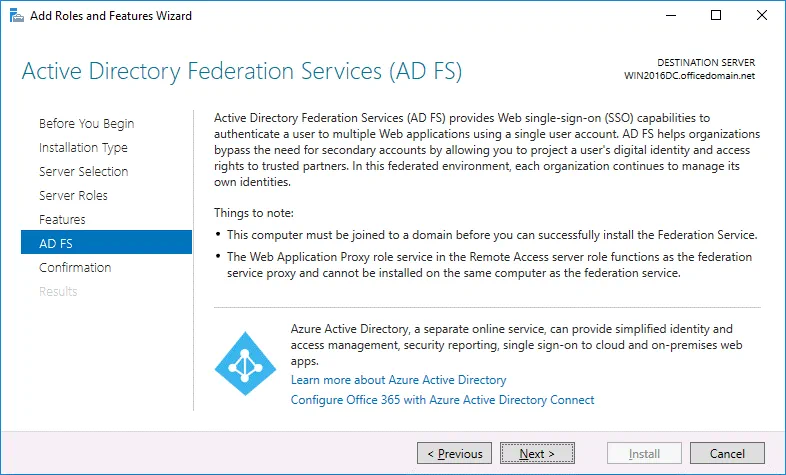
AD FS. Just click Next at this step after reading the description of Active Directory Federation Services.
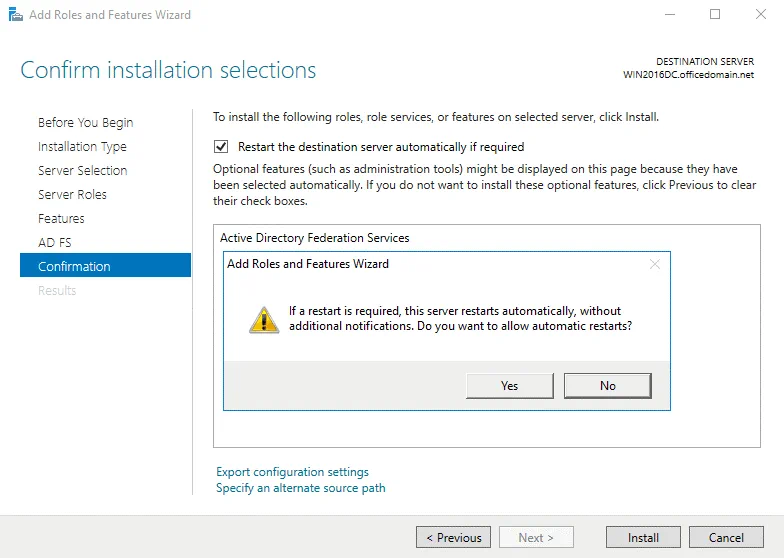
Confirmation. You can select the checkbox to restart the destination server automatically if required and hit Yes to confirm. Finally click Install to set up ADFS for Office 365.
Results. Wait until the installation process of ADFS 2016 has finished.
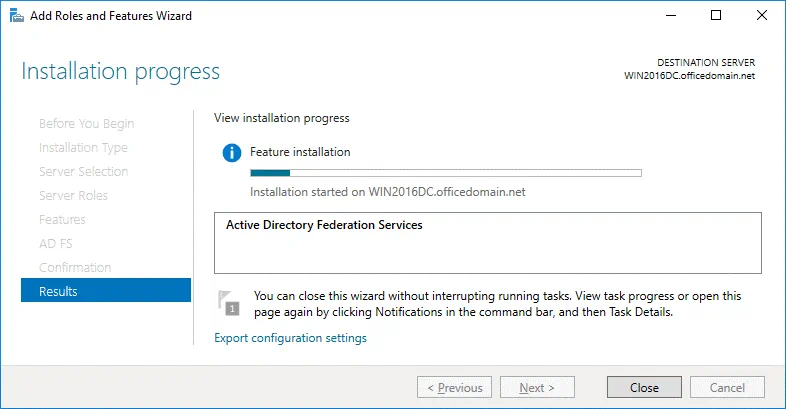
After finishing ADFS installation, the server must reboot.
Installing ADCS to create a certificate
Before you can continue to set up ADFS for Office 365, you should create a certificate. Active Directory Certificate Services must be installed for this purpose. In Server Manager click Add roles and features. As described in the previous section, the Add Roles and Features Wizard opens.
Installation Type. Select Role-based or feature-based installation. Hit Next for each step of the wizard to continue (as you have done before when installing ADFS).
Server Selection. Select a server from the server pool: WIN2016DC.officedomain.net (as described for installing ADFS).
Server Roles. Select the checkbox next to Active Directory Certificate Services. Related roles and features such as IIS (Internet Information Services) are selected automatically.

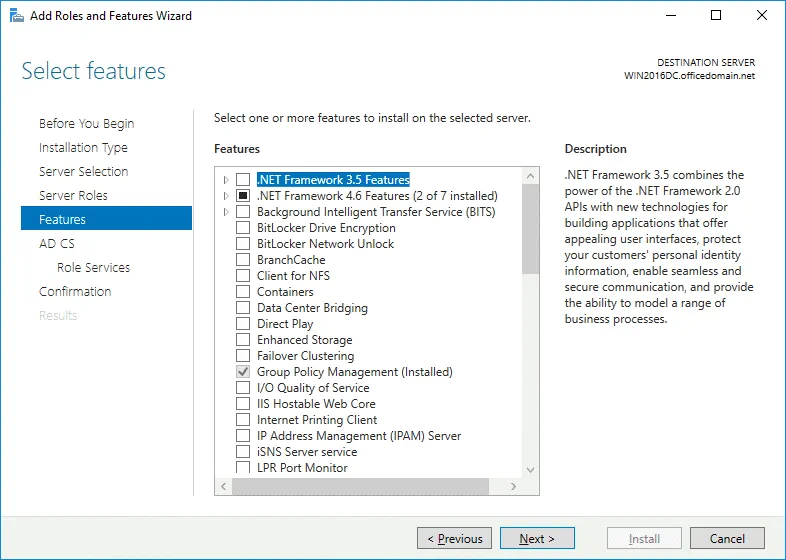
Features. At this step .NET Framework features must be selected (they are selected by default as the related features).
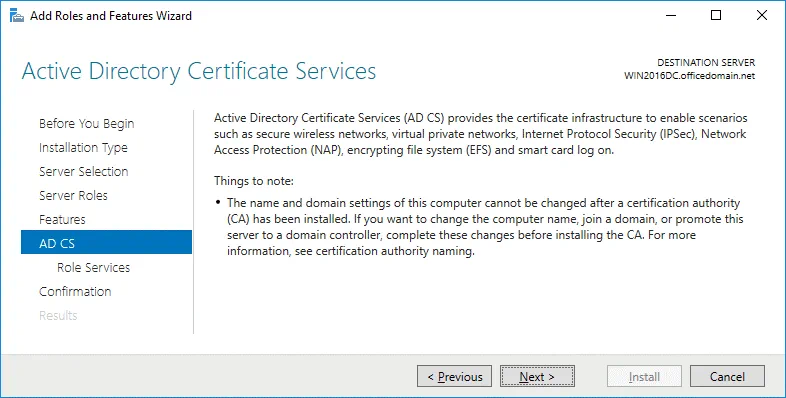
AD CS. There is nothing to configure in this step. You can read the description of Active Directory Certificate Services and continue.
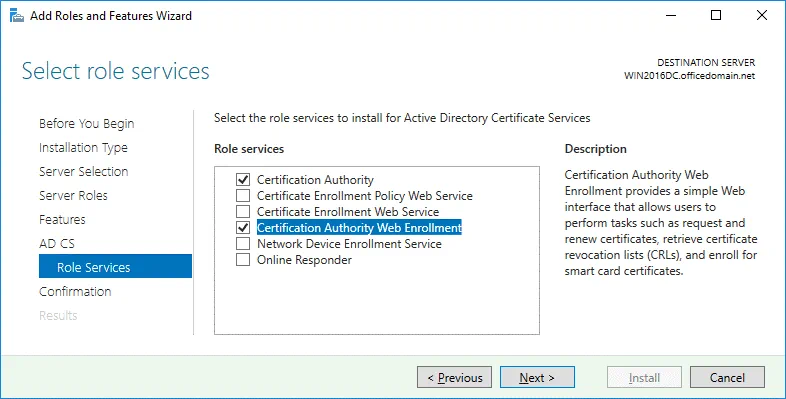
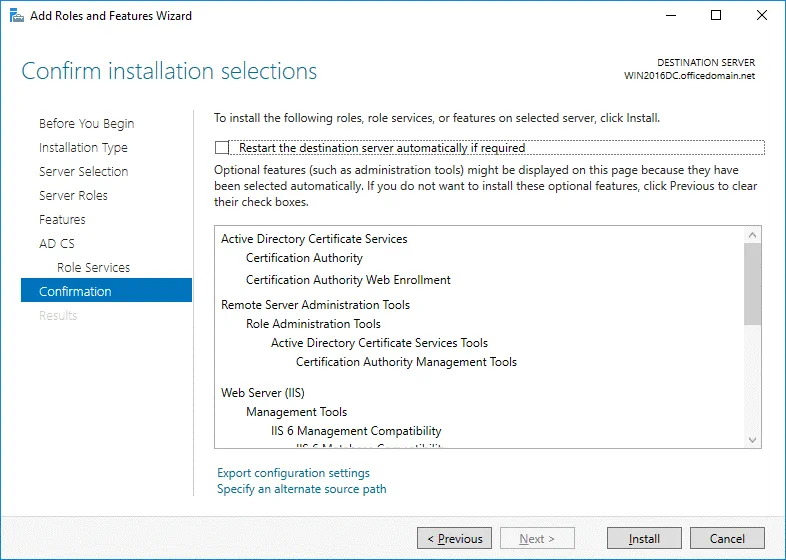
Role Services. Select the checkboxes next to Certificate Authority and Certification Authority Web Enrollment services.
Confirmation. Check your configuration, select the checkbox to restart the destination server automatically if required and hit Install to start the installation process.
ADCS configuration
Now you should perform the post-deployment configuration of Active Directory Certificate Services before you can continue configuring ADFS for Office 365. In Server Manager, click the yellow triangle near the flag icon. In the menu that opens, click Configure Active Directory Certificates on this machine.
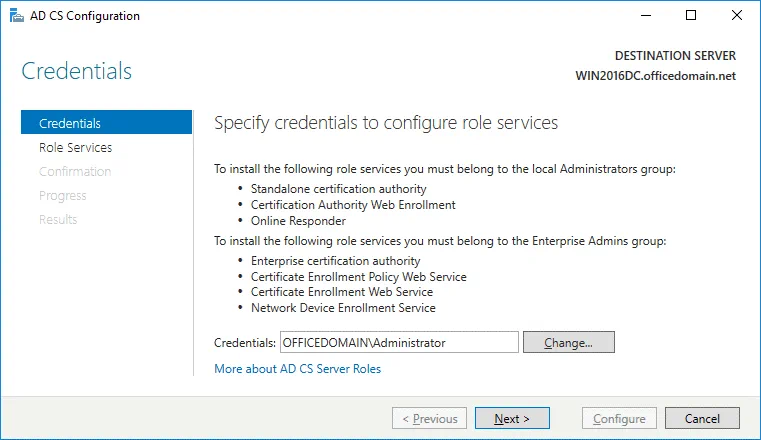
Credentials. Specify credentials to configure role services. In our case, OFFICEDOMAIN\Administrator is the account used to install the selected role services. Hit Next for each step of the wizard to continue.
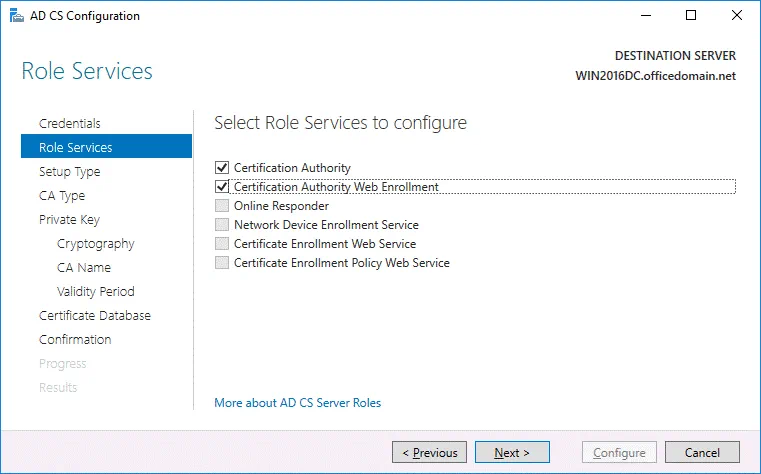
Role Services. To choose Certification Authority and Certification Authority Web Enrollment, select the appropriate checkboxes.
Setup Type. Select Enterprise CA because Active Directory Domain Services are used in this case.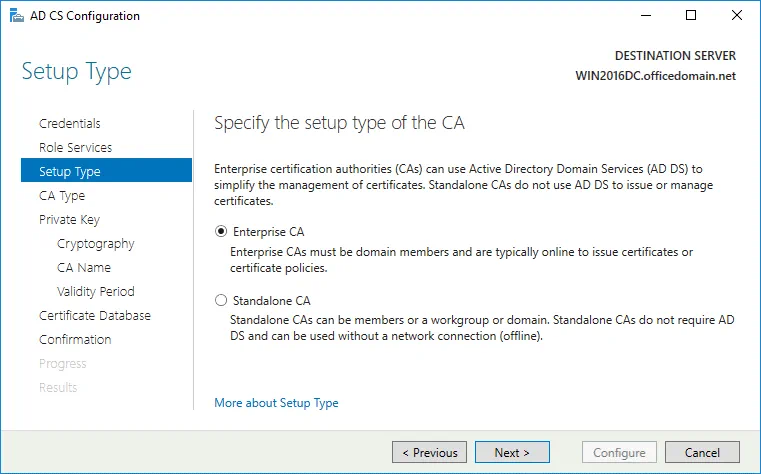
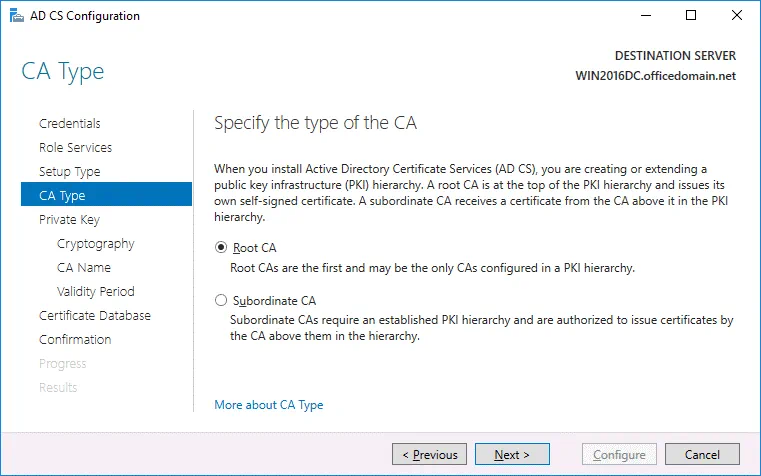
CA Type. Specify the type of the CA. Select Root CA that is the first in a public key infrastructure (PKI) hierarchy.
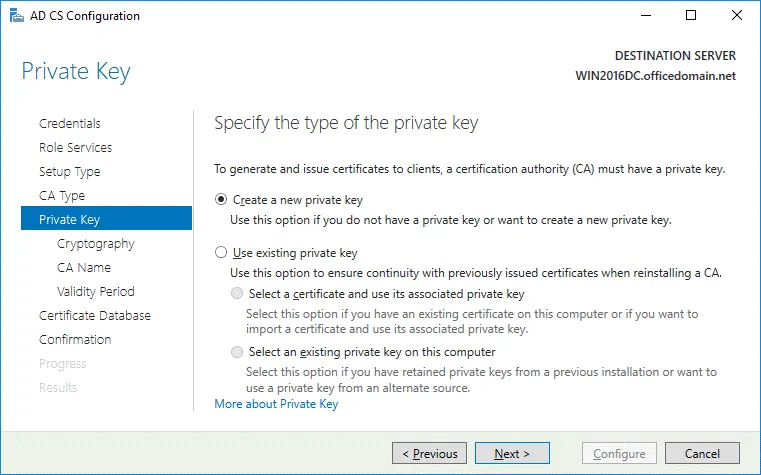
Private Key. To specify the type of the private key, select Create a new private key.
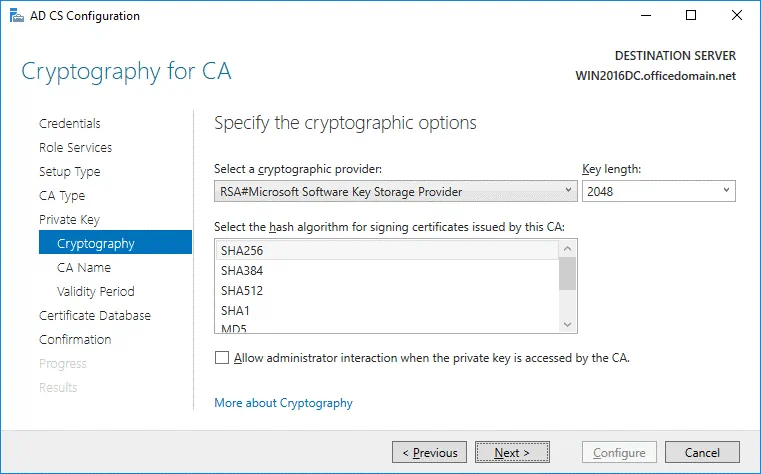
Cryptography. Specify the cryptographic options for CA. In this example, RSA#Microsoft Software Key Storage Provider is selected with a key length of 2048. SHA256 is selected as the hash algorithm.
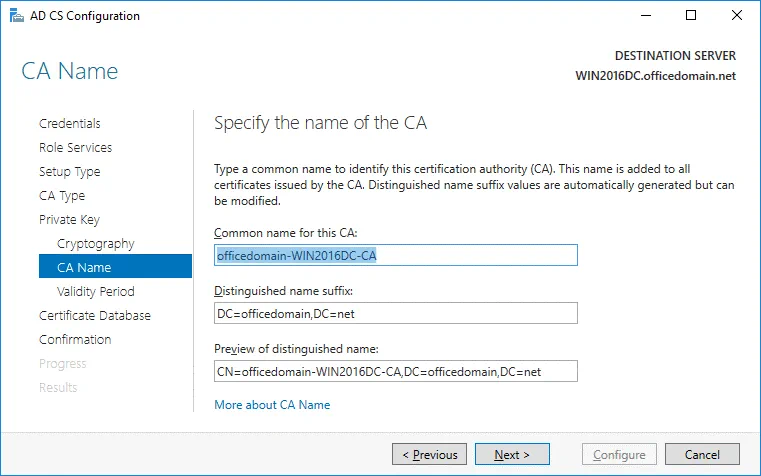
CA Name. Specify the name of the CA. The following parameters are used in this example.
Common name for this CA: officedomain-WIN2016DC-CA
Distinguished name suffix: DC=officedomain,DC=net
Preview of distinguished name: CN=officedomain-WIN2016DC-CA,DC=officedomain,DC=net
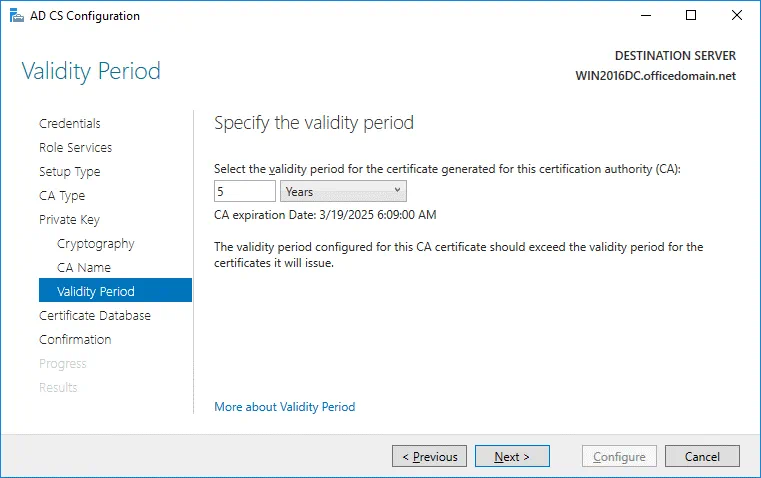
Validity Period. Specify the validity period for the certificate generated for this certification authority (CA), for example, 5 years.
Certificate Database. Specify the database locations. You can keep the default values.
Certificate database location: C:\Windows\system32\CertLog
Certificate database log location: C:\Windows\system32\CertLog

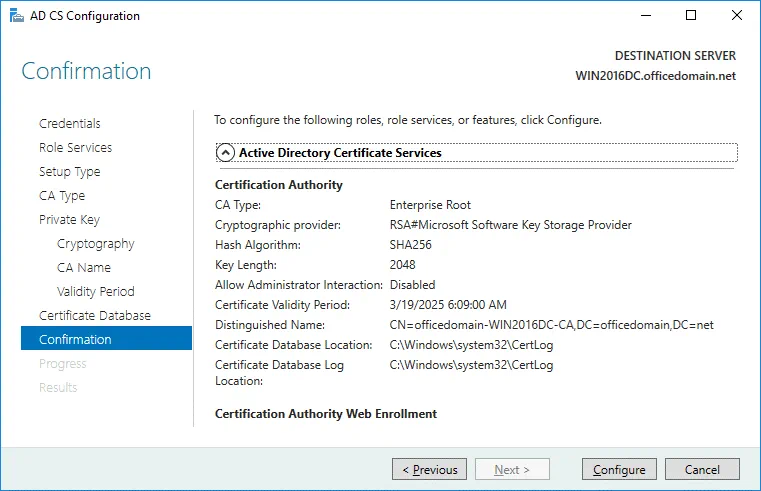
Confirmation. Check your configuration of Active Directory Certificate Services and if everything is OK, hit Configure.
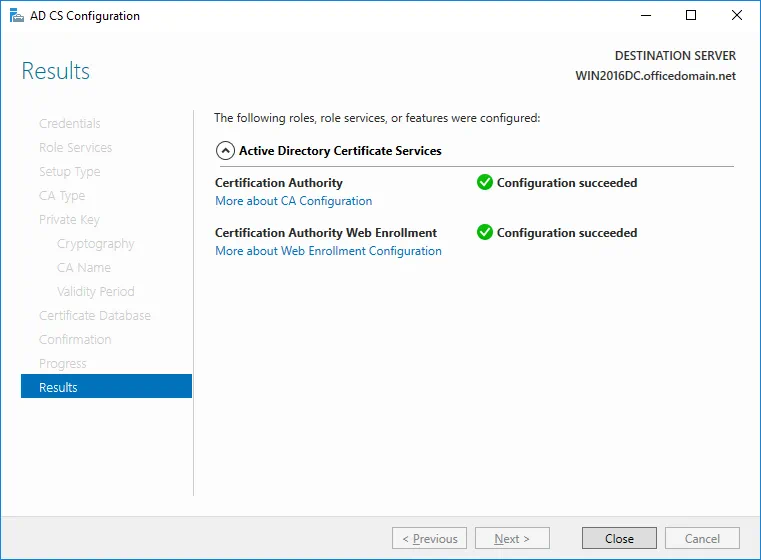
If you see the Configuration succeeded message, then everything is correct and you can close the window.
Editing a certificate template
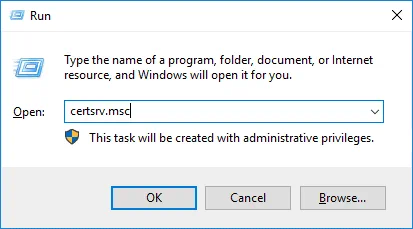
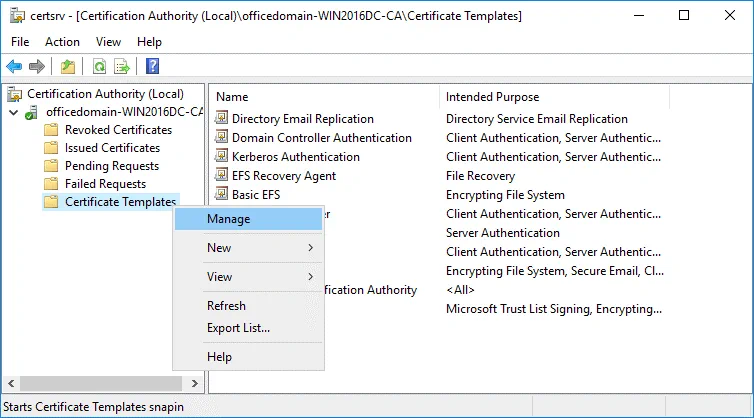
To edit a certificate template, open the Certification Authority configuration window by pressing Win+R and running certsrv.msc
In the opened window of the Certification Authority, right click Certificate Templates and in the context menu click Manage.
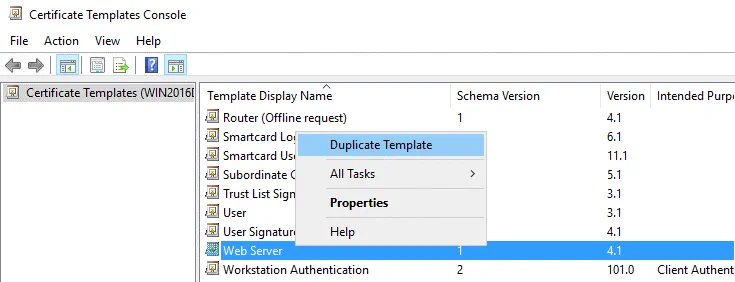
In the opened Certificate Templates Console, right click Web Server and in the context menu hit Duplicate Template.
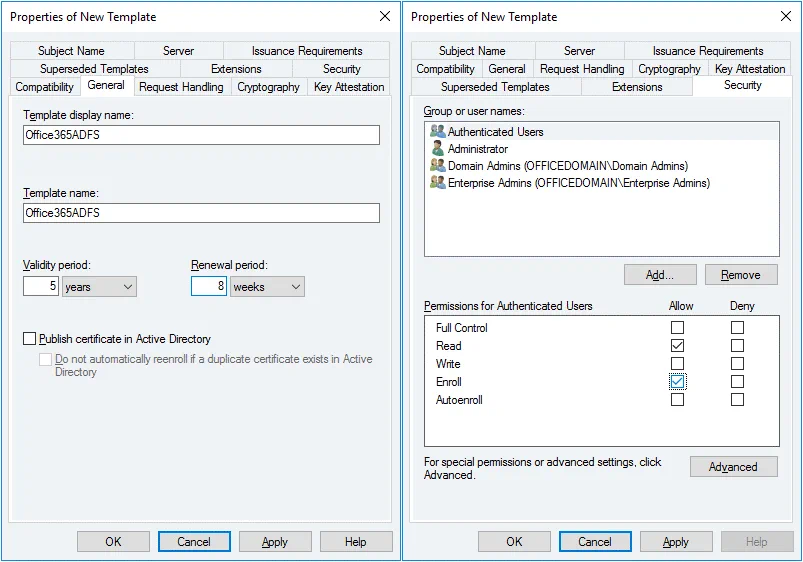
The Properties of New Template window opens. In the General tab enter the template display name and template name. We are configuring ADFS for Office 365, hence, the template name is Office365ADFS in this example. You can also set the validity period for the certificate.
In the Security tab select Authenticated users and in the permissions for authenticated users select the checkbox to Allow Enroll (see the screenshot below).
Now in the Certification Authority window (certsrv) click Action > New > Certificate Template to Issue.
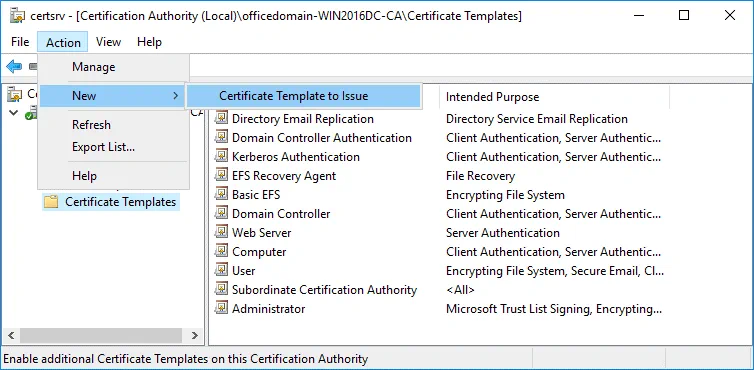
In the Enable Certificate Templates window, select the template you have created earlier (Office365ADFS in this case) and hit OK.
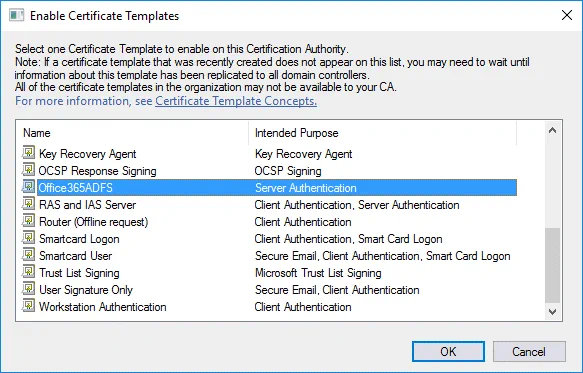
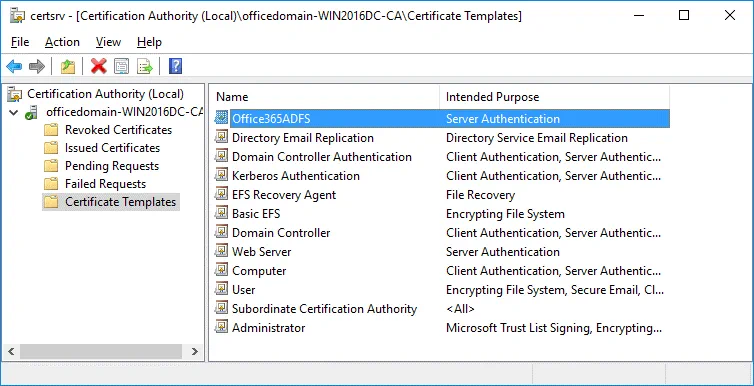
Now your Office365ADFS template is displayed in the list of templates in the Certificate Templates directory of the Certification Authority list.
Creating a new certificate
Go to Start > Run and open the Certificate Manager with the command:
certlm
In the certlm window that opens, go to Personal > Certificates, then right click in the empty place in the right section of the window. In the context menu, select All Tasks > Request New Certificate.

Before You begin. There is nothing to configure in this step. Click Next to continue.
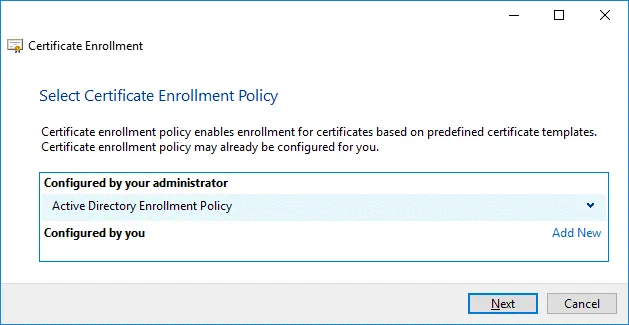
Select Certificate Enrollment Policy. The default settings can be used in this step.
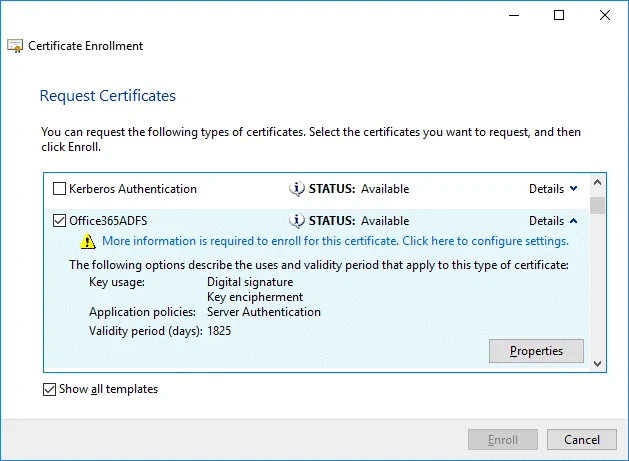
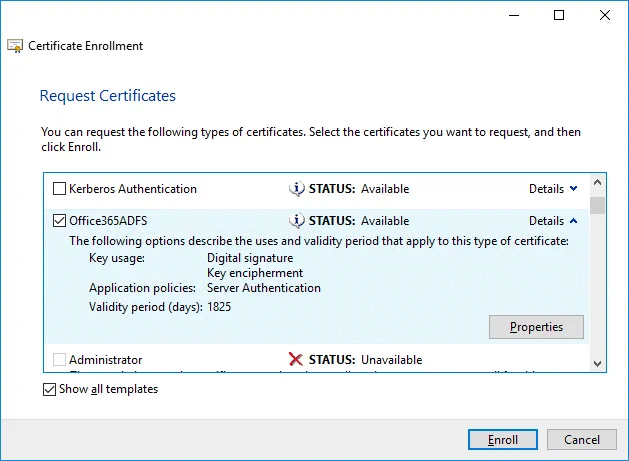
Request Certificates. Select your Office365ADFS certificate template by selecting the checkbox, click Details to expand settings and then click Properties.
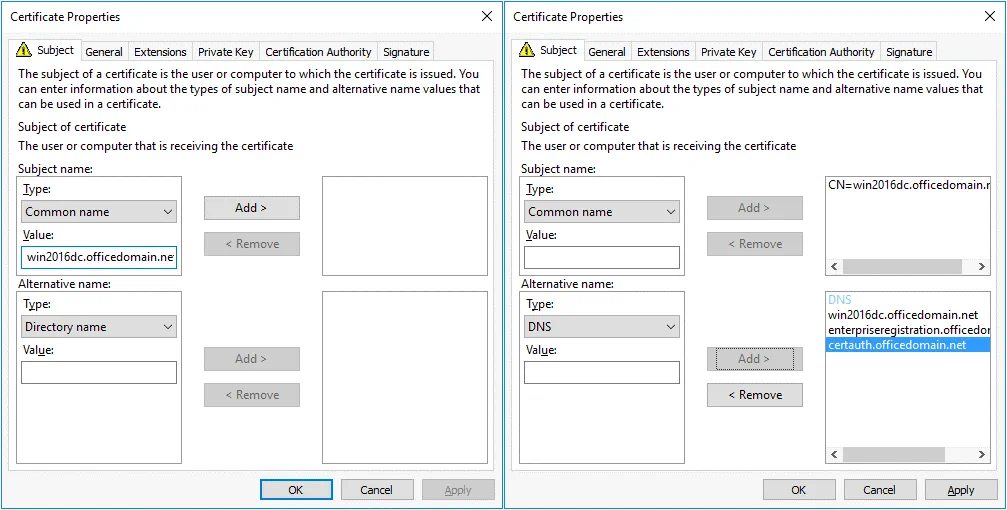
The Certificate Properties window opens. In the Subject tab, find the Subject name section and, in the drop-down menu, select Common name as a type. Enter the value that is a fully qualified domain name (FQDN) of your Windows Server on which ADFS is installed, for example: win2016dc.officedomain.net (see the left screenshot).
Similarly, in the Alternative name section, add three values. Type: DNS.
win2016dc.officedomain.net
enterpriseregistration.officedomain.net
certauth.officedomain.net
Note: A certificate must support EKU Server Authentication and be able to export the private key. All servers of a farm must use the single certificate. After configuring the first ADFS server in the farm, a certificate must be exported to another server. You cannot use different certificates with different thumbprints.
A certificate template for a web server or another certificate can be used to create your custom certificate. The main condition is the correct EKU. Another main point is using correct values for a subject name and subject alternative name.
enterpriseregistration.[domain-name] is used to enable clients to register via Workplace Join and provides mechanisms to implement Condition Access for web applications whose authentication is configured via ADFS. Office 365 ADFS configuration can also use this principle.
certauth.[domain-name] allows authentication by using smart cards, including virtual smart cards.
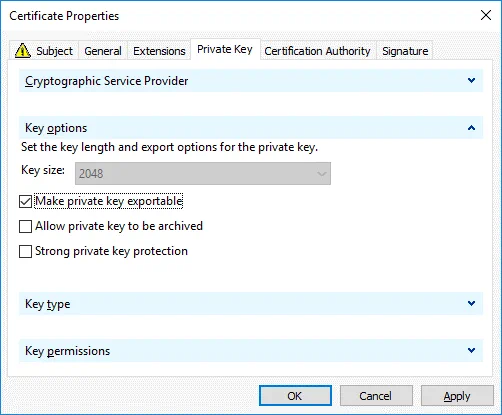
In the Private Key tab, select the Make private key exportable checkbox.
Hit OK to save settings.
All the required information to enroll the certificate is defined. Click Enroll to continue.
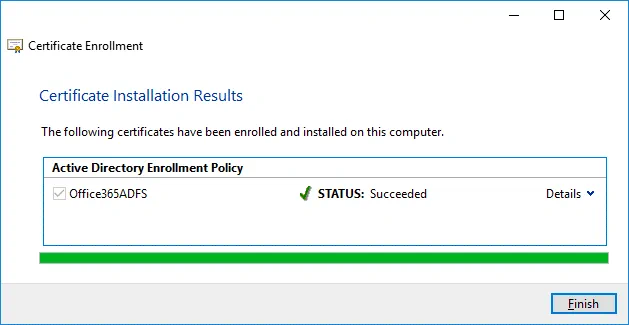
If the status is Succeeded in the Certificate Installation Results step of the wizard, click Finish to close the window.
Exporting a certificate for Office 365 ADFS setup
You should export a certificate to a file that could be used on the current server and other Windows servers in the ADFS farm.
Run certlm if you have not done that yet.
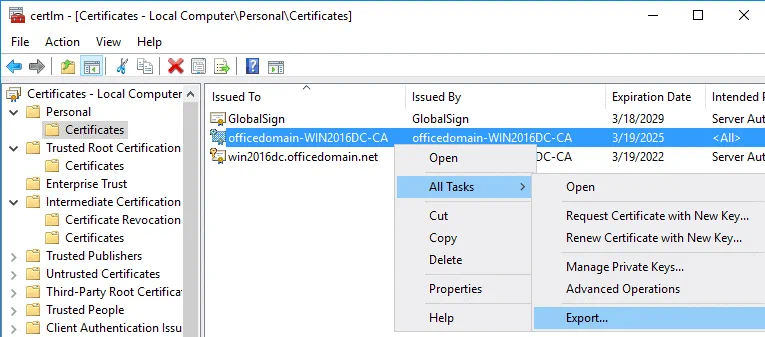
Go to Personal > Certificates, select your certificate. In our example, the selected certificate is officedomain-WIN2016DC-CA. Right click the certificate and in the context menu, select All Tasks > Export.
The Certificate Export Wizard opens.
Welcome to the Certificate Export Wizard. This is the first step of the wizard used for introduction. There is nothing to configure and you can click Next to continue.
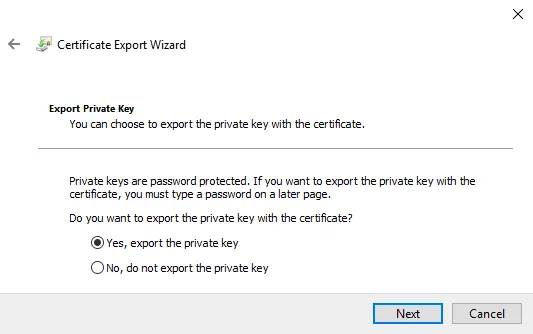
Export Private Key. Select Yes, export the private key.
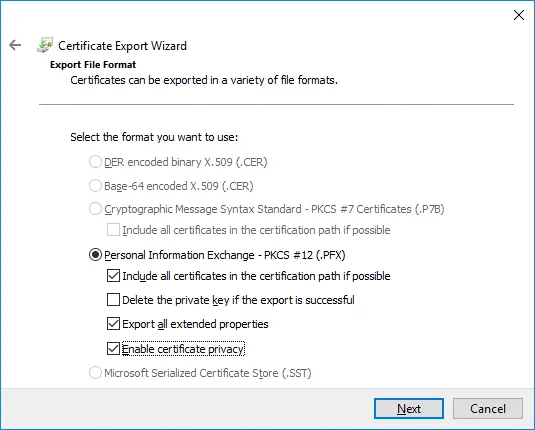
Export File Format. Select Personal Information Exchange – PKCS #12 (.PFX) as the file format. Then select the following checkboxes:
- Include all certificates in the certification path if possible
- Export all extended properties
- Enable certificate privacy
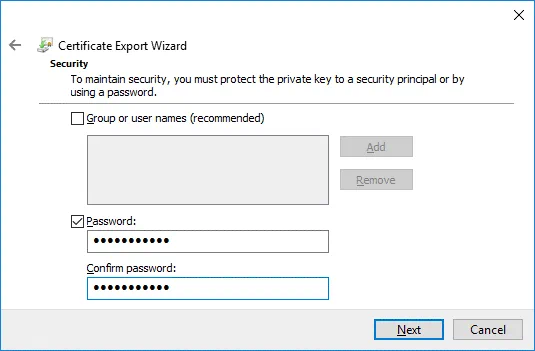
Security. Select the Password checkbox, enter your password and confirm your password.
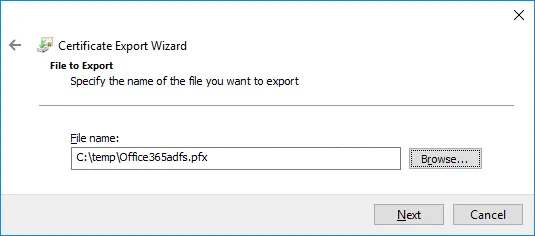
File to Export. Click Browse and select destination and the file name for the exported certificate. In this example, the name of the file to export is C:\temp\Office365adfs.pfx
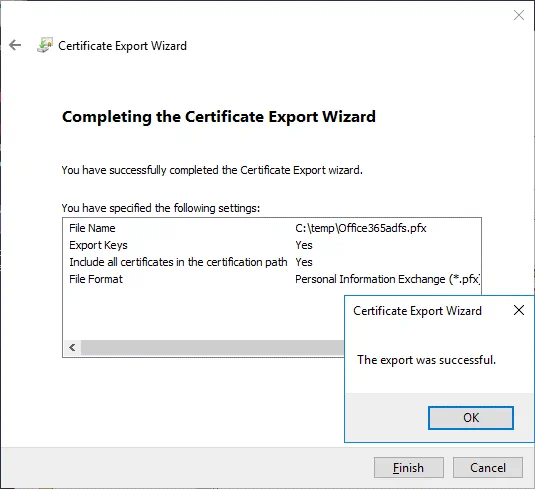
Completing the Certificate Export Wizard. Now everything is ready for export. Hit Finish to export the certificate. The export was successful. Click OK to close the window.
Configuring ADFS for Office 365
After installing the ADFS role and creating/exporting a certificate, you can resume Office 365 ADFS setup.
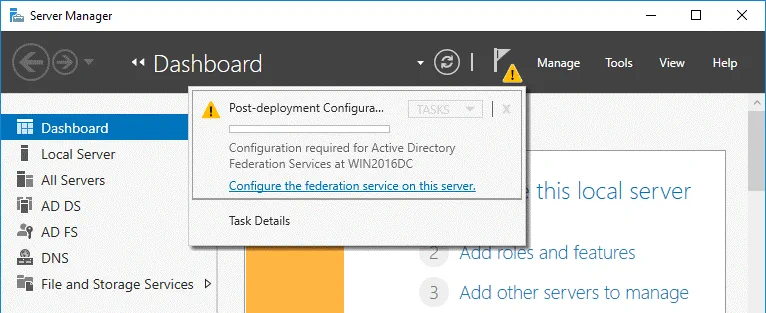
Open Server Manager and click the flag icon with the yellow triangle. In the menu that opens, click Configure the federation service on this server to perform the post-deployment configuration.
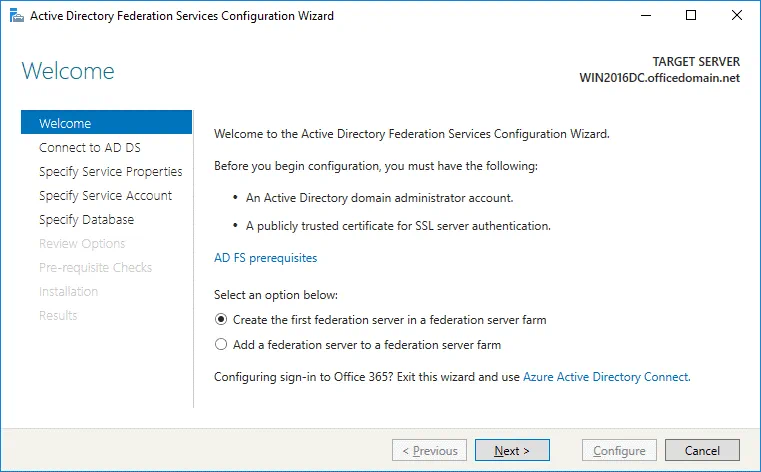
The Active Directory Federation Services Configuration Wizard opens.
Welcome. In the first step of the wizard, select the option: Create the first federation server in a federation server farm. Hit Next to continue.
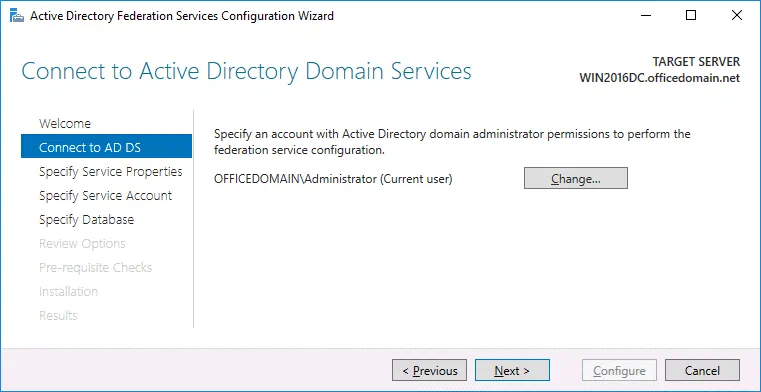
Connect to AD DS. Select the account with permissions of the AD domain administrator (OFFICEDOMAIN\Administrator in this case). You can click the Change button and select another user.
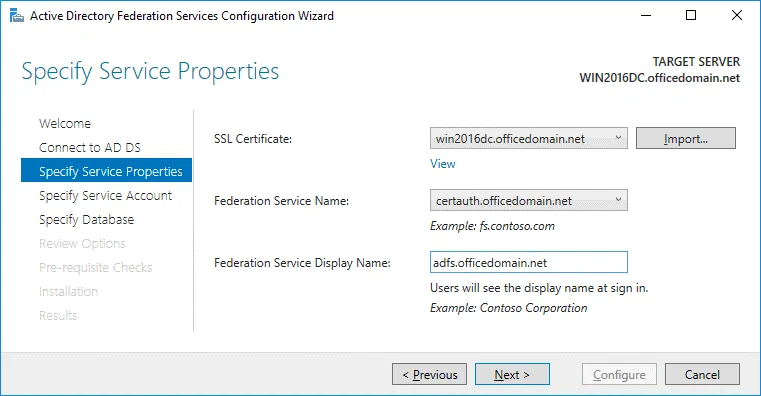
Specify Service Properties. SSL Certificate: win2016dc.officedomain.net (select the certificate you have created before in the drop-down menu. As an alternative, click the Import button and browse the exported certificate file.)
Federation Service Name: certauth.officedomain.net
Federation Service Display Name: adfs.officedomain.net (this name will be displayed for users to sign in).
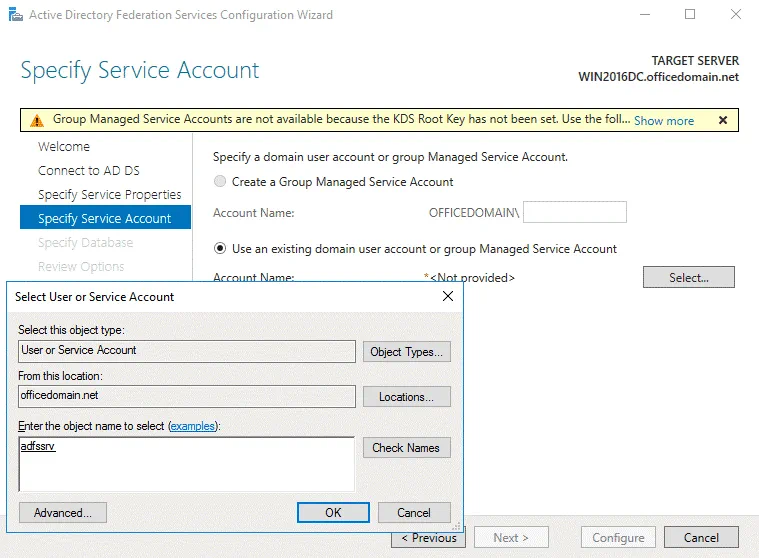
Specify Service Account. Specify a domain user account or group. The second option is selected in our example: Use an existing domain user account or group. Click Select to choose the account with administrative permissions (a special adfssrv account was created in the beginning of this this walkthrough).
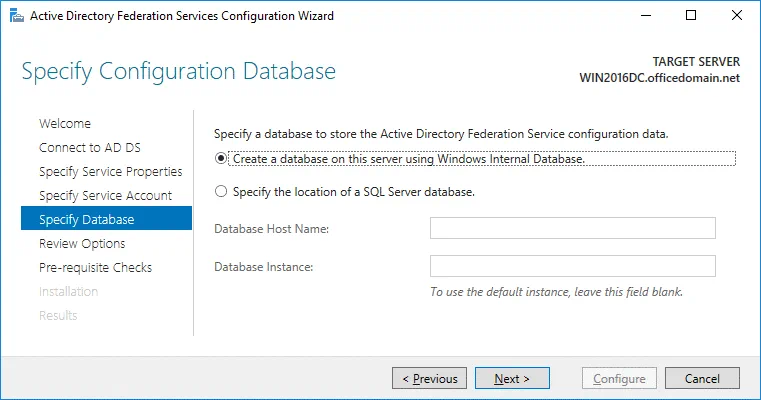
Specify Database. At this step you have to specify a database to store the Active Directory Federation Service configuration data. For small organizations and ADFS environments the internal database can be used. MS SQL Server Database is recommended for large ADFS deployments. In this example, we select the first option:
Create a database on this server using Windows Internal Database.
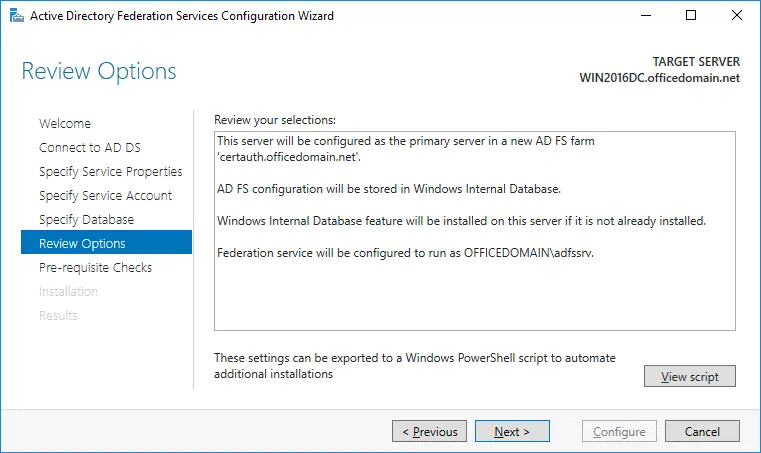
Review Options. Review your options. You can click View script and save the configuration script. This may be useful if you want to deploy multiple Active Directory Federation Servers.
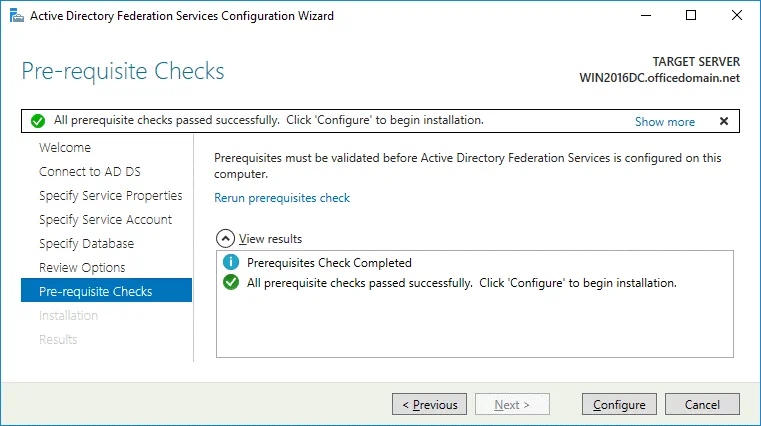
Prerequisite Checks. A system checks configuration parameters. If everything is correct, you will see the message: All prerequisite checks passed successfully. Click Configure to begin installation. Wait until Office 365 ADFS setup has completed.
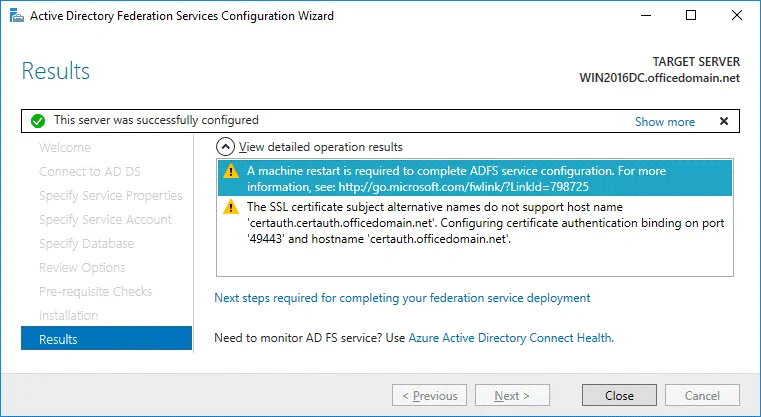
Results. In the case of successful installation, you will see the message: This server was successfully configured. You can close the wizard.
Run PowerShell as Administrator and execute the command:
Set-AdfsProperties -EnableIdpInitiatedSignonPage $true
It is possible to check the EnableIdpInitiatedSignonPage parameter with the Get-AdfsProperties command.
You can test the ADFS login page in your web browser by using one of the links:
https://win2016dc.officedomain.net/adfs/ls/IdpInitiatedSignon.aspx
https://win2016dc.officedomain.net/adfs/ls/idpinitiatedsignon.htm
Change the domain name (win2016dc.officedomain.net) in these links according to your configuration. Later you can customize that web page, for example, you can implement your company style.
Add your site (the links above) to the Trusted Sites in Group Policies so that domain users don’t have to enter passwords manually.
Using Azure AD Connect
Azure AD Connect is a Microsoft tool that allows you to connect your on-site Active Directory infrastructure to Azure Active Directory in the cloud. Authentication and authorization in mixed environments are also called hybrid identity. When installing Azure AD Connect, the components that enable connection with SSO and AD sync are installed.
Download Azure AD Connect by using the link below:
https://www.microsoft.com/en-us/download/details.aspx?id=47594
You can download tools that allow you to connect to Azure Active Tenant with PowerShell.
Microsoft Online Services Sign-In Assistant for IT Professionals RTW:
https://www.microsoft.com/en-us/download/details.aspx?id=41950
Windows Azure Active Directory Module for Windows PowerShell:
https://www.powershellgallery.com/packages/MSOnline/1.1.166.0
Install Azure AD Connect and run the Azure AD Connect wizard. Configure the following:
Connect to Azure AD. Enter your Azure AD credentials.
Connect to AD DS. Enter the Active Directory Domain Services enterprise administrator credentials. (for example, officedomain.net\administrator)
Configure. You can select the checkbox: Start the synchronization process when configuration completes.
Hit Install.
When you have completed configuration, hit Exit. Now you can check the details of the on-premises Active Directory users in Azure Portal > Azure Active Directory.
Then you can install Office 365 ProPlus on other machines in the domain. The installation process is covered in detail in How to Install Office 365 ProPlus on a Remote Desktop Service Server. In the XML configuration, use a shared folder that is accessible for domain users. Once Office 365 has been installed and Office 365 ADFS configuration is completed, you can sign into Office 365 accounts with the single sign-on password by using Windows domain credentials (via your ADFS server).
Conclusion
This blog post covers Microsoft Office 365 ADFS setup to allow users of your organization to use Single Sign-On (SSO) for authentication with Federated Identity Management. The idea is to create a user once in the Active Directory domain of your organization and synchronize Azure Cloud with on-premises Active Directory to provide SSO for Office 365 applications. One of the most important steps of configuration is generating a certificate for configuring Active Directory Federation Services. After configuring ADFS for Office 365, you have to install Azure AD Connect to synchronize on-premises and cloud environments and ensure hybrid identity.