How To Add a Calendar to SharePoint and Office 365: A Full Review
A calendar is a useful application for users in organizations for scheduling personal and group events. Using a calendar helps users avoid scheduling conflicts with other users. Office 365 (now renamed to Microsoft 365) users can use calendar applications in this software suite. There is a calendar in Outlook Online and a calendar in SharePoint Online. A group calendar in SharePoint Online can be especially useful in an organization for collaboration.
This blog post covers calendar options in Office 365, Outlook, and SharePoint calendar sharing options, and explains how to use Office 365 SharePoint calendar and Outlook calendar based on examples.

How to Add SharePoint Calendar to Outlook
A calendar in Outlook is the most familiar form of a calendar for most users. Let’s create a calendar for Microsoft Outlook in Office 365 and share this calendar with other Office 365 users in an organization.
- Open your web browser and go to https://outlook.office.com/calendar/, the address of Outlook Online in Office 365.
- Log in to Office 365 by using a Microsoft 365 account.
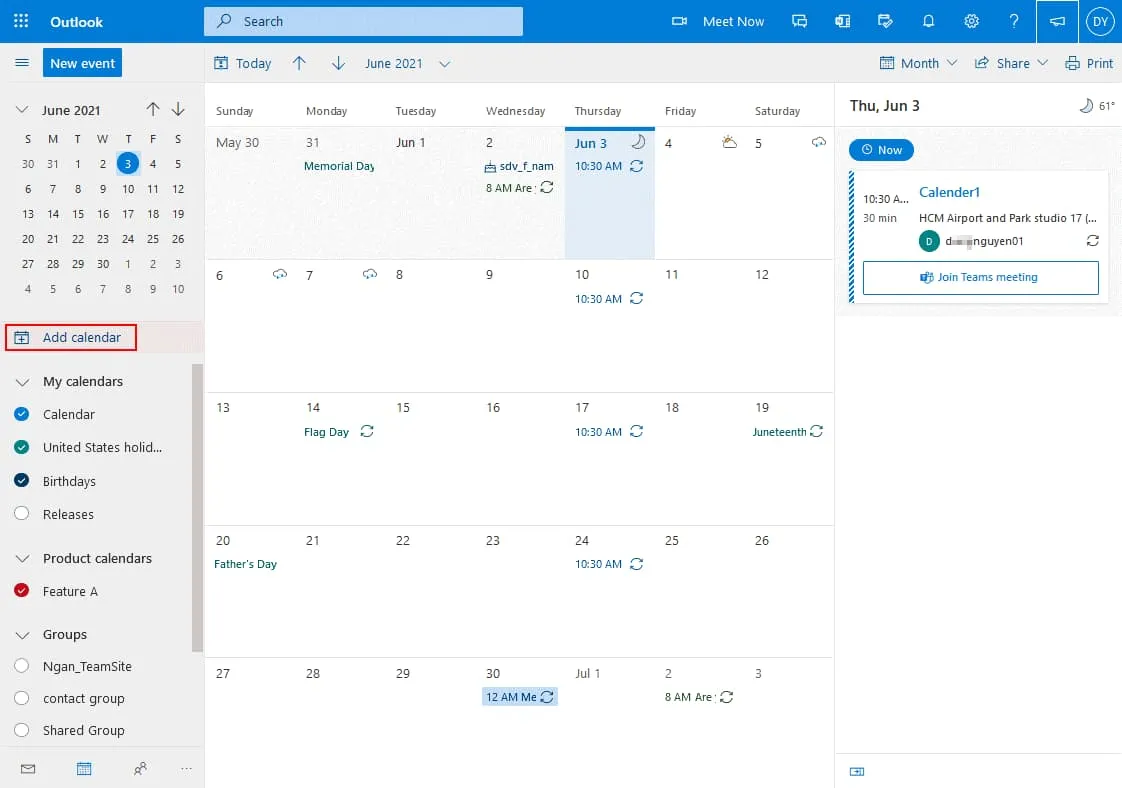
- Click Add Calendar in the left pane to add a new calendar.
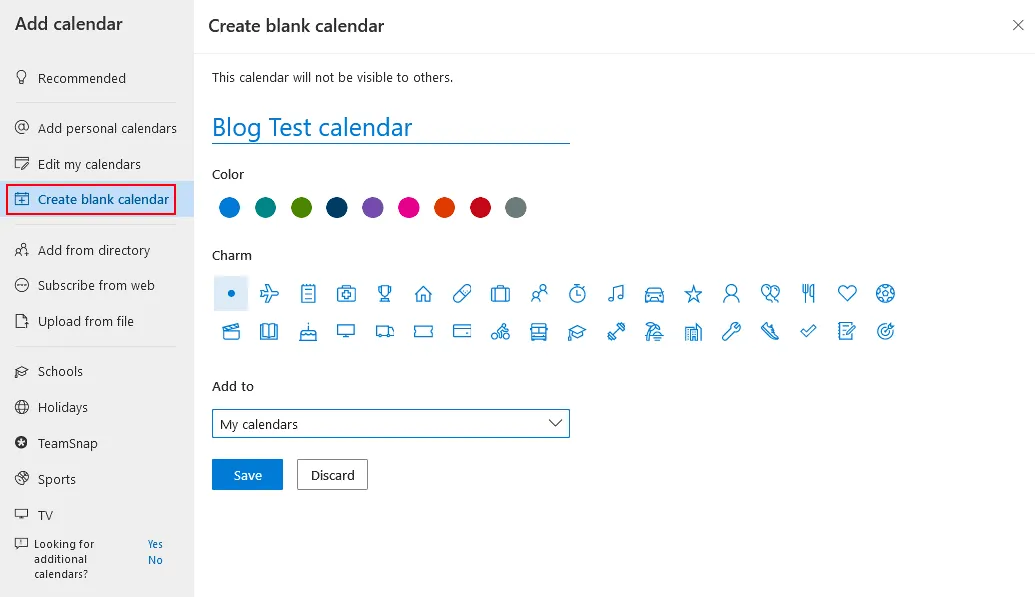
- Click Create a blank calendar on the Add calendar page. Enter a calendar name, for example, Blog Test calendar. Select color and charm if you want, then select location (a folder) to store the calendar in the drop-down menu (My calendars is selected in my case). Click Save to save settings and create a calendar.
Sharing the calendar
Now the new calendar is displayed in the navigation pane in the list of calendars, and I can share the calendar with other users.
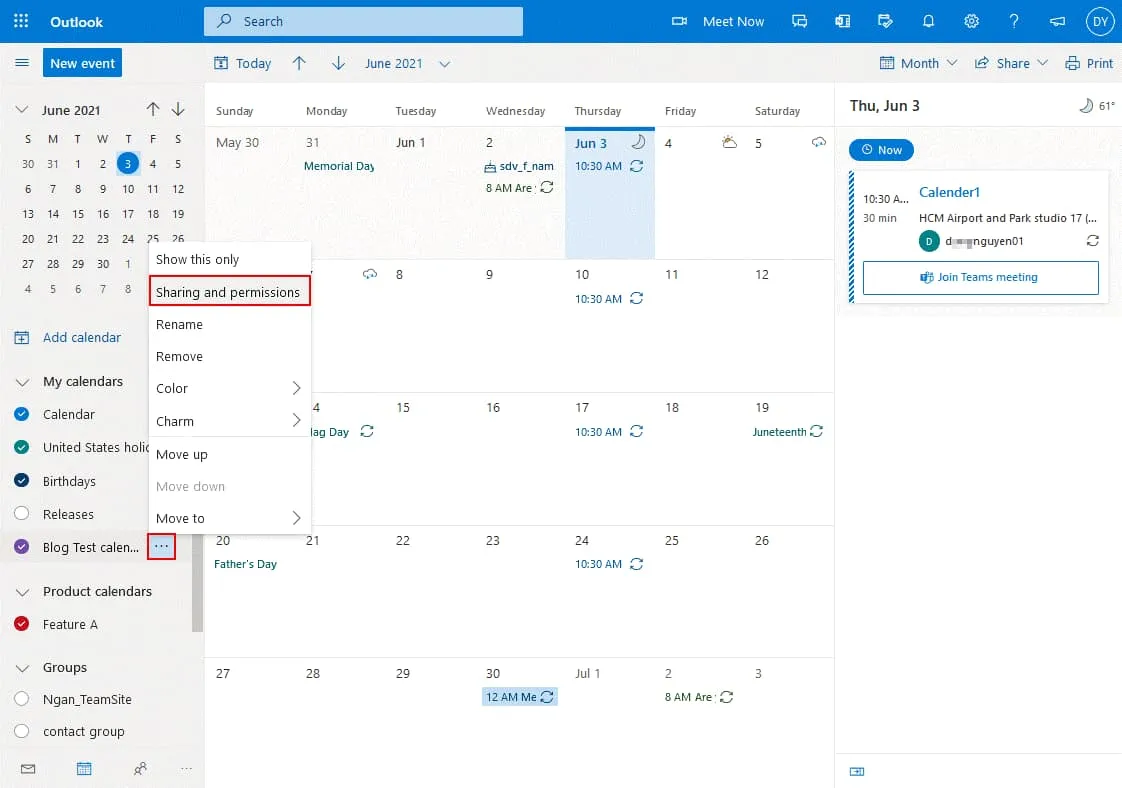
- Click the three dots near next to the new calendar you have created and in the menu that opens, click Sharing and permissions.
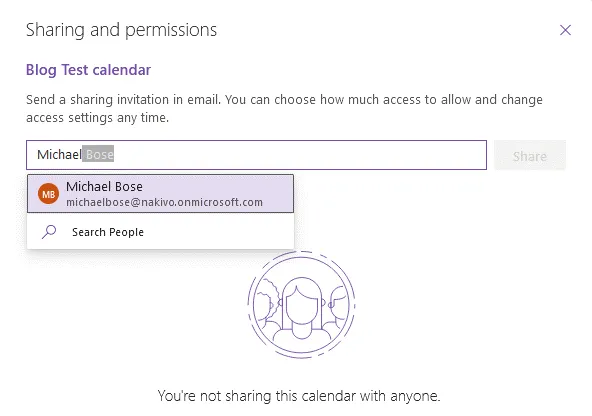
- The Sharing and permissions window opens in the Office 365 web interface. Click the field and enter the names of the Office 365 users and groups in your organization with whom you want to share this calendar.
- Once you begin to enter names, auto-filling suggests available users, displayed below in a list. In my example, I’m sharing the calendar with Michael Bose. You can select multiple users and groups.
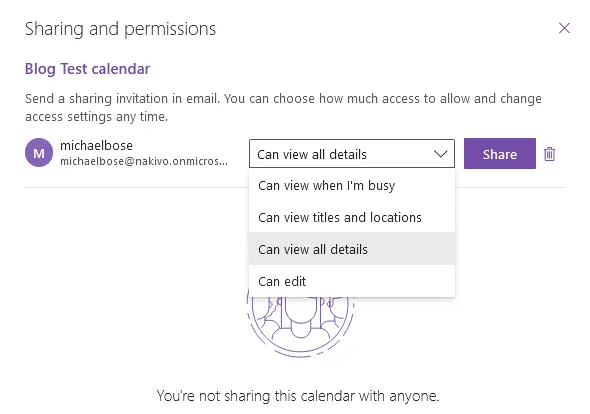
- After selecting users and mailbox accounts, you should set permissions for the selected users.
- You can select the Can view all details option if you want users to view all details without being able to edit the calendar.
- If you select the Can edit option, the selected users have permission to edit the calendar, including adding events, deleting events, editing events, inviting other users, and sharing the calendar with others.
Once you have selected users and permissions, click Share.
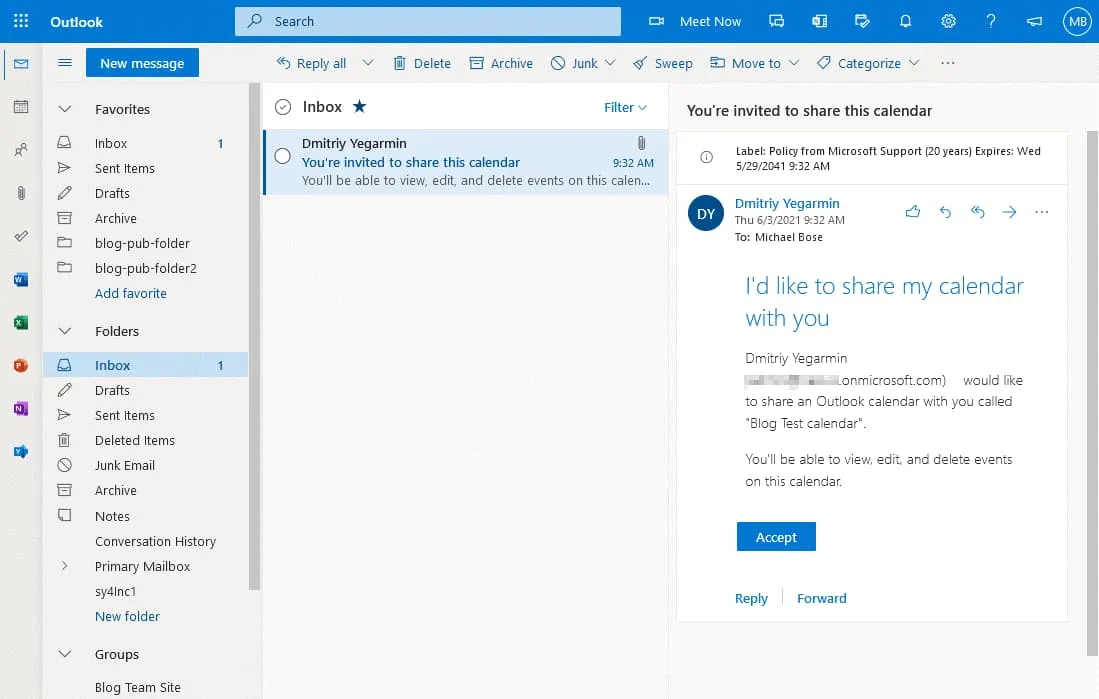
- A calendar is now shared with the selected users (Michael Bose in my case). Log in to Office 365 as a user with whom you shared a calendar. I’m logging in to Office 365 as Michael Bose now. After opening Outlook Online, I see the invitation message to open a shared calendar. Click Accept to add a shared calendar to your calendars in Office 365.
Creating an event
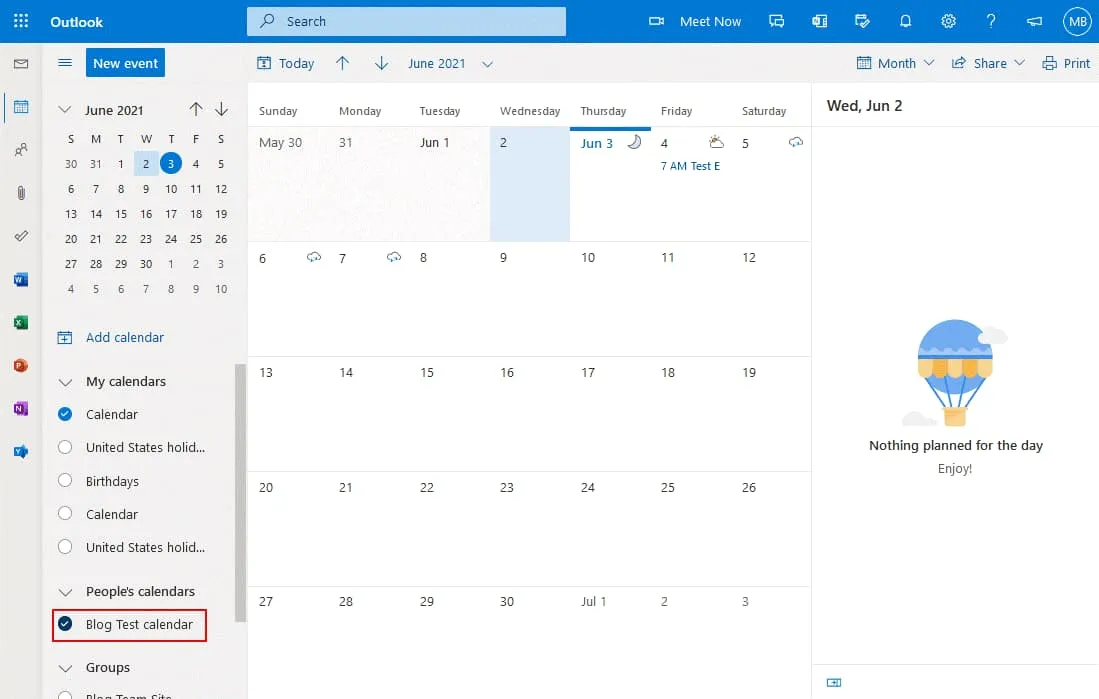
The Blog Test calendar is now added to Michael Bose’s account and is displayed in the left pane of the Outlook Calendar page (https://outlook.office.com/calendar/view/month).
- Click this calendar and then double-click the date to add or edit an event.
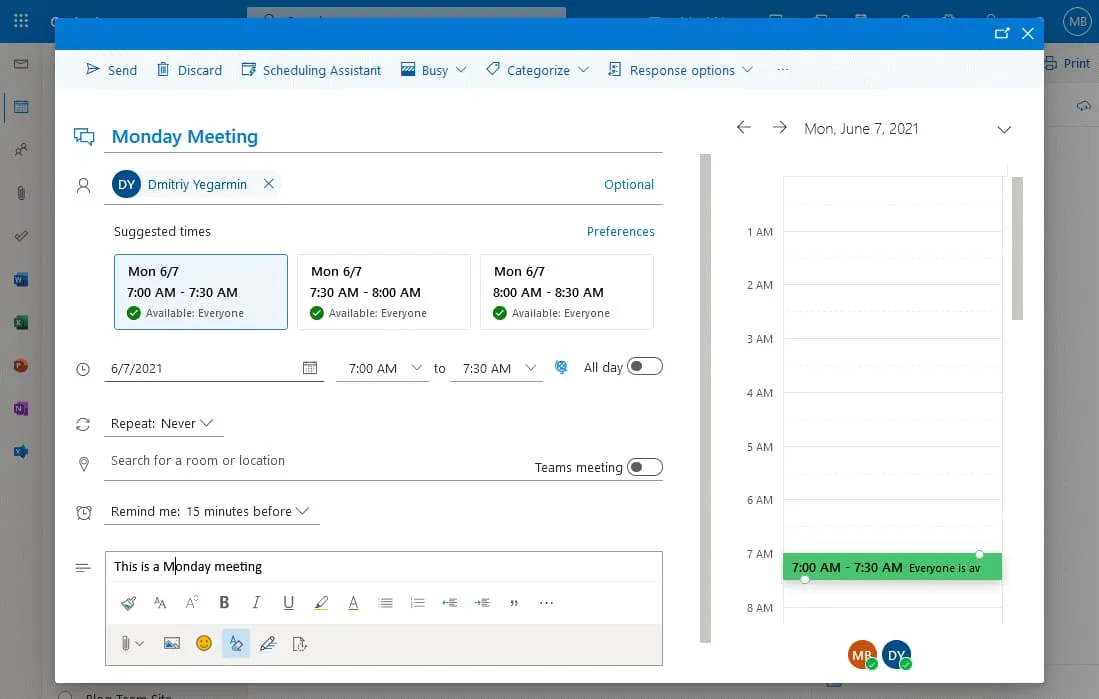
- A new window that contains options for an event is displayed in the web interface. Enter the name for the event, for example, Monday Meeting.
- Select the users you want to invite to attend this event.
- Select the start and end time, check the date, repeating options, location, and reminder settings, and write a comment or description for this event.
- Click Send in the top left corner of the window to save settings to the calendar.
The event is now added and defined users can see this event in their calendar.
How to add a Calendar to SharePoint
SharePoint is well-known due to the high number of collaboration features. And the calendar is no exception. A calendar in SharePoint can be also created and edited in a web browser by Office 365 users. Configuring a calendar in SharePoint differs from calendar configuration in Outlook Online. Let’s look at how to create and use a calendar in SharePoint.
- Log in to Office 365 and open your SharePoint site in a web browser. Your Office 365 subscription plan must include SharePoint Online. In my example, I use a Blog Team Site that was previously created in SharePoint Online. You (and users who will edit the SharePoint calendar) must have the required permissions to open and edit a SharePoint site.
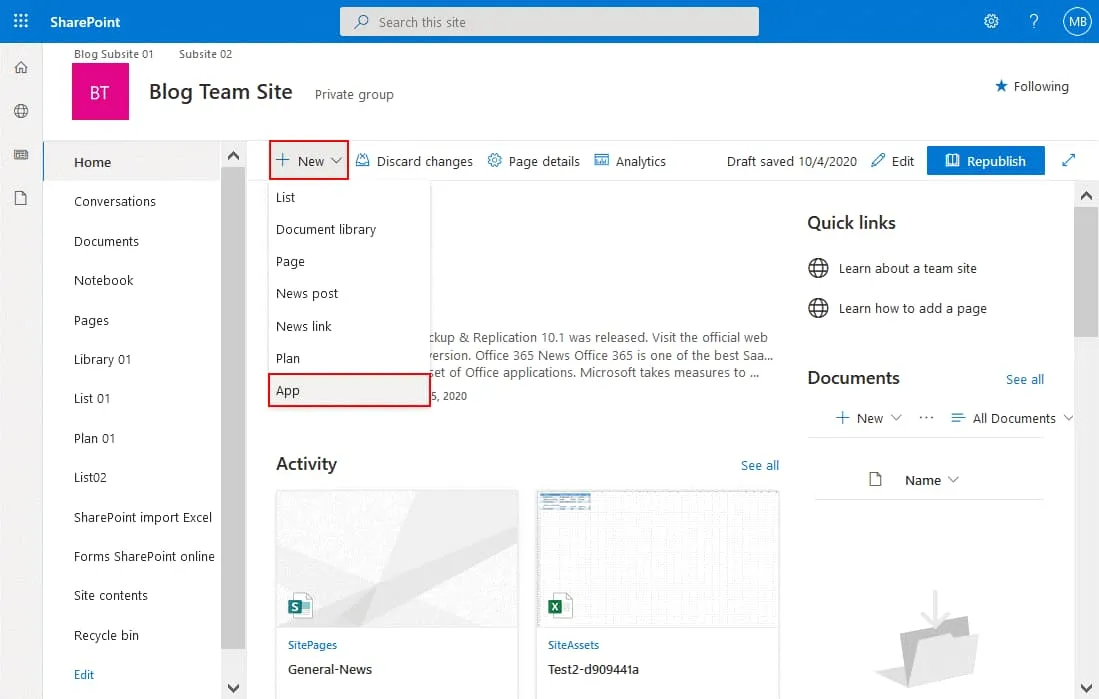
Pro Tip: Read blog posts about SharePoint overview and how to use SharePoint to learn more about SharePoint Online and about creating sites, lists, and other content. - You have to add a calendar app on your SharePoint site. Click New > App to add a new app.
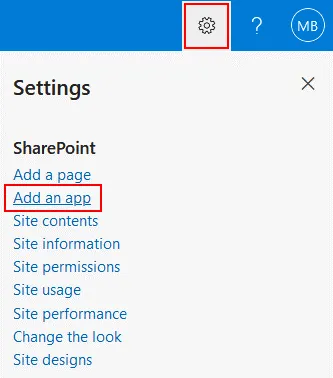
- Another way to add an app is to click the Settings icon in the top right corner of the web interface and in the menu that opens, click Add an app.
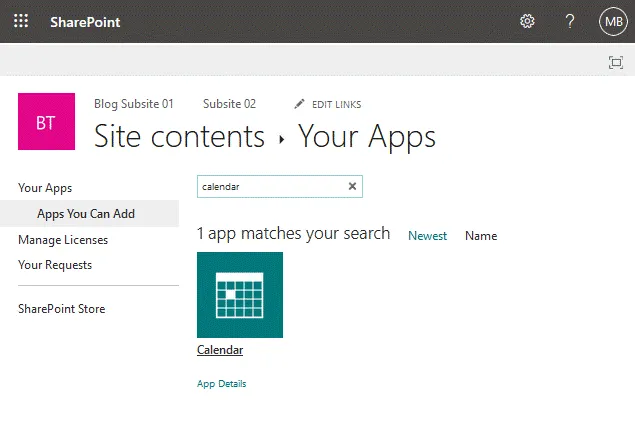
- A list of apps is displayed. Find and select the Calendar app in the list of available SharePoint apps. You can type calendar in the search field to display the Calendar app.
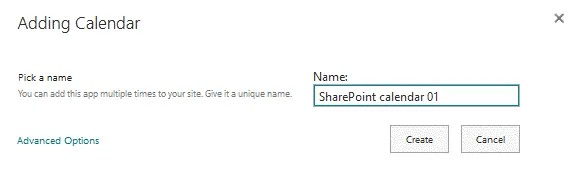
- After you click the Calendar app, the Adding Calendar window is displayed in the web interface. Enter a name for your calendar, for example, “SharePoint calendar 01” and click Advanced options to edit more options.
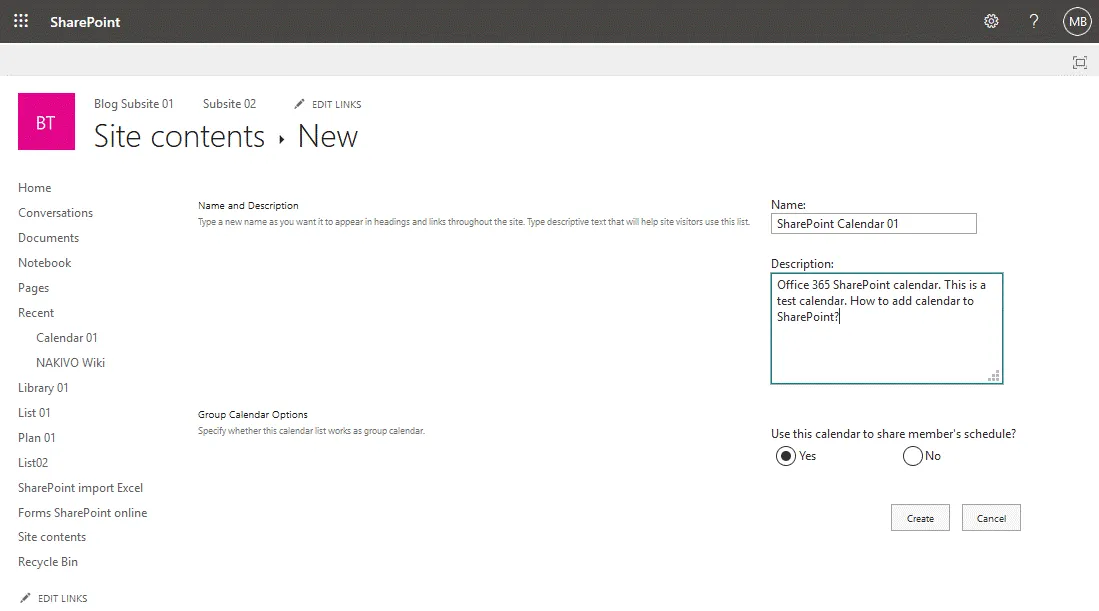
- The extended New Calendar window is now open. We can enter the description and select group calendar options.
Description: Office 365 SharePoint calendar. This is a test calendar. How to add a calendar in SharePoint? - Use this calendar to share member’s schedule? Select Yes. This option allows a group of users to use the calendar.
- Click Create to finish creating a new SharePoint Calendar.
- Now I am redirected to my SharePoint calendar page. The calendar is empty but you can create new events. I’m going to create events later, and now I should configure additional settings to make working with the calendar easier. On the screenshot below, you see a calendar without enabled group options.
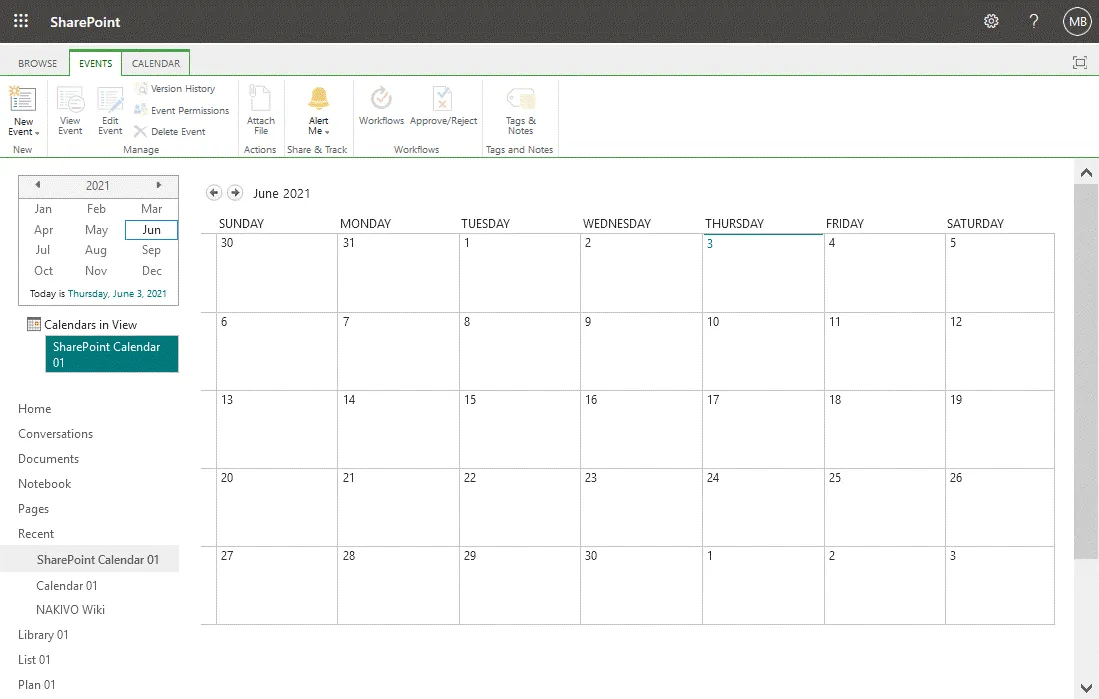
A group calendar allows you to see which users are busy and when meeting rooms are busy in a single SharePoint calendar view.
Making a SharePoint calendar findable
You should edit some settings to make it easier to find the calendar in SharePoint. By default, it can be difficult for users to locate a calendar on your SharePoint site because the calendar is not displayed on the main page.
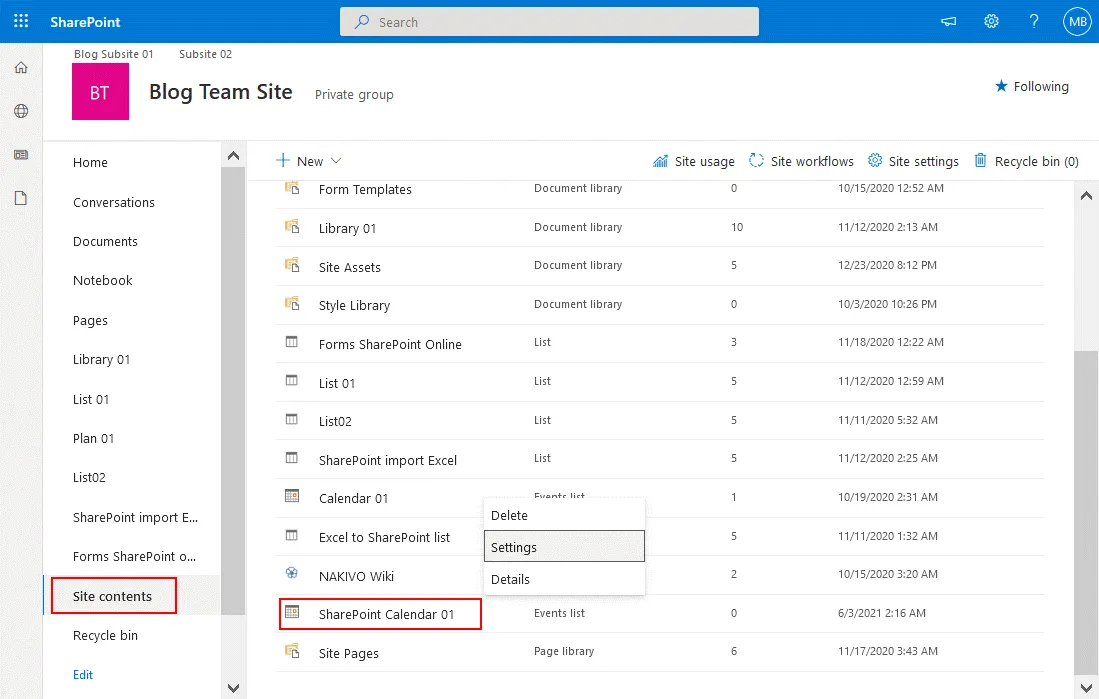
- Go to the Site Contents page (open your SharePoint site and click Site contents in the navigation pane), select your calendar (SharePoint Calendar 01 in our case), right-click the calendar name, and in the context menu click Settings.
- Click List name, description, and navigation on the calendar settings page. A SharePoint calendar is based on a SharePoint list, that’s why this settings page has this name. Rows are used for events and columns are used for metadata such as location, event title, start date, end date, etc.
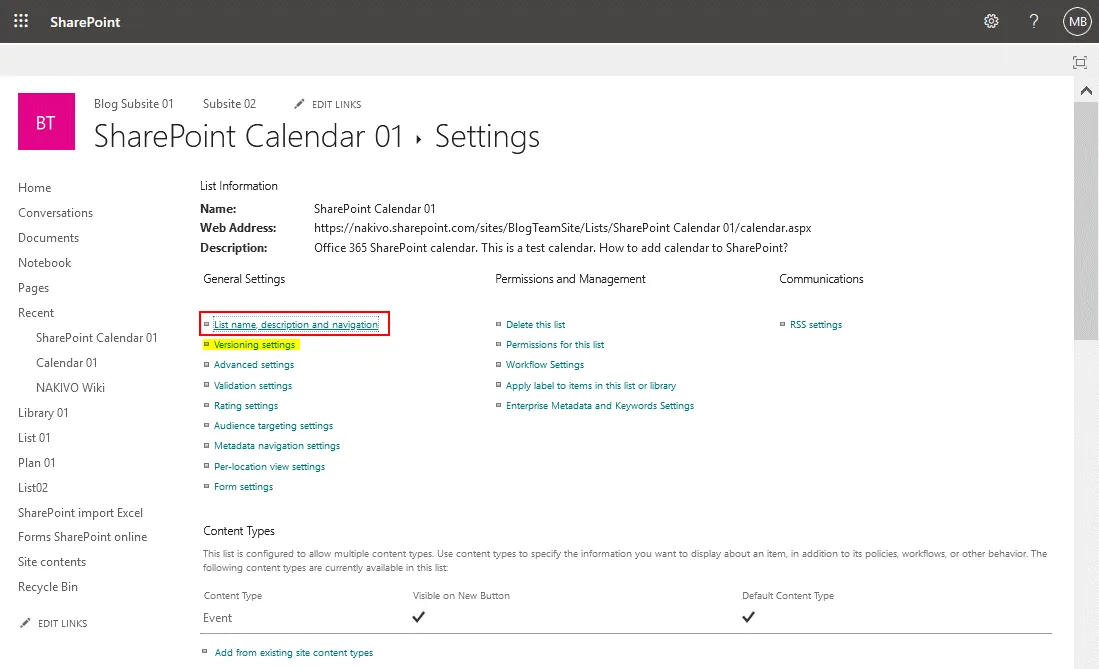
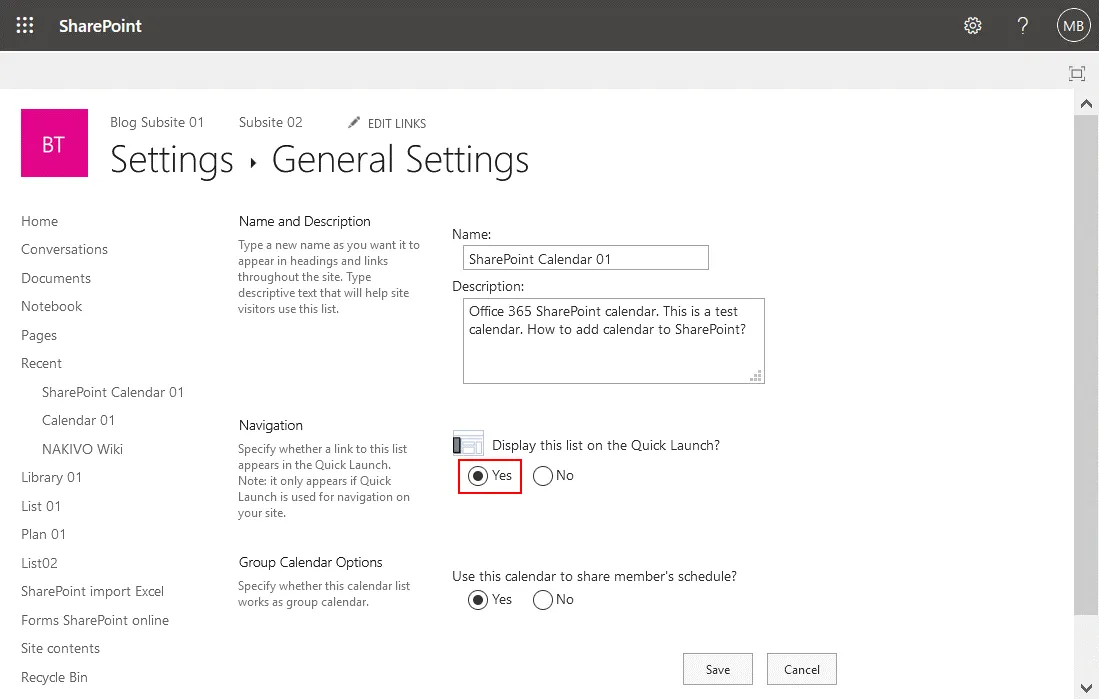
- On the General Settings page of a SharePoint list, you can edit the name and description of a SharePoint calendar and set navigation options and group calendar options. Go to the navigation settings because the other settings are correct in my case.
Display this list on the Quick Launch? Select Yes. - Click Save to save settings for this SharePoint calendar.
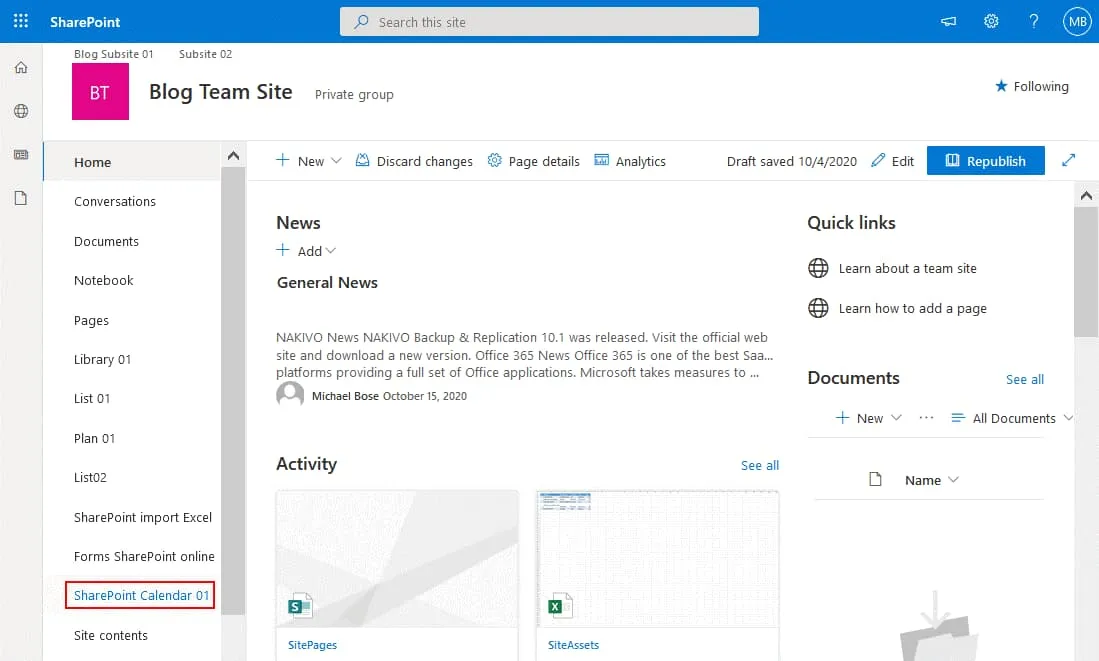
- Go to the main page of your SharePoint site (Blog Team Site in my case). Now the SharePoint calendar should be displayed on the main site page in the navigation menu (it is also called a quick launch menu).
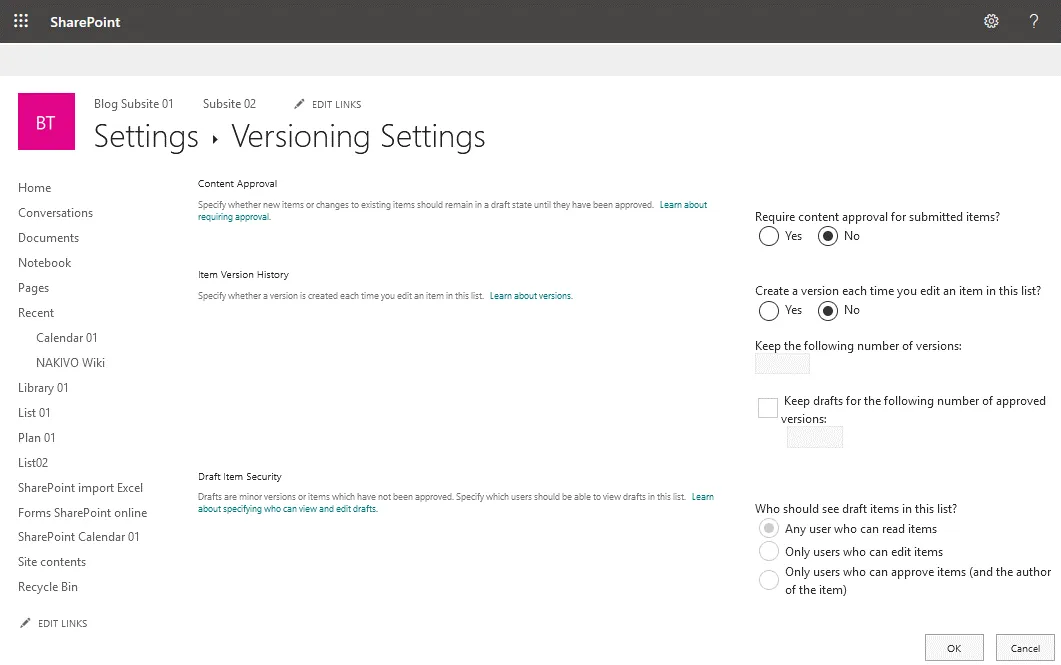
Versioning settings
You can open versioning settings from the calendar (list) settings page and enable versioning. Versioning allows you to restore a previous version of a SharePoint calendar if unwanted changes have been made to the calendar. By default, versioning is disabled.
Creating a new event and sharing options
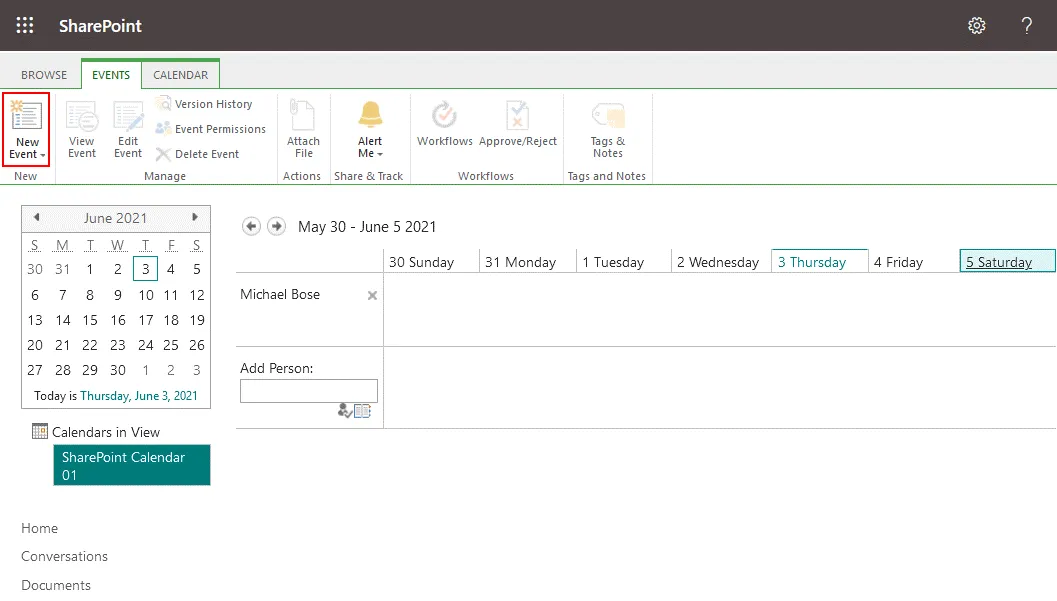
Let’s go back and open our calendar in SharePoint. On the screenshot below you can see the SharePoint calendar view when the group mode is enabled.
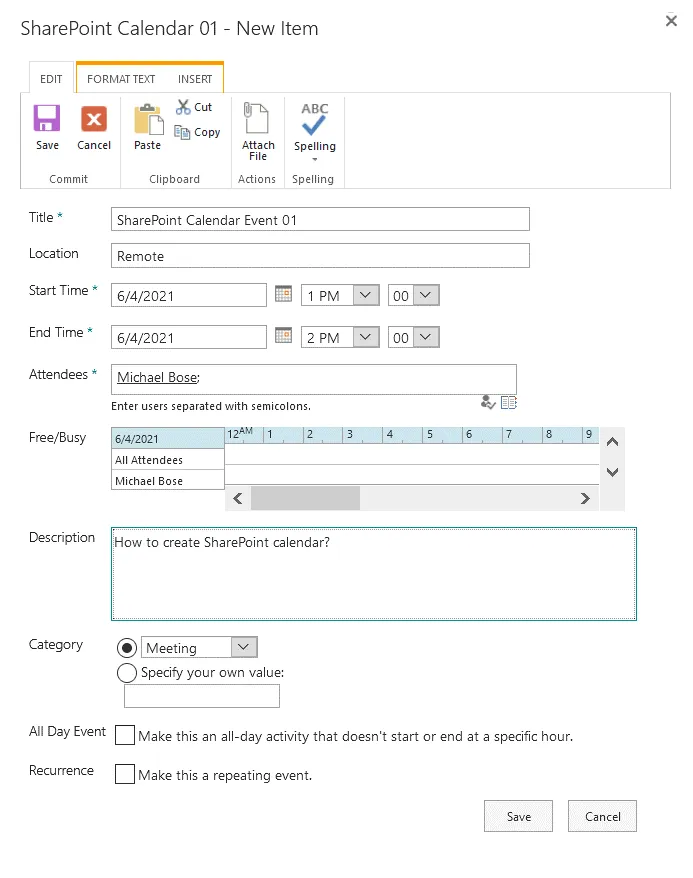
- Click the Events tab to display a ribbon with options, click New Event to create a new event in the calendar.
- The New Item window opens. Define the required parameters for the new event you are adding to the SharePoint calendar, including the event title, location, start time, end time, attendees, and category. Free and busy hours of each attendee are displayed in the diagram to avoid overlaps when creating events. You can select checkboxes to make the event an all-day event and make this event a repeating event. Click Save to save event settings and close this window.
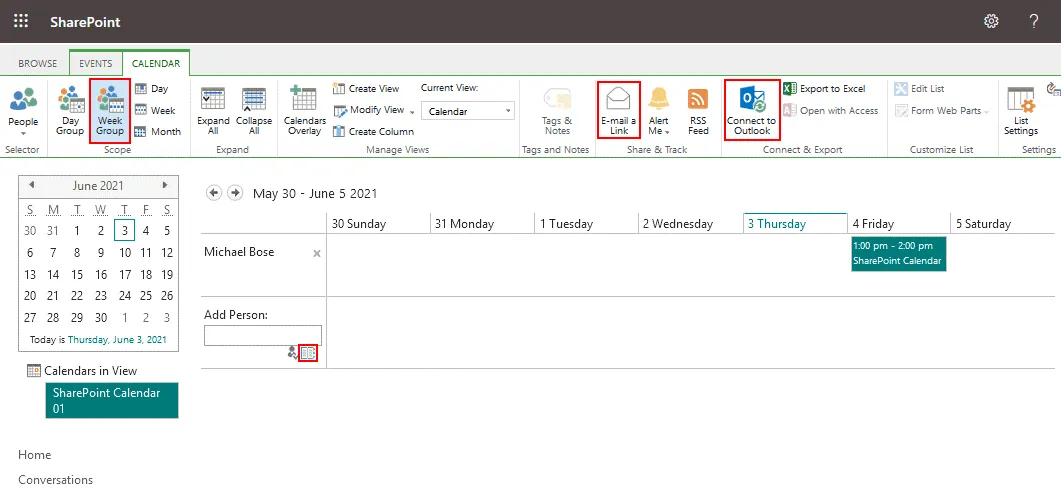
- On the screenshot below you see a calendar that is available for a group of users. Users can edit this calendar and add, edit, and delete events. Let’s select the Week Group for the SharePoint calendar view, send an email notification for other users who are added to this SharePoint calendar, and connect the calendar to Outlook. Click the Calendar tab to display a ribbon with options. In order to add users or groups to this calendar, click the notepad icon near the Add Person field.
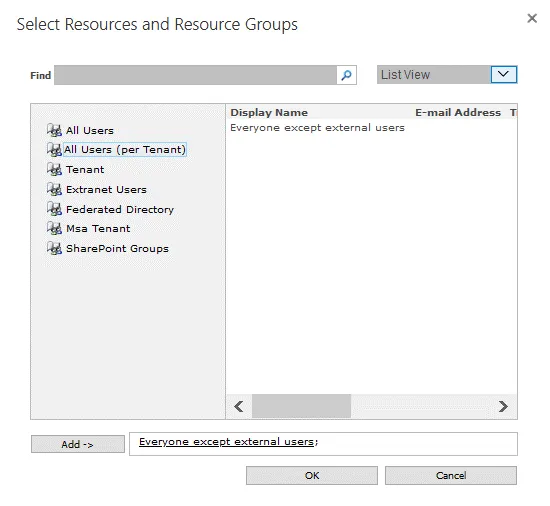
- Select the needed Office 365 users. We select All Users (per Tenant) to add everyone except external users. You cannot add the external email addresses of users. Then click Add and OK.
- Click Email a link to send email invitations to other users to use this calendar. This option helps you share this SharePoint calendar with others. The default email client opens in your operating system after clicking this button. Note that sending an email to share a calendar doesn’t grant additional permissions. Permissions to the calendar are set in SharePoint settings. By default, SharePoint site permissions are inherited to a SharePoint calendar created on this site.
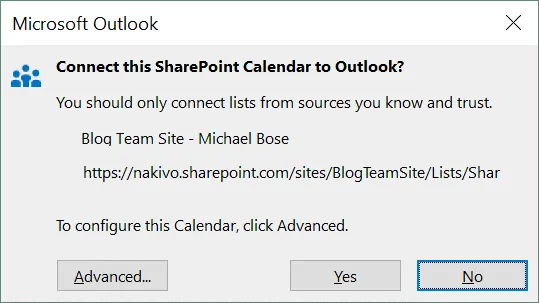
- If you want to add this SharePoint calendar to Microsoft Outlook that is installed as a standalone email client in your Windows operating system, click Connect to Outlook in the SharePoint calendar view in a web browser. A confirmation message is displayed in your web browser, and you have to select the email application to which you want to add this calendar, for example, Microsoft Outlook.
- You can click Calendars Overlay in the ribbon to overlay multiple calendars in one SharePoint calendar. After that, you can view multiple calendars in a single SharePoint calendar view. For example, you can configure the calendar overlay to view group events, events of other users, and your own scheduled events on a single page.
Advantages and Disadvantages of a Calendar in SharePoint and Outlook Online
I have covered the two most popular calendars for business – the Outlook calendar and SharePoint calendar. Each of them has advantages and disadvantages. Let’s summarize them.
Advantages of the Outlook calendar
- Easy to use
- Integration with Outlook
Disadvantages of the Outlook calendar
- Group calendar options are not as powerful as for a SharePoint calendar
- Cannot be embedded into a SharePoint site
- No versioning support
Advantages of the SharePoint calendar
- You can customize metadata
- Versioning, approvals, and workflows are supported
- Multiple calendars can be displayed in a single SharePoint calendar view
- Can be exported/synchronized with the calendar in Outlook
Disadvantages of the SharePoint calendar
- Integration with Outlook is not full. The existing Outlook calendar cannot be imported to a SharePoint calendar and displayed in the overlay SharePoint calendar view. If you schedule an event in the SharePoint Calendar, the event is not automatically added to the Outlook calendar.
- The interface and configuration is less user friendly than for the Outlook Calendar
- You can roll up to a maximum of 10 SharePoint calendars in the same site collection
Which Calendar to Choose in Office 365?
SharePoint is designed for collaboration and the calendar in SharePoint is powerful and well-integrated with other SharePoint Online components in Office 365. If you use a calendar to schedule events for you and other users, using the Outlook calendar may be enough for you. The Outlook calendar is included in Office 365 subscription plans with Outlook. If you need more capabilities for collaboration with a large team and scheduling events for a high number of users, the Office 365 SharePoint calendar is a better choice.
SharePoint calendars are based on SharePoint lists and operate separately from Exchange and Outlook. Calendar integration between SharePoint Online and Outlook is available, but sharing and overlaying features are excellent in Office 365 SharePoint calendar. SharePoint Online provides more capabilities to configure permissions for users when sharing a calendar in SharePoint.
Conclusion
Using a calendar is convenient for collaborative workflows. This blog post has covered calendars in Office 365, including the Outlook calendar and SharePoint calendar. Now you know the difference between these two calendars, and you can choose which one is better for your needs.
If you use Office 365, it is recommended that you back up your data regularly. Use NAKIVO Backup & Replication for protecting your SaaS data. The Solution supports Office 365 backup for Exchange Online, SharePoint Online, and OneDrive for Business.