Hyper-V Export and Import: What, Why, and How
One of the many benefits of virtualization is portability, meaning that you can easily move selected virtual machines (VMs) from one location to another without experiencing downtime or service disruption. Portability within a Hyper-V environment is ensured through the Hyper-V Export and Import functionality, which allows you to easily copy and move a Hyper-V VM to a target location and then restore the VM to how it was at the time of export.
So, how does the Hyper-V Export and Import functionality work? When you export a Hyper-V VM, a copy of VM configuration files, VHD files, and VM snapshots can be created. After that, you should specify whether you want the VM copy to be located within a Hyper-V Host or to move an exported VM across Hyper-V hosts. Finally, the archived VM can later be used in case of hardware failure or data loss in order to restore the VM data.
Today’s blog post attempts to discover whether the Hyper-V Export and Import functionality can be considered an effective VM backup alternative and how it compares to a comprehensive data protection solutions.

What Is Hyper-V Export?
Hyper-V Export is the process of exporting a selected VM, including its virtual hard disk files, VM configuration files, and Hyper-V snapshots, to a single unit. This operation can be performed when the VM is either online or offline. In earlier Windows versions (prior to Windows Server 2012), you could export Hyper-V VMs only when they were turned off. Hyper-V Export can be performed only on an on-demand basis.
Also, you couldn’t previously export a VM directly to a network share. In earlier Windows versions, the VM had to first be exported to a local storage space and copied across the network to a target location where archive files were stored. With the release of Windows Server 2012, this issue was eliminated.
Hyper-V Export can be used for archiving a VM which you no longer need, or as an ad-hoc backup which allows you to capture VM data at a specific point in time. Moreover, Hyper-V Export can be used for testing purposes. For example, you can create a copy of the production VM and export it to a non-production environment for testing and troubleshooting.
The process of exporting Hyper-V VMs is often compared to taking Hyper-V snapshots as well as creating backups. Exporting VMs is not as fast as taking snapshots but, unlike Hyper-V snapshots, it allows you to create a full copy of the existing VM and send it for storage to another location. At the same time, Hyper-V Export cannot be considered a full VM backup. It doesn’t apply compression, deduplication, and encryption techniques, which are widely used by data-protection solutions and allow you to reduce storage space needs and use available disk space more effectively.
What Is Hyper-V Import?
Hyper-V Import allows you to recover selected VMs which you previously exported from a set of configuration files. Hyper-V VMs can be imported to a source Hyper-V host or a new one. Previously, Hyper-V Import had to be preceded by Hyper-V Export. However, starting from Windows Server 2012 R2, you can now import Hyper-V VMs without having previously exported them. When performing Hyper-V Import, the VM gets registered with the Hyper-V host.
Hyper-V Import can be one of the following types:
- Register in-place. In this case, source files are not changed or moved in any way. Moreover, the VM’s unique ID remains the same, meaning that the VM is already registered with the Hyper-V host. If you attempt to import the VM without first deleting the source VM with the ID, the operation will fail.
This import type can be used if you are looking to run the VM from the source location, or if the VM has failed and you need to register it with the Hyper-V host once again. When the import operation is complete, the export files become the running state files and can’t be removed.
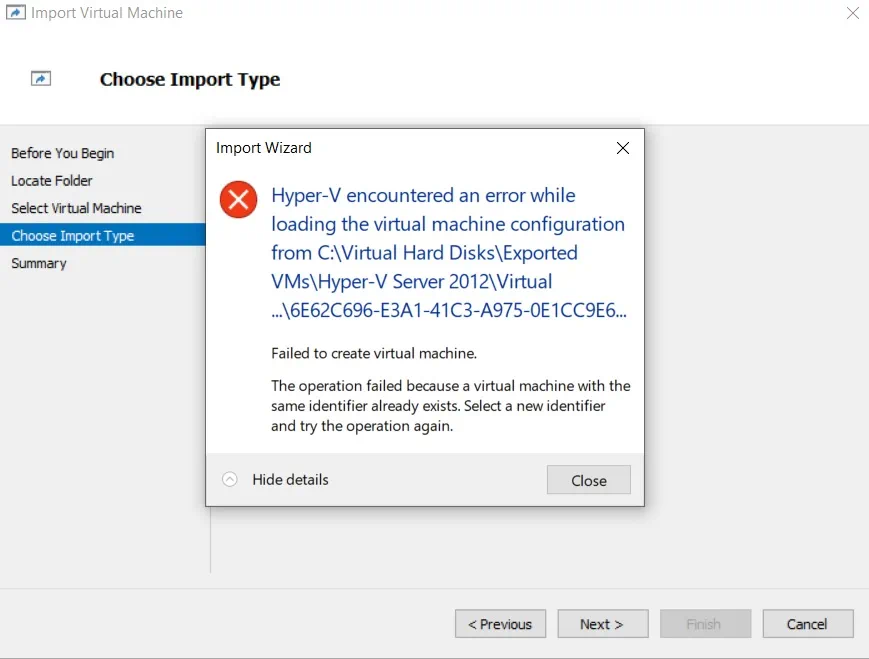
- In this case, exported files are copied to a target location and the VM’s unique ID remains the same as at the time of Hyper-V Export. Thus, it is better to delete the original VM before the import operation begins so that their IDs will not clash. If not, you will encounter the same error mentioned above.
When the Hyper-V Import operation is complete, the exported files will remain intact and can be removed or imported again.
- When recovering an archived VM, you should choose the Copy import type. In this case, VM files are copied to the target location and a new unique ID is assigned to the VM, meaning that you can import the pre-configured VM to the same Hyper-V host multiple times.
How to Export Hyper-V VMs
You can export Hyper-V VMs using Hyper-V Manager and running PowerShell cmdlets. I will describe these approaches in detail and walk you through each step of exporting Hyper-V VMs.
Using Hyper-V Manager
In order to export Hyper-V VMs, you need to launch the Export Virtual Machine wizard:
1. Open Hyper-V Manager.
2. Right-click the VM from the list. As you can see, I have chosen the running VM.
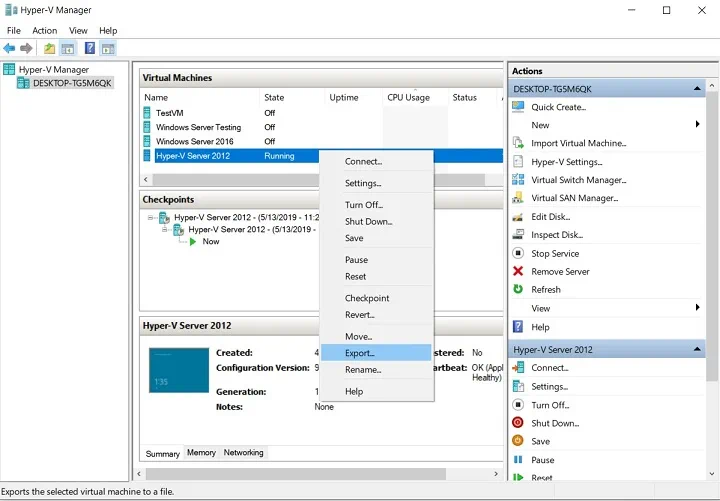
3. Select Export to open the Export Virtual Machine wizard.
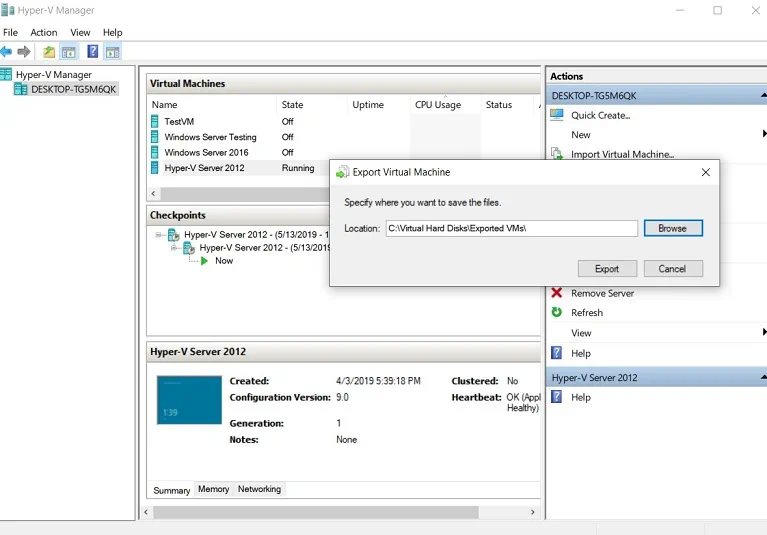
4. Click Browse to specify the location to which the VM should be exported.
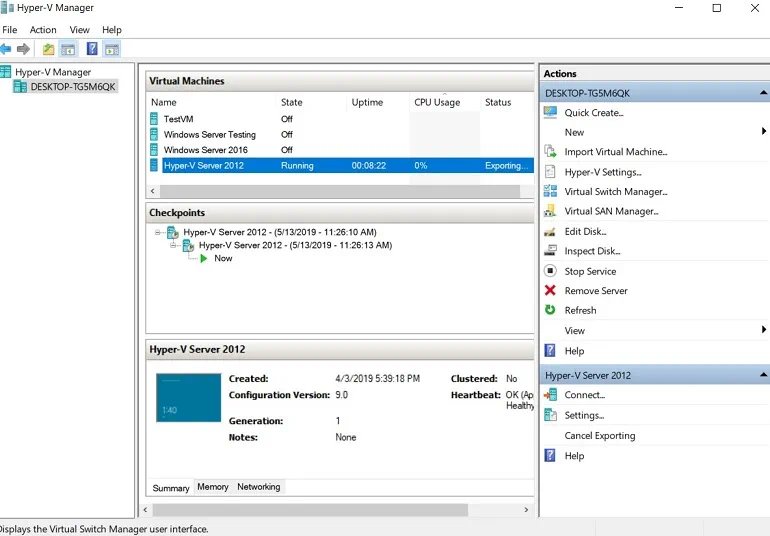
5. Monitor the progress of the Hyper-V Export operation in the Status column.
6. After the operation is complete, open the folder to verify that everything has been successfully exported.
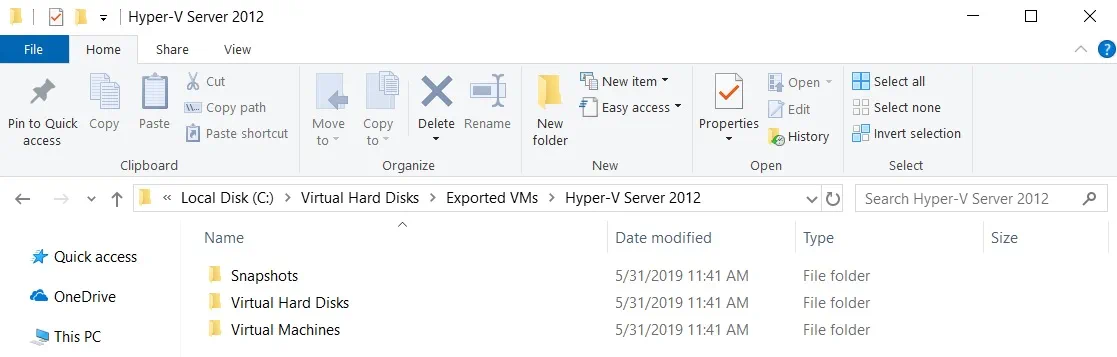
As you can see from the screenshot above, the selected VM, including its virtual hard disks, VM configuration files, and VM snapshots, has been successfully exported to a new location.
Using PowerShell
The next method is to run PowerShell cmdlets, which can help you automate the process of exporting Hyper-V VMs. After creating a functional PowerShell script, you can schedule the script to run automatically using Task Scheduler. This way, you can back up your running VMs on a regular basis, without experiencing system downtime or service disruption.
To export Hyper-V VMs with PowerShell, you should run the following cmdlet:
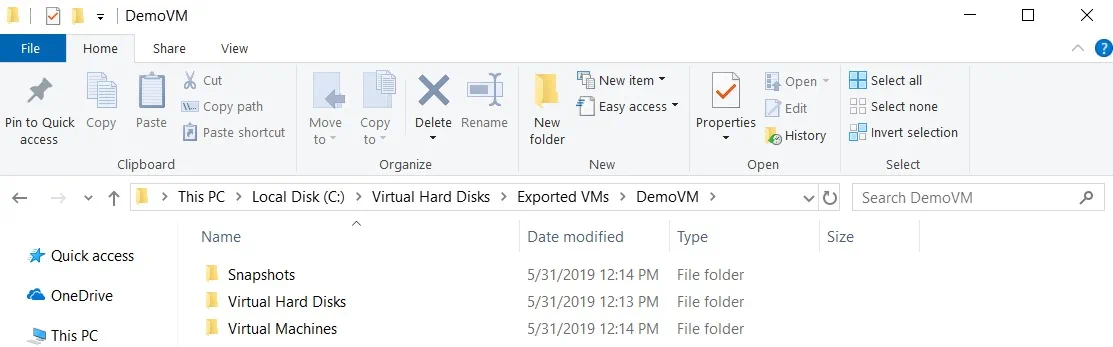
Export-VM -Name DemoVM -Path 'C:\Virtual Hard Disks\Exported VMs'
Remember to run PowerShell as Administrator for the cmdlets to work as required.

After checking the target folder, you can see that the VM and corresponding files have been successfully exported.
The following cmdlet can be used to export all available VMs to the root of the C drive (C:).
Get-VM | Export-VM -Path C:\
How to Import Hyper-V VMs
As mentioned above, you can even import Hyper-V VMs which have not previously been exported. For this purpose, you can also use Hyper-V Manager or PowerShell commands.
Using Hyper-V Manager
To import a Hyper-V VM, you should take the following steps:
1. Open Hyper-V Manager.
2. In the Actions section, select Import Virtual Machine to open the Import Virtual Machine wizard.

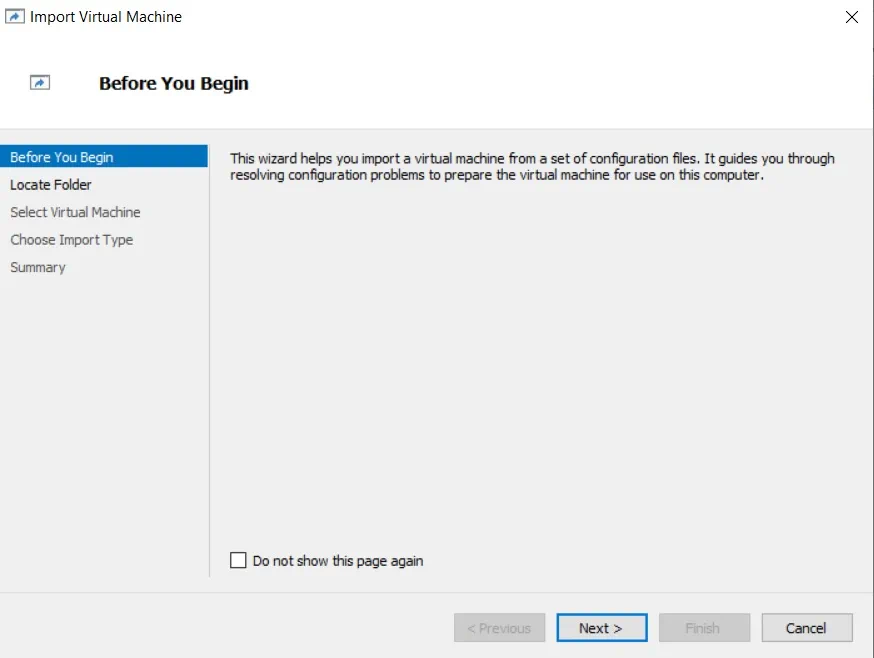
3. In the Before You Begin section, read what this wizard can do and click Next.
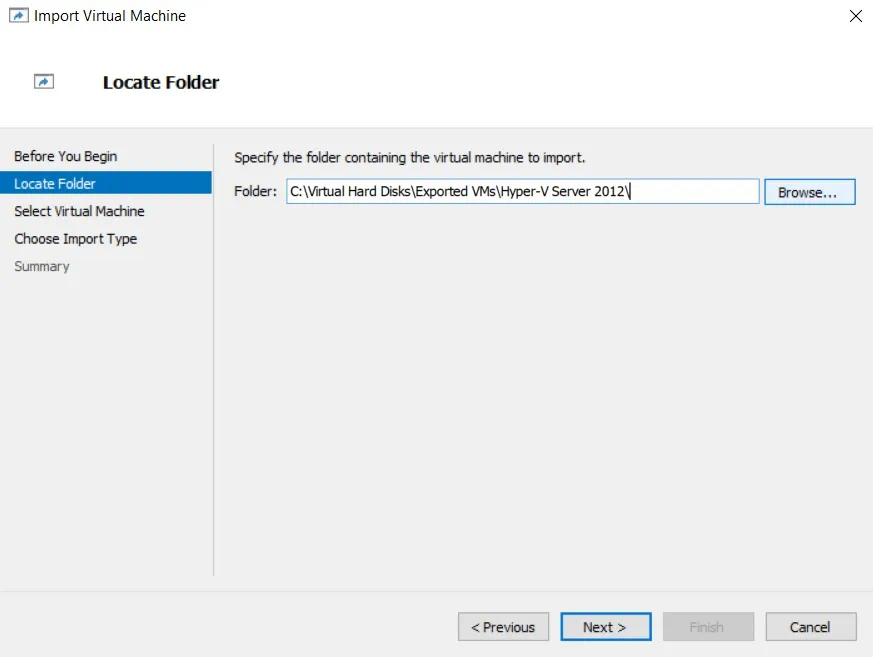
4. In the Locate Folder section, you should select the folder which contains the VM you would like to import.
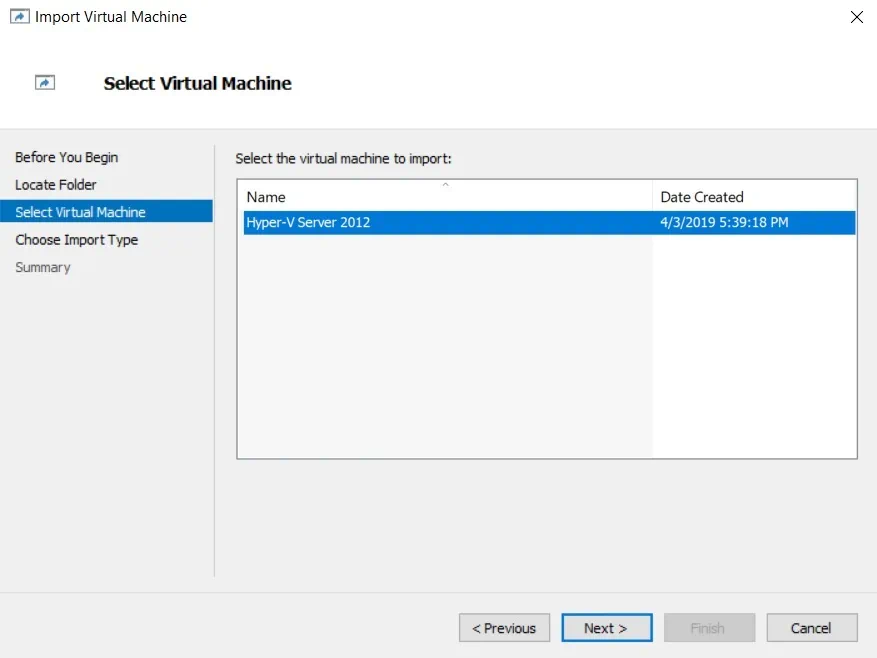
5. In the Select Virtual Machine section, choose the VM to import.
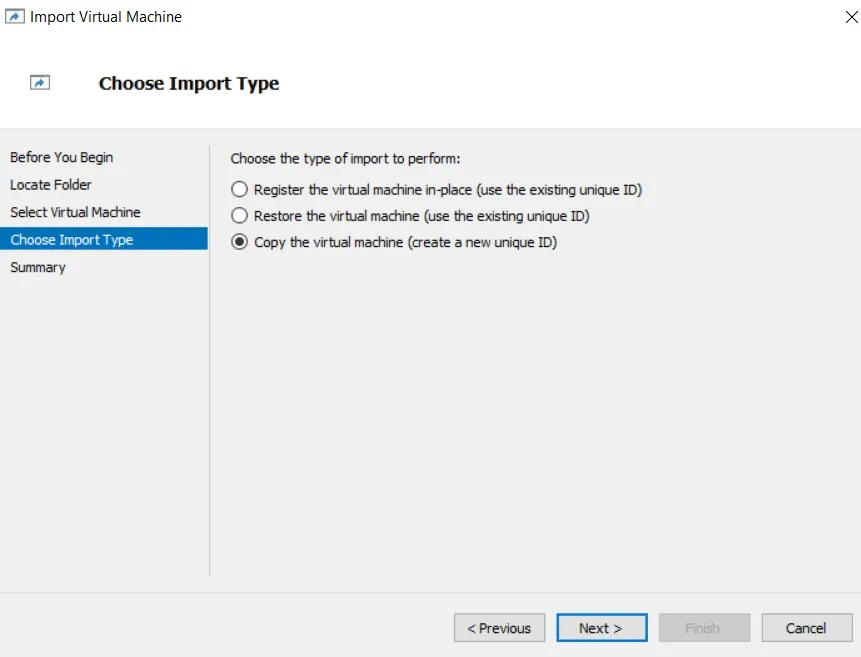
6. In the Choose Import Type section, based on your particular needs, you must make the choice between the three import types: Register the virtual machine in-place, Restore the virtual machine, and Copy the virtual machine. In this case, I am going to demonstrate how you can copy the VM and assign a new unique ID to it.
7. In the Choose Destination section, you can specify folders in which the VM files should be stored. You have two options: to import the VM files to default Hyper-V folders or to store the VM in a different location by selecting folders manually.
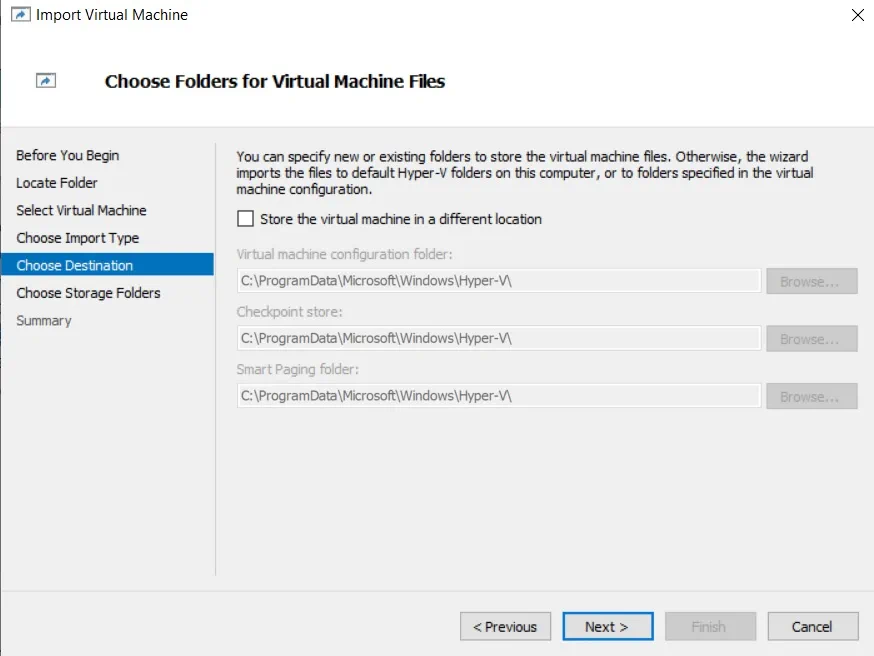
8. In the Choose Storage Folders section, click Browse to select the folder where the virtual hard disks for this VM will be stored.

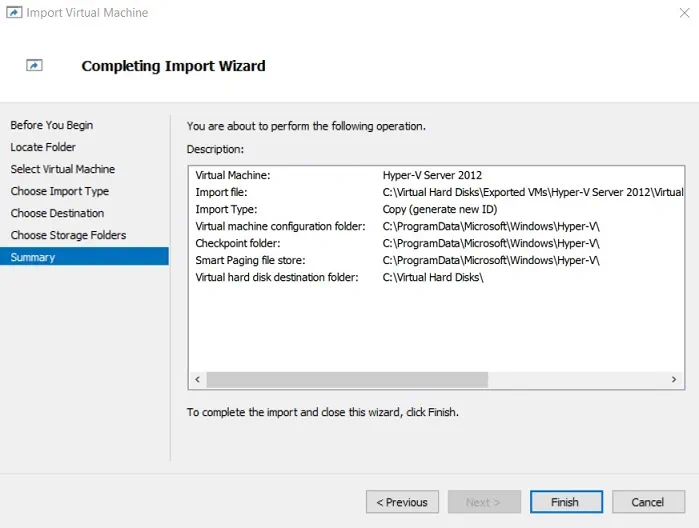
9. In the Summary section, you can look through the selections you’ve made in this wizard. Click Finish if you would like to close the wizard and import a Hyper-V VM.
10. Files are being copied to the target location.
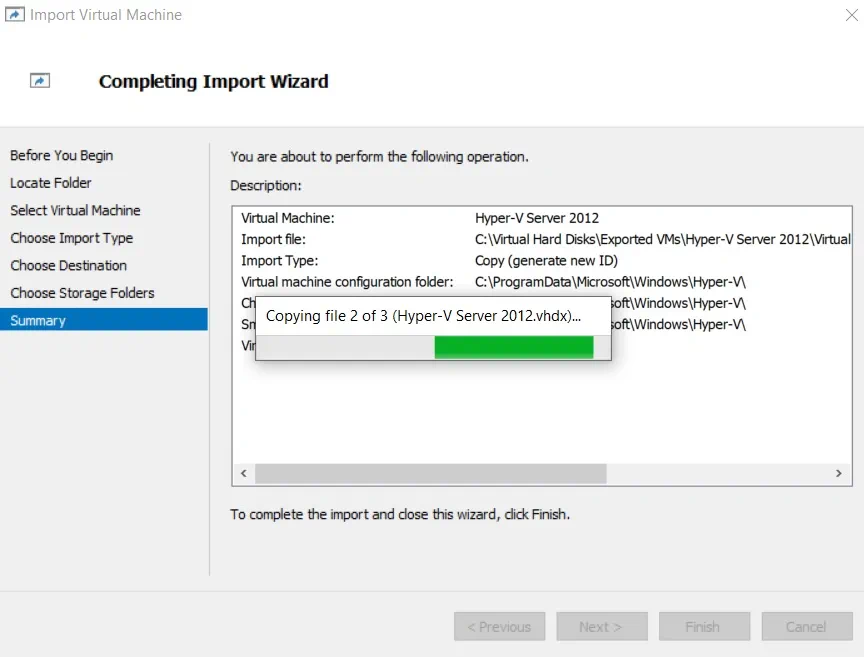
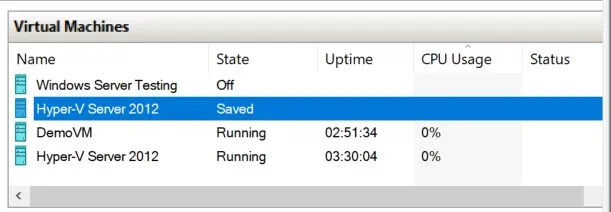
Once the operation is complete, you can find the imported VM on the selected Hyper-V host using Hyper-V Manager.
Using PowerShell
As you know, three import types exist in a Hyper-V environment, and you can use the Import-VM cmdlet to perform various types of Hyper-V Import.
To perform in-place registration of the selected VM, you should first delete the source VM which has the same ID. For this purpose, run the following cmdlet:
Get-VM DemoVM | Remove-VM
After that, you can run the Import-VM cmdlet to ensure that the VM gets registered in-place and the existing unique ID is used.
Import-VM –Path 'C:\Virtual Hard Disks\Exported VMs\DemoVM\Virtual Machines\9C21B83D-EF80-4566-BF25-DDA50FEE2FFE.vmcx'

The next option is to restore the VM. In this case, exported files will be copied and moved to the new location and the existing ID will be used in this case. This import type also requires you to delete the source VM before starting the restore operation.
Import-VM -Path 'C:\Virtual Hard Disks\Exported VMs\Hyper-V Server 2012\Virtual Machines\6E62C696-E3A1-41C3-A975-0E1CC9E67A31.vmcx' -Copy -VhdDestinationPath 'C:\Program Files\Imported VMs\VHD Files' -VirtualMachinePath 'C:\Program Files\Imported VMs\VM Files'
The import operation should be completed in a few seconds.

For this cmdlet to work, you need to clearly specify a full path to the location where the source .vcmx file is currently stored, and a full path to the place where the .vcmx and .vhdx files should be copied.
Finally, you can copy the VM using the following PowerShell cmdlet. In this case, you don’t need to delete the source VM, since a new unique ID will be created for the imported VM. Using this approach you can import this VM to the same host multiple times.
Import-VM -Path 'C:\Virtual Hard Disks\Exported VMs\DemoVM\Virtual Machines\9C21B83D-EF80-4566-BF25-DDA50FEE2FFE.vmcx' -Copy -GenerateNewId

Wrapping Up
To export or import Hyper-V VMs, you can use either Hyper-V Manager or run PowerShell scripts. Each of these approaches has its own benefits and use cases, and you should choose between the two based on your individual needs.
The Hyper-V Export and Import feature can be used as a backup alternative, i.e. you can create a copy of running VMs and recover them if they get corrupted or fail. However, the process of exporting and importing Hyper-V VMs requires a lot of manual input on your part and can be automated only using PowerShell scripts. Thus, compared to full-fledged backup solutions, Hyper-V Export and Import has a rather limited functionality, which allows you to protect only small Hyper-V environments in addition to requiring a lot of your time and effort.
If you want to make the process of protecting Hyper-V VMs easy, fast, and secure, you should consider installing an advanced data protection solution. NAKIVO Backup & Replication is a reliable and powerful solution, which can help you protect multiple environments for a fraction of the price.