A Guide to VMware vSphere 7.0 Installation and Setup
VMware vSphere 7 introduces a number of new useful features and improved vSphere 6 features. VMware vSphere is a popular virtualization platform that is widely used in the world and a release of the seventh version of the product is good reason to upgrade the current vSphere version or deploy VMware vSphere 7.0 from scratch. There are some differences in vSphere installation and setup of the seventh version comparing to vSphere 6. This blog post explains how to deploy vSphere 7 in the walkthrough format.

1. Requirements
Before going to vSphere 7 installation, make sure to go over the hardware requirements.
1.1. Requirements for ESXi 7
Minimum hardware requirements for ESXi are:
CPU. A two-core x86_64 CPU on the computer where the ESXi host will run. Intel VT-x or AMD-v (RVI) features must be enabled in UEFI/BIOS.
RAM. 4 GB of RAM to run ESXi and at least 8 GB of RAM to run VMs on an ESXi host. The more memory your computer/server running ESXi has, the more VMs you can run.
Storage. At least 8 GB of disk space is required to install and boot ESXi 7.0. ESXi can be installed on a separate HDD or SSD, RAID, and even a USB flash drive or SD card. Be aware that when you install ESXi on a USB flash drive or SD card, there is no persistent /scratch partition to store logs. It is recommended that you provide 32 GB or more on a boot device for ESXi. A boot device must not be shared between multiple ESXi hosts. Opt for SCSI (SAS) disks for VM storage.
Network. At least one Gigabit Ethernet network controller. The network adapter must be compatible with ESXi 7.0. Install multiple network adapters on your ESXi server to use NIC Teaming (link aggregation), configure separate This is especially important for using VMware clustering features. It is recommended that you use static IP configuration for vSphere components such as ESXi hosts, vCenter servers, and so on.
If you need to deploy additional vSphere components such as NSX or Kubernetes, minimum requirements are increased.
Check the VMware Compatibility Guide before selecting hardware to install ESXi.
Download the ESXi installation ISO image from the VMware website. In this walkthrough, we use
VMware-VMvisor-Installer-7.0.0-15843807.x86_64.iso installation image.
If you have servers from vendors such as DELL or Hewlett Packard, you may need the customized ESXi installation images such as:
VMware-VMvisor-Installer-7.0.0-15843807.x86_64-DellEMC_Customized-A00.iso
VMware_ESXi_7.0.0_15843807_HPE_700.0.0.10.5.0.108_April2020.iso
1.2. Requirements for vCenter 7
vCenter Server is used to manage ESXi hosts centrally.
vCenter 7.0 can be deployed only as vCenter virtual appliance (VCSA), that is a virtual machine deployed from a template that runs on an ESXi host. A platform service controller (PSC) is integrated in the VCSA. You cannot install a PSC separately and install vCenter on a Windows machine (although this was possible in vSphere 6.7).
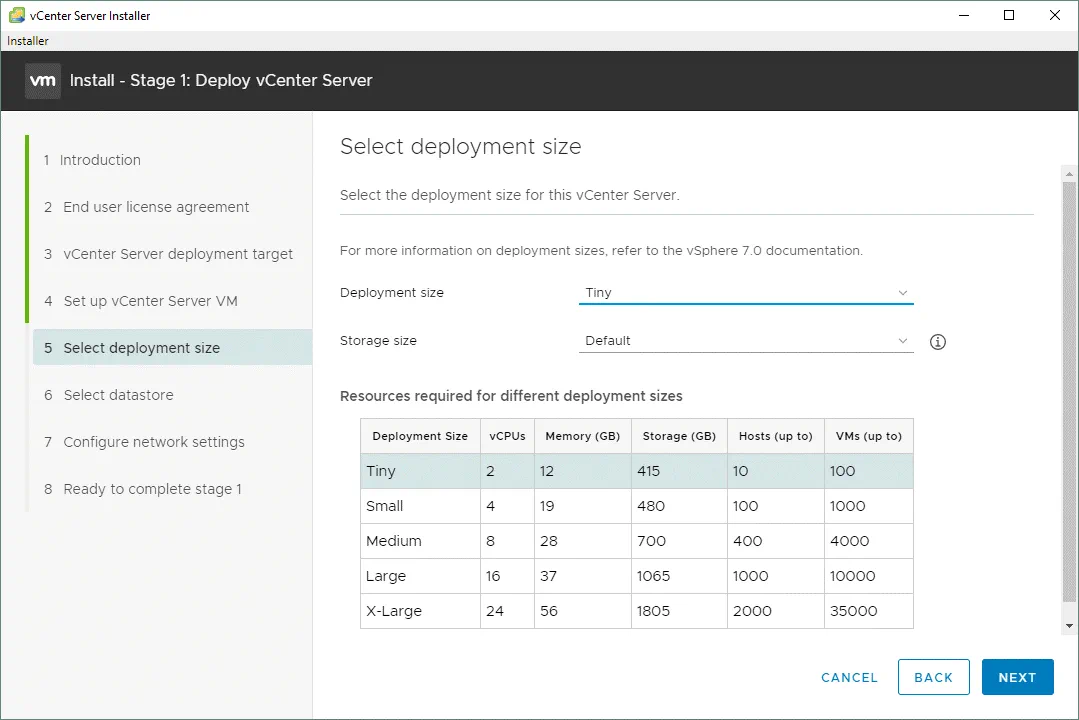
If you are going to deploy vCenter for a tiny environment (up to 10 hosts or 100 virtual machines), you need to provide 2 vCPUs and 12 GB of RAM. The more hosts and VMs that will be managed by vCenter, the more CPU and memory capacity must be provisioned during installation and the appropriate installation mode must be selected (Tiny, Small, Medium, Large, X-Large).
Storage requirements for vCenter Server Appliance 7.0 range between 415 GB and 3665 GB depending on the number of virtual machines managed by vCenter.
Network requirements. The appropriate ports must be open for vCenter to work properly. A static IP address must be set for vCenter.
Download the vCenter Server Appliance installation ISO image from the VMware website. In this example we use the
VMware-VCSA-all-7.0.0-16189094.iso installation image of vCenter 7.
2. The Deployment Scheme
In our walkthrough, we are going to install two ESXi servers, deploy vCenter Server Appliance on the first ESXi host and use the second ESXi host to run other VMs. You can add more ESXi hosts and create more VMs in your environment. Main components used in this vSphere installation and setup guide are:
ESXi 1: 192.168.11.30
ESXi 2: 192.168.11.27
vCenter: 192.168.11.31
Gateway/DNS: 192.168.11.2
Network: 192.168.11.0/255.255.255.0
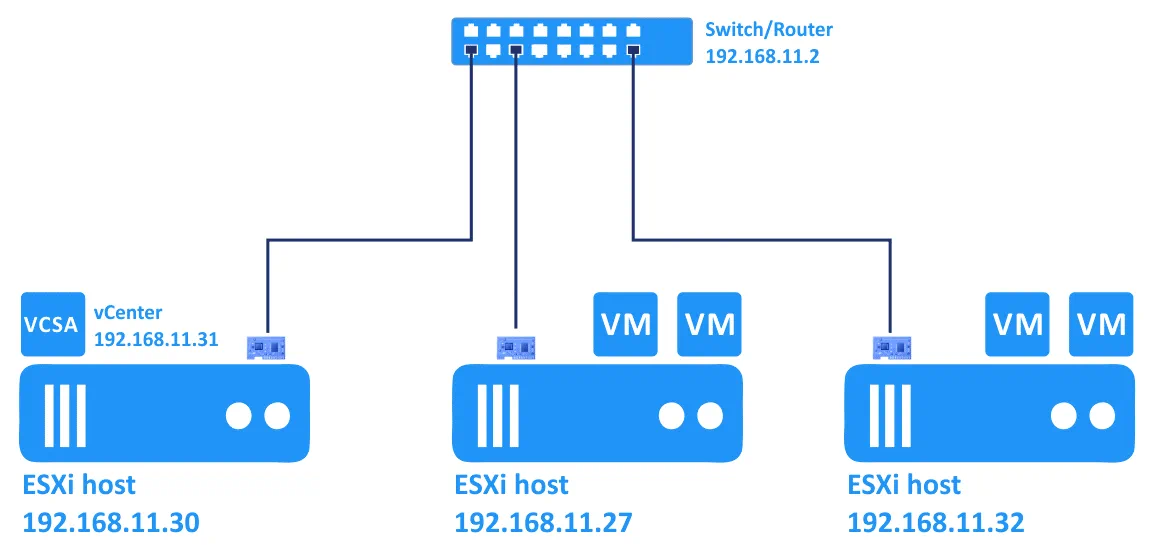
ESXi hosts and VMs are connected to the same network (192.168.11.0/24) in this vSphere installation and setup guide. You can create separate networks for virtual machines. If you are going to deploy a high number of virtual machines, consider using separate VM networks. VLAN can be used to isolate networks from each other on the second layer of the OSI model. Your router must support VLANs in this case. Separate networks must be configured for vMotion and management when using VMware clustering (a vMotion network and management network).
3. Deploying ESXi Hosts – Installing ESXi on Servers
First of all, you should deploy ESXi hosts. ESXi is a hypervisor that can run virtual machines on real hardware by using hardware emulation (virtual devices are emulated for a virtual machine). ESXi is the first type hypervisor. Prepare your physical computers/servers to install ESXi on them. If you want to practice vSphere 7 deployment but you have not prepared servers yet, read the blog post about VMware 7 Home Lab to learn how to deploy ESXi hosts and vSphere 7 on VMware Workstation virtual machines for educational purposes.
3.1. Installing the first ESXi host
Let’s install the first ESXi host (192.168.11.30) where the vCenter virtual machine will be deployed. Write the ISO image (VMware-VMvisor-Installer-7.0.0-15843807.x86_64.iso) to a DVD disc or USB flash drive and boot from this prepared medium to run the ESXi 7 installer on your server.
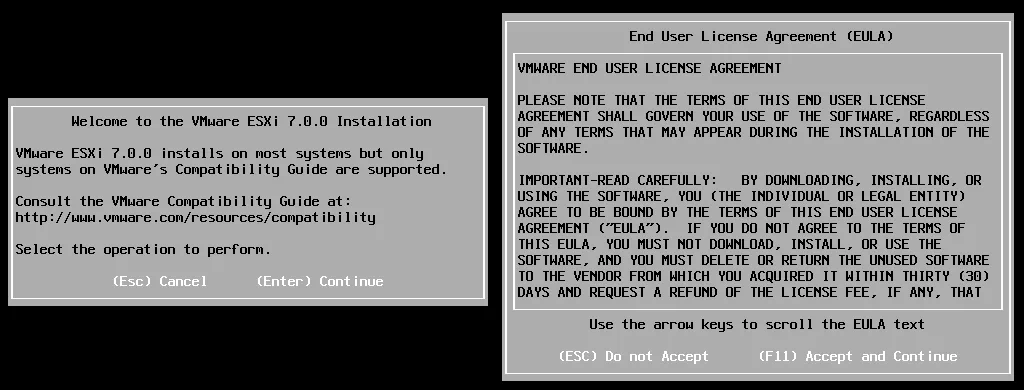
Welcome to the VMware ESXi 7.0.0 Installation. Read the welcome message and hit Enter to continue.
End User License Agreement (EULA). Read the EULA and press Enter to accept and continue.
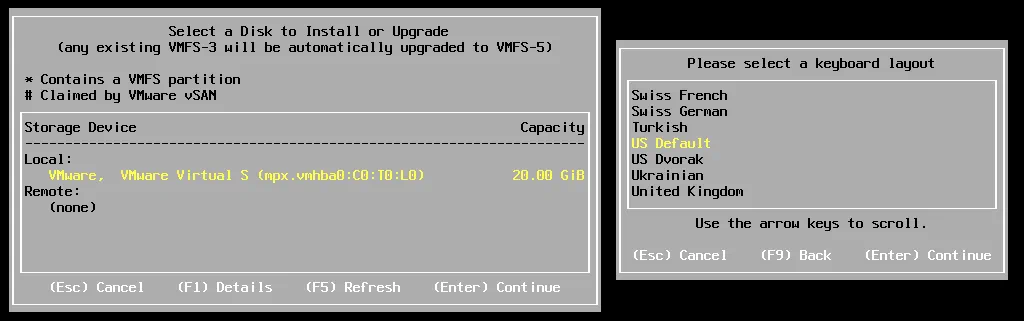
Select a Disk to Install or Upgrade. In this example we have one disk to install ESXi 7.0. Later you can attach more disks, initialize them and use as datastores to store VM files. Select a storage device and hit Enter.
Please select a keyboard layout. US Default is used in our case. We recommend that you use the same option.
Enter a root password. A password must meet the complexity requirements.
Confirm Install. Press F11 to start the installation process of ESXi 7.0 on your server.

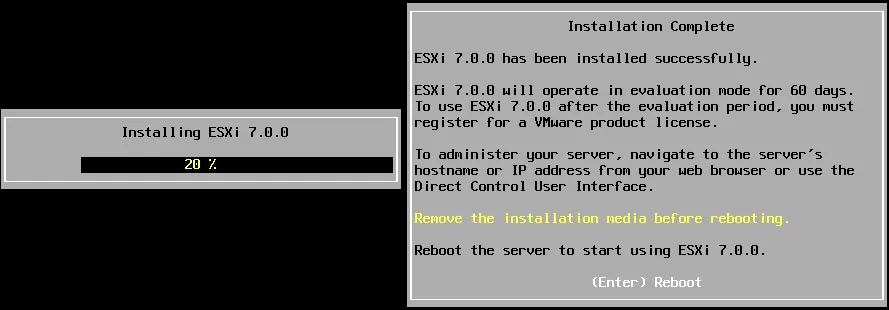
Wait until the installation process finishes.
Installation Complete. When you see this screen, it means that ESXi 7.0 has been installed successfully. Remove the installation medium and press Enter to reboot the machine.
3.2. Basic configuration of the ESXi host
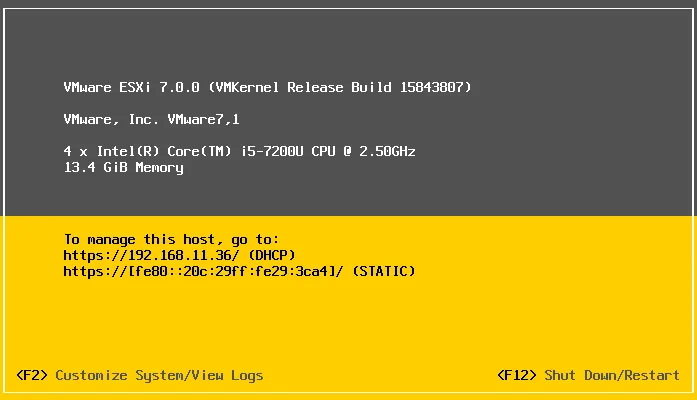
Once you have installed ESXi 7.0 on your server you see a grey and yellow screen that is called ESXi direct console (DCUI). On this screen you can see the ESXi version, build number, CPU, memory configuration, the IP address, and a link that can be opened in a web browser to manage the ESXi host.
Press F2 to customize system.
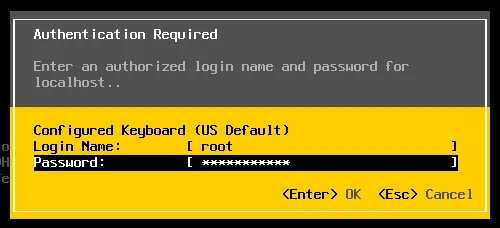
Authentication required. Enter the root password that you have set during ESXi installation. Hit Enter to continue.
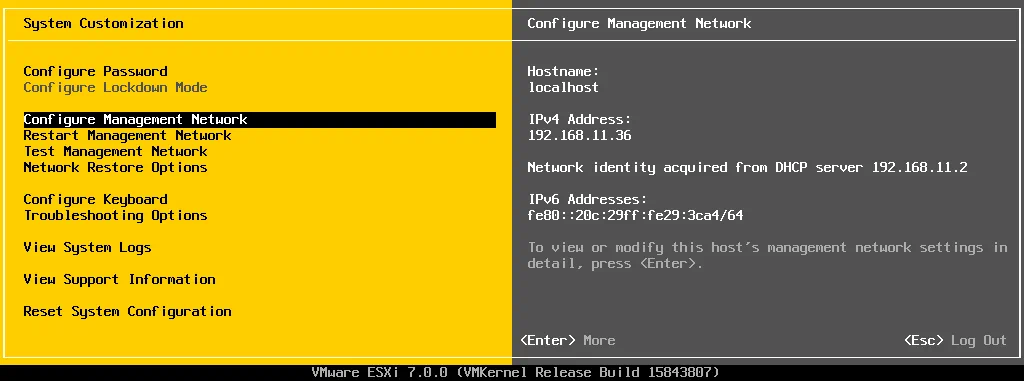
Now you are in the System Customization menu. In the right side of the interface you can see the current IP address assigned via DHCP. Let’s edit network settings and configure a static IP address on this ESXi host. Select Configure Management Network and hit Enter.
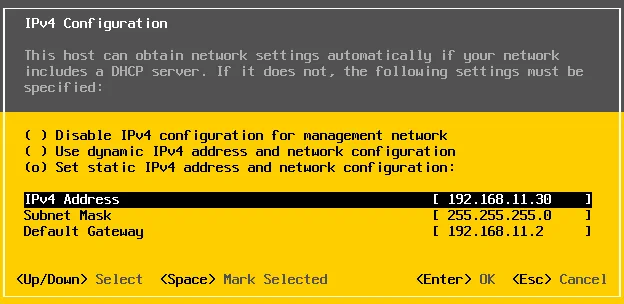
Select IPv4 Configuration and press Enter.
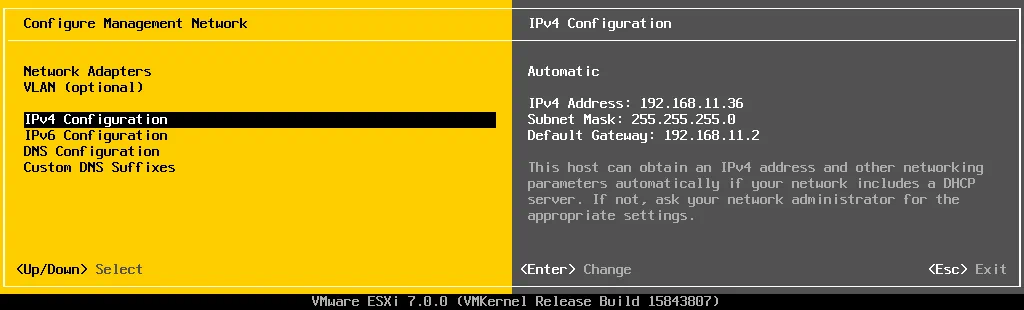
Select Set static IPv4 address and network configuration and hit a Spacebar. We enter the following IPv4 settings:
IPv4 Address: 192.168.11.30
Subnet Mask: 255.255.255.0
Default Gateway: 192.168.11.2
Hit Enter to save settings.
You can disable IPv6 if you don’t use this network protocol.
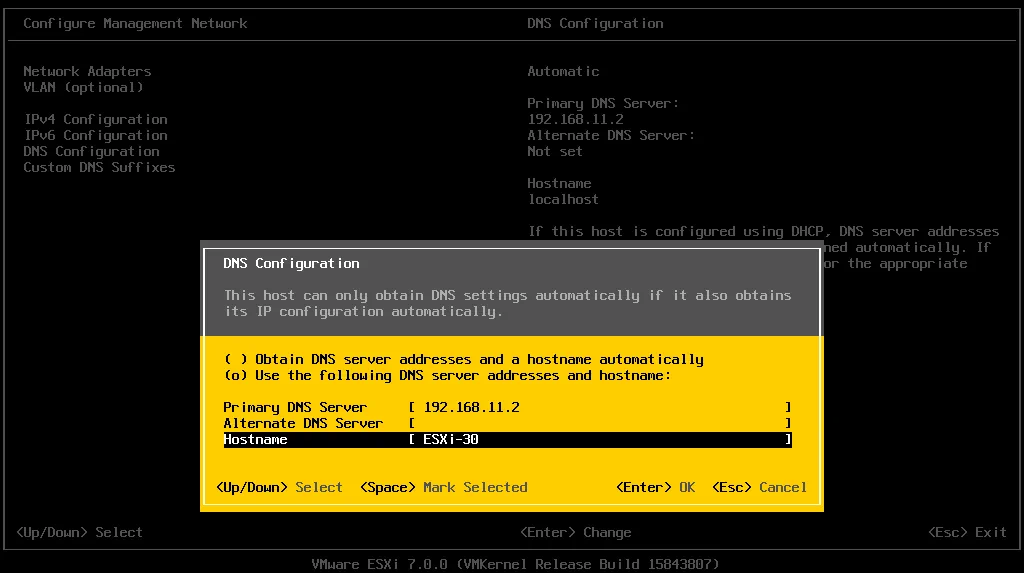
After that go to the DNS Configuration. Select Use the following DNS server address and hostname and press Space.
We use the following DNS configuration in network settings of this ESXi host:
Primary DNS Server: 192.168.11.2
Alternative DNS Server: 192.168.11.1
Hostname: ESXi-30
Hit Enter to save settings.
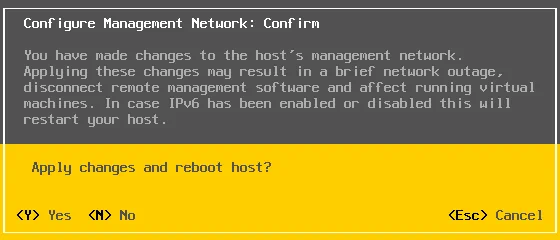
Press Escape to exit the Configure Management Network menu.
Reboot is required to apply changes. Press Y to reboot the ESXi host.
After the ESXi host reboot, go to Troubleshooting options in the System Customization menu.
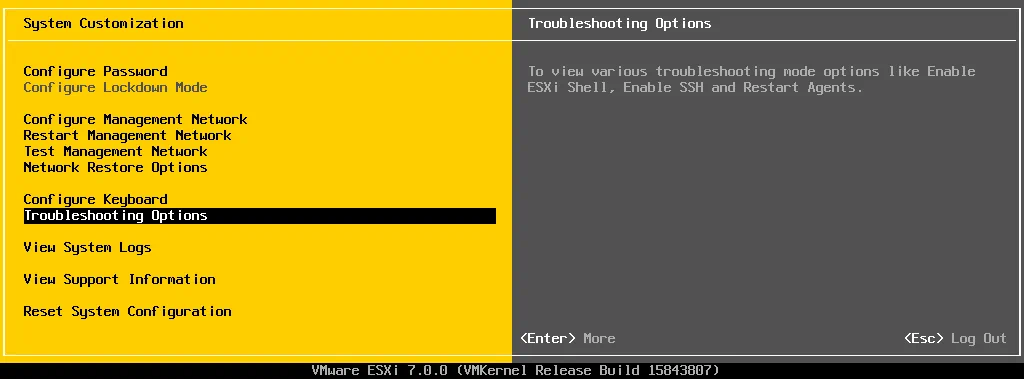
Enable ESXi Shell and SSH access for the ESXi host by selecting the appropriate option and pressing Enter.

3.3. Creating a datastore
You can create a dedicated datastore to store virtual machine files.
Attach a disk or disks to your ESXi server.
Note: It is recommended that you use RAID 1 or RAID 10 in production environments to provide redundancy and reduce the probability of data loss in a case of disk damage. However, using RAID cannot replace data backups. Please perform VMware VM backup in production environments to protect data.
Enter the IP address of your ESXi host in the address bar of your web browser. In our case we use https://192.168.11.30 as the link to our ESXi host for management. Enter your user name and password to log in. In our case we use root as a username and the password set during ESXi 7 installation.
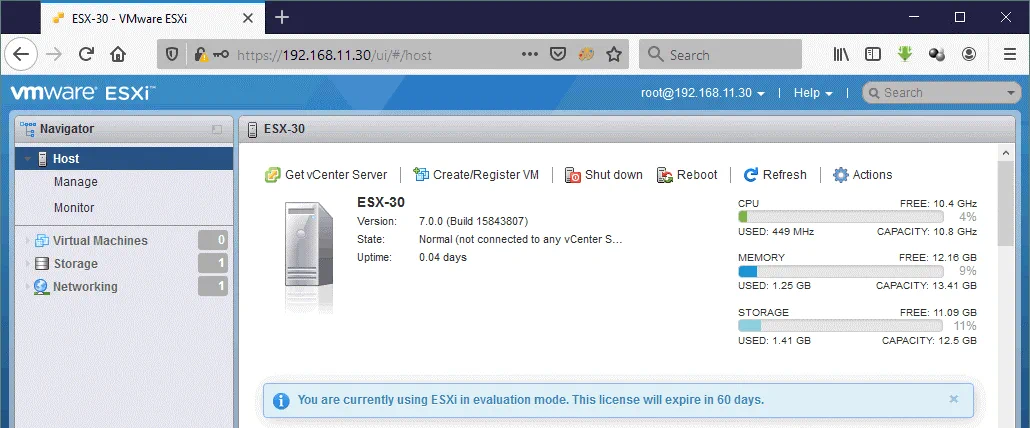
Now you are using VMware Host Client to manage an ESXi host. Select Host in the Navigator to see the general information about an ESXi host such as version, host name, CPU, memory, and storage usage.
Go to the Storage section in the navigation pane and in the Datastores tab click New datastore.
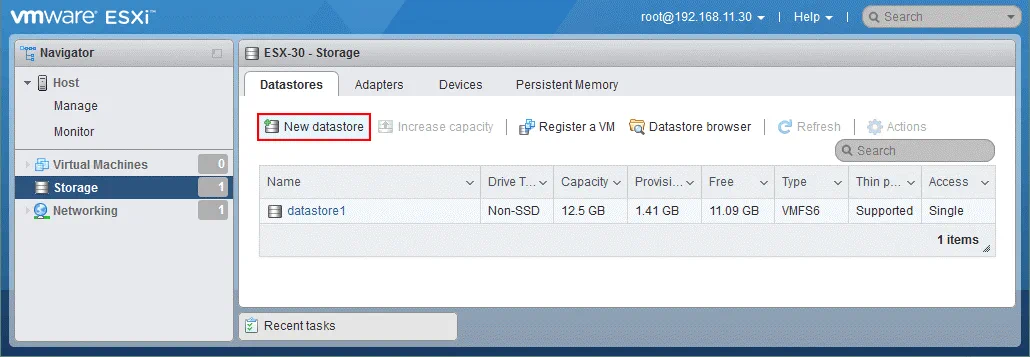
The datastore creation wizard opens.
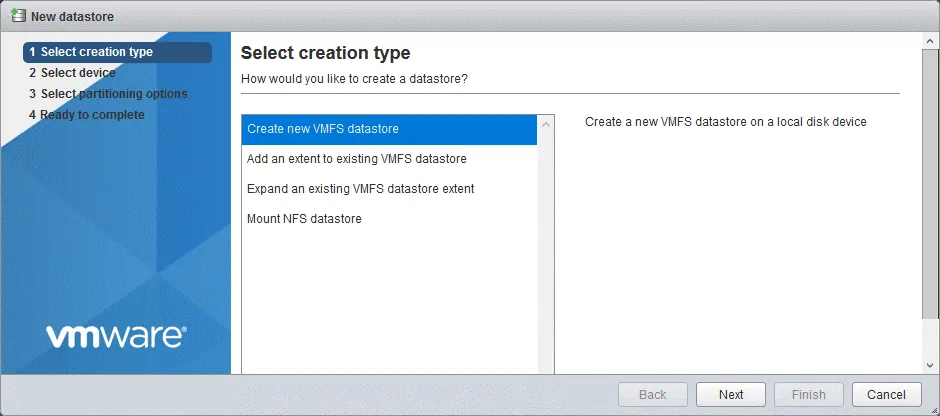
1. Select creation type. Click Create new VMFS datastore.
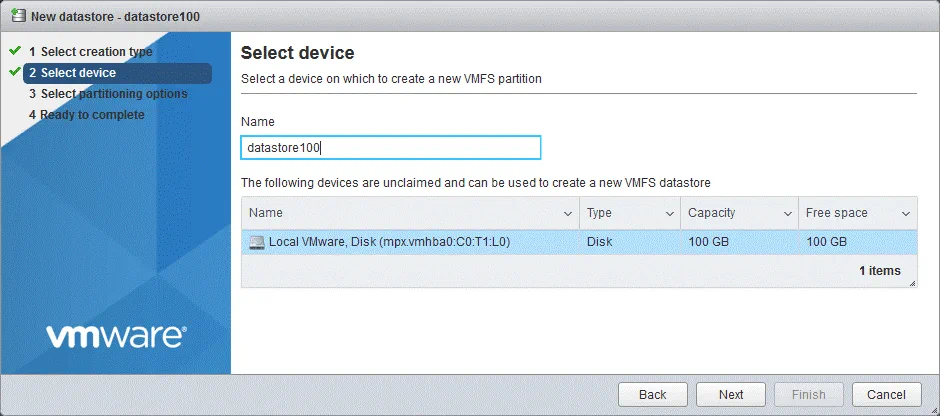
2. Select device. Select a storage device you have connected before. In our case it is a 100-GB disk. Enter the datastore name, for example, datastore100.
3. Select partitioning options. Let’s leave default options and use a full disk.

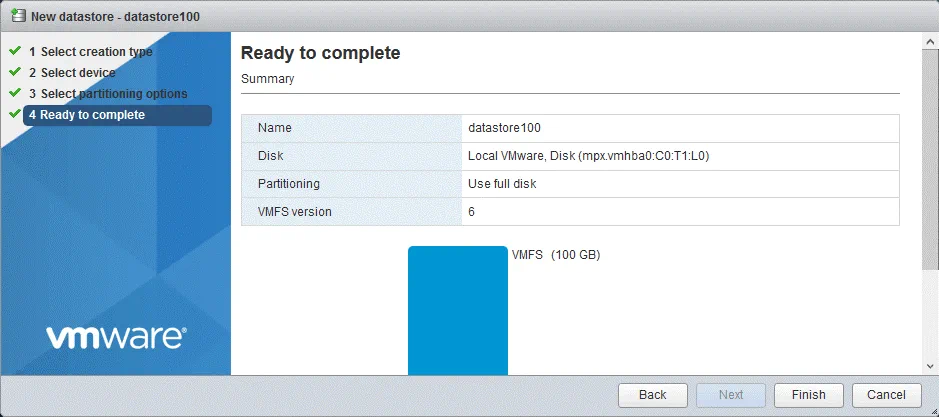
4. Ready to complete. Hit Finish to create a new datastore.
A confirmation message is displayed:
The entire contents of this disk are about to be erased and replaced with the specified configuration, are you sure?
Click Yes.
The datastore is now created and is displayed in the list of datastores in the Datastores tab.

The first ESXi host (192.168.11.30) is ready to use for creating virtual machines.
3.4. Deploying other ESXi hosts
Similarly, we should deploy the second ESXi host (192.168.11.27). The second ESXi host will be used to run virtual machines in our vSphere 7 environment. You can deploy more ESXi hosts by using the workflow explained above.
4. Deploying vCenter Server
Now it’s time to deploy vCenter.
Download the vCenter 7 installation ISO image from the VMware website if you have not done it yet. After downloading has finished, we have the ISO image to install vCenter 7:
VMware-VCSA-all-7.0.0-16189094.iso
We save the ISO file to
“D:\Install\VMware\VMware vSphere 7\VMware vCenter 7” on a Windows machine from which we manage our vSphere environment.
There are two methods to deploy vCenter Server Appliance 7.0.
Method 1
Mount the ISO image or extract its content to a selected directory.
Go to the vcsa directory and find the VMware-vCenter-Server-Appliance-7.0.0.10300-16189094_OVF10.ova file.
Open VMware Host Client and click Virtual Machines in the Navigator.
Click Create/Register VM.
Hit Deploy a virtual machine from an OVF or OVA file.
Enter a VM name and select the VMware-vCenter-Server-Appliance-7.0.0.10300-16189094_OVF10.ova file.
Follow the instructions of the wizard to complete the VCSA installation.
Method 2
We will use the second method to deploy vCenter Server appliance 7 in this tutorial.
Mount the ISO image as a virtual DVD drive on your computer (desktop/laptop) from which you connect to ESXi hosts or extract contents of the ISO image to a custom directory.
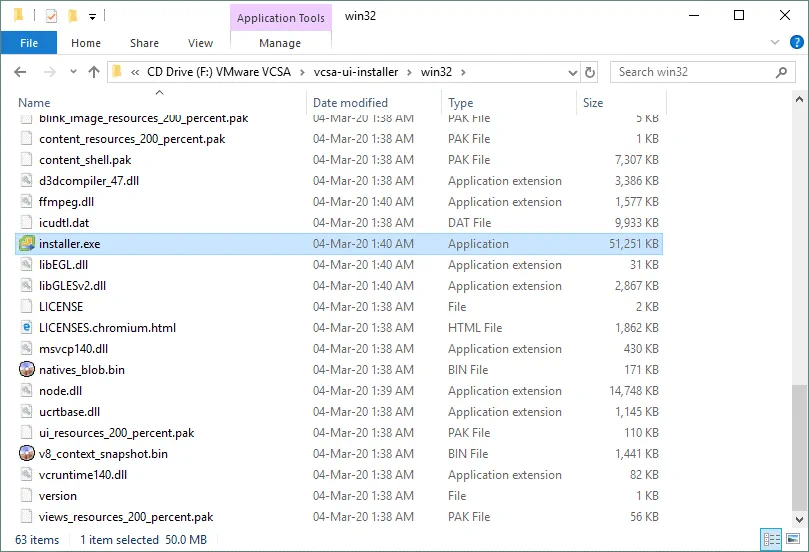
Go to the vcsa-ui-installer\win32 directory on the mounted disk (for example, U:\vcsa-ui-installer\win32) and run installer.exe. If you’re using Linux, go to vcsa-ui-installer/lin64.
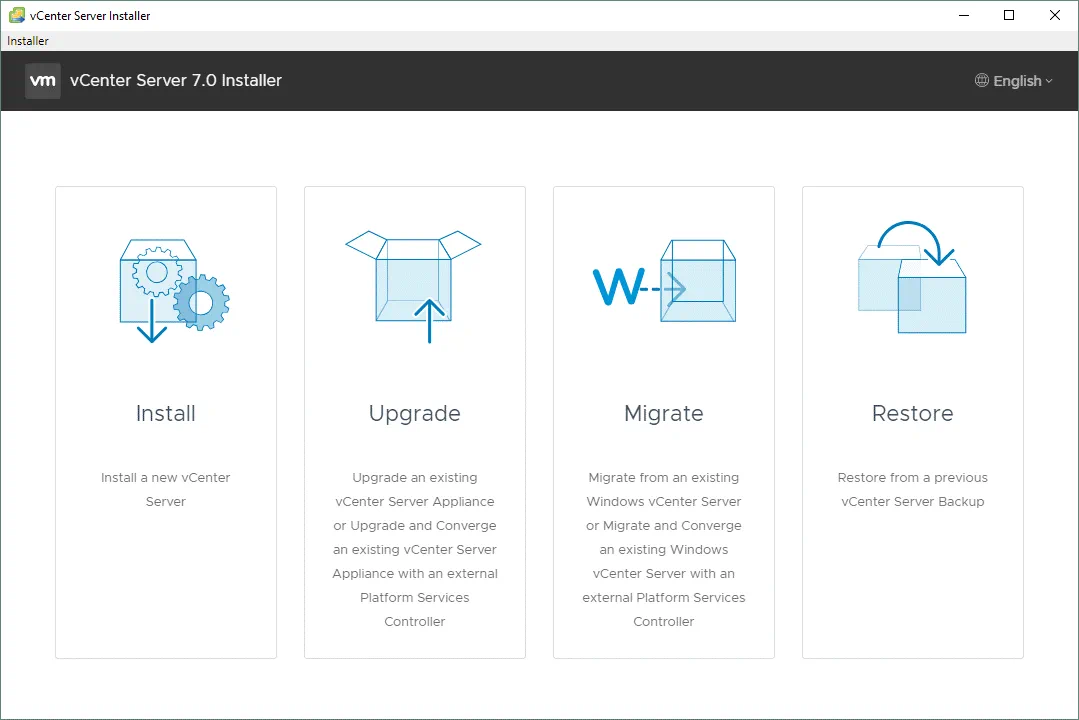
The vCenter Server 7.0 Installer application is running. This application is convenient for installing, upgrading, and migrating vCenter.
Click Install to install a new vCenter Server.
A Deploy vCenter Server wizard is opened.
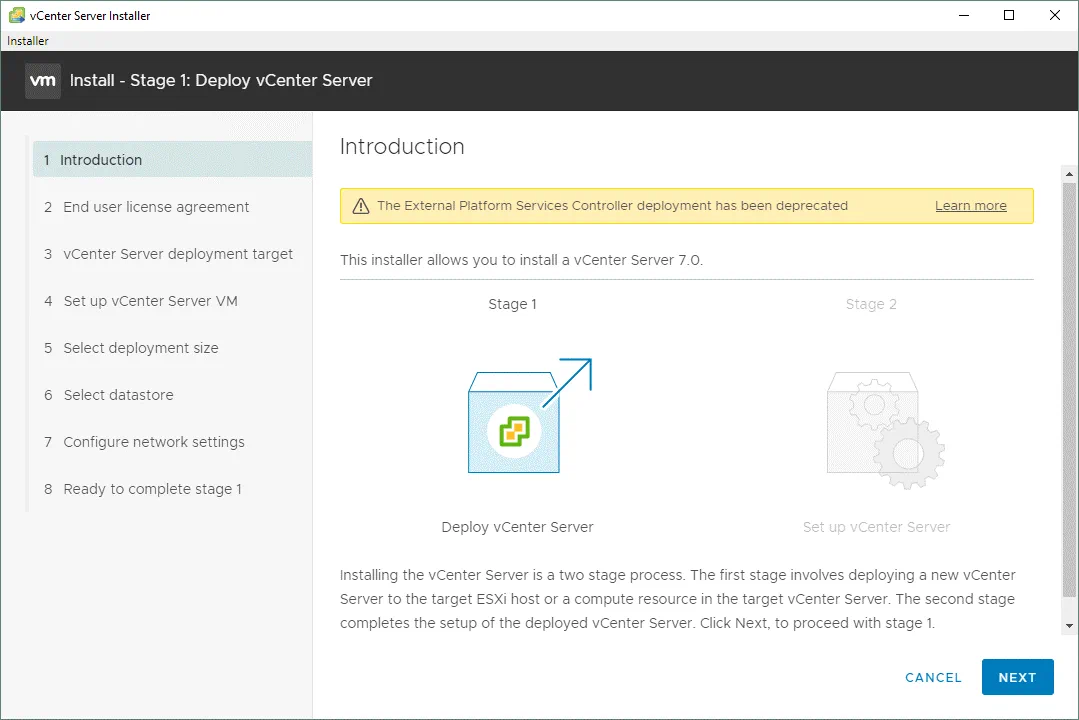
Stage 1
1. Introduction. Read the provided information to familiarize yourself with the vCenter 7 installation process. VMware vCenter setup consists of two stages. Click Next at each step of the wizard to continue.
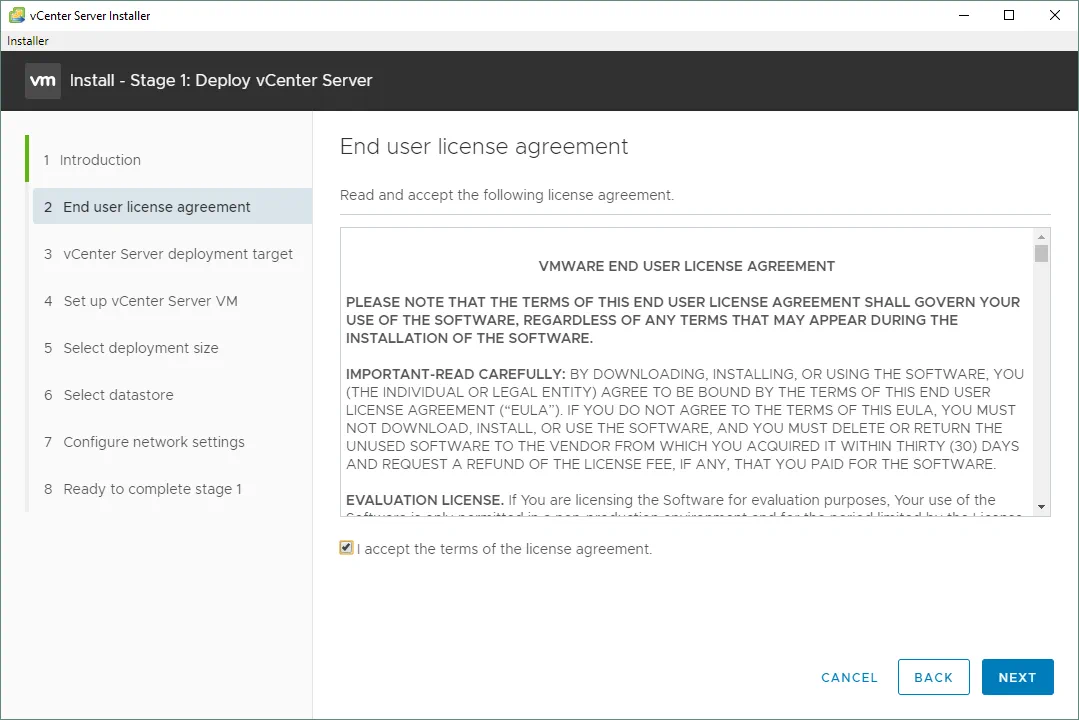
2. End user license agreement. Read the EULA and select the I accept the terms of the license agreement checkbox.
3. vCenter Server deployment target. Specify the vCenter Server deployment target settings. We have to set parameters of our first ESXi host on which we are deploying vCenter.
ESXi host or vCenter Server name: 192.168.11.30
HTTPS port: 443
User name: root
Password: ************
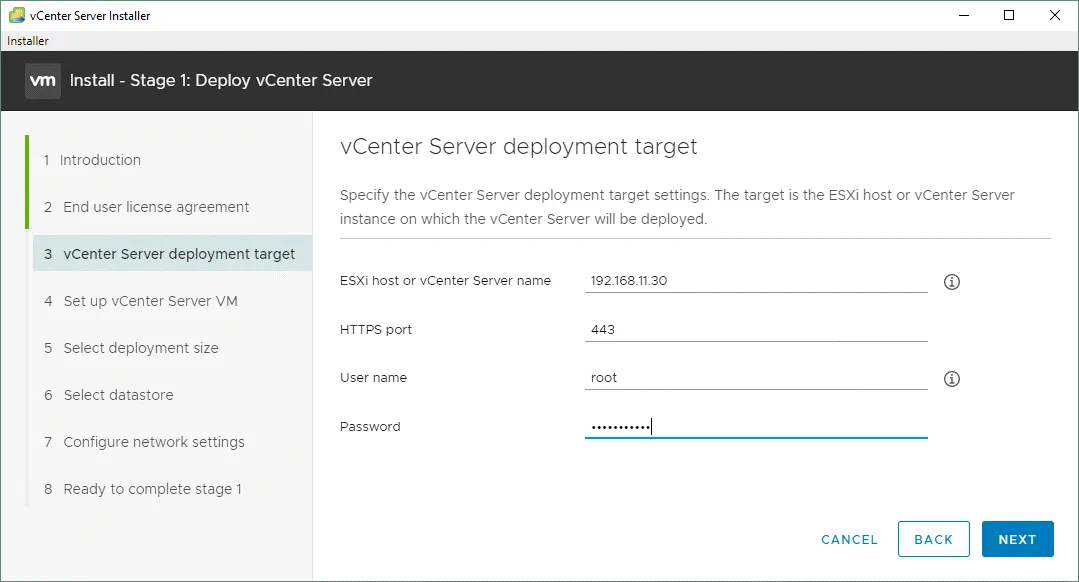
If a certificate warning is displayed, click Yes to continue.

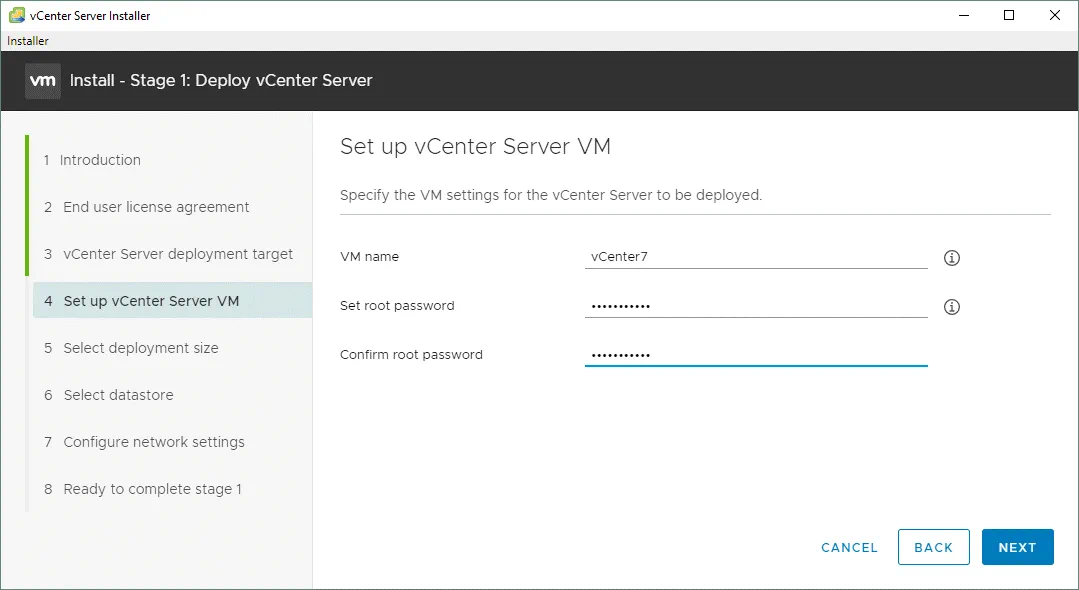
4. Set up vCenter Server VM. Enter the vCenter VM name and set the root password for vCenter Server appliance.
5. Set deployment size. Select deployment and storage size. As we are going to use vCenter for less than 10 ESXi hosts and less than 100 VMs, we select the Tiny deployment size and a default storage size. You can see a table with the configuration requirements for different deployment sizes.
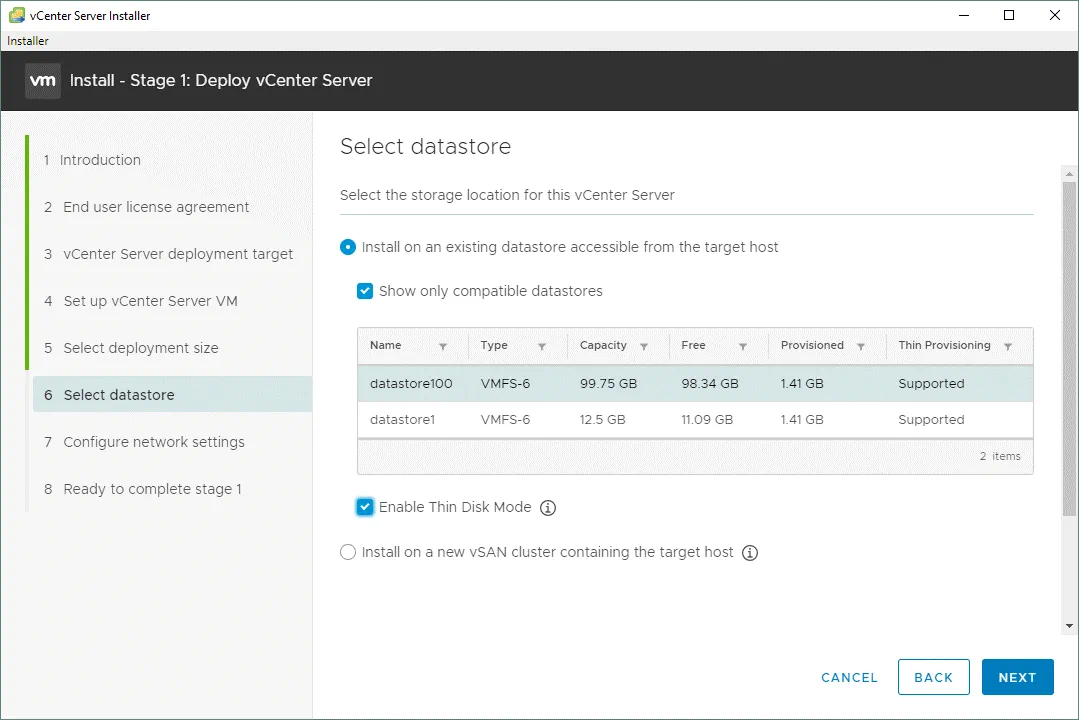
6. Select datastore. Select the storage location for this vCenter Server that has enough free space to deploy the vCenter VM. We use datastore100 that was previously created in this tutorial to deploy vCenter 7. Select Enable Thin Disk Mode to use Thin Provisioning for virtual disks of the vCenter VM. Read more about thick and thin provisioning in this blog post.
7. Configure network settings. We use the following network settings for vCenter Server Appliance:
Network: VM Network
IP version: IPv4
IP assignment: static
FQDN: (optional)
IP address: 192.168.11.31
Subnet mask of prefix length: 255.255.255.0
Default gateway: 192.168.11.2
DNS servers: 192.168.11.2

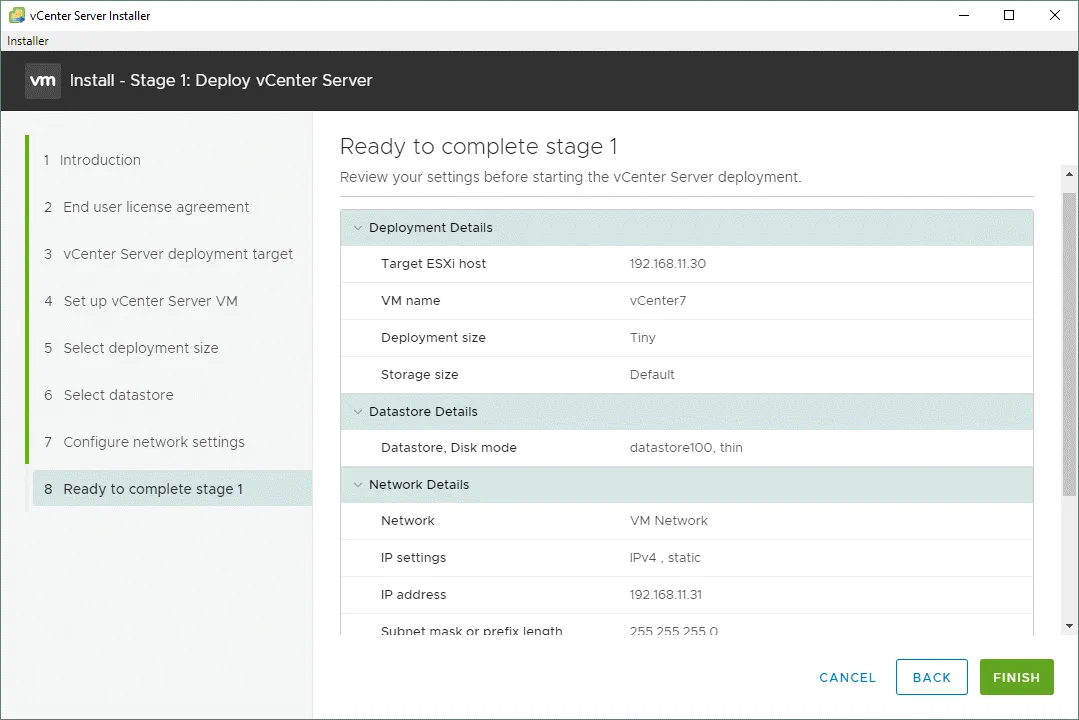
Ready to complete stage 1. Review your vCenter settings and hit Finish to finish stage 1.
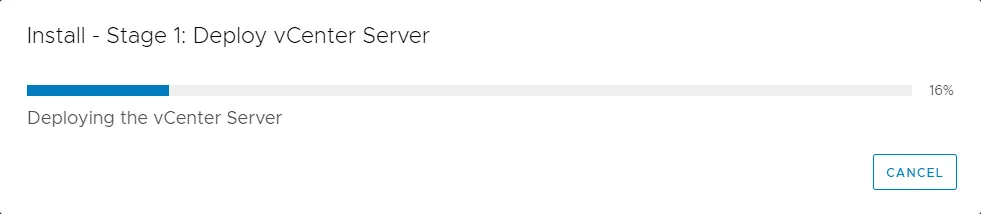
Wait until the vCenter 7 deployment process is finished.
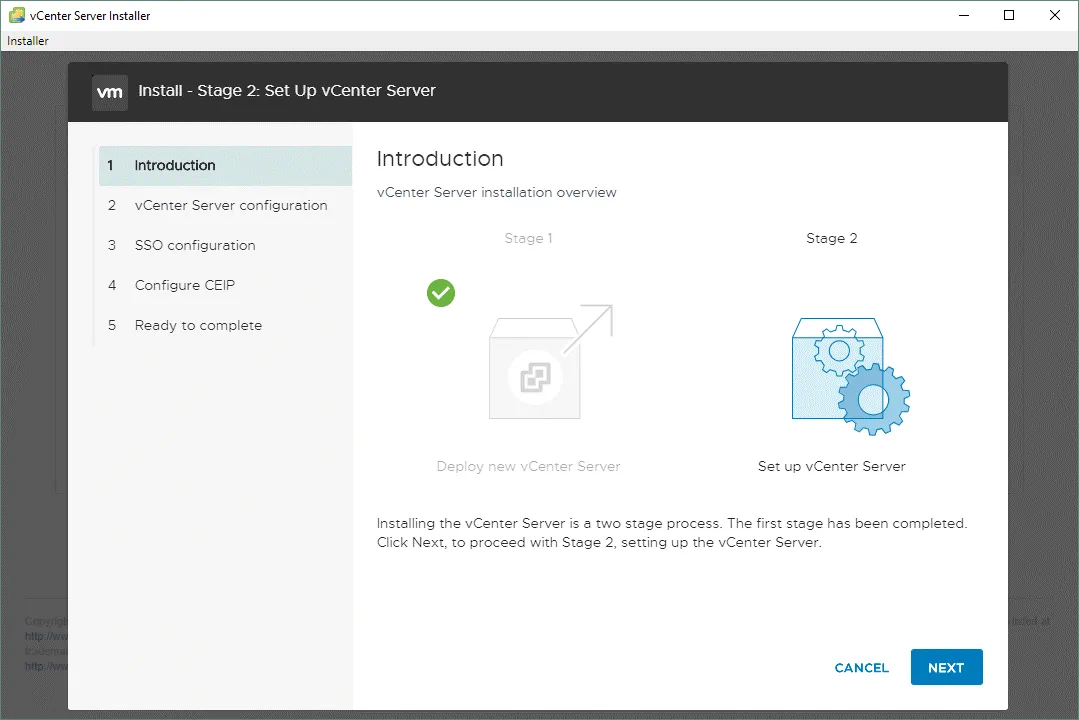
Stage 2
Once stage 1 of vCenter 7 installation is finished, you have to pass stage 2 to finish the installation process.
1. Introduction. Hit Next to start stage 2 of vCenter Server setup.
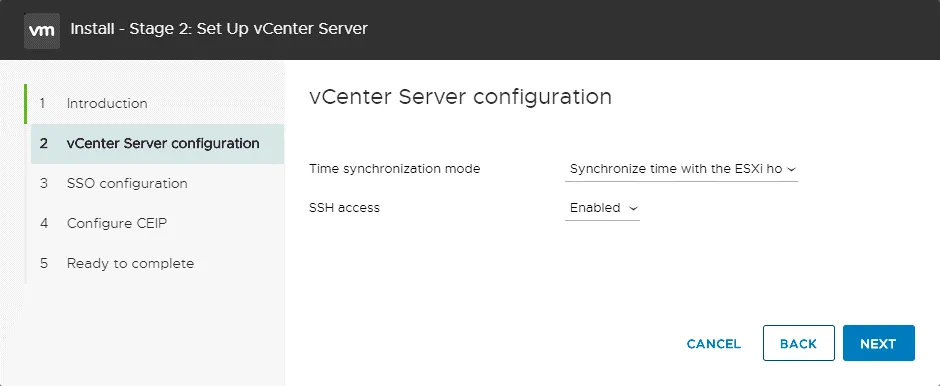
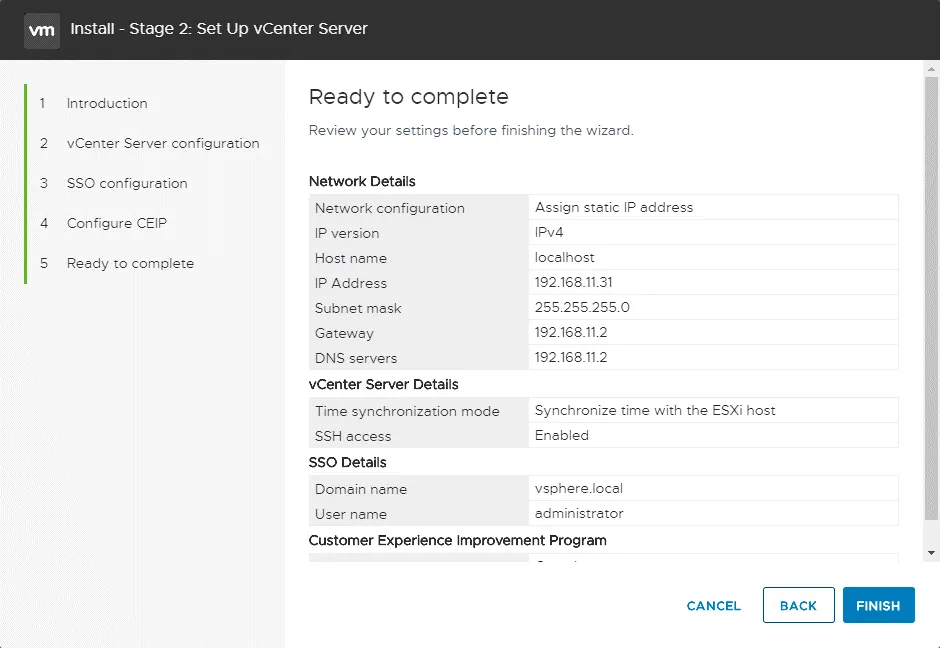
2. vCenter Server configuration. Select time synchronization settings and enable SSH access.
Time synchronization mode: Synchronize with the ESXi host
SSH access: Enabled
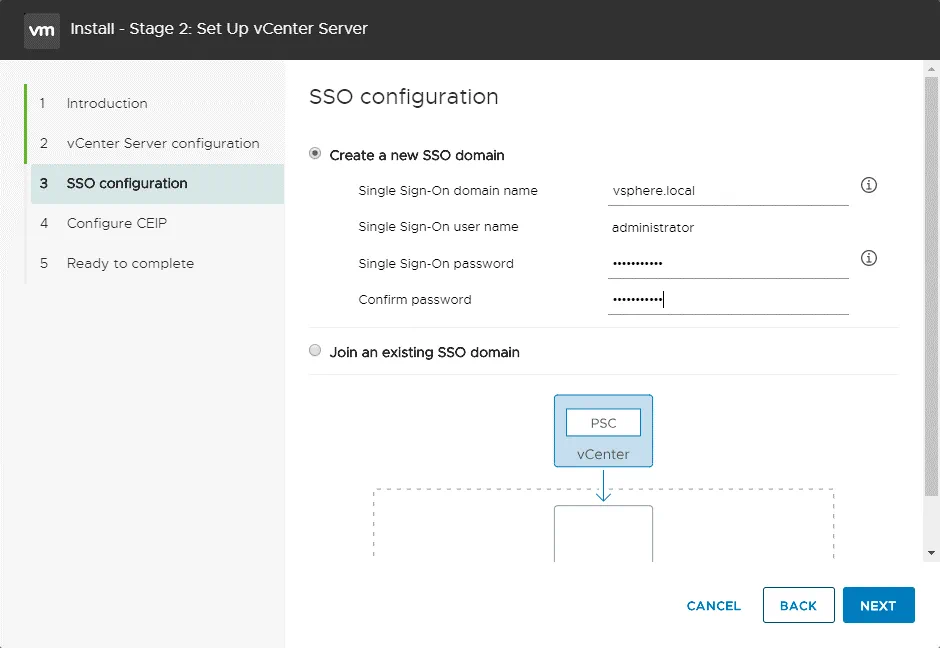
3. SSO configuration. Select the Create a new SSO domain option.
Single Sign-On domain name: vsphere.local
Single Sign-On user name: administrator
Single Sign-On password: Enter a password and confirm the password
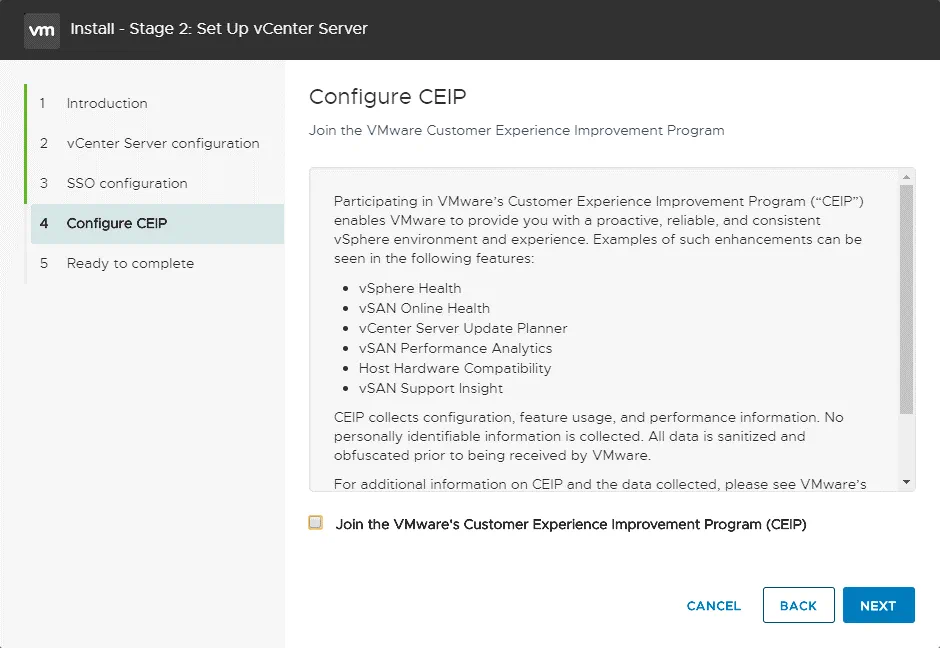
Configure CEIP. Deselect the checkbox if you don’t want to send your statistics information to VMware and go to the next step.
Ready to complete. Review your settings and if everything is correct, hit Finish.
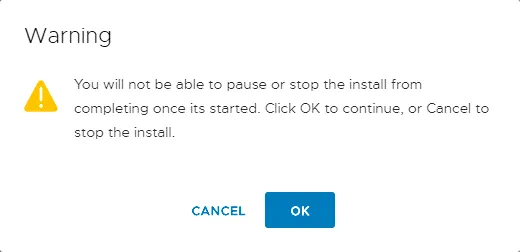
Don’t terminate the installation process. Otherwise you will need to re-install vCenter from the beginning.
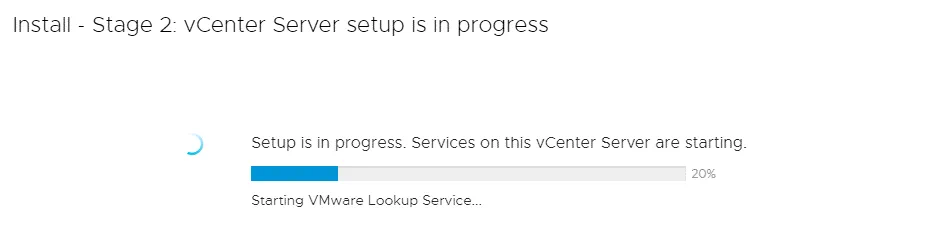
Wait until the vCenter 7 installation process for stage 2 has finished.
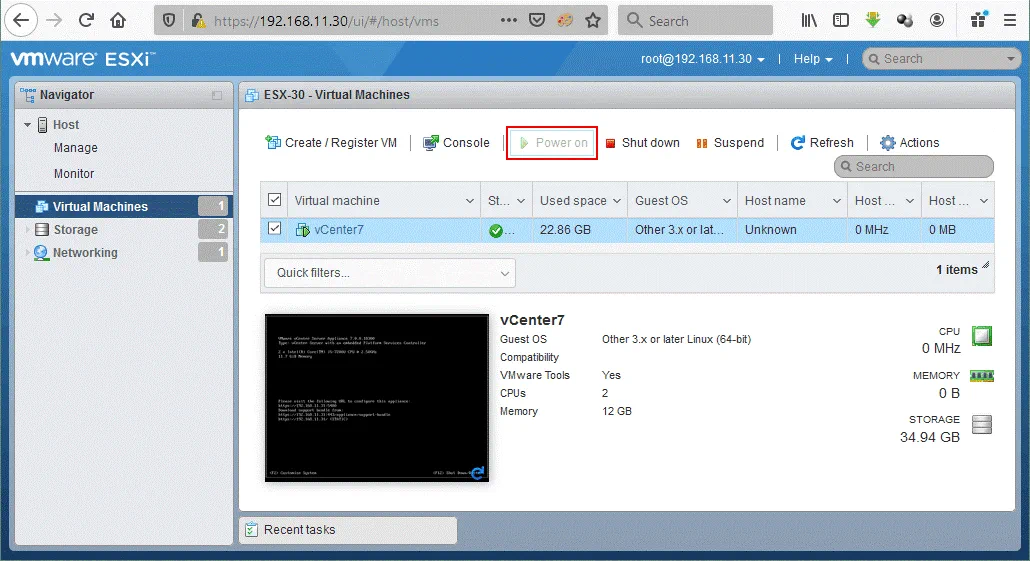
VMware vCenter Server Appliance should start automatically after deployment has finished. If for any reason vCenter does not start automatically, connect to the ESXi host where vCenter virtual appliance (VCSA) is residing and start the VM manually in VMware Host Client.
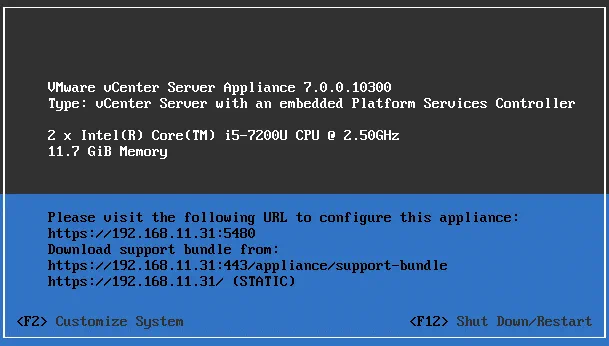
You can connect to the vCenter VM and open the VCSA direct console. Click the display preview of the VM in VMware Host client, use VMware Remote Console, which is a standalone application, or VMware Workstation to open a virtual display of the VM for management with keyboard and mouse.
The direct console interface of VCSA is designed in a grey and blue color scheme and is similar to the DCUI of ESXi. VMware vCenter version, CPU configuration, memory configuration, an IP address and links to manage VCSA are displayed on this screen. Press F2 and enter the credentials you set during vCenter installation to edit settings similarly to how you edited settings on ESXi.
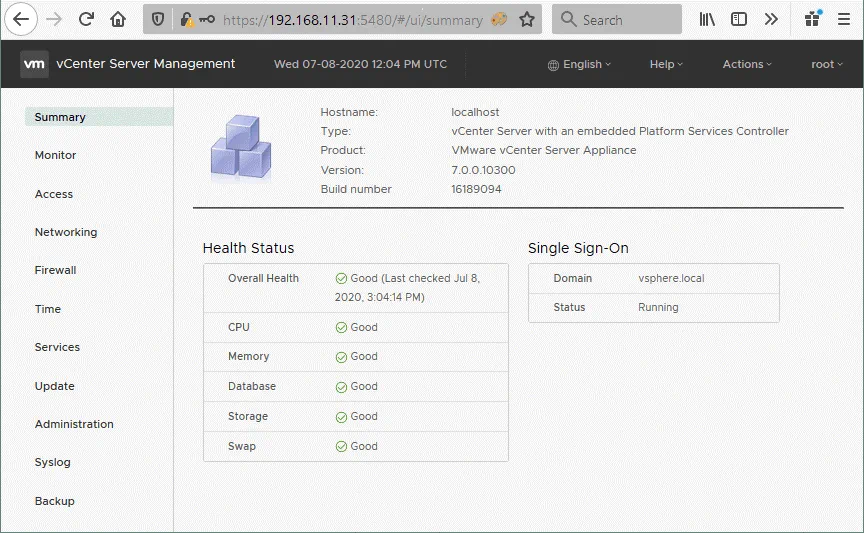
Let’s use the link displayed in the direct console (https://192.168.11.3.1:5480) to open the web interface of the VCSA. You have to enter a username (root by default) and password to log in.
The vCenter Server Management page allows you to configure basic settings such as status of services, time zone, firewall, network settings, and access settings.
Go to Administration, click Edit, and edit the password expiration settings. You can disable password expiration to avoid issues after the password expires and the need to reset the password then.
5. Configuring the vSphere 7 Environment
Once you have ESXi, configured the ESXi hosts, and deployed and configured vCenter, you can go on to configure the vSphere environment, create VMs and use diverse vSphere 7 features.
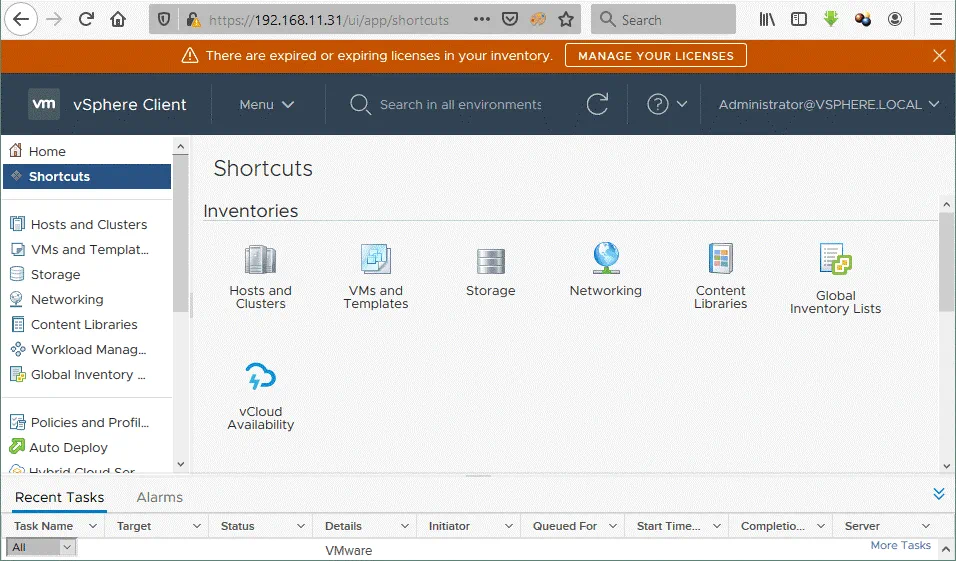
Enter the IP address of your vCenter Server in a web browser. In our case, we use https://192.168.11.31 to open vSphere Client. Note that in vSphere 7 only HTML5 vSphere Client is available (Flash-based Web Client has been deprecated).
Enter your username and password to log in.
administrator@vsphere.local
After connecting to vCenter and opening vSphere Client, a notification about the license is displayed. You can use vCenter and ESXi hosts in a full-featured trial mode for a 60-day period. A set of features from the vSphere 7 Enterprise Plus license is available during the evaluation period. If you have license keys, enter a key for vCenter and then enter a key for ESXi hosts. The keys for vCenter and ESXi are different. Note that the licensing model for vSphere 7 was slightly changed in comparison with the vSphere 6 licensing model and serial numbers from vSphere 6 are not compatible with vSphere 7. Hosts running the ESXi Free Edition cannot be managed by vCenter.
Click Hosts and clusters to start configuring the inventory.
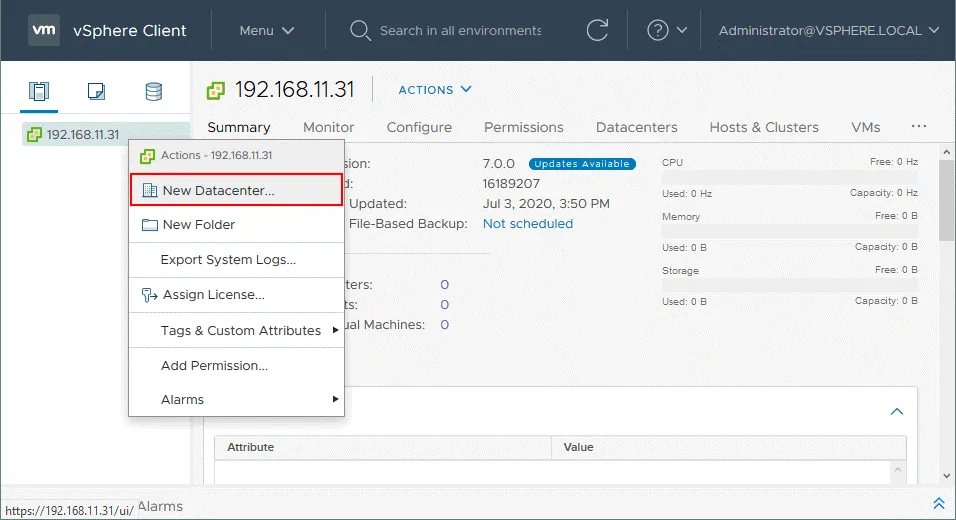
5.1. Creating a datacenter
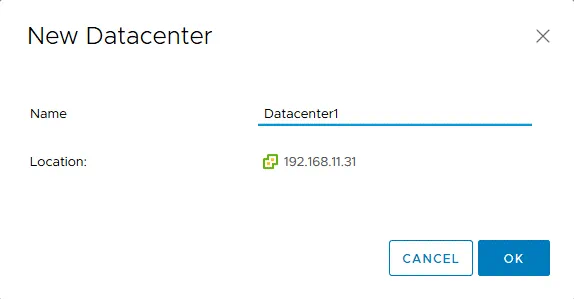
First you have to create a datacenter. A datacenter is a logical container used to organize ESXi hosts, clusters and virtual machines. Right click the vCenter server (192.168.11.31 in our case) and click New Datacenter in the menu that opens.
Enter a datacenter name, for example, Datacenter1.
5.2. Adding ESXi hosts
Once the datacenter is created, you have to add ESXi hosts to the datacenter.
Right click the datacenter name and in the menu that opens click Add Host.
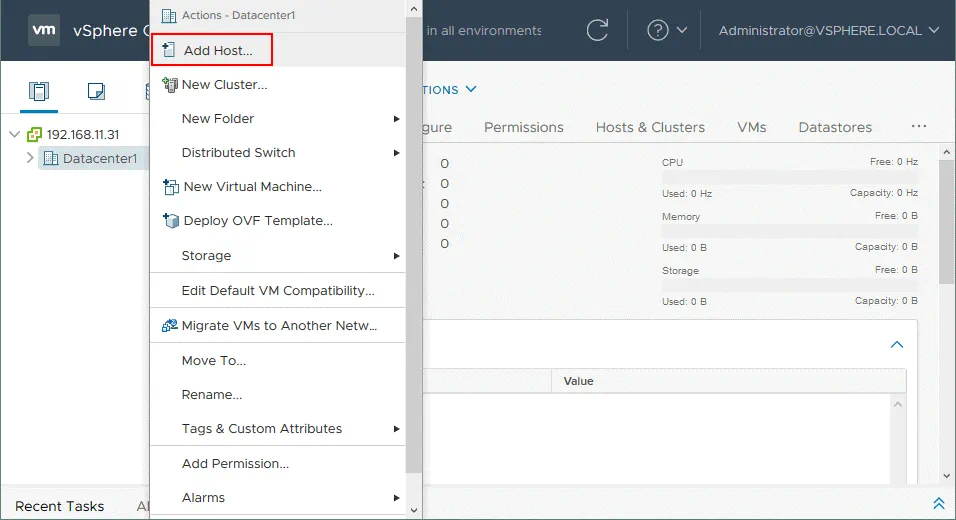
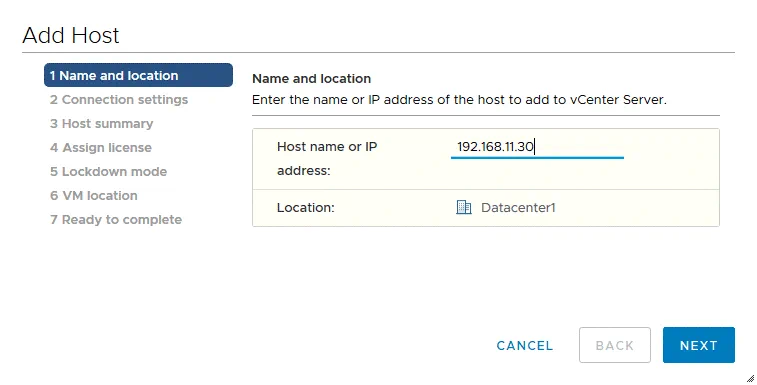
The Add Host wizard opens.
1. Name and location. Enter the IP address of the ESXi host you want to add. We are adding the ESXi host with IP address 192.168.11.30. Hit Next at each step of the wizard to continue.
2. Connection settings. Enter a user name and password to access the ESXi host that must be added.
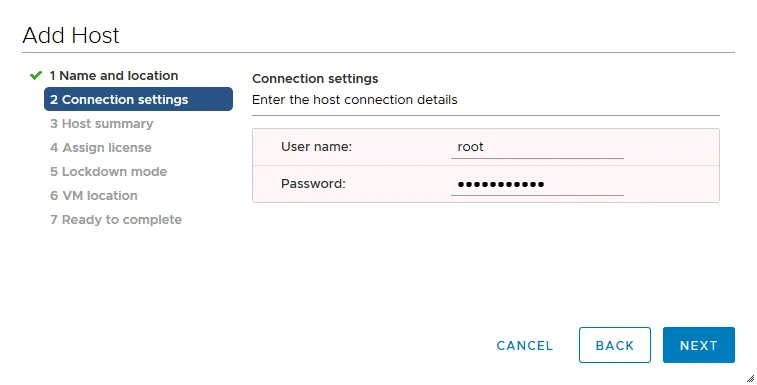
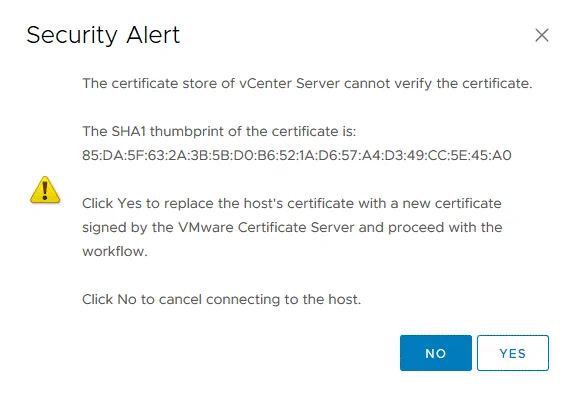
If a certificate security alert is displayed, hit Yes to continue.
3. Host summary. Check the ESXi host summary and continue.

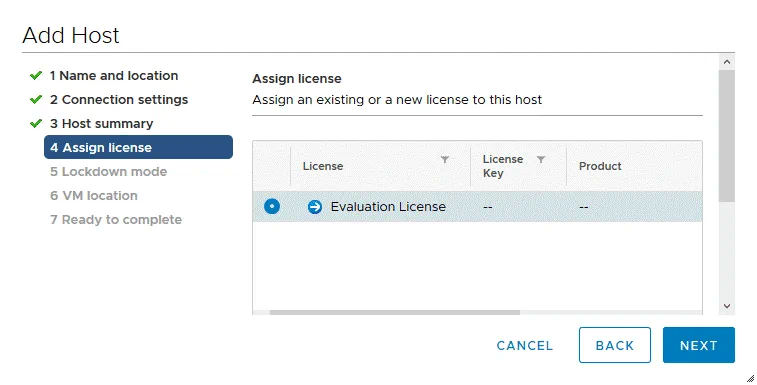
4. Assign license. Enter the serial number for vSphere 7 if you have one. Otherwise, the evaluation mode will be preserved.
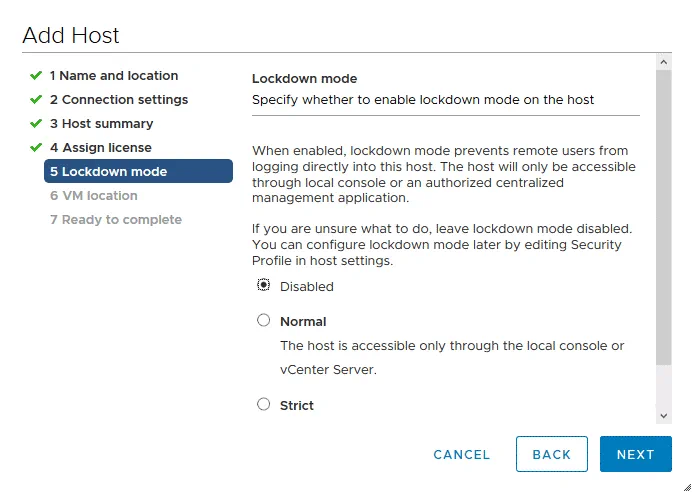
5. Lockdown mode. Leave the lockdown mode disabled for being able to connect to an ESXi host directly bypassing vCenter. When the lockdown mode is disabled you can connect to an ESXi host by using VMware Host Client for management even if a vCenter machine is down.
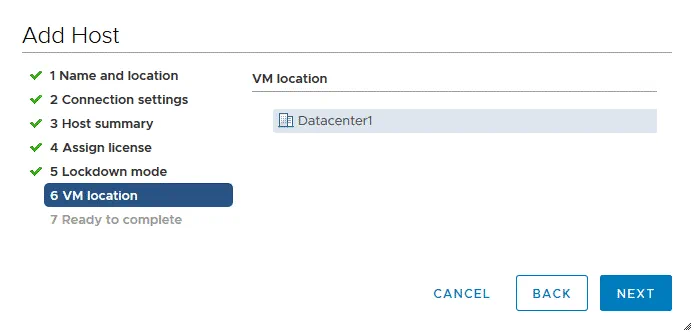
6. VM location. Select a datacenter for VM location (Datacenter1 is used in this case).
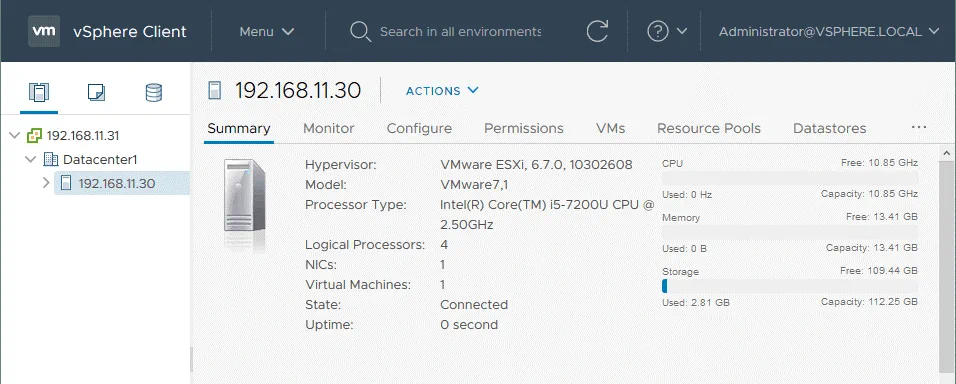
7. Ready to complete. Review settings and hit Finish.
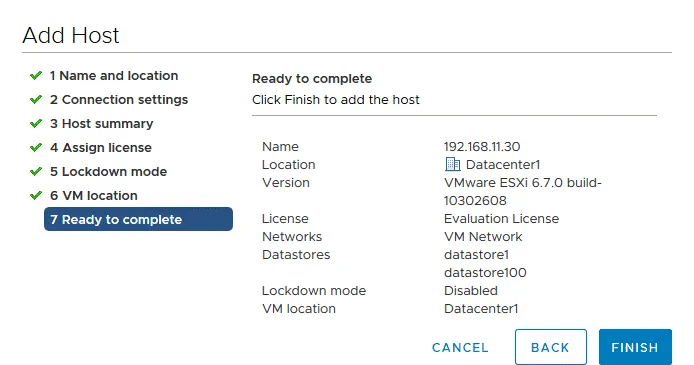
Now one ESXi host is added to the vCenter inventory. In our example, the vCenter VM is running on 192.168.11.30 (the IP address/name of the ESXi host).
Similarly add the second ESXi host to the vCenter inventory (192.168.11.27) in our case.
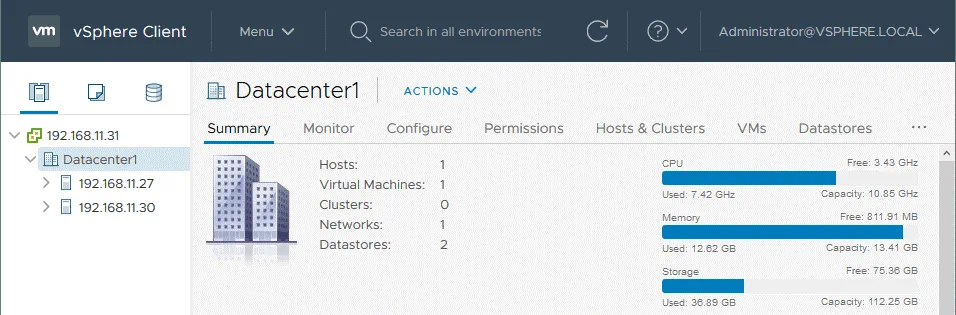
Now we can create virtual machines on 192.168.11.27 and other ESXi hosts that are added to vCenter. Read also about VMware vApps and VMware VM templates that can make your life easier when you need to deploy a high number of similar VMs.
Conclusion
This blog post has covered vSphere installation and setup for vSphere version 7. You need to install ESXi on servers, deploy vCenter Server Appliance as a virtual machine for centralized management of ESXi hosts, and then perform the final configuration of your VMware vSphere environment. The main difference between deploying vSphere 7 and vSphere 6 is that vCenter must be installed only as vCenter Server Appliance (VCSA), that is as a virtual machine based on a Photon OS (a special modification of Linux made by VMware), and vCenter 7 cannot be installed on a Windows machine.
Regardless of the vSphere version, backup for VMware vSphere is a must. NAKIVO Backup & Replication supports VMware vSphere 7 and can protect your VMs even if they are running in a cluster and with Fault Tolerance enabled.