How to Set Up Network File Sharing in Windows
When having more than one computer in a local area network (LAN), you may need to make files stored on one computer accessible on another computer over the network. In this case, you can share a folder in Windows using the SMB protocol. Note that the workflow is the same for sharing folders in Windows versions 7, 8, and 11.
Preparing for Windows 10 Data Sharing
Before we create a shared folder and configure access, let’s briefly go over the main steps:
- Enable file and printer sharing; ensure that the firewall doesn’t block the SMB connections.
- Define which users must have access and create user accounts if needed.
- Share a folder and set permissions at the SMB protocol level and file system level.
- Access the shared folder from another computer over the network.
- Map a shared folder as a network drive and configure other settings if needed.
Requirements
The requirements to share a folder are:
- NTFS is the recommended file system. FAT32 has limitations for settings permissions (the Security tab is missing in folder properties when using FAT32).
- TCP ports 445, 139, 138, and 137 must be open.
- You must have enough Windows permissions for your user account to change the folder properties.
The setup
In this walkthrough, we will use Windows 10 Professional Edition (Build 19042):
- Computer name: Computer10
- IP address: 192.168.101.212
- All computers are located in the same subnet (192.168.101.0/24).
- All computers are not members of an Active Directory domain, and the network type is classified as Workgroup.
Tuning the Network Settings on Windows 10
First, we need to enable file and printer sharing in Windows 10 network settings. These settings are related to the firewall configuration.
- Go to
Control Panel > Network and Internet > Network and Sharing Center
or
Control Panel > All Control Panel Items > Network and Sharing Center.
Alternatively, you can open this window with the command:
control /name Microsoft.NetworkAndSharingCenter - Click Change advanced sharing settings in the left pane. As an alternative, you can use the command:
control.exe /name Microsoft.NetworkAndSharingCenter /page Advanced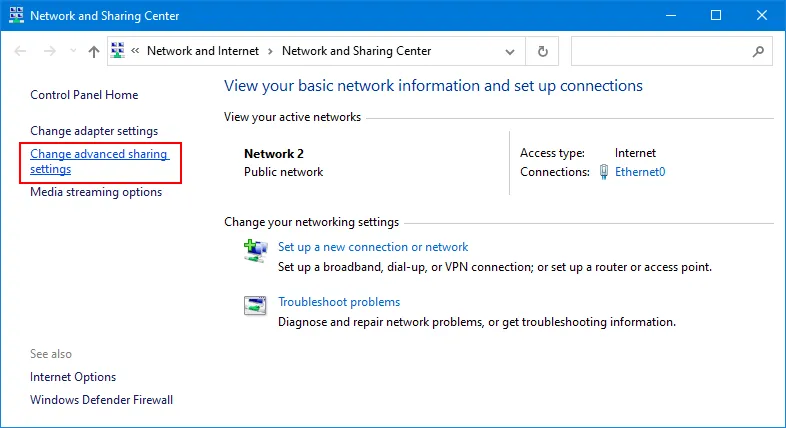
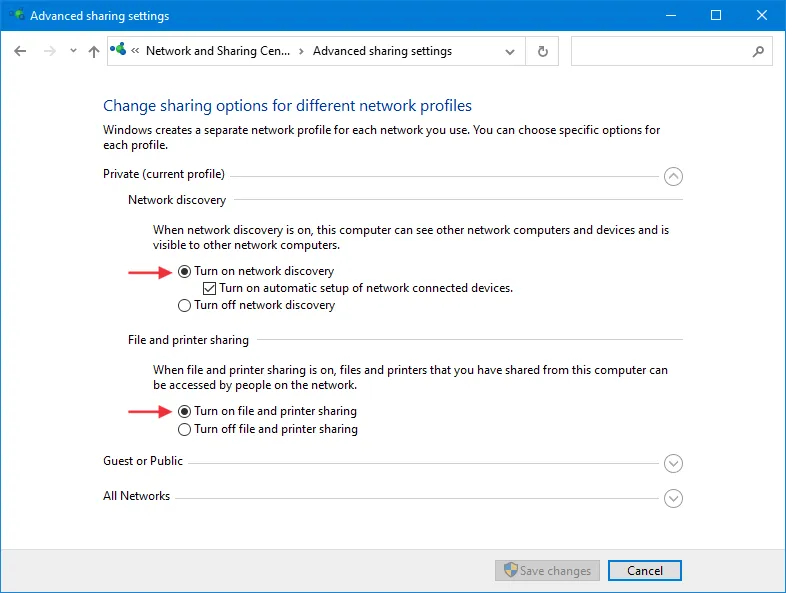
- We are on the Advanced sharing settings page with settings for network profiles and for all networks (see the screenshot below).
A network profile is a preset with special security, firewall, and network sharing settings in Windows for the network connection.
A network profile in Windows 10 can be private, public, and domain (if a computer is a domain member).A network profile must be Private to share a folder in Windows 10 and newer Windows versions. If you need to change a network profile, read how to do this at the end of this section.
- Select your private profile which must be the current profile and select the following options:
- Turn on network discovery
- Turn on File and printer sharing
After setting these options, other computers in the network can ping your computer and access shared folders.
- Configure the above settings on both computers: Windows acting as an SMB server and Windows acting as an SMB client.
- SMB server is a computer on which a folder is shared.
- SMB client is a computer that connects to an SMB share via the network.
How to change the network profile
Follow these steps to change the network profile in Windows 10 and prepare for setting up network sharing.
- Click Start > Settings > Network & Internet.
- Select your network adapter and click Properties.
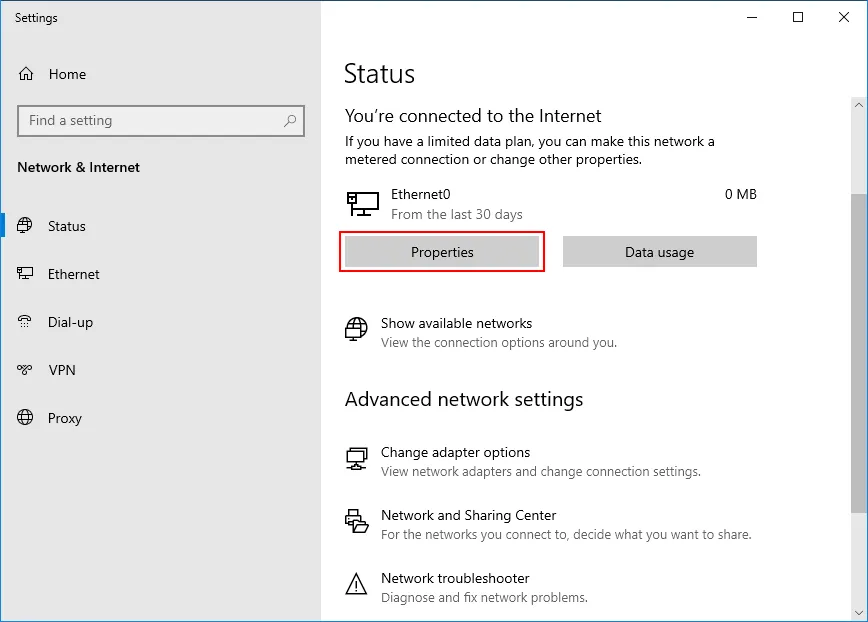
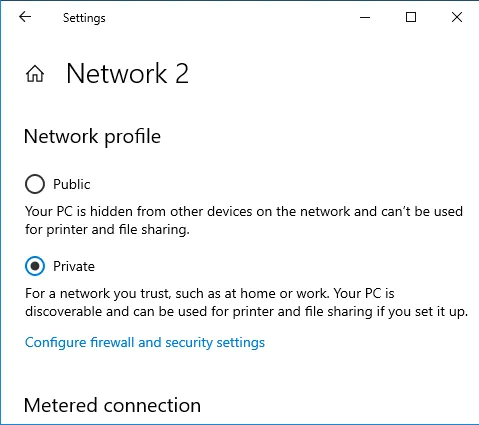
- Select the needed network profile in the opened window (Private in this case).
Creating Users for File Sharing
Providing credentials of your Windows user account to other people is not a good idea. Based on best practices, it’s recommended that you create special user accounts in Windows 10 and set the needed access level for these accounts to share a folder. There are various settings to create users and groups in Windows 10 Professional edition.
- Right-click My computer or This PC icon and click Manage in the context menu. You can also open this window by running the command in the command line (CMD):
compmgmt.msc
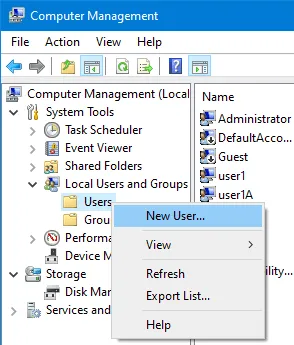
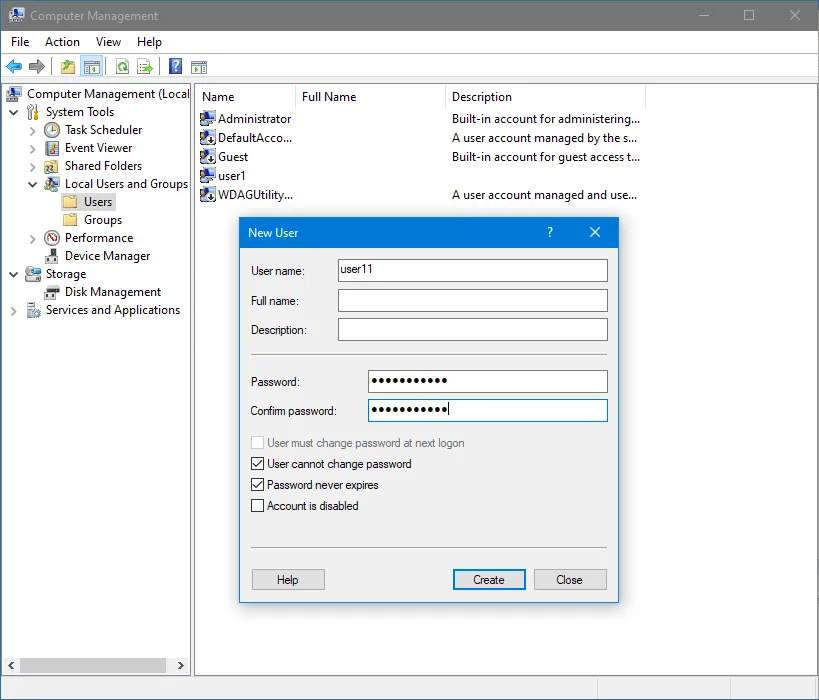
- In the left pane of the Computer Management window, click Local Users and Groups and select Users. Right-click Users and select New User to create a new user.
- Enter a username, set the password, and select the account options.
We create user11, user12, user13, and user14 here. By default, these users are members of the Users group.
Creating a group
To share a folder with the same permissions for multiple users who must use different credentials, it is more convenient to create a group, add the needed users to the group, and share a folder with this group.
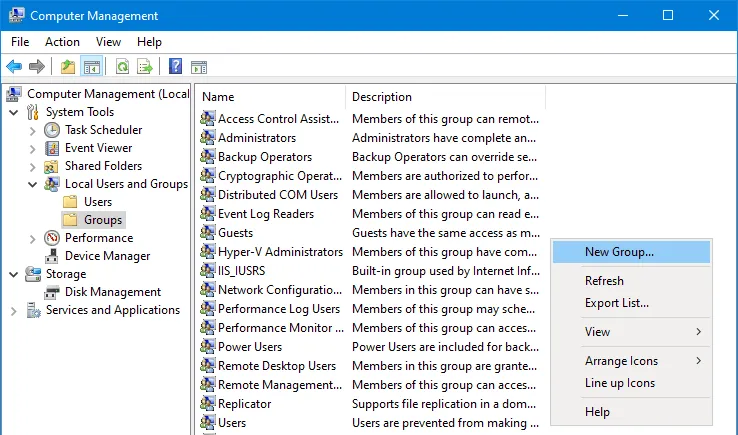
- Go to Local Users and Groups in the Computer Management window. Right-click Groups (or the empty place in the Groups pane) and click New Group in the context menu.
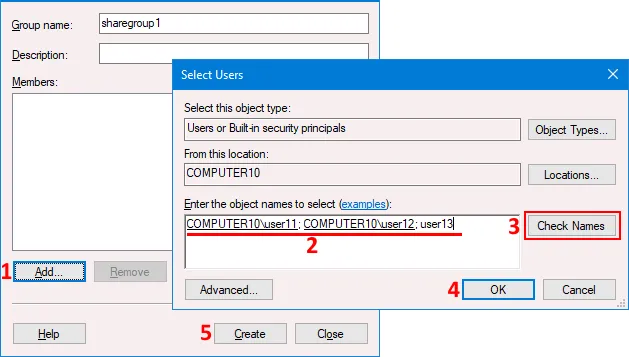
- Enter a group name, for example, sharegroup1. Click Add to add users to the group (see the screenshot below).
We add three users (that were created before) to this group – user11, user12, and user13.
- Enter the username and click Check names. If the username is correct, the full username is underlined in the ComputerName\UserName format. You can use a semicolon and add multiple users in this window by checking each one after typing a username. Once done, click OK to finish adding users and close this window.
- Click Create to finish creating a group and get ready for setting up network sharing.
All preparation steps have been completed. Network settings are configured, users and groups are created. Now we can share a folder in Windows 10.
How to Share a Folder in Windows
To share a folder in Windows 7, 8, 10, or 11, do the following:
- Right-click the folder you want to share (in this example, the folder is share01). Then click Properties in the context menu.

- The folder Properties window is opened.
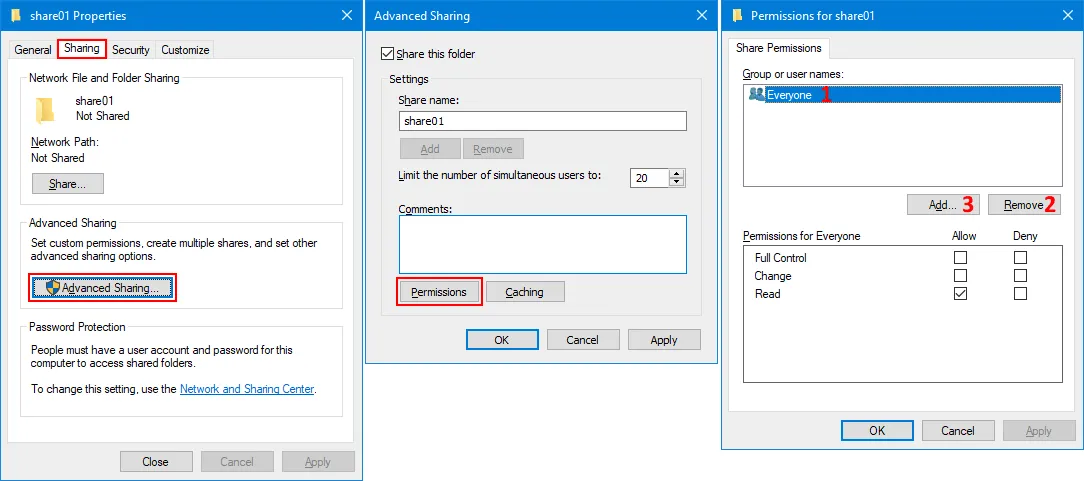
- Select the Sharing tab and click Advanced Sharing. According to Windows sharing best practices, it is recommended that you use advanced sharing settings instead of simple sharing using the Share button. Advanced sharing settings provide the maximum flexibility for Windows 10 data sharing (and for other Windows versions).
- In the Advanced Sharing window, select the Share this folder checkbox.
- Enter/edit a share name (share01 in our case).
- Click Permissions to set permissions for users and groups at the SMB level.
- By default, read-only access is granted to Everyone. This is not the configuration we want to have. Select Everyone and click Remove.
Note: If Everyone is selected in Share Permissions, access can be limited in the NTFS security permissions of the Security tab explained below after configuring Share Permissions.
Click Add to add the needed user or group with whom you want to share the folder.
- Select Users or Groups. Enter a group name or a username and click Check Names. If you have entered a name correctly, the user or group name is underlined and displayed in the ComputerName\UserName format. We added sharegroup1 and user14 to share a folder with them. Click OK to save settings and close the window.

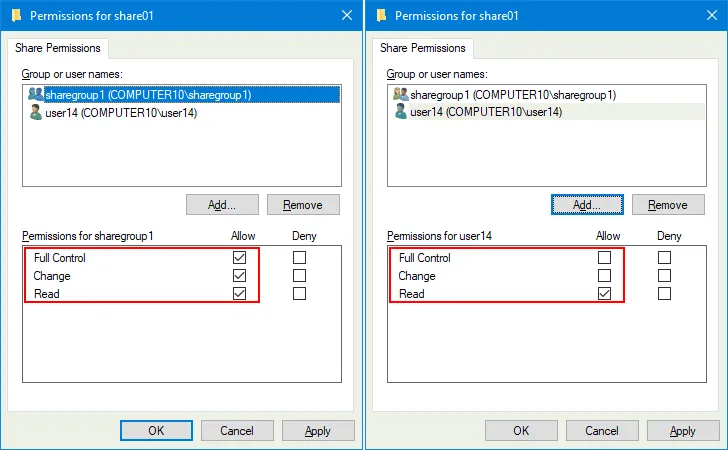
- We are back to the folder Permissions window. Let’s set the permissions for the group and the user we have added. We select sharegroup1 and click Full Control to grant full access to this group, including user11, user12, and user13, who are members of this group. We select user14, who is not a member of sharegroup1 and leave the Read permissions as is. Click OK to save the settings and close the window.
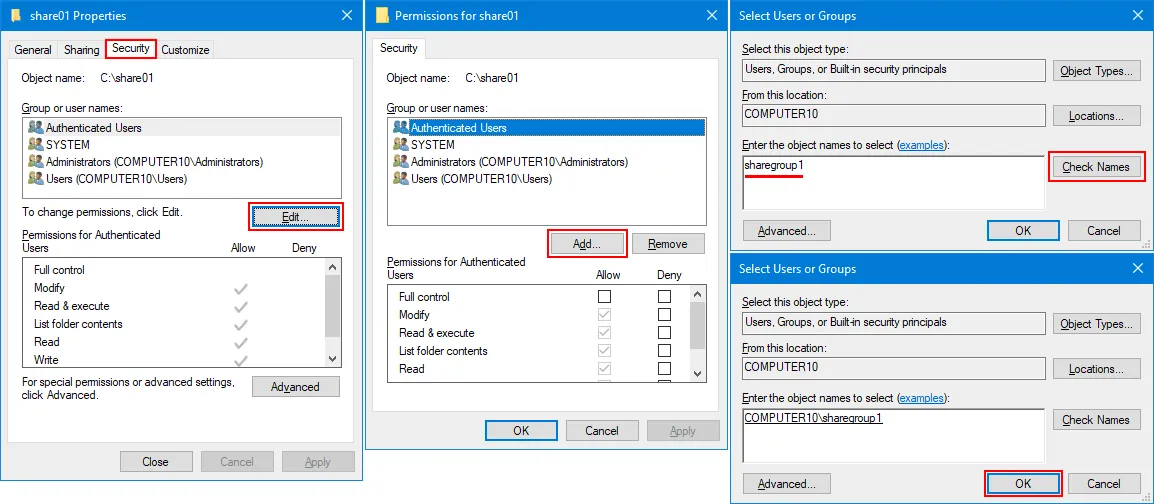
- We are back to the folder properties window. Select the Security tab and click Edit.
- The Permissions window (file system permissions) for the selected folder opens. Click Add to add a group or users to set permissions.
- Enter the name of a user or group, click Check Names, and click Add. We add sharegroup1 and user14 in our example.
- Going back to the Permissions window of the shared folder, we select sharegroup1 and select Full Control to grant full access to this folder. We also select user14 and leave default permissions for read-only access. Click OK to save settings, close the Permissions window, and go back to the folder properties window.
- You can see the list of permissions for users in the Security tab of the folder properties window. Click Close.

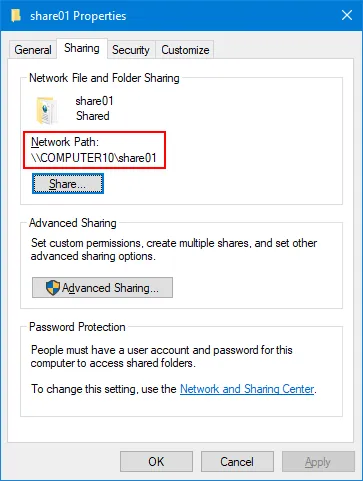
- The network path to the shared folder is displayed in the folder properties window. Remember that you can use an IP address instead of a computer name if entering a path using the computer name doesn’t work. You can hit OK and close this window.
- The folder has been shared successfully. Try to access the shared folder from another computer. We explain how to access a file share below in this article.
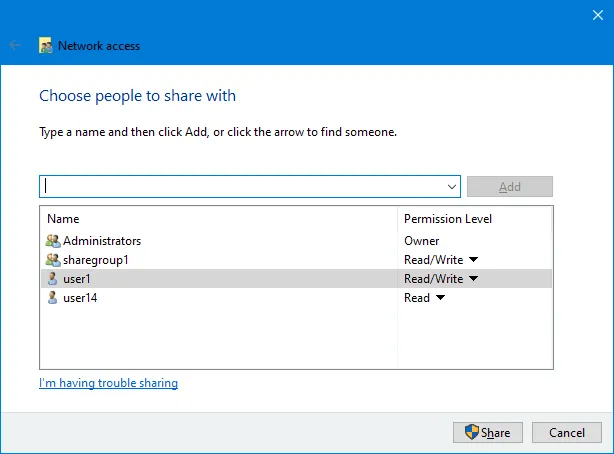
Note: We use advanced sharing and not simple sharing because the options to configure are limited with simple sharing. In the screenshot below, you can see how simple sharing settings look after we configured Windows 10 data sharing via SMB. Moreover, using advanced sharing settings allows you to understand how to share a folder in Windows 10 and general file sharing principles better.
The alternative sharing method
The alternative method to share a folder in Windows 7, 8, 10, or 11 is using a Shared Folders snap-in fsmgmt.msc. You can also follow the steps below to find this snap-in:
- Right-click My Computer and hit Manage.
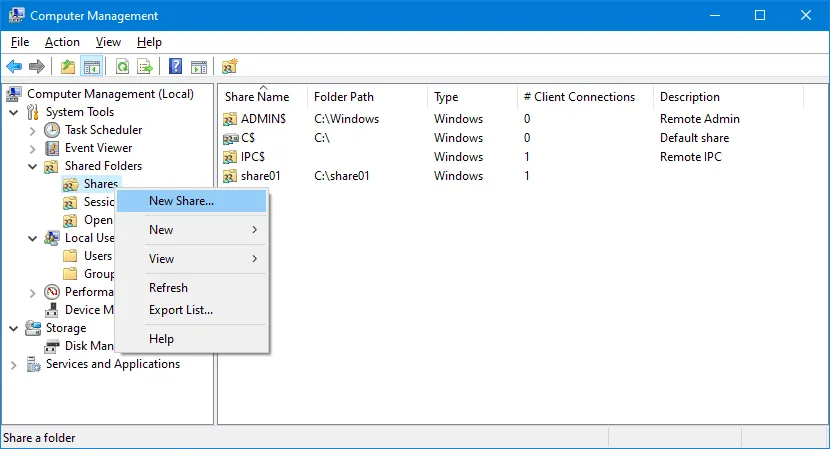
- In the Computer Management window, go to System Tools > Shared Folders.
- Right-click Shares and in the context menu, click New Share.
- Follow the intuitive wizard and configure the needed options as we did above.
You can also check shared folders, opened sessions, and opened files in this snap-in, as well as manage existing shares and disable file sharing.
Connecting to a Shared Folder
To connect to a shared folder from a Windows 10 computer over the network, do the following:
- Open My Computer (This PC) or open a new window in Windows Explorer.
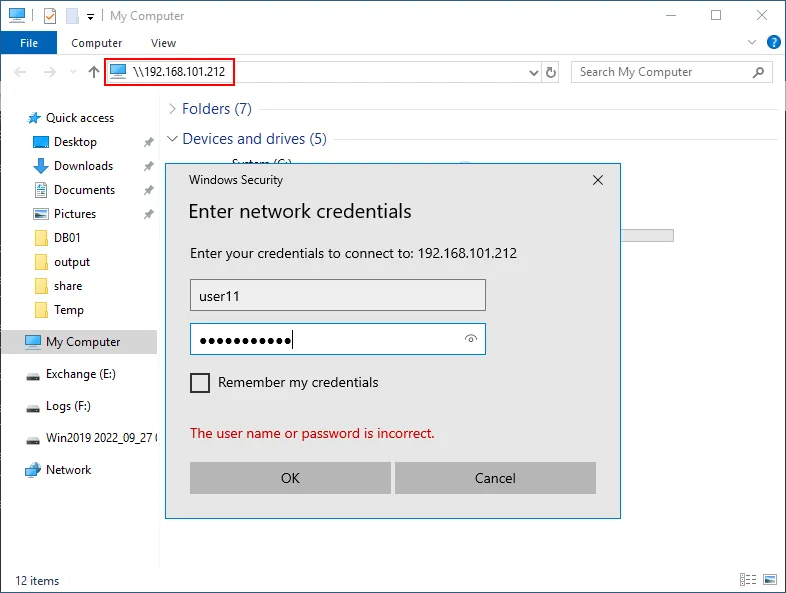
- Enter an IP address or the hostname (DNS name) of a machine with a shared folder to which you want to connect. For example:
- \\192.168.101.212
- \\Computer10
You can enter the full network path to a shared folder known as UNC path, such as:
- \\192.168.101.212\share01
- \\Computer10\share01
This method can be useful because sometimes a list of shared folders cannot be browsed on a remote SMB server.
How to map a network drive in Windows 10
We have explained how to access shared folder in Windows 10 in a general way. For more convenience, you can map a remote shared folder as a network drive that will be displayed in Windows Explorer permanently (until you remove this drive). This method also works for other Windows versions.
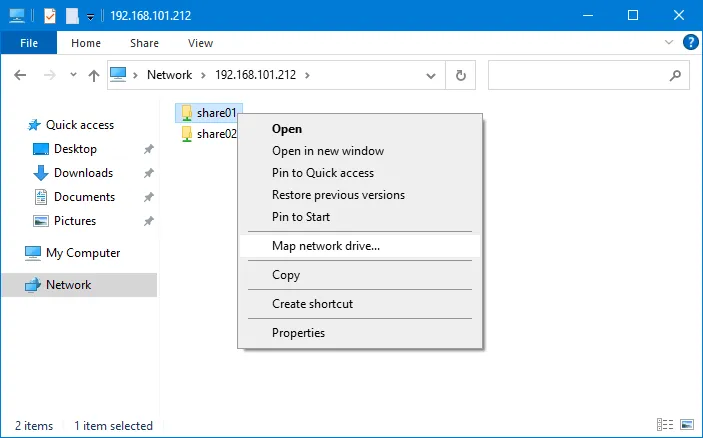
- Right-click a shared folder after you have accessed a remote computer with a shared folder.
- Click Map network drive.
- Select a letter for a network drive, select Reconnect at sign-in and finish.
How to Connect to a Shared Folder Without a Password
By default, all shared folders are protected by a password for specific users. However, there is a secure method for users to access a shared folder from their Windows computers without entering a password each time. The conditions are the following:
- The username on the computer where the shared folder is stored must be the same as the username on the remote computer from which a user connects to the shared folder.
- The password for this user account must be the same on both Windows machines (that act as SMB server and SMB client).
- The user must be logged in to Windows (SMB client) under the account whose name and password are the same as those on Windows where the folder is shared (SMB server).
Let’s use an example to illustrate this. For example, we have two computers:
Computer 1 parameters:
- Computer name: Computer1
- Username: User1
- User password: Password1
Computer 2 parameters:
- Computer name: Computer2
- Username: User1
- User password: Password1
Create User1 on Computer1 and User1 on Computer2. The password for User1 on Computer1 must be the same as the one for User1 on Computer2 (Password1 in this example).
After completing this configuration, User1 can access the shared folder on Computer1 from Computer2 without entering a password, but the connection is password-protected. The user must be logged in to Windows on Computer2 as User1. This approach is classified as a best practice when users need to access a shared folder without entering a password.
Risks of connecting without a password
By default, users on remote computers cannot access a file share if they don’t enter a password or if their account doesn’t have a password. This is for security reasons. However, you can configure Windows shared folders to access them without passwords. Be aware that setting up network sharing without passwords is not secure and has high risks to your data.
The information below is provided for educational purposes, as these settings go against the best practices of Windows file sharing and should not be used. Opt for the approach explained above with the same passwords for user accounts if you don’t want to enter a password when accessing a file share. Even if all users in your local network are trusted users, somebody can illegally access your network, for example, by connecting to the network via Wi-Fi and gain access to your data.
Below you can see the settings that make it possible to connect to a file share without a password at all.
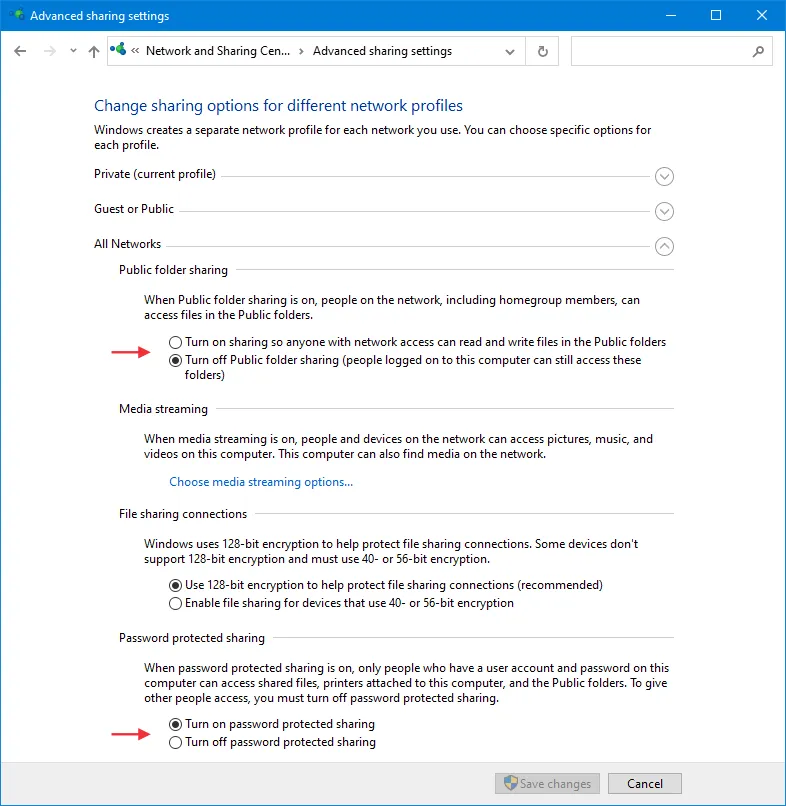
In Advanced sharing settings > All networks, you can see two options that enable access without passwords:
- Turn on sharing so anyone with network access can read and write files in the Public folders
- Turn off password protected sharing
In addition to that, there is a group policy responsible for access to a shared folder without a password.
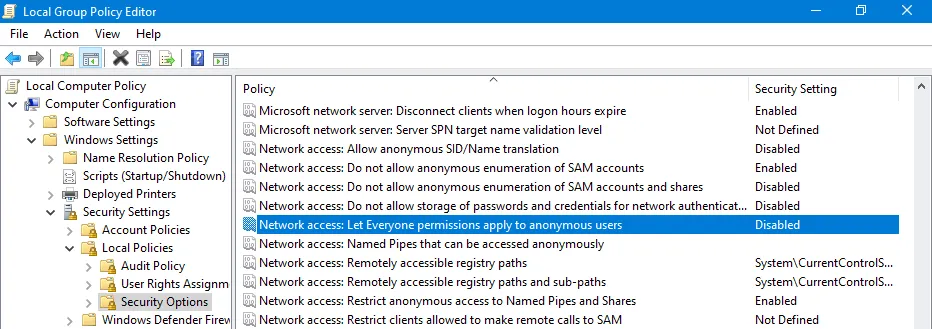
You can find this policy in the group policy editor (gpedit.msc) in Windows Settings > Security Settings > Local Policies > Security Options. The policy name is: Network access: Let Everyone permissions apply to anonymous users
If this policy is Enabled, then users can access a Windows shared folder without a password.
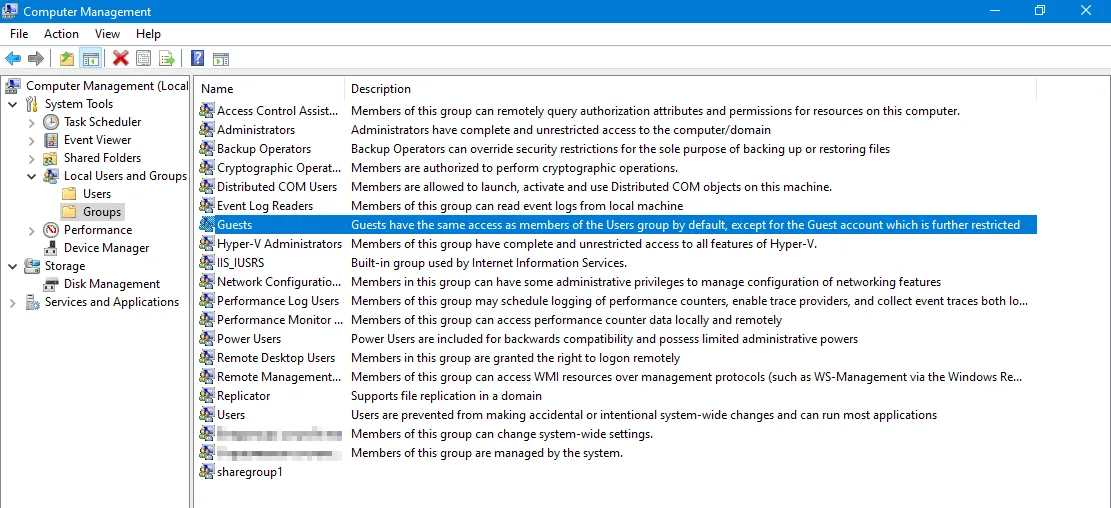
What is a guest user?
Guest is a built-in Windows user with limited privileges that can be used to access particular resources on a Windows machine. A guest user account can play a role in file sharing and providing anonymous access to a shared folder. When enabling anonymous access to shared folders, users can access the appropriate shared folder as a guest user without entering credentials.
Enabling anonymous access to shared folders using a guest user account widens the attack surface. Malicious actors or unauthorized users can attempt to exploit vulnerabilities in the guest user account or in the file sharing configuration to gain unauthorized access to the system or sensitive data.
By default, Guest is disabled for security reasons.
How to add Guest on Windows 10
It is impossible to enable or create a guest account in Windows 10 build 10159 and newer because Microsoft removed this option. You can create only a standard local user account with manually set permissions, but not a special guest account as it was in Windows 7, Windows XP, and earlier versions (it’s even not possible in the command line and by editing group policies).
How to Enable SMB 1.0 in Windows 10
Windows 10 uses SMB 3.1 by default to share folders (SMB server) and access shared folders on remote machines (SMB client). If you share a folder in Windows 10 and try to connect to this shared folder from Windows XP, for example, you will get an error because Windows XP uses SMB 1.0 and SMB 1.0 is disabled in Windows 10 by default for security reasons.
Note: Ransomware such as WannaCry and NotPetya used EternalBlue and EternalRomance exploits related to the SMB 1.0 protocol vulnerabilities to attack computers and corrupt data. After that, Microsoft released security patches for all Windows operating systems starting from Windows XP. There are also EternalChampion, EternalSynergy, and EternalRocks exploits for the SMB v1 protocol used by ransomware.
Learn more about CIFS and other SMB versions and read about the differences between SMB and NFS.
You can check whether the appropriate version of the SMB protocol is enabled in Windows by using the PowerShell commands listed below.
- Check whether SMB v1 is enabled on Windows 10 and Windows 8.1:
Get-WindowsOptionalFeature -Online -FeatureName SMB1Protocolor
Dism /online /Get-Features /format:table | find "SMB1Protocol" - Check whether SMB v2 is enabled on Windows 10 and Windows 8.1:
Get-SmbServerConfiguration | Select EnableSMB2Protocol - Check whether SMB v1 is enabled on Windows 7
Get-Item HKLM:\SYSTEM\CurrentControlSet\Services\LanmanServer\Parameters | ForEach-Object {Get-ItemProperty $_.pspath} - Check whether SMB v2 is enabled on Windows 7
Get-ItemProperty HKLM:\SYSTEM\CurrentControlSet\Services\LanmanServer\Parameters | ForEach-Object {Get-ItemProperty $_.pspath}If the command returns True in the output, it means that the current SMB protocol version is enabled.
- Check whether SMBv1 and SMBv2 are enabled with a single command:
Get-SmbServerConfiguration | select "*enablesmb*"
To enable SMB 1.0 for an SMB server or client in Windows 10, do the following:
- Go to Control Panel > Programs and Features. Alternatively, you can press Win+R and run
appwiz.cplin the Run prompt or runappwiz.cplin the command line (CMD). - Click Turn Windows features on or off in the left pane. As an alternative, press Win+R and run
optionalfeaturesor runoptionalfeaturesin the command line (CMD).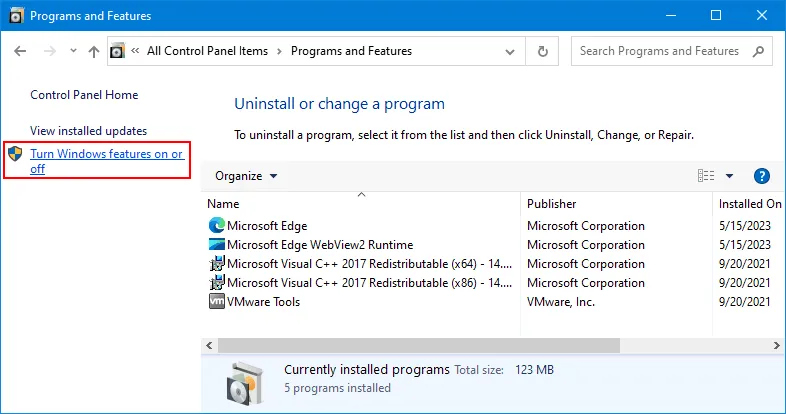
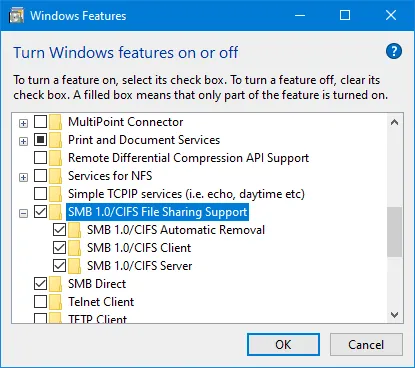
- Find SMB 1.0/CIFS File Sharing Support in the Windows Features window and select this checkbox if you want to select all related features. Note that Windows 10 version 1709 and newer includes the SMB 1.0 automatic removal feature that disables SMB 1.0 automatically for security reasons if it was not used in the last 15 days. You can select SMB 1.0/CIFS Client and/or SMB 1.0/CIFS Server only (deselect the Automatic Removal checkbox). Click OK to save the settings.
You can enable SMB 1.0/CIFS File Sharing Support in CMD:
Enable-WindowsOptionalFeature -Online -FeatureName SMB1Protocol
or
Set-SmbServerConfiguration -sEnableSMB1Protocol $true
or
Install-WindowsFeature FS-SMB1
Enable client only:
Enable-WindowsOptionalFeature -Online -FeatureName "SMB1Protocol-Client" -All
Enable SMB 1.0 server:
Enable-WindowsOptionalFeature -Online -FeatureName "SMB1Protocol-Server" -All
If, for some reason, you need to disable SMB 2 on Windows 10, you can edit the appropriate registry parameter or use the PowerShell command:
reg.exe add "HKLM\SYSTEM\CurrentControlSet\services\LanmanServer\Parameters" /v "SMB2" /t REG_DWORD /d "0" /f
sc.exe config lanmanworkstation depend= bowser/mrxsmb10/nsi
sc.exe config mrxsmb20 start=disabled
PowerShell -ExecutionPolicy Unrestricted
Set-SmbServerConfiguration -EnableSMB2Protocol $true
How to Resolve Common Windows Sharing Errors
This section explains common issues when Windows sharing is not working and provides tips on resolving them.
Windows cannot access \\hostname\share
Windows cannot access \\hostname\share
You do not have permission to access \\hostname\share. Contact your network administrator to request access.
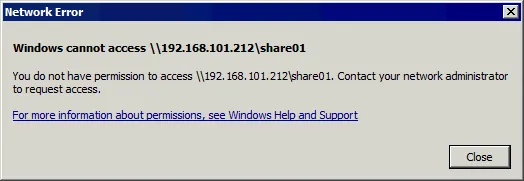
If you see this error message, it can mean that a user has not been added to the list of users in the sharing settings of the shared folder or that there are no permissions to access this share for this user. Edit sharing settings of the folder, add the needed user, and set the appropriate permissions.
- You can also check SMB sharing permissions and NTFS security permissions with the appropriate PowerShell commands:
Get-SmbShareAccess -Name "share01"get-acl C:\share01\ |flUse the appropriate share name and path to the shared folder in the above commands because they may be different in your case.
- Check whether a user name is entered correctly and check usernames on the machine that acts as the SMB server.
- Delete saved passwords in Windows Credential Manager. If a password was saved and then was changed, issues may occur. You can find Credential Manager in Control Panel:
Control Panel\User Accounts\Credential Manager
The alternative way is to run the command to open the classic Credential Manager:
rundll32.exe keymgr.dll,KRShowKeyMgr - Check the TCP/IP NetBIOS Helper service status in the Services snap-in of the Computer Management window (services.msc). You may need to start this service.
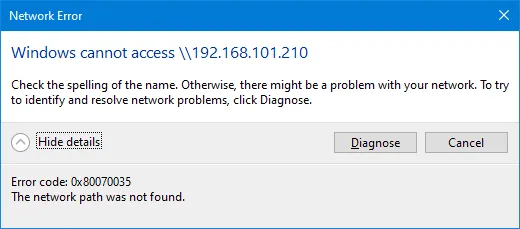
Error 0x80070035
Windows cannot access \\sharename
Check the spelling of the name. Otherwise, there might be a problem with your network.
Error code: 0x80070035.
The network path was not found.
Fix 1
Check SMB protocol versions on the server and client sides. You may need to enable or disable the appropriate SMB versions.
Fix 2
A Server service can be stopped or disabled. This server is responsible for an SMB server in Windows for file sharing. Check the service state and start the service if it is not running.
Check whether the following Windows services are running on a machine with a shared folder:
- Function Discovery Resource Publication
- Function Discovery Provider Host
Fix 3
If anonymous (guest) access is used (that is not recommended, as we explained above), then check the following group policy.
Enable insecure guest logons
in
Computer Configuration > Administrative templates > Network > Lanman Workstation
We don’t recommend enabling this policy or enabling guest access for security reasons. If you use guest access anyway, then enabling this policy may fix the 0x80070035 error.
reg add HKLM\SYSTEM\CurrentControlSet\Services\LanmanWorkstation\Parameters /v AllowInsecureGuestAuth /t reg_dword /d 00000001 /f
The anonymous access error
An error occurred while reconnecting S: to
\\Computer\share
Microsoft Windows Network: You can’t access this shared folder because your organization’s security policies block unauthenticated guest access. These policies help protect your PC from unsafe or malicious devices on the network.
The error is reflected in the log of Event Viewer in Windows.
Log Name: Microsoft-Windows-SmbClient/Security Source: Microsoft-Windows-SMBClient Event ID: 31017
Rejected an insecure guest logon.
This error can be encountered on Windows 10 newer than build 1709 when trying to use anonymous access to a shared folder because anonymous (guest) access is disabled for SMB v1 for security reasons. SMB v1 and SMB v2 don’t use SMB signing and encryption that make the connection vulnerable.
The optimal solution is to configure a remote host with an SMB share to use SMB v3 on an SMB server. Disable anonymous (guest) access. If SMB v2 is the highest protocol version that can be used, configure access with authentication. Access with authentication is the best approach for setting up network sharing.
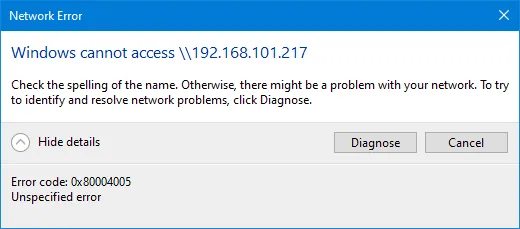
Error 0x80004005
This error can occur if SMB 1.0 is disabled on a client machine. See the information above about how to enable SMB 1.0 or configure an SMB server and SMB client to use SMB 3.0 or 3.1 on both sides.
Windows 10 connection limits
Maximum 20 concurrent connections for file and printer shares is the limit in Windows 7 and newer client Windows versions. It means that 20 users can connect to the file share at the same time. If user 21 connects to the file share while 20 users have already been connected, he/she will get an error.
Unlike Windows 10 and other client Windows versions, Windows Server 2019 (and other server versions) does not have a limit of concurrent connections to a shared folder. If you need to create a file server and share folders for many users, including domain users, consider configuring a file share on Windows Server 2019. Read also this NAS vs file server comparison.
Conclusion
Now you know how to share a folder in Windows 10 and other client Windows versions. You need to configure the firewall/security settings, create user accounts, and set SMB sharing permissions and NTFS file system permissions for the folder. Clients can connect to a shared folder using their credentials and map a shared folder as a network drive.
Remember to back up your files stored in shared folders. NAKIVO Backup & Replication supports backup to SMB file shares and NFS shares (including NAS).