Methods for Microsoft Exchange Data Recovery
Microsoft Exchange Server is a popular and reliable email server with excellent Outlook client compatibility, and it is widely used in organizations. Sometimes, email data can be lost, and an Exchange database can be corrupted. Fortunately, in many cases, it is possible to recover email data in Microsoft Exchange Server using native and third-party tools.
This blog post explains Exchange data recovery, including Exchange database recovery and Exchange mailbox recovery.

Basics of Exchange Data Recovery
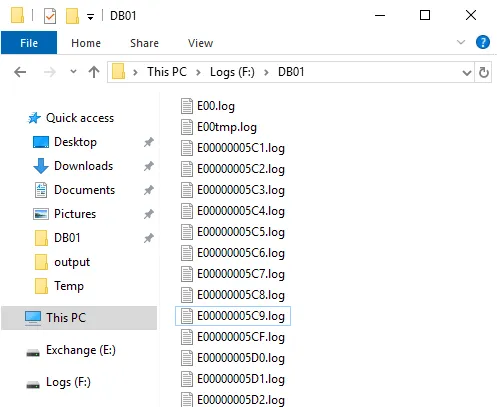
Microsoft Exchange Server stores all email data in databases. Databases are stored in .edb files. Another important component of an Exchange database is database transaction log files. Transaction logs are used for Exchange data recovery if a database was not shut down properly, and some transactions were not committed (for example, hard server power off caused by power loss). You can use these logs to replay uncommitted transactions to a database.
The default path for the Exchange database for Microsoft Exchange Server 2013, 2016, and 2019 is:
C:\Program Files\Microsoft\Exchange Server\V15\Mailbox\Exchange_Database_Name.edb
It is recommended that you store the Exchange Server database and its log files on separate volumes. We follow this approach in our example. There can be multiple databases used by a single Exchange instance on a server.
You can get information about Exchange Server in Exchange Management Shell (also known as Exchange Server PowerShell), which is a command line interface built on PowerShell. To open Exchange Management Shell run this command in the PowerShell console:
LaunchEMS
In the Windows GUI, go to:
Start > Microsoft Exchange Server 2016 > Exchange Management Shell
Then you can use this command to get information about Exchange Server:
Get-ExchangeServer
The more detailed command to find all Exchange databases and display their names, location, and log path:
Get-MailboxDatabase | Select Name,EdbFilePath,LogFolderPath

There are two main approaches to Exchange data recovery:
- Recovery from a backup
- Exchange database recovery or repairing without a backup
Let’s explore each of these two approaches.
Exchange Data Recovery with Windows Server Backup
Windows Server Backup is a native Windows data protection feature that you can use to back up data such as volumes, files, and folders of the machine running Windows Server. If Microsoft Exchange Server is installed on this Windows Server machine, the Exchange plugin for Windows Server Backup allows you to create an application-consistent (Exchange-aware) backup by using the VSS technology.
By default, the Windows Server Backup feature is disabled. You need to enable this feature to perform backup and Exchange data recovery.
Note: You must have an Exchange Server backup before you can go to Exchange data recovery. You must enable native Windows Server Backup when your Exchange Server is working properly before data loss occurs. If you don’t have a backup, enabling Windows Server Backup for Exchange does not help after an Exchange failure.
Enabling Windows Server Backup
You must enable the Windows Server Backup feature to use this native backup tool.
- Run the command to enable Windows Server Backup in PowerShell:
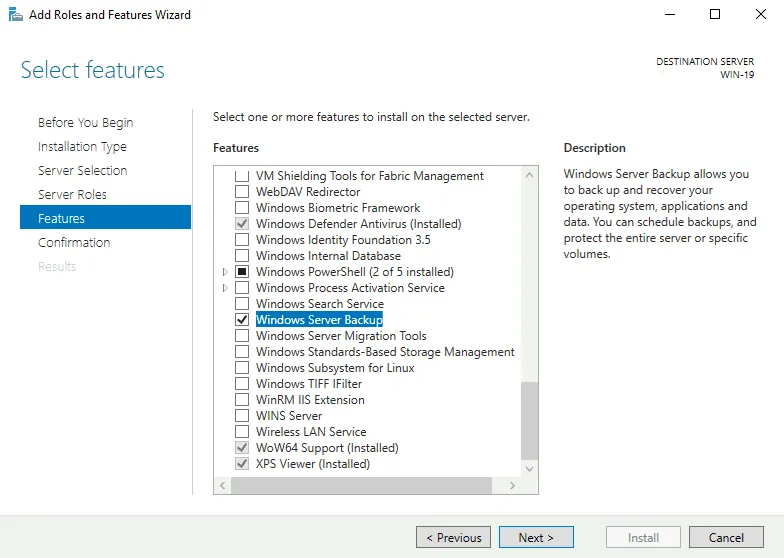
Install-WindowsFeature Windows-Server-BackupIf you prefer using the graphical user interface (GUI) in Windows Server, do the following:Open Server Manager. Click Manage > Add Roles and Features and follow the wizard. At the Features step of the wizard, select Windows Server Backup.
- Once Windows Server Backup has been enabled, run this tool from Server Manager:Server Manager > Tools > Windows Server Backup
 Now you can create a backup of Exchange Server and other Windows Server components.
Backing Up Exchange with Windows Server Backup
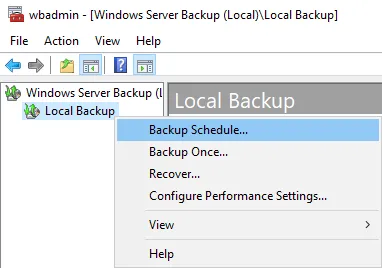
Right-click Local backup in the left pane of the main Windows Server Backup window and click Backup Schedule in the context menu.
The Backup Schedule Wizard opens.
- Getting Started. Read the information and click Next.
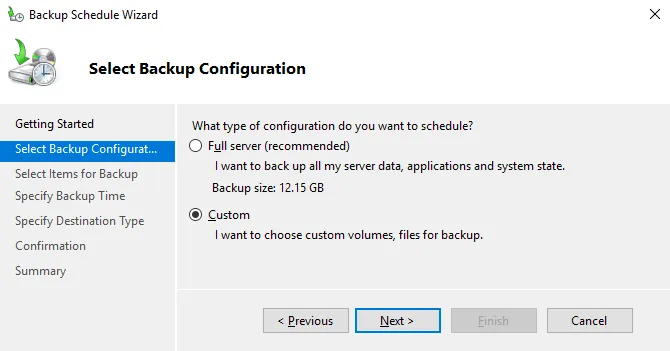
- Select Backup Configuration. Select Custom. Click Next at each step of the wizard to continue.
- Select Items for Backup. Select the volume (partition) with the Exchange Server database and the partition with Exchange database log files. It is important that you select a volume (volumes), and not files or folders. Otherwise, you can have issues during the Exchange data recovery process. In our example, .edb files are stored on E: and Exchange database log files are stored on F:Note: When backing up the Exchange Server database manually as specific files, dismount the database first.
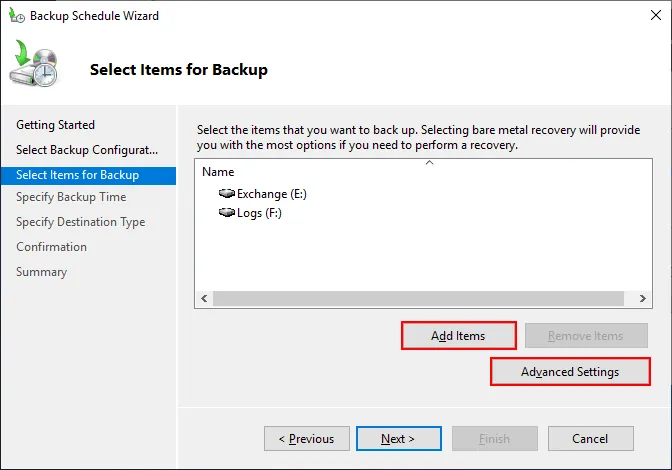 Click Advanced Settings. In the Advanced Settings window, select VSS full backup in the VSS Settings tab if you want to truncate Exchange database logs after creating a backup. If you want to preserve logs or you also use another backup application for Exchange backup, select VSS copy Backup.
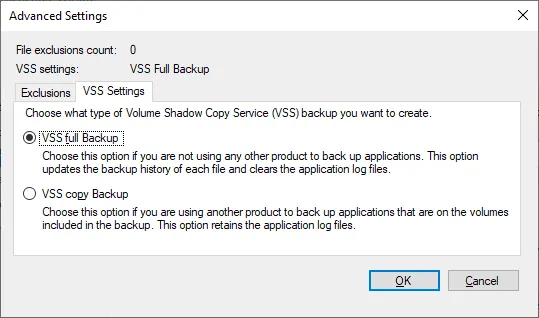
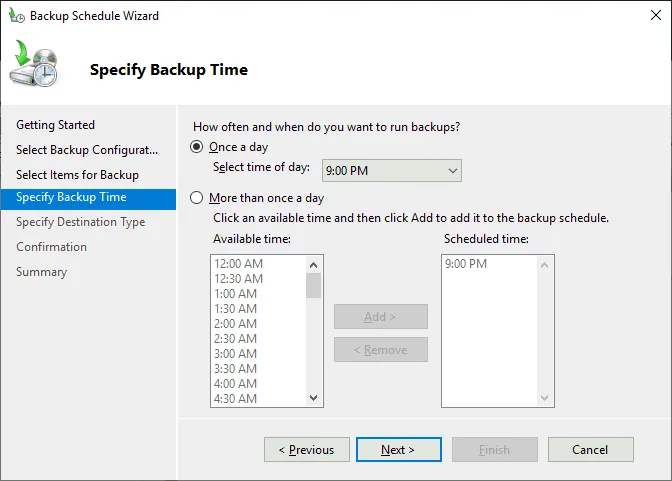
- Specify Backup Time. You can set the time for running a backup. This can be once a day or more frequently.
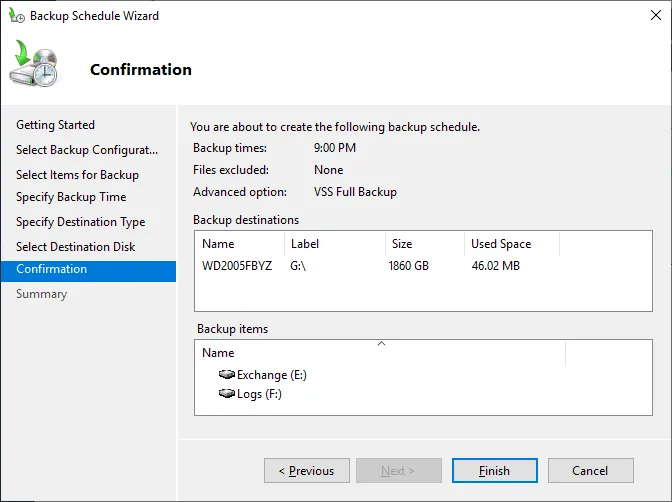
- Select Destination Disk. Select the disk where you want to store the Exchange Server backup. In our case, we use disk G:
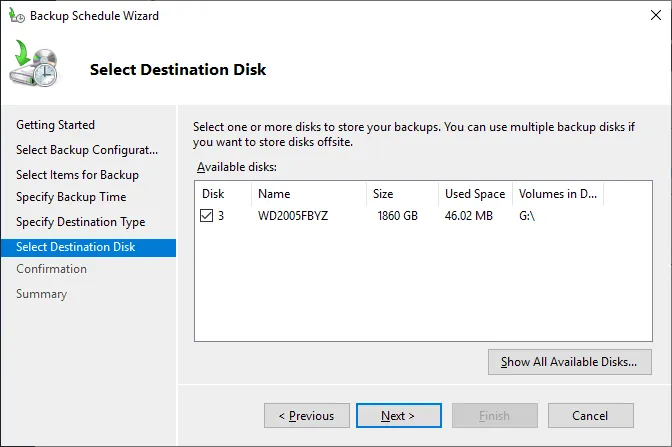
A message appears as a warning that all existing data on the selected disk will be deleted. Click Yes to continue.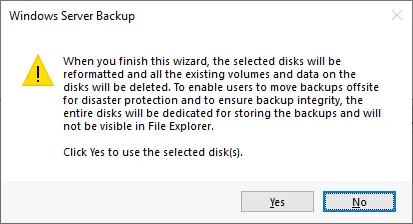
Note: Windows Server Backup saves volume backups in the VHDX virtual disk format on the selected disk/volume. If the size of the disk volume you’re backing up doesn’t exceed the maximum VHDX limits, there are no reasons to worry.
- Confirmation. Check the selected settings and click Finish.
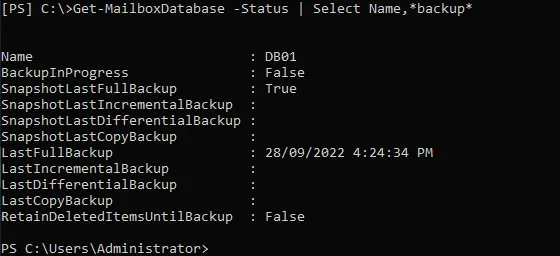
You can check the backup status of the Exchange Server database with the command:Get-MailboxDatabase -Status | Select Name,*backup*
Exchange data recovery from Windows Server Backup
When you have a backup, you can proceed with Exchange data recovery.
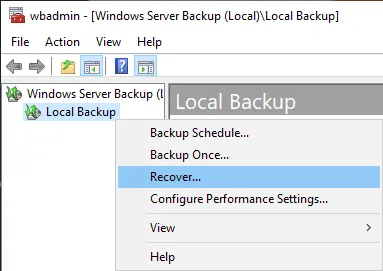
Open the Windows Server Backup window. Right-click Local Backup and in the context menu, click Recover.
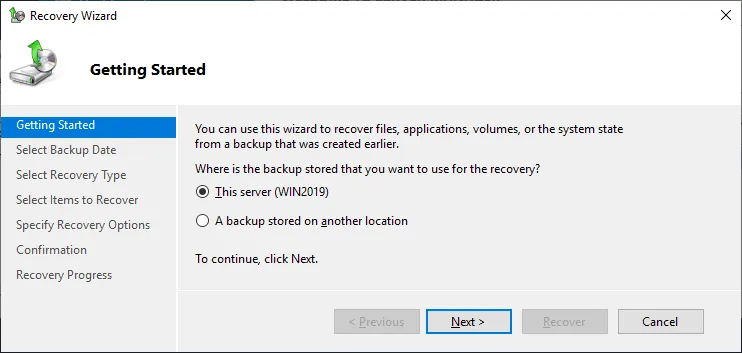
The Recovery Wizard opens.
- Getting Started. Select the location of the backup. We are storing our backup on this server and select the first option. Hit Next to continue.
- Select Backup Date. Select the needed backup date (that is, the recovery point), for example, the latest available backup.

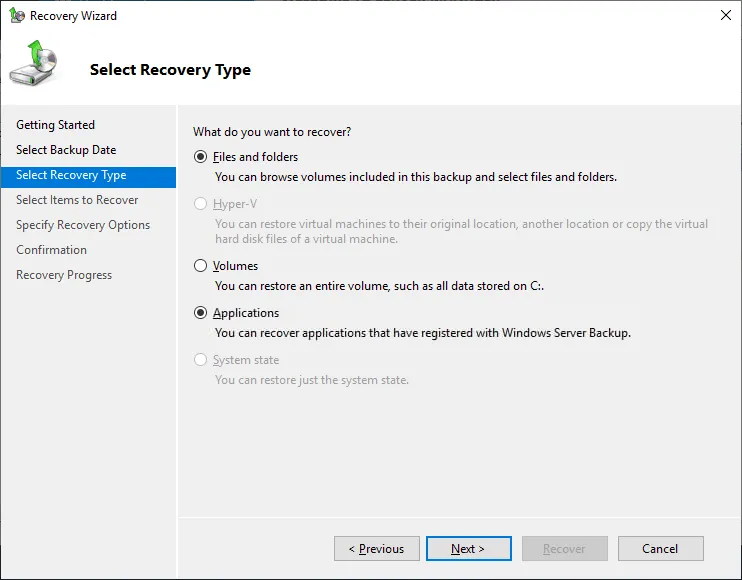
- Select Recovery Type. Select Applications. The Applications option may be inactive (grayed out) if you selected files or folders in the backup settings of Windows Server Backup instead of backing up volumes.Note: You can select Files and folders and recover .edb Exchange database files and logs to a custom location. Then you can use these files for the Exchange recovery database for Exchange data recovery.
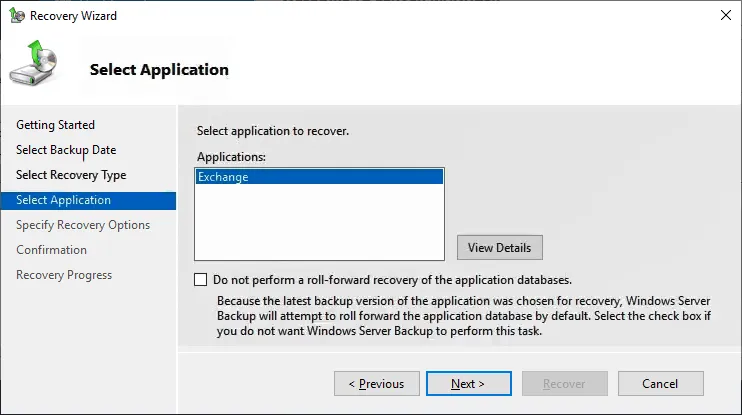
- Select Application. Select Exchange as the application to recover.
-
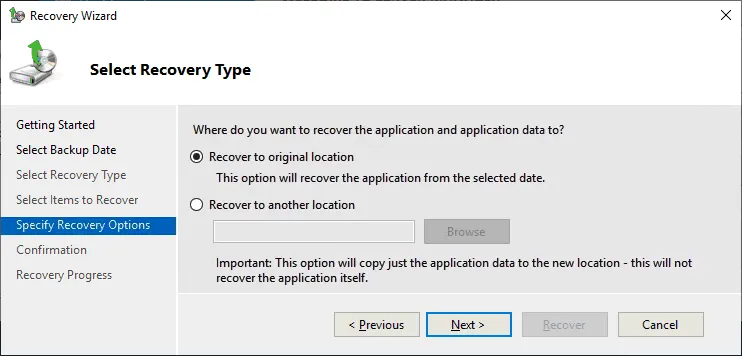
- Specify Recovery Options. There are two options for recovery destination:
- Recover to original location. Exchange files are recovered to the original location where the original Exchange files are located. You cannot select which database to restore. All Exchange files will be restored.
- Recover to another location. You can select another location to recover Exchange data from Windows Server backup to a recovery database (RDB). Then you can use this Exchange recovery database to recover your real Exchange database. An Exchange database restored to another location has a dirty shutdown state.
- Specify Recovery Options. There are two options for recovery destination:
We select Recover to the original location.
- Confirmation. Verify whether the settings selected before are correct.
- Recovery Progress. Wait until the Exchange data recovery is completed.After finishing Exchange data recovery from a backup (to the original location in this example), mount the database and check whether the database was restored successfully. You can mount the database in the Exchange Admin center, as shown in the screenshot below.
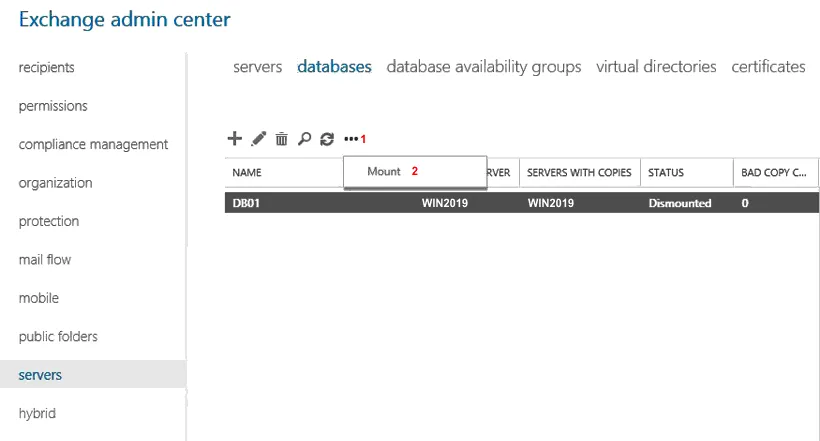
We can mount the Exchange database in the command line:Mount-Database DB01where DB01 is the database name.Check the database status in Exchange Management Shell:Get-MailboxDatabase -Server -Status | fl Name,*FullBackup
You may see an error after mounting a database that the database cannot be mounted. Possible reasons for the error can be physical corruption of the disk on which a database file is stored or logical corruption caused by software errors, improper server shutdown, etc. The eseutil command line utility can help fix the issue.
Exchange Database Recovery in the Command Line
Copy Exchange database files (.edb) and log files to a custom folder on a disk (for example, D:\DBrecovery\DB01\ ) for Exchange data recovery. You can copy and use files you have recovered in the previous step from Windows Server Backup. A common way is restoring database and database log folders from Windows Server Backup to a custom location (for example, D:\DBrecovery\DB01\ ).
If you have selected Files and folders (when recovering data from Windows Server Backup) and recovered .edb and log Exchange files to a custom location, you can use these files for data recovery and an Exchange recovery database. A recovery database is a special kind of an Exchange database that you can mount and restore data to the original Exchange database during the Exchange data recovery process. Give a unique name to the recovery database.
We need to use eseutil for Exchange database recovery and fixing database issues.
eseutil.exe is located in this folder by default:
C:\Program Files\Exchange Server\bin
You may need to change the directory to this one in the command line or PowerShell console (if this path is not added in the PATH variable in Windows).
The eseutil syntax to use a soft method for database recovery by specifying a database file location and transaction log folder:
eseutil /R EXX /l <RDBLogFilePath> /d <RDBEdbFolder>
where EXX is the log generation prefix, such as E00, E01, E02, etc.
Before going to Exchange database recovery diagnose the database.
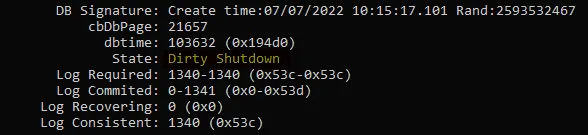
- Check in which state your database is:
eseutil.exe /MH D:\DBRecovery\DB01\DB01.edb
State: Dirty Shutdown
It means that the database is not in a consistent state, and we need to fix this issue before we can use this database on Exchange Server.
Below in the output, you can also see information on which logs are required to restore Exchange database state to Clean Shutdown. This information is stored in .edb database headers.
- Check whether logs are not corrupted:
eseutil.exe /ml E00
Status OK must be displayed if logs are not corrupted.
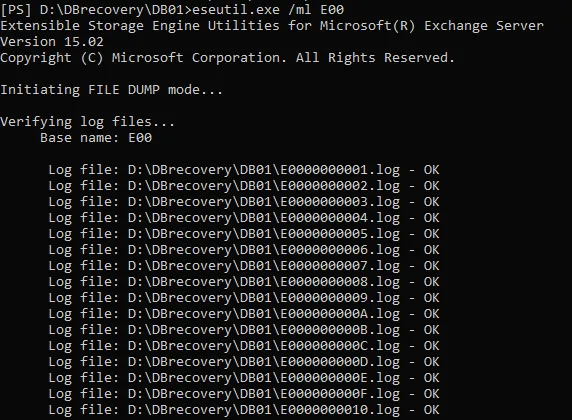
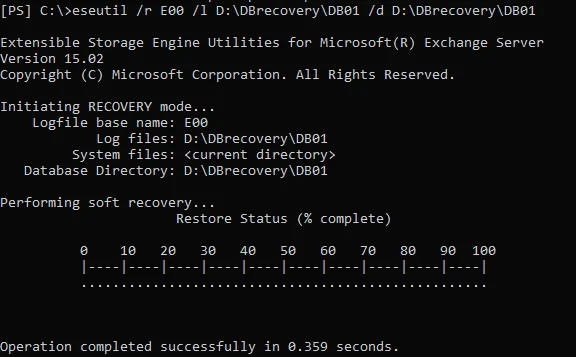
- Our logs are healthy, and we can perform Exchange database recovery with the soft recovery method.
eseutil /r E00 /l D:\DBrecovery\DB01 /d D:\DBrecovery\DB01
/l – set database logs location
/d – set the destination with the .edb database file we need to recover using logs and put in the clean state
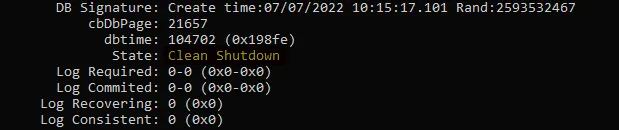
- Check the database state after recovery with the familiar command:
eseutil /R E00 /l D:\DBrecovery\DB01 /d D:\DBrecovery\DB01
The state is Clean Shutdown in our case now.
Our database is healthy now, and we can use this database as a recovery database for Exchange data recovery of mailboxes, for example.
Exchange Mailbox Recovery from a Recovery Database
You can perform Microsoft Exchange mailbox recovery for a particular user by using a recovery database.
- Create the Exchange Recovery database (using the existing .edb file) with the command like:
New-MailboxDatabase -Recovery -Name <RDBName> -Server <ServerName> -EdbFilePath <RDBPathandFileName> -LogFolderPath <LogFilePath>
RDBName must be the unique name for the recovery database.
The exact command in our case is:
NewMailboxDatabase -Recovery -Name RDB01 -Server Win2019 -EdbFilePath D:\DBrecovery\DB01\DB01.edb -LogFolderPath D:\DBrecovery\DB01
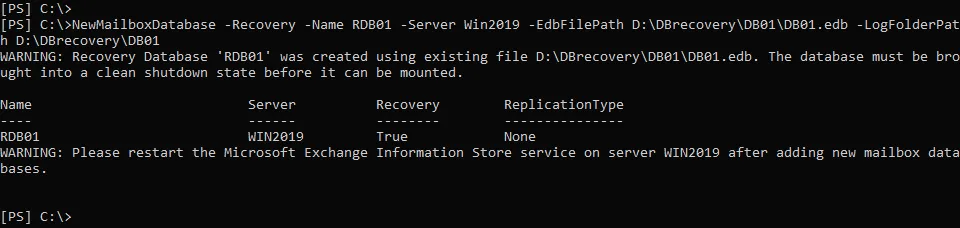
- You must restart the Exchange Information Store service:
Restart-Service MSExchangeIS
Alternatively, go to services.msc from the command line and restart the Microsoft Exchange Information Store service in the GUI window of Microsoft Services Console.
- Mount the recovery database:
Mount-database RDB01
- Check whether the recovery database contains any data:
Get-MailboxStatistics -Database RDB01 | Format-Table DisplayName,MailboxGUID -AutoSize
The output displays the mailbox name and ID, which are needed to move the recovered email to another mailbox.
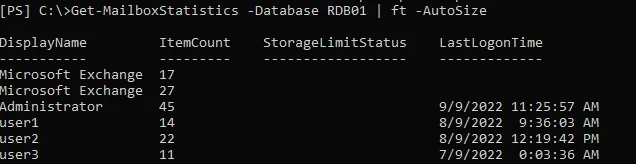
Another way to check mailboxes in the Exchange recovery database:
Get-MailboxStatistics -Database RDB01 | ft -AutoSize
- For example, we need to perform Microsoft Exchange mailbox recovery for the mailbox whose ID is:
8aa77cb3-dc38-1f37-72e5-55702e737f52
The command to restore a mailbox from the recovery database is as follows. You need to specify the source database (recovery database), the mailbox ID in the recovery database, and the target database.
New-MailboxRestoreRequest -SourceDatabase RDB01 -SourceStoreMailbox 8aa77cb3-dc38-1f37-72e5-55702e737f52 -TargetMailbox DB01
If you see the error message:
Source mailbox legacuexchangedn doesn’t match
add the -AllowLegacyDNMismatch at the end of the command:
New-MailboxRestoreRequest -SourceDatabase RDB01 -SourceStoreMailbox 8aa77cb3-dc38-1f37-72e5-55702e737f52 -TargetMailbox DB01 -AllowLegacyDNMismatch
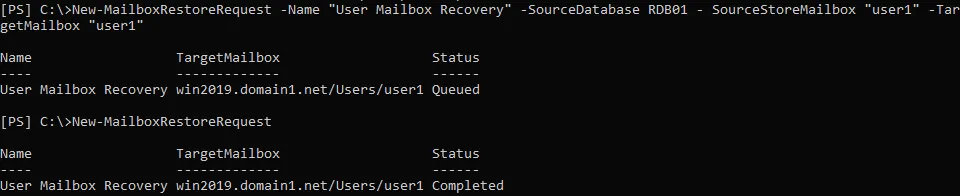
Note: Another way to recover a mailbox is by setting the mailbox name, for example, user1:
New-MailboxRestoreRequest -Name "User Mailbox Recovery" -SourceDatabase RDB01 - SourceStoreMailbox "user1" -TargetMailbox "user1"
- After finishing Exchange mailbox recovery, you can delete a mailbox restore request:
Get-MailboxRestoreRequest | where status -eq completed | Remove-MailboxRestoreRequest
- Then you can dismount the recovery database:
Dismount-Database RDB01
Try to access the recovered mailbox via Outlook for the web and verify whether all needed data has been recovered for the user.
Hard Recovery of an Exchange Database
The Exchange database recovery method explained above was an example of soft recovery. Soft recovery is applicable when a database file is not corrupted, and database transaction logs are present. If these conditions are not met, the other method for Exchange data recovery is a hard recovery (if you don’t have an Exchange Server backup). Hard recovery results in deleting all corrupted data from the Exchange Server database to make the database state consistent.
- Repair corrupted database. Use this command if Exchange database transaction logs are missing:
eseutil /p E:\DB01\DB01.edb
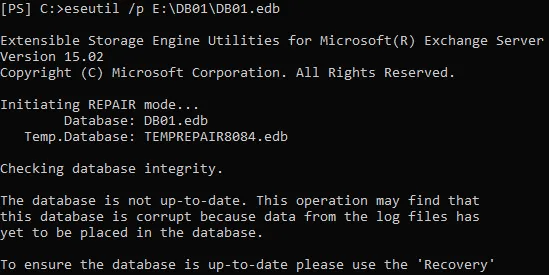
The warning message is displayed:

This process cannot be reverted and some data can be lost after finishing this operation.
Click OK to proceed and wait until the process is completed.
- Check whether the database is in the Clean Shutdown state:
eseutil /mh E:\DB01\DB01.edb
- After repairing, defragment the database because deleting large pieces of corrupted data from the database causes database performance degradation:
eseutil /d E:\DB01\DB01.edb
A new database will be created and all consistent (healthy) data from the old database we have repaired will be transferred to a new database.
- Mount the defragmented database:
Mount-Database E:\DB01\DB01.edb
- Check this database with the command to ensure that there are no issues:
Get-MailboxRepairRequest -Database E:\DB01\DB01.edb
Exchange database recovery for a corrupted database is finished.
Exchange Data Recovery with NAKIVO
NAKIVO Backup & Replication is a data protection solution that supports Exchange data recovery from a physical or virtual machine backup. You can recover specific Exchange Server objects such as mailboxes and emails as well as perform full Exchange database recovery. The recovery process consists of a few steps performed in the web interface of the product.
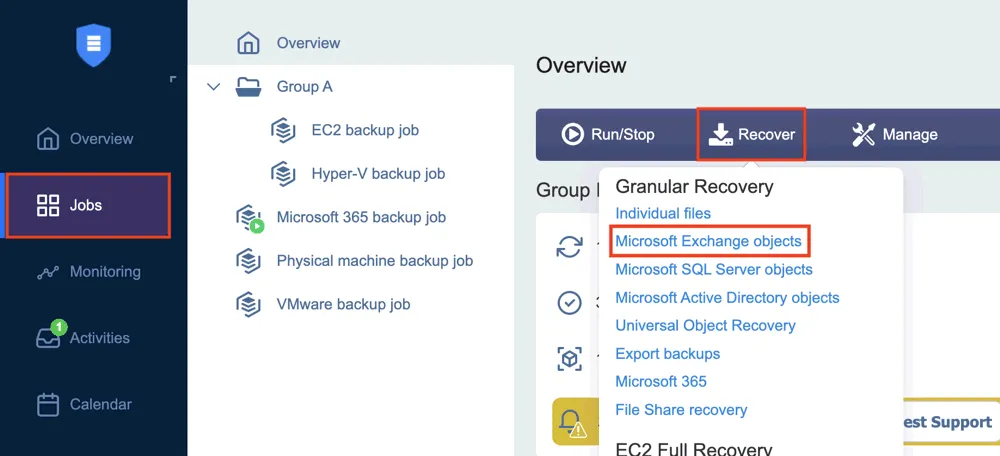
On the main dashboard, click Jobs > Recover > Microsoft Exchange objects to start the Exchange Server recovery process.
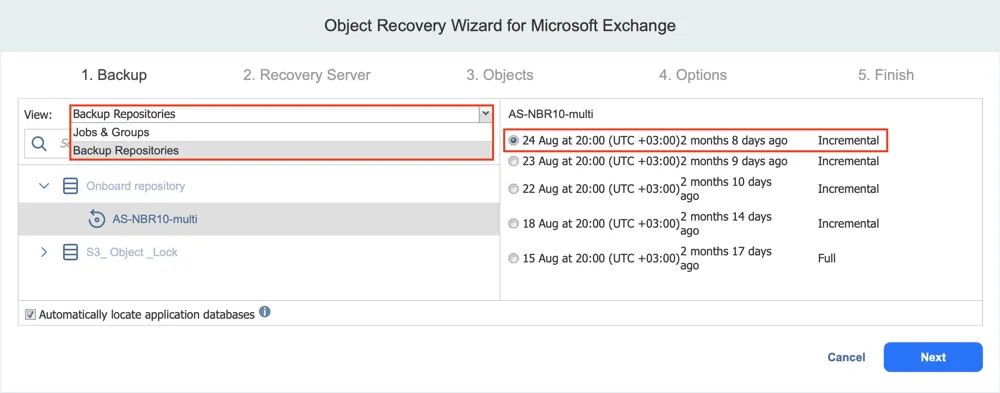
Follow the steps in the Object Recovery Wizard.
- Select the backup and recovery point. A flexible retention policy allows you to recover items for different time ranges.
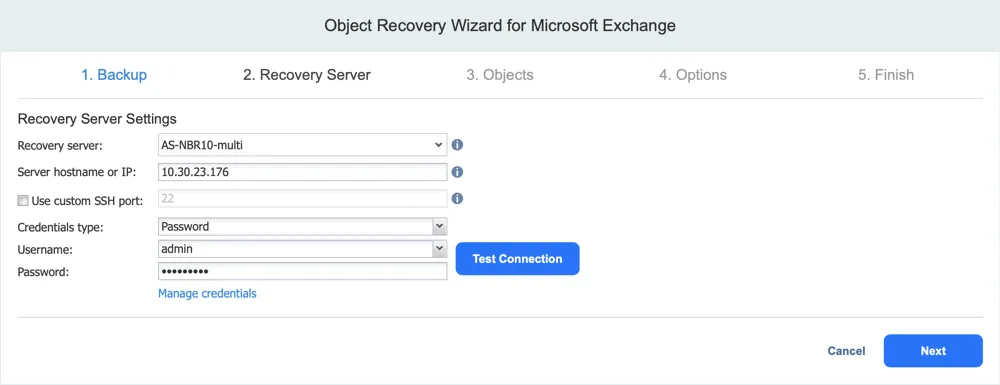
- Select a recovery server. Select the original machine with Microsoft Exchange Server installed or another machine to which to recover Exchange Server data.
Note: To recover particular emails and download them as PST files via web browser, you need to set the
system.exchange.enable.direct.recovery parameter in the Expert settings page that is accessible via addresses like
https://localhost:4443/c/configuration?expert or
https://localhost:4443/c/configuration?action=&targetId=&backUrl=&wizard=false&expert
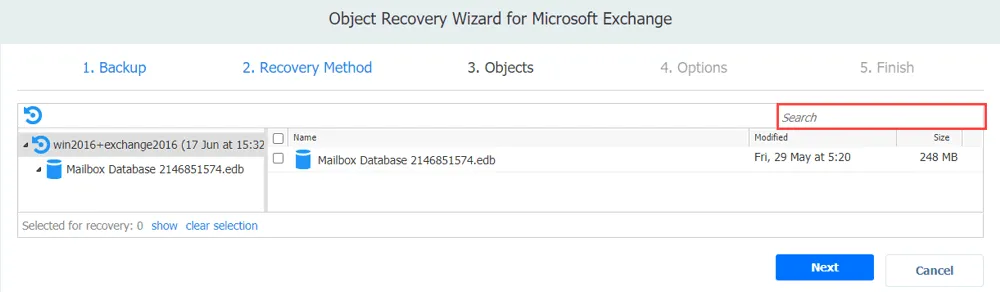
- Select Exchange objects to recover. You can recover the entire .edb database or select specific mailboxes and emails. You can also search the needed Exchange Server objects for more convenience.
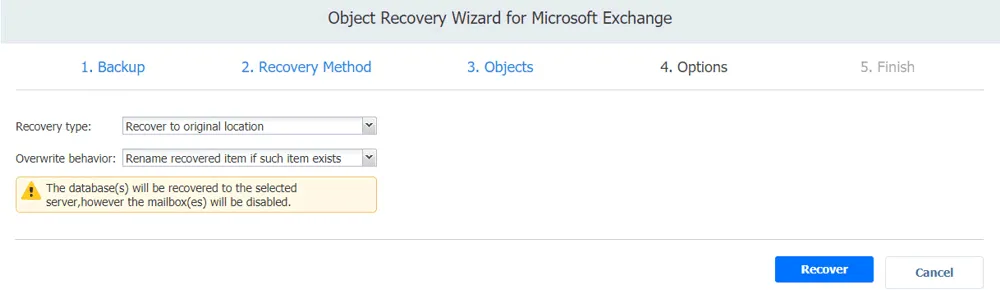
- Select recovery options such as recovery type and overwrite behavior:
- Recover to original location – the selected objects are recovered to the original locations on the server or virtual machine.
- Recover to custom location – allows you to select a machine and specify a path where to recover the objects.
- Export to custom location – allows you to export selected Exchange objects, including a whole mailbox to a local folder or CIFS (SMB) share.
Overwrite behavior sets what to do if an item already exists:
- Rename recovered item
- Skip recovered item
- Overwrite the original item
- Wait until Exchange data recovery is completed.
Conclusion
The best method you can use for Exchange data recovery is recovery from a backup with a professional and comprehensive data protection solution. You can use NAKIVO Backup & Replication to create consistent backups of Exchange Server running on a physical or virtual machine with a wide range of flexible instant recovery options. The product also supports the recovery of Active Directory objects that may be needed for proper work of Exchange Server.