How to Use SharePoint Online for Data Management: A Complete Guide
SharePoint is more than just a place for document storage. It is a powerful platform for data management and collaboration. SharePoint can be used as a data management system to resolve issues in traditional file shares. Document search may be time-consuming when you want to find a document stored on a classic Windows share on a file server with a large number of files.
This blog post covers SharePoint management tools and explains how to use the SharePoint document management system to store and categorize your data and increase efficiency of work with shared documents and other files. We will use SharePoint Online in Microsoft 365 to provide examples.

Site Hierarchy
You can use SharePoint to create an information architecture and a site hierarchy for your organization. Define your vision of storing data in SharePoint before creating content and loading data to SharePoint. Planning how your data will be stored in SharePoint based on how your organization will use that data allows you to simplify SharePoint use in future. Define what content you are planning to store in SharePoint, whether you are going to share files with other users, and the types of sites you will create in SharePoint. Outline your site hierarchy. For example you can use different sites for main categories and create subsites for subcategories. For example, you can create a team site for developers and create subsites used to store documentation for ASP .NET, C++, Java, Python, and other programming languages.
When you start using SharePoint Online, you get a single site collection that is a top site structure in SharePoint. A site collection can contain sites and subsites and has a name that looks like https://your-organization-name.sharepoint.com. In my case, the name of the site collection is https://nakivo.sharepoint.com.
If you want to create a complex site structure in your intranet, you may need to create multiple site collections. You can manage site collections in SharePoint Online by using the link:
https:// your_organization_name-admin.sharepoint.com/_layouts/15/online/SiteCollections.aspx
In our case, we are using the following link:
https://nakivo-admin.sharepoint.com/_layouts/15/online/SiteCollections.aspx
Microsoft has announced that this link will no longer be available at the end of 2020. Make sure to check updates on Microsoft’s website.
Creating subsites
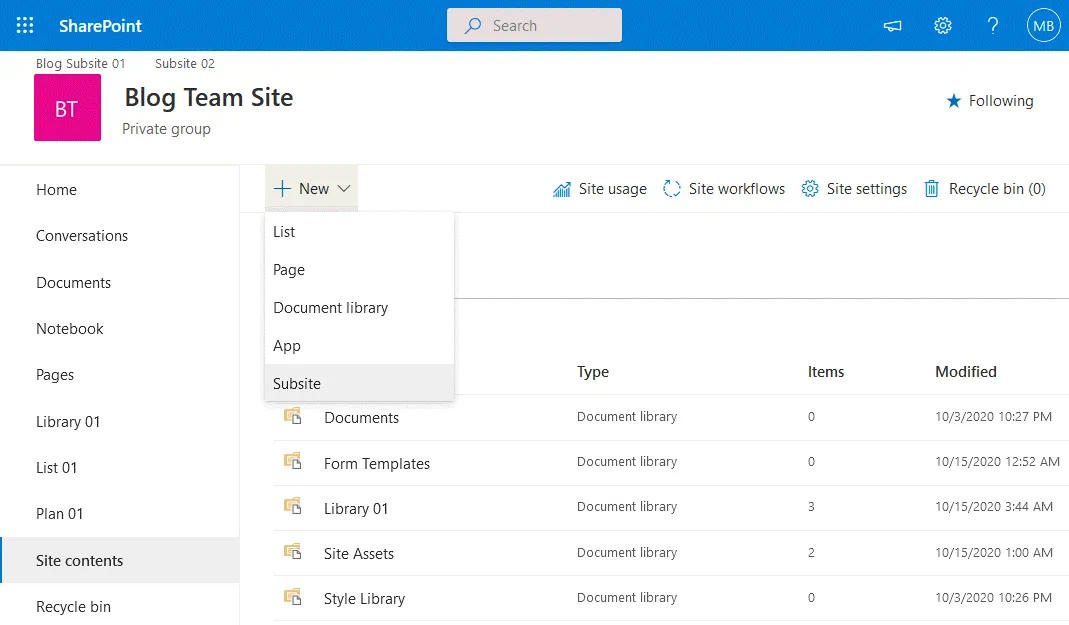
In order to create a subsite, open your SharePoint site. In the navigation pane, click Site contents and, on the Site Contents page, click New > Subsite.
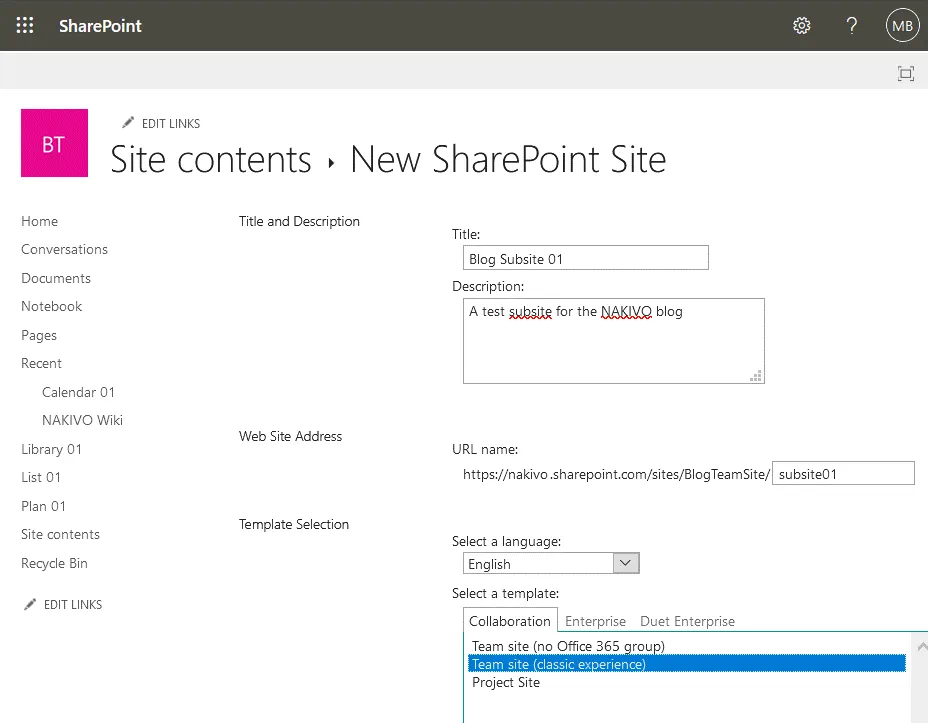
Enter the needed parameters and configure a new subsite. In this example, we create a subsite with the following parameters.
Title: Blog subsite 01
Description: A test subsite for the NAKIVO blog
Website address: https://nakivo-admin.sharepoint.com/sites/BlogTeamSite/subsite01
Template selection. Language: English
Collaboration: Team site (classic experience)
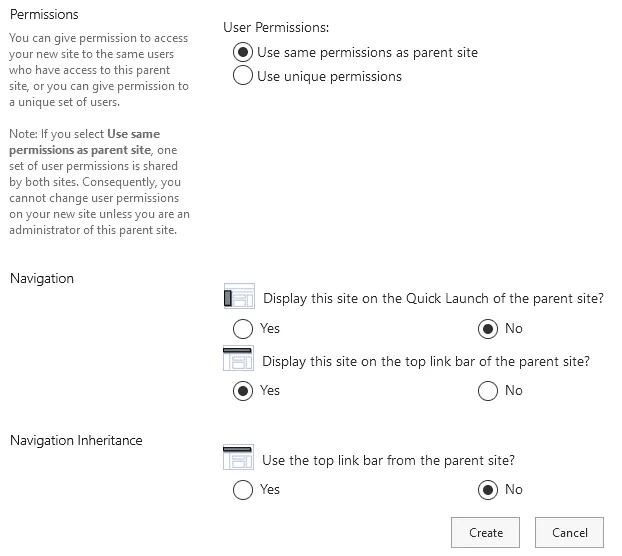
User Permissions:
- Use the same permissions as parent site
- Display this site on the Quick Launch of the parent site? (Yes/No)
- Display this site on the top link bar of the parent site? (Yes/No)
Use the top link bar of the parent site? (Yes/No)
Similarly, we’ll create the second subsite (Subsite 02) on our main site (Blog Team Site) by using SharePoint management tools.
Checking site hierarchy
Once you have created a site and subsites, you can check your site hierarchy.
In the navigation pane, select Site contents, then click Site settings.
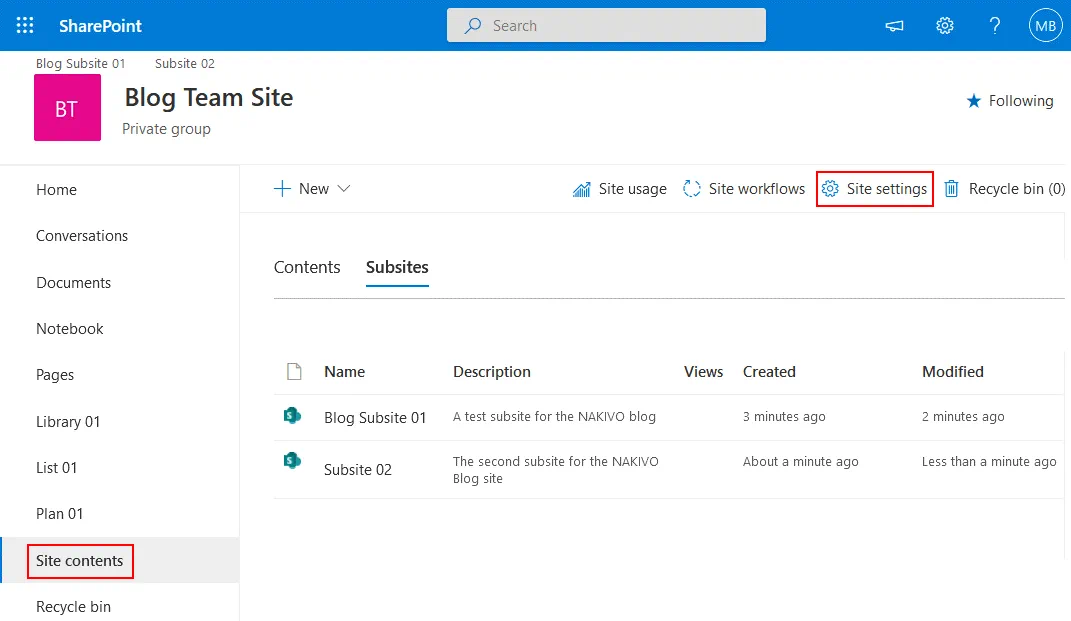
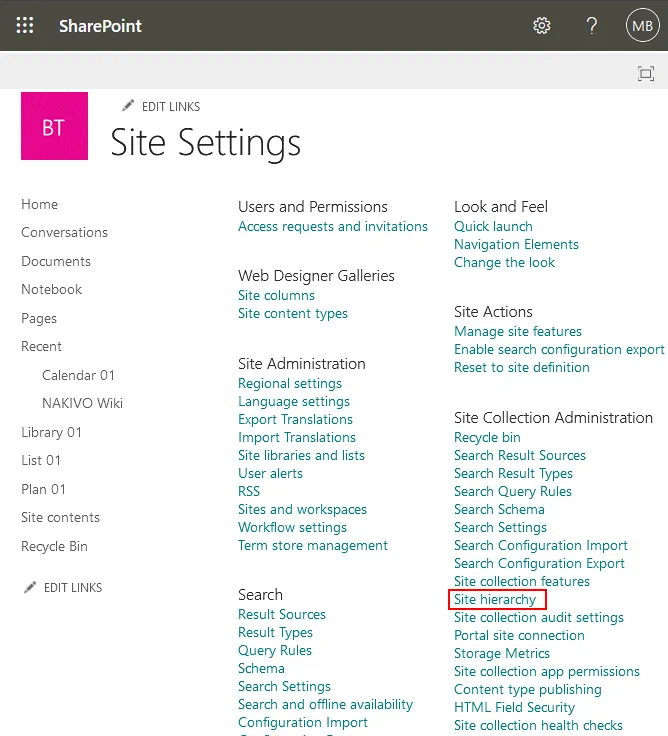
On the Site Settings page, hit Site hierarchy. You can see many other settings on this page. Keep in mind how to open the Site Settings page as you will it again later to configure SharePoint document management.
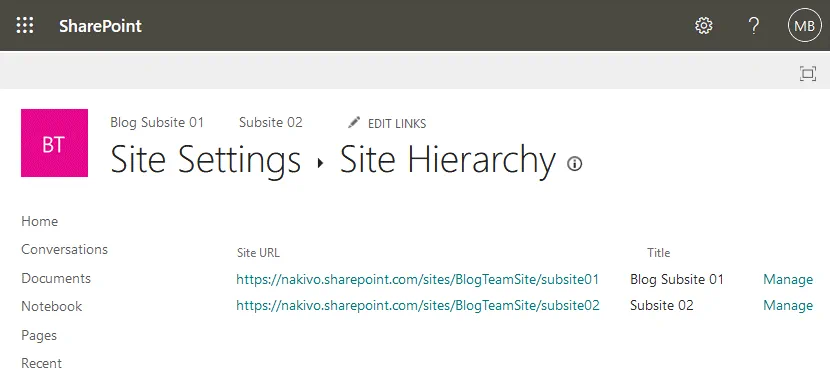
Once the Site Hierarchy page is opened, you can see subsites located in your site. There are two subsites in my example – Blog Subsite 01 and Subsite 02.
Security
SharePoint provides a high level of security. However, it’s up to administrators to implement proper security measures and configure correct permissions and policies. You can control access to documents on the folder level. SharePoint groups are usually used to configure access for users because it is more convenient and reliable compared to configuring access permissions for each user individually. When using groups for SharePoint document management and access restriction, there’s less room for mistakes. Let’s consider an example on how to configure site permissions by using SharePoint management tools.
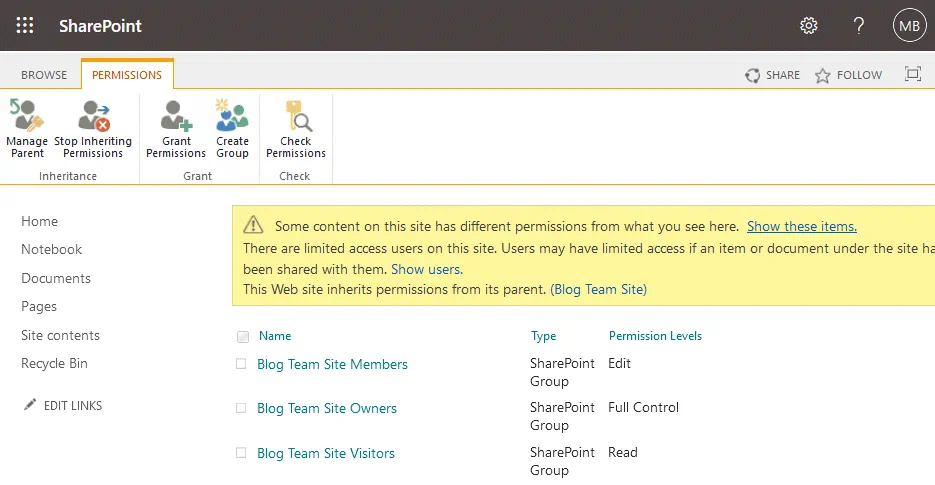
Go to Site Settings, and hit Site permissions.
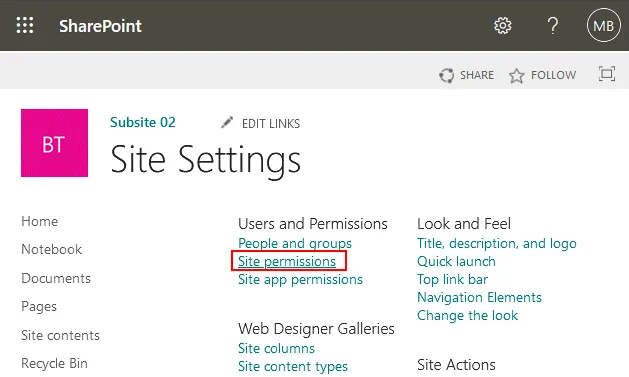
In the Permissions tab of the page that opens, you can see users, groups, and their permissions to access a SharePoint site. Hit Create group to create a new group. Then you can add members to a group, manage permissions, etc.
Information Classification
In addition to the site hierarchy, use information classification to build your information architecture in SharePoint. SharePoint allows you to use metadata to organize content in a modern way and classify files. If you define metadata for files stored in SharePoint, even if these files are not sorted to appropriate folders, you can filter and sort files by metadata similarly to the way you can sort files by name, size, and modified date in Windows Explorer. Modified date and file size are examples of metadata.
SharePoint provides features for creating custom types of metadata. For example, if you use the classic approach, you store DOC files of bills in different folders using the name of the organization that sent the bill as the folder name (for example, names of the companies Microsoft, Oracle, and VMware are used as the folders names). If you store all these documents in one folder, you can define the type of metadata and set a “Company” category of metadata, then set a type as a company name. After entering a company name for each document in metadata, you can search for documents for the needed company.
Note: SharePoint uses mechanisms of crawling and indexing to improve file search. Automatic data indexing for fast search is used by the SharePoint data management system in combination with metadata.
Sorting by vendor and by city in directories. Let’s say that some companies produce goods in multiple cities, and each city has a couple of companies (vendors). You can create folders that have names of vendors and that include subfolders with the names of the cities. Or the other way around: folders that have names of cities and contain subfolders that have names of companies. One company can have multiple addresses in one city. In this case, saving this data (a vendor name, city, address) in metadata may be useful for organizing data and for improving search functions.
Metadata navigation is a feature for filtering files stored in SharePoint libraries and lists dynamically. Metadata is displayed in columns of SharePoint libraries. Metadata navigation can be used after configuring a library with custom metadata columns. Below we are going to look at the settings related to metadata for SharePoint document management in SharePoint Online.
Metadata
Metadata is additional information about files (it is also called data about data). Use metadata for classification of documents, quick search and fast navigation on your SharePoint site if you have a lot of content. Each category of files can have unique metadata properties. Create columns and configure the view in a SharePoint library. Let’s find out how to configure metadata for files stored in SharePoint libraries.
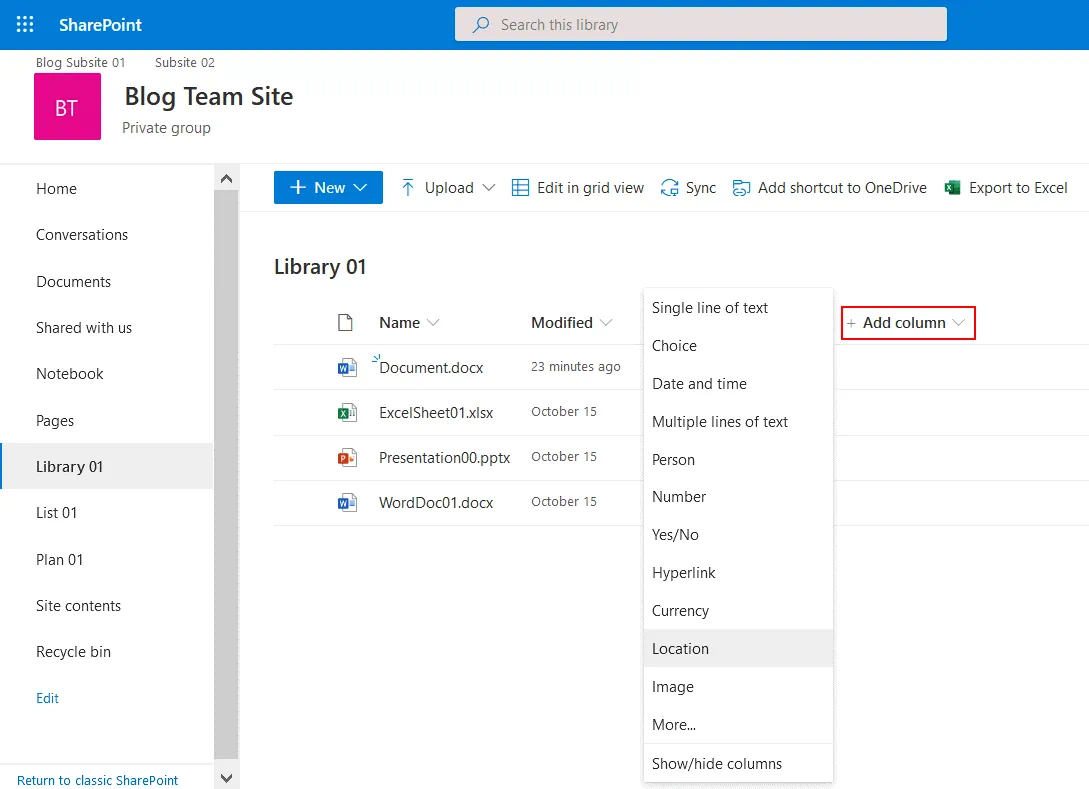
Open your library, and click +Add column. In the menu that opens, select the needed category for metadata, for example, Location. You can learn how to create a new library in this blog post.
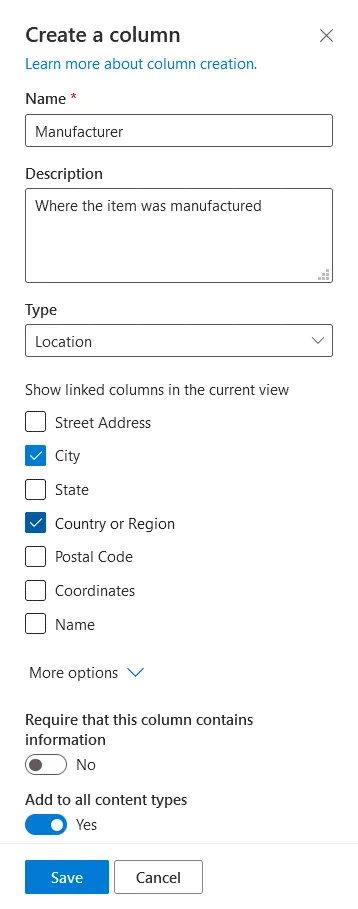
Create a column. Enter a column name, for example, Manufacturer. Enter a description (optional). In the drop-down menu, select a type of data (Location in our case). Select the needed checkboxes to show linked columns in the current view. We want to define Country or Region and City for files stored in our SharePoint library. Click More Options to expand additional options. Now you can set the required column data for all files that are uploaded to the library and added to all content types. Hit Save to save the settings.
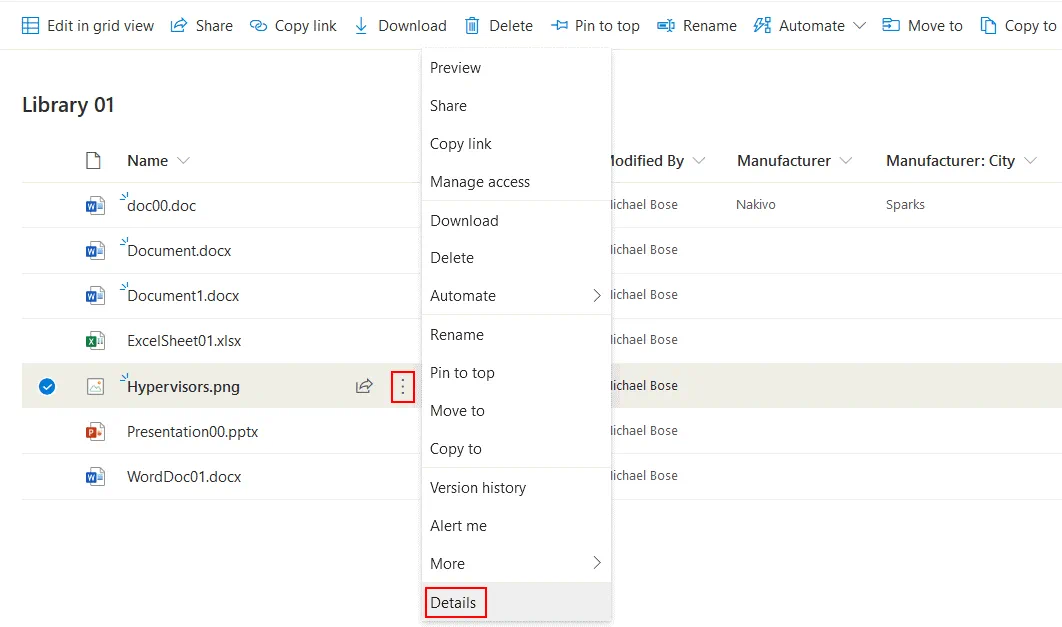
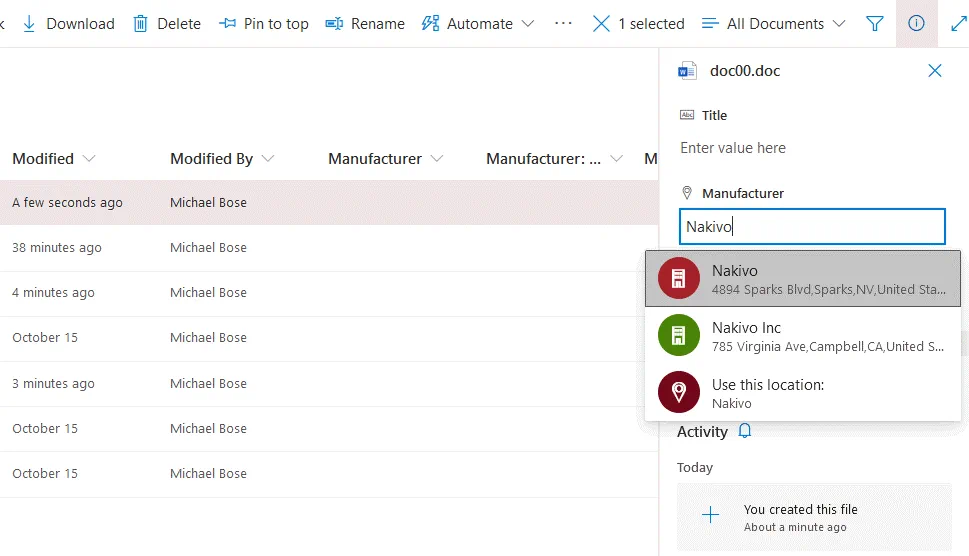
We have uploaded some files to the library before creating new columns to add metadata. However, we can add metadata to existing files. Right click the three dots near the appropriate file and, in the menu that opens, hit Details.
In the window that opens, we can now select the manufacturer, for example, NAKIVO. SharePoint automatically finds all suitable values and displays the address of the selected manufacturer. Once we have selected all needed parameters, we can close this window located on the right side of the web interface. Changes are saved automatically.
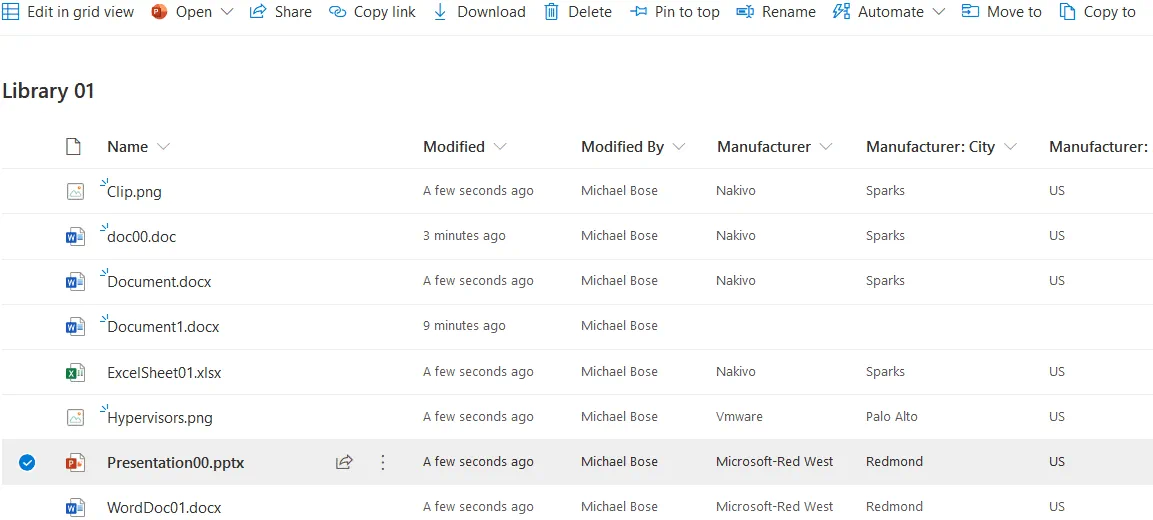
Now you can see that metadata is displayed in three custom columns for each file in the library (Manufacturer, Manufacturer: City, and Manufacturer: Country).
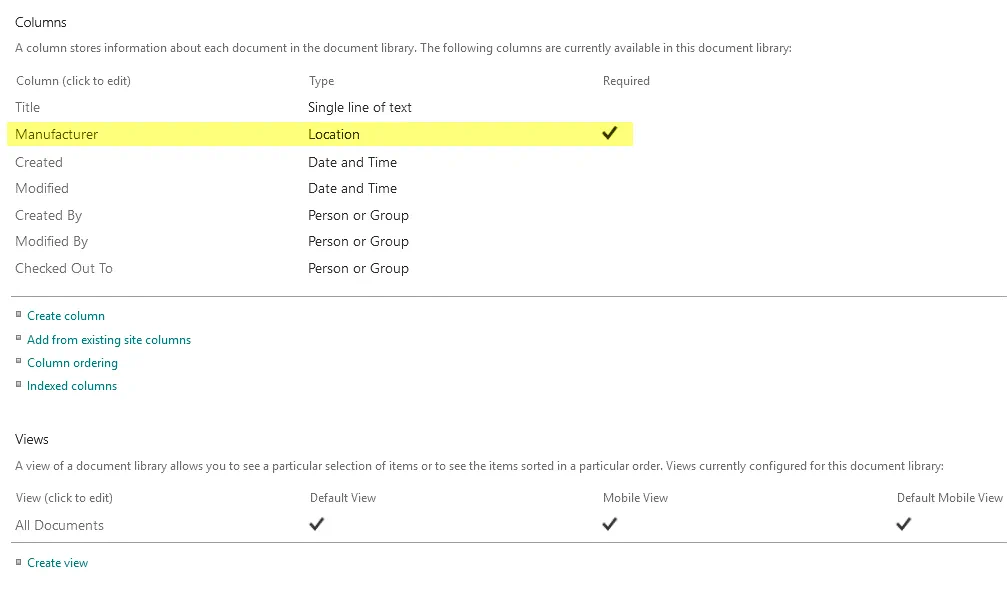
You can also configure the required information in Library settings > Columns by clicking the column name. If the metadata information is required, a user cannot finish uploading a file before filling out the needed metadata.
Enable metadata navigation
By default, metadata navigation and filtering are not enabled, and you should enable this feature manually.
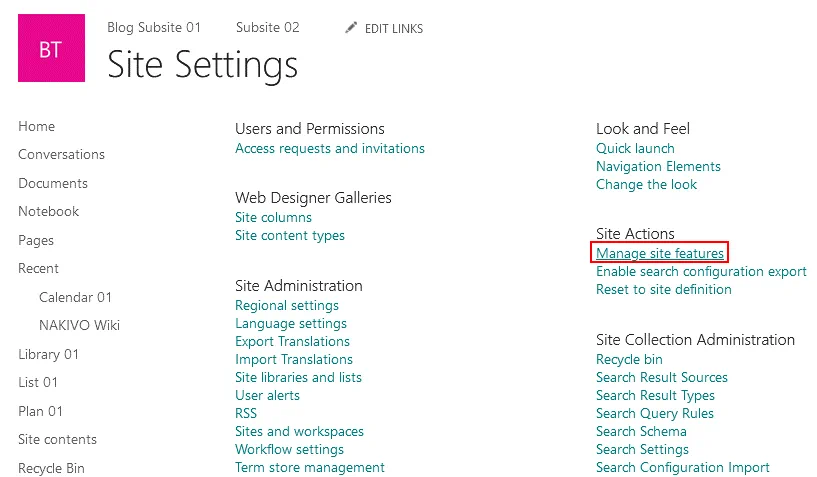
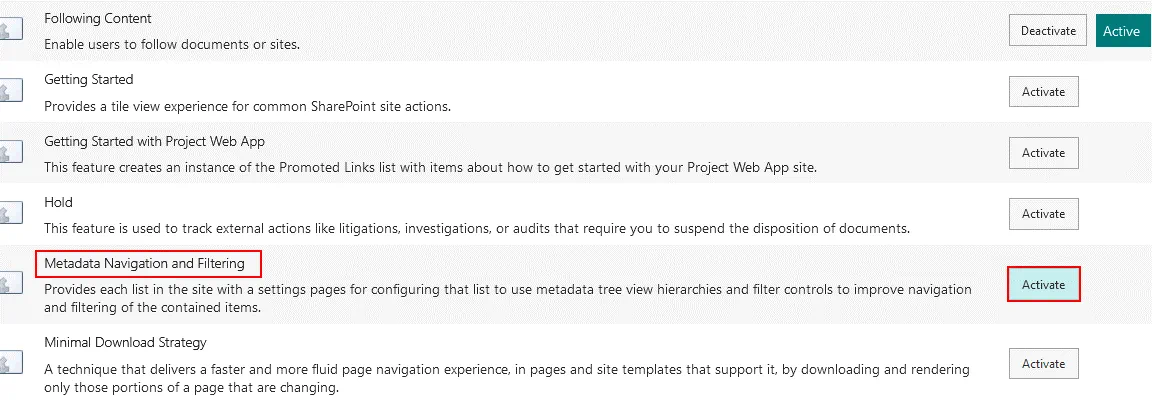
Go to site settings, and, in the Site Actions section, hit Manage site features.
Find Metadata Navigation and Filtering on this page, and click Activate. A short comment is displayed under this option.
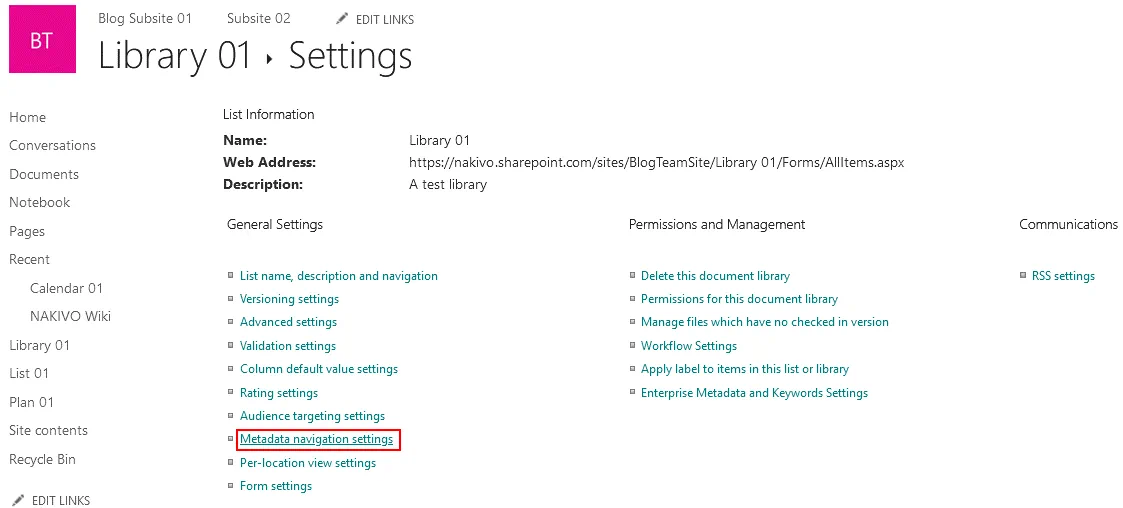
Go to library settings (as explained before).
Click Metadata navigation settings.
Select the needed hierarchy fields in the left list, and hit Add.
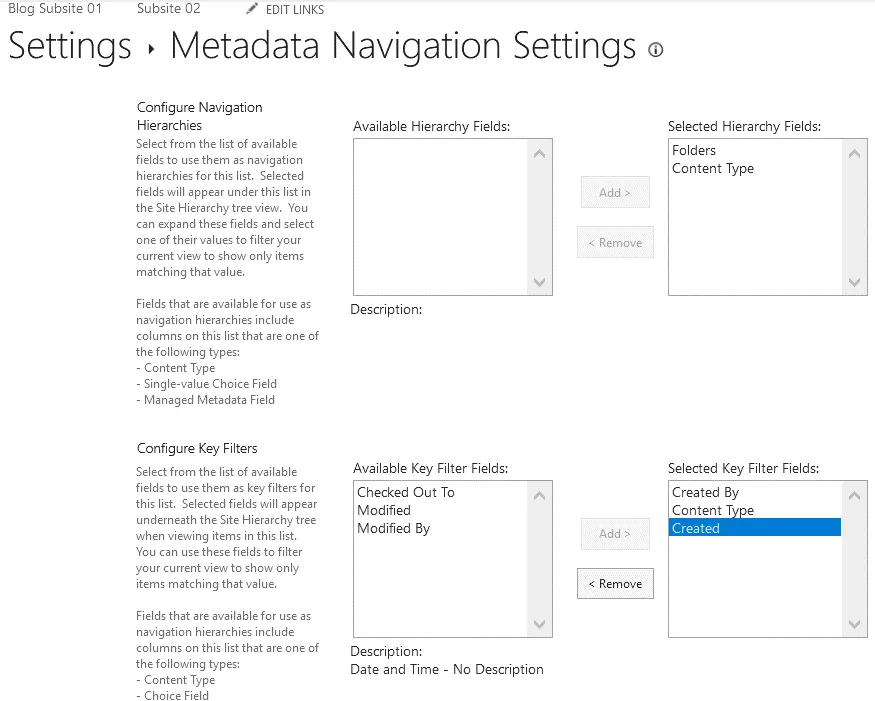
Configure automatic column indexing if needed, and hit OK to save settings.
Content types
As mentioned above, metadata helps you organize content on SharePoint sites and in content libraries. Custom columns with metadata are created for this purpose. However, if you have to store files that represent different categories of goods, a set of columns can be different for each type of goods. Let’s say you have monitors and bars of chocolate. Monitors have parameters such as manufacturer name, model name, production data, warranty period, resolution, dimensions, interfaces, and weight. Chocolate bars have parameters such as manufacturer, percentage of cocoa, expiration date, weight, presence of palm oil (yes/no), and type of package (paper, foil, etc.). Let’s say you have to store different documents related to monitors and chocolate bars such as photos, user manuals, specifications, warranty, composition, storage conditions, etc. and organize these files in SharePoint. You cannot apply user manuals to chocolate bars or composition to monitors. If you store these documents in a single library, you would get a large number of columns and some parameters won’t apply when you’re uploading the files. You can create a separate library for each content type, but in some cases a high number of libraries can make running searches cumbersome and time-consuming. To resolve these issues, SharePoint allows you to create custom content types and to store documents related to different content types in one document library.
Content types are collections of columns (that is, metadata properties) for particular types of content. Create two content types – monitors and chocolate bars – with the appropriate types of metadata that represent the needed characteristics of items. Content types are independent from the file format.
As a result, when you upload a document to a SharePoint library, you select the needed content type, and you select only suitable options predefined for this content type. For example, you upload a DOC file with a user manual for a monitor, select the “Monitor” content type, and enter a manufacturer name, model name, production data, warranty period, resolution, dimensions, interfaces, and weight. If you upload a JPG photo of a chocolate bar, select the “Chocolate” content type and enter a manufacturer, percentage of cocoa, expiration date, weight, presence of palm oil, and type of package.
How to create a content type in SharePoint Online
Open site settings of your SharePoint site as explained above.
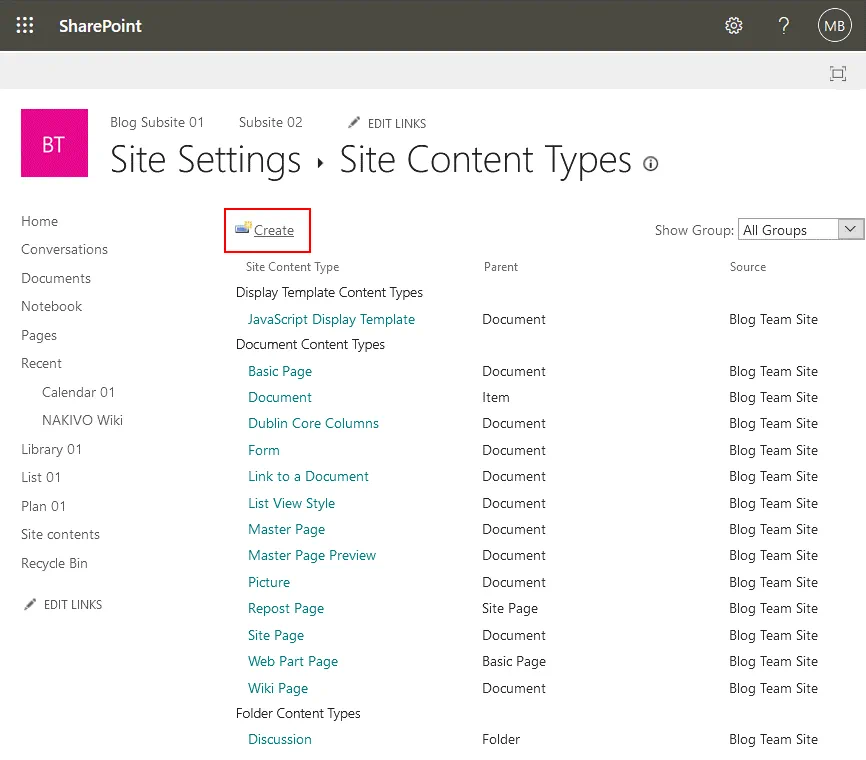
In the Web Designer Galleries section, click Site content types.

The Site Content Types page opens. You can see existing content types. Hit Create to create a new content type.
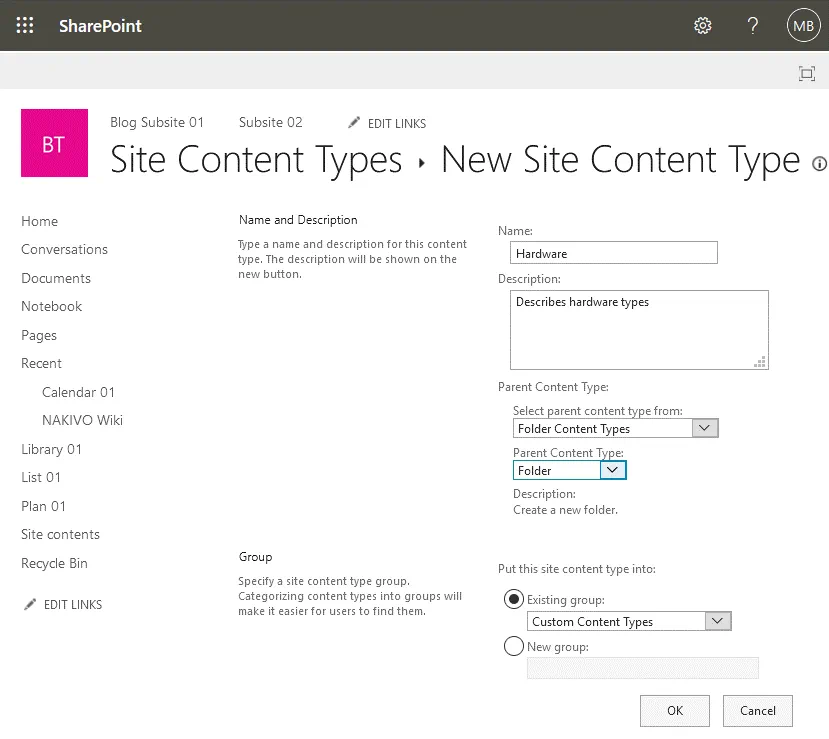
The New Site Content Type window opens. Define the needed settings.
Name: Hardware (for example)
Description (optional): Describes hardware types
Parent content type. Select parent content type from the drop-down menu.
Specify a content type group.
Hit OK when ready to finish creating a content type.
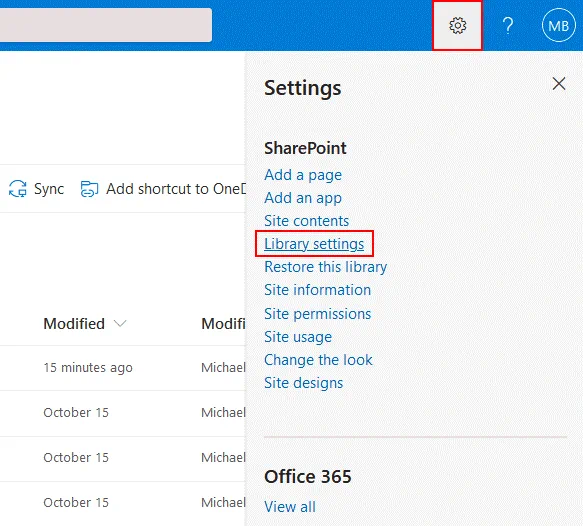
Now you should enable management of content types. Open your library, go to Settings > Library settings.
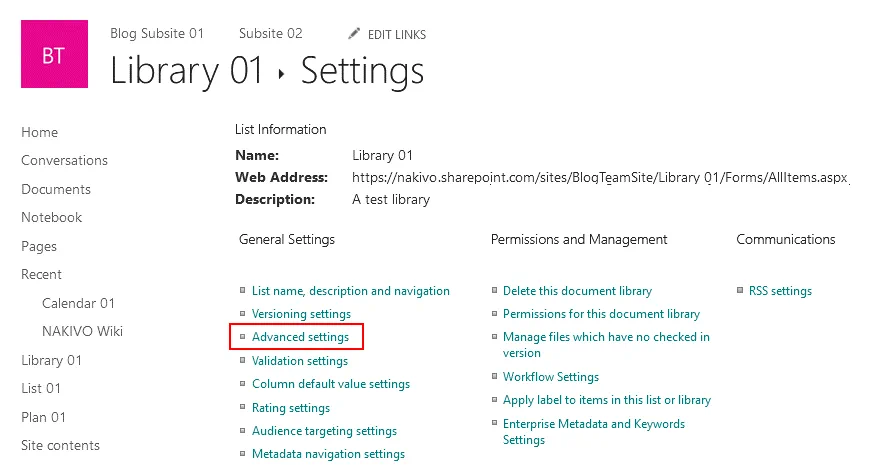
On the library settings page, hit Advanced settings.
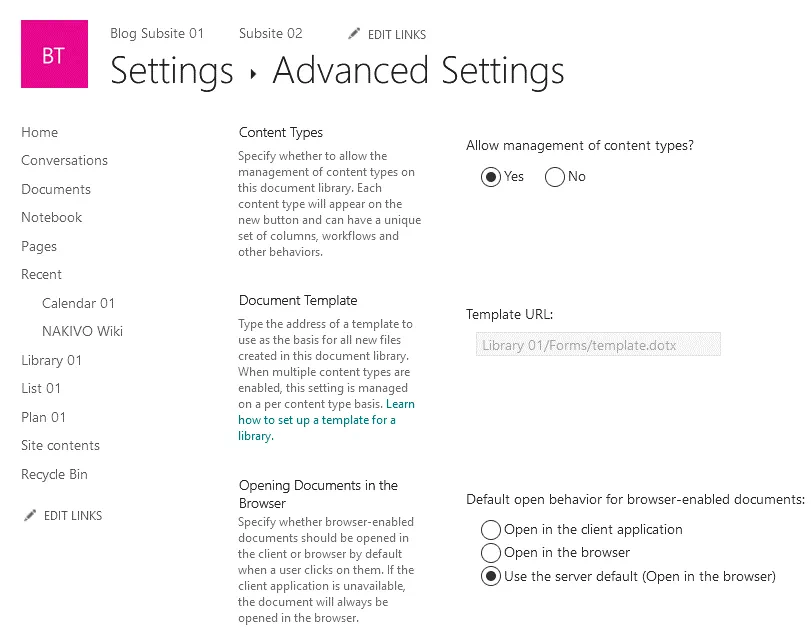
The Advanced Settings page opens. Allow management of content types? Select the Yes. You can also configure other options.
Adding custom content types to the library
Now you should add custom content types to the library.
Go back to the library settings page.
Click Add from existing site content types at the bottom of the page.
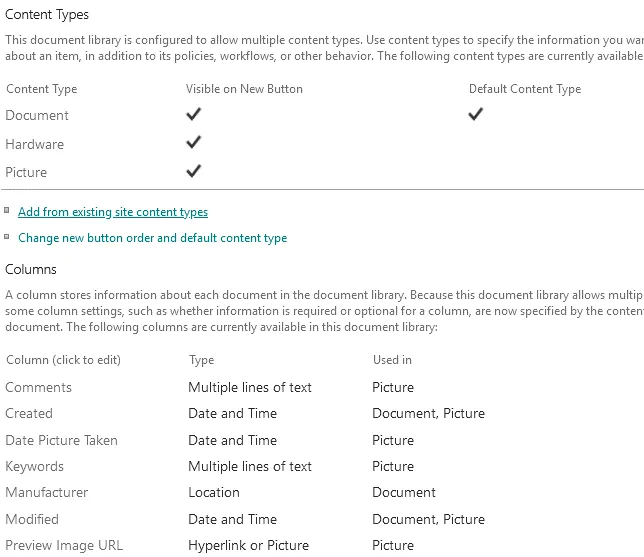
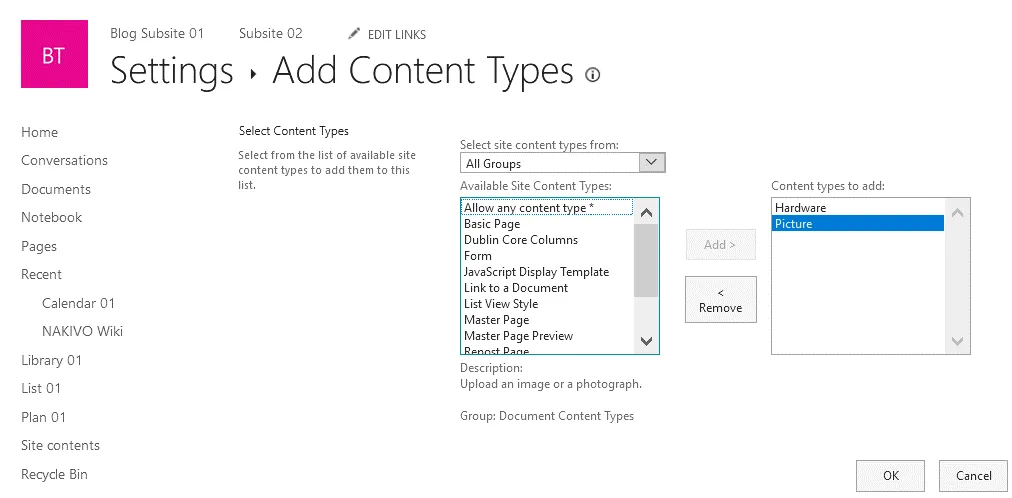
Select the content types you have created from the list on the left side of the web interface, and click Add >. Then hit OK to save the changes.
Versioning
Versioning is another useful feature of a SharePoint document management system that allows users to preserve previous versions of documents and restore them if needed (for example, if unwanted changes are written to a document). Let’s explore how to configure versioning settings.
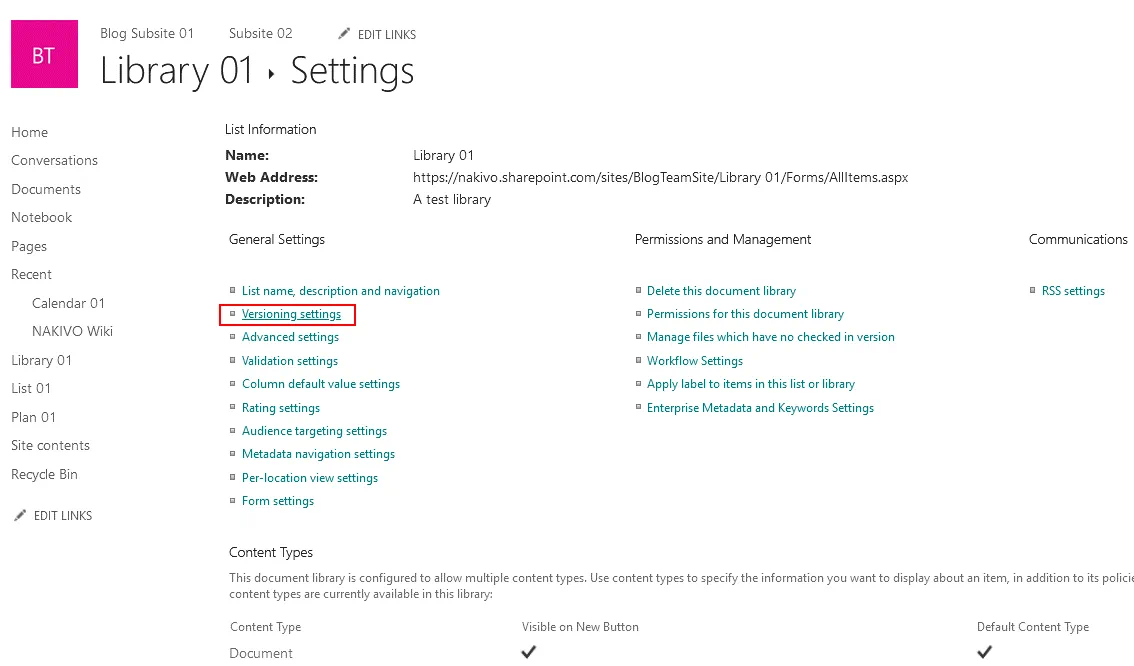
Open library settings, and hit Versioning settings.
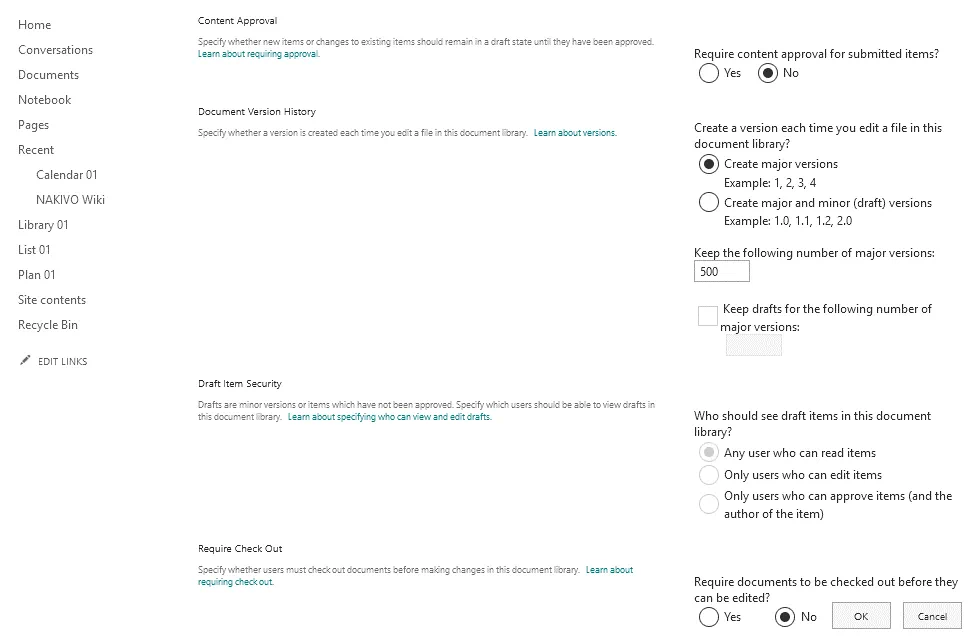
On this page you can configure a set of options:
- Require content approval for submitted items
- Set the number of major and minor versions, and set the maximum number of major versions
- Define settings for drafts
- Check out requirements
SharePoint Data Backup
SharePoint is a reliable platform, and SharePoint data management system provides some native recovery options, but it is recommended that you back up your data stored in SharePoint regularly. Having a SharePoint data backup provides you more options for data recovery. NAKIVO Backup & Replication is the all-in-one data protection solution that supports backup of SharePoint Online and SharePoint on-premises and provides a set of useful features such as incremental backup, granular recovery, flexible retention policies, and among others. NAKIVO Backup & Replication supports backup of OneDrive for Business and Exchange Online in Microsoft 365.
Conclusion
SharePoint is a multi-functional platform for collaborating and centralized data storage. SharePoint document management is a useful system that provides a set of benefits such as security, document versioning, classification of documents, metadata navigation, advanced file search, customization, big storage capacity, and real-time collaboration. This blog post has covered the SharePoint data management system and explained how to use data management features in SharePoint Online such as subsites, metadata, content types, versioning, and group management.
Don’t forget to outline site hierarchy when you start using SharePoint, and make sure to keep your SharePoint data safe by backing it up regularly.