How to Back Up and Recover Office 365 SharePoint Sites
SharePoint for Office 365 allows users to store files and other documents in a single place in the cloud, access the files from anywhere, and collaborate by simultaneously editing and exchanging these documents and other files. SharePoint Online is an online portal that can be accessed via a web browser by users for collaboration. Many users want to migrate SharePoint to Office 365 due to ease of deployment and configuring Office 365 SharePoint.
Despite the high reliability of Microsoft’s cloud services, including that of Office 365, files stored on SharePoint sites can sometimes be lost. The reasons for data loss include unintentional human error or sabotage, malware infection on a user’s computer with writing access to OneDrive where SharePoint files are stored, among others. The probability of a power outage in Microsoft datacenters is extremely low, but if this event happens you will not be able to access your files in the cloud. One of the best methods to protect your Office 365 SharePoint data is by creating a backup. This blog post explains methods to create Office 365 SharePoint backup.

Which Data to Back Up?
First, let’s determine which SharePoint data is important to you and should be backed up.
- Documents and other files you work with.
- List items, such as calendars and action items.
- Metadata, which contains information about modifying a document, changing state, date and other parameters.
- Site structure, which consists of elements that are unique for your SharePoint site, for example, branding information, architecture, navigation, and other parts.
- Email accounts of Office 365 users who work with SharePoint Online in your organization.
When you know which data to back up, you can draw up your backup strategy and your disaster recovery plan for Office 365 SharePoint. Now we can move to how to back up Office 365 SharePoint data.
Copying Files Manually
This method is simple and doesn’t require the installation of additional software, but all steps must be performed manually. You only need a web browser to access your SharePoint Online storage.
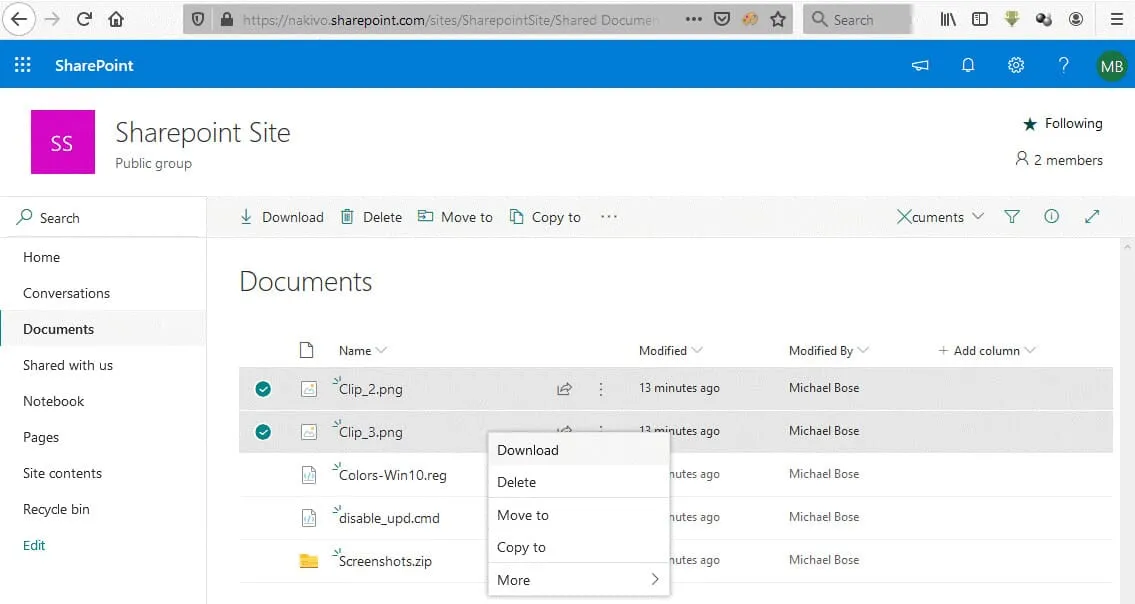
Open your SharePoint site in a web browser.
Go to SharePoint Online files library, open Documents, select the needed files, right click the selected files, and in the context menu, click Download. Save the files to the local disk of your computer or to a portable disk that can be used to store your Office 365 SharePoint backup.
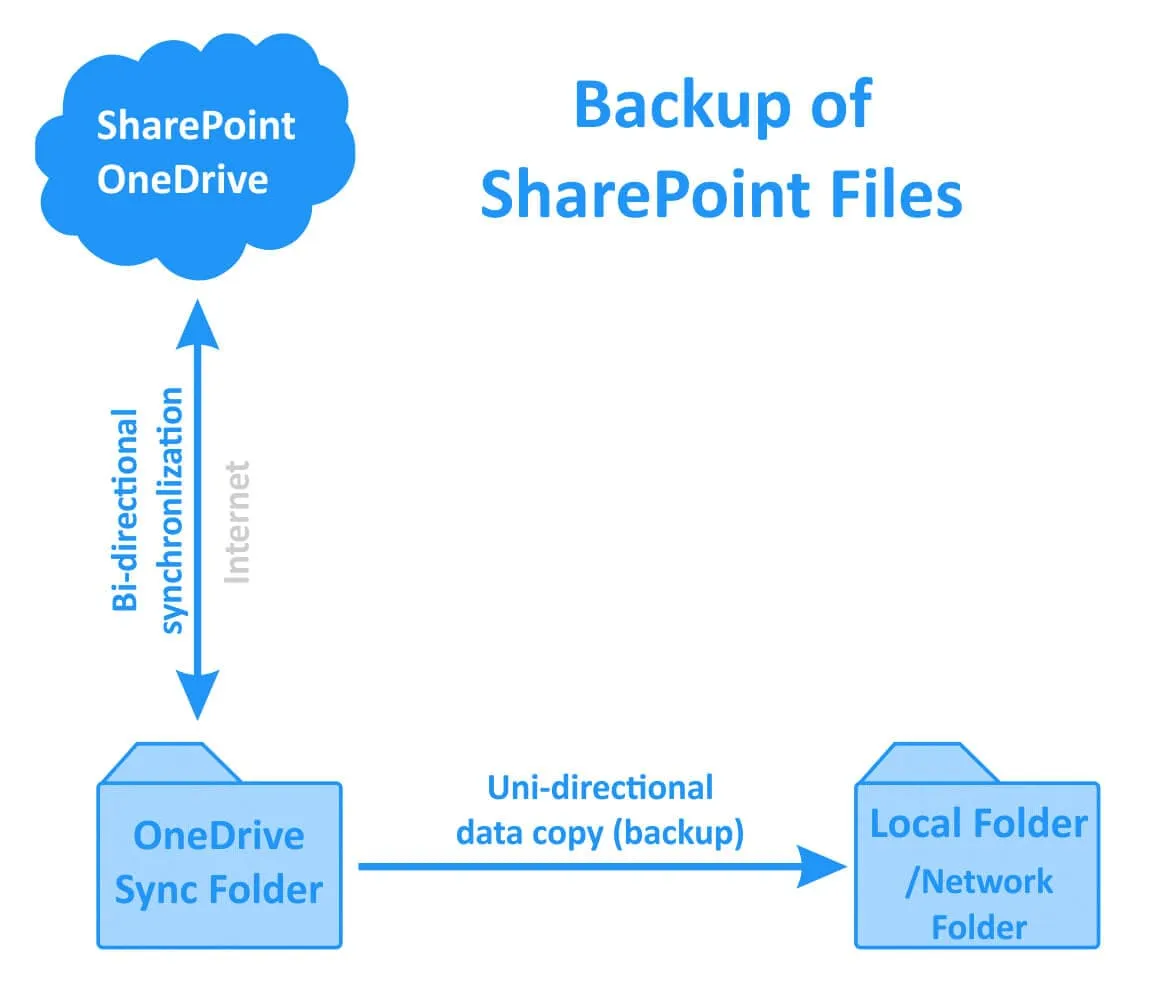
Using OneDrive Sync Client
SharePoint for Office 365 uses OneDrive to store files. As Office 365 SharePoint storage is OneDrive, users can install OneDrive Sync client on their machines and use the client to download and synchronize files stored on OneDrive in the cloud to a folder on their local computers. OneDrive is mounted to a specified local folder to synchronize files. Having files store in a synchronized folder is not equal to having a backup. When changes are made in a local folder used for OneDrive synchronization, the changes are reflected immediately on OneDrive in the cloud side.
If a user’s computer is infected with ransomware or other viruses that corrupt files, and the files in the synchronized OneDrive folder on a user’s computer are corrupted, the devastating changes are applied to SharePoint files stored on OneDrive at the cloud side. That’s why you need to back up your SharePoint files from the synchronized folder to a safe place.
Note: Read How to Back Up and Recover OneDrive Files to learn more about using OneDrive sync client and copying files to a safe place for preventing file corruption and data loss.
Using a Recycle Bin
If your files have been deleted, try to recover your SharePoint files in the web interface from the Recycle bin. A user Recycle bin is the First-stage recycle bin. When a user deletes items from the Recycle bin, the items are moved to a Second-stage recycle bin. Let’s see how to restore deleted files in the Recycle bin for Office 365 SharePoint.
In the left pane of the web interface of your SharePoint site, select Recycle bin. In the Recycle bin, select the files you want to recover, right click the selected files and in the context menu click Restore.
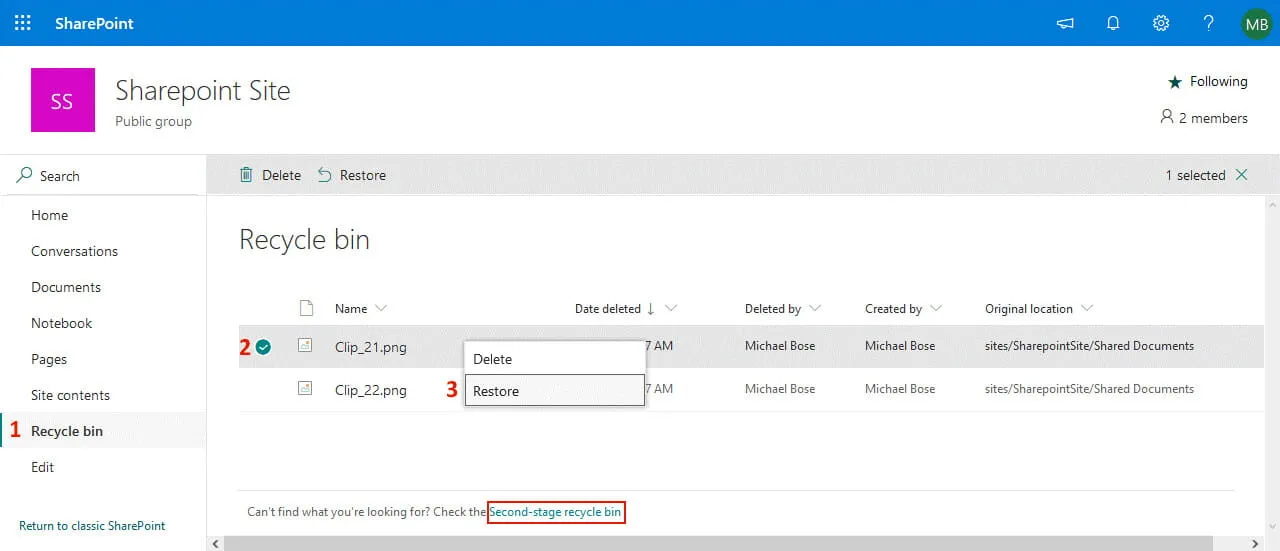
If you cannot find the needed files in the Recycle bin, then your files could be deleted from the First-stage recycle bin. Try to look for the deleted files in the Second-stage recycle bin. Click Second-stage recycle bin at the bottom of the Recycle bin page as shown on the screenshot above.
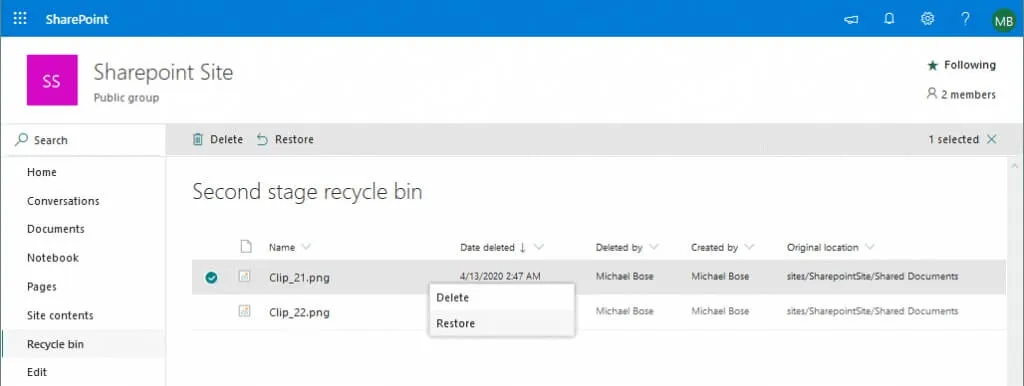
Deleted files are stored in the Second-stage recycle bin for 93 days from the deletion of the files from the original location or until the storage quota is exceeded for the Second-stage recycle bin. After 93 days, the data is deleted permanently. Users can also delete data from the Second-stage recycle bin manually.
Example:
A user deleted a file to the Recycle bin. The file remained in the Recycle bin for 80 days. The user then deleted the file from the Recycle bin. The file will remain in the Second-stage recycle bin for 13 days before being deleted permanently.
Select the needed files in the Second-stage recycle bin, right click the files and hit Restore to restore deleted SharePoint files.
As you see, you can use the Recycle bin and the Second-stage Recycle bin for Office 365 SharePoint the same way as you would for OneDrive.
Using Version Control
If your files have been corrupted or any other unwanted changes have been made to your files, try to recover the intact file by using version control to the version that reflects the file state before unwanted changes were applied. Version control, also called versioning, records changes to specific files over time by creating new file versions. This allows you to restore the state of a file for the appropriate time point when changes are saved to the file. By default, versioning is enabled for SharePoint libraries but not for SharePoint lists. If you use SharePoint libraries, you can enable version control whenever you want.
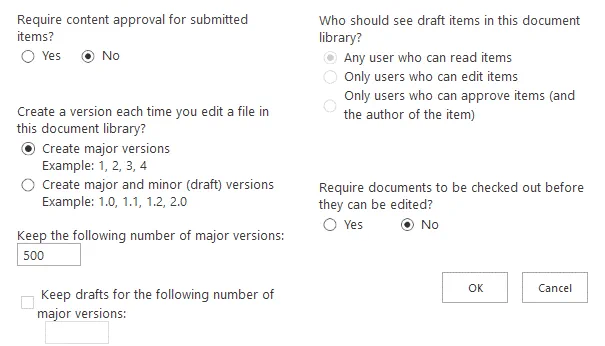
Note, that when versioning is enabled, more storage space is required to save each file version. Office 365 Business and Office 365 Enterprise subscription plans allow you to save up to 500 file versions in SharePoint Online. If you need to save more than 500 versions, you can upgrade your subscription plan.
In order to enable version control, click the Settings Icon in the top right corner of the window. In the menu that opens, click List settings or Library settings.
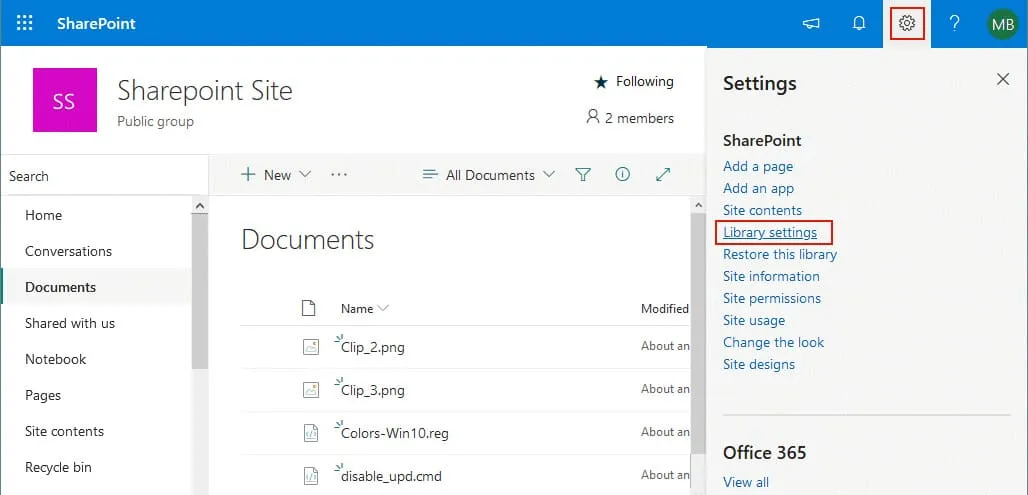
A new window opens. Click Versioning settings to configure version control for your SharePoint files.
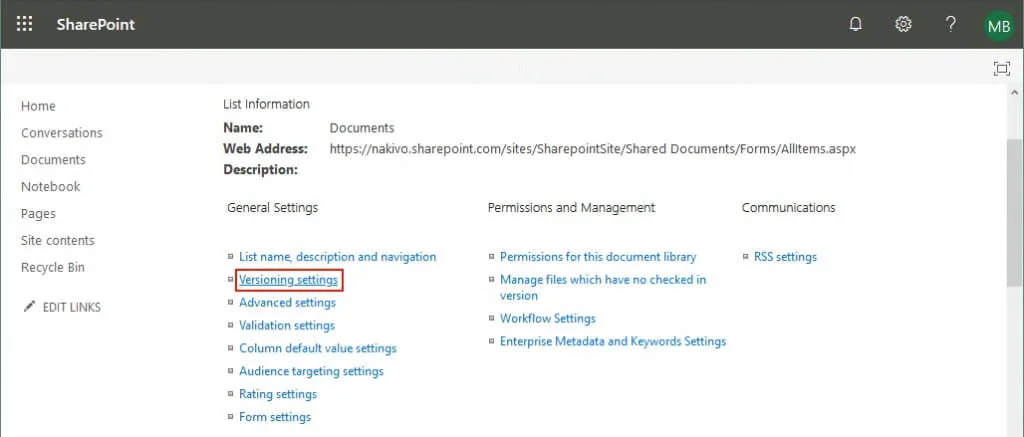
You can configure the settings shown on the screenshot below.
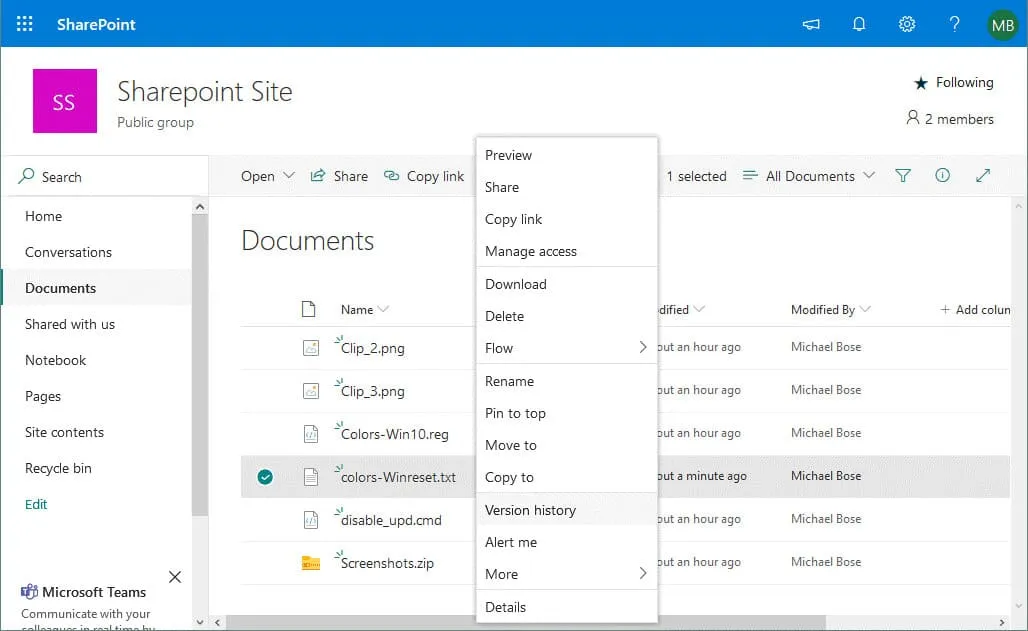
When versioning settings are configured, you can see that after saving changes to a file, a new version of the file is saved. Keep this in mind because each new file version will require space in the cloud storage used by Office 365 SharePoint. Open a directory with files, for example, Documents, select a file that was edited or changed and right click the file. In the context menu, select Version history.
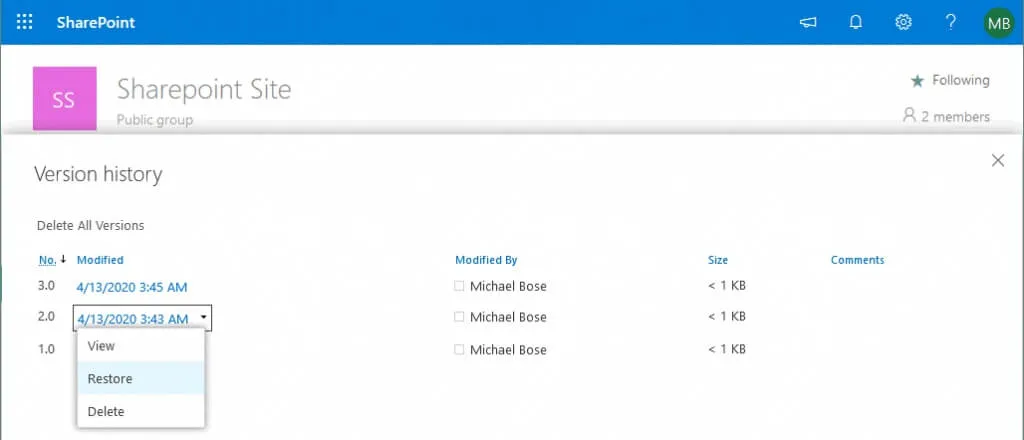
Now you can see the version history. If the latest version of your file is corrupted or some important data was accidentally or intentionally deleted, you can select a previous version of the file that is valid. After selecting the needed file version, click Restore.
Recovering a SharePoint Site
Another possible scenario is to recover SharePoint data in Office 365 by using a Site collection recycle bin.
Open the Recover a deleted SharePoint 365 site page by using the link:
https://admin.microsoft.com/sharepoint?page=recycleBin&modern=true
Log in as admin.
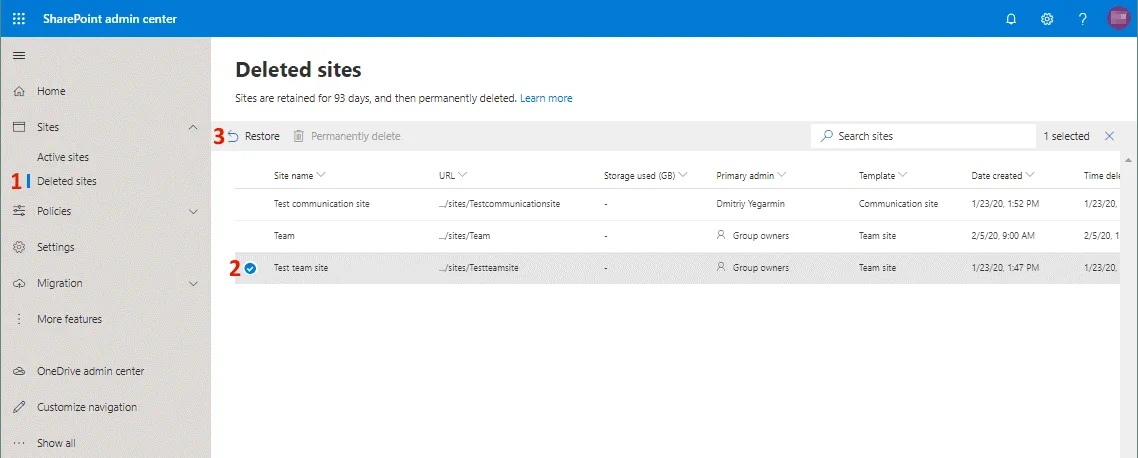
As an alternative, you can go to SharePoint admin center for Office 365 and in the left pane select Sites > Deleted sites.
The deleted data is stored in the Site collection recycle bin for 93 days, which is the maximum retention period after you delete the data from original location in SharePoint Online. If the amount of data stored in the Recycle bin exceeds the quota, the data that was deleted first is purged from the Recycle bin.
Select the needed files in the Deleted sites section and hit the Restore button.
If you deleted multiple objects, first you must recover a parent (container) object and then you can recover a child object. For example, if you deleted files and then deleted a library, you must restore the library first and then you can recover the needed files. However, if you deleted files and after that you deleted a folder in which those files were stored, then you can restore the needed files without additional steps. A folder in which the selected files were stored is recreated automatically (without other deleted files that are not restored).
Email Backup
Users who use SharePoint for Office 365 usually have email accounts and mailboxes. SharePoint notifications can be configured for sending via email to users after modifying and deleting files or other events. However, users can have other information that is more important than notifications in their email correspondence. When you are going to set up Microsoft Office 365 backup and SharePoint Microsoft Office 365 backup, don’t forget to back up email accounts of users in your company.
Note: Read also how to back up Office 365 accounts and how to recover deleted emails in Office 365.
Request Support in Microsoft
When files are deleted and no recovery options are left in the interfaces available for SharePoint Office 365 users and administrators (if it is not possible to restore files from the Recycle bin or with File Restore options), a user with global administrator rights can request file recovery from Microsoft. Microsoft retains files deleted from SharePoint Online for an additional 14 days after the final deletion in the web interface. Backups are performed every 12 hours. Microsoft allows you to send a request to technical support to recover site collections and sub-sites, but not for recovery of individual files, libraries, lists or mailboxes. Requests sent to Microsoft for recovery of SharePoint data are processed in a common queue. You cannot speed up the process of file recovery even if you upgrade your Office 365 subscription plan or buy more licenses. Hence, you should be prepared for not being able to recover your SharePoint immediately after sending a recovery request to Microsoft’s technical support.
The data can be restored to a state on a specified (available) date and any progress made after that date will be lost after SharePoint recovery. Note that according to the service level agreement (SLA) there is no warranty that all needed data will be restored within 14 days after deletion. Data recovery may take up to two days after a request is recorded. That’s why it’s better to perform Office 365 SharePoint backup. With backups, you have more flexibility for recovering your SharePoint data swiftly.
Note: Read also how to connect to Exchange Online with PowerShell and how to configure Microsoft Office 365 SMTP settings for your email client.
Conclusion
If you use SharePoint Online in your company, don’t forget about Microsoft Office 365 SharePoint backup. Despite the reliability of the Microsoft’s cloud platform and services, sometimes you may need advanced recovery capabilities for Office 365 SharePoint data. This blog post has covered native methods of SharePoint Online backup and recovery. Most of the operations are typically performed by Office 365 administrators.
However, if you learn how to back up and recover Office 365 SharePoint, you can protect the needed data yourself and spend less time for recovery in case any failures occur.