Account-Level Calendar and Contacts Sharing for Office 365
Microsoft Office 365 users who use Outlook know how important the contacts and calendar are. In Office 365 you can share a calendar with other users and export Office 365 contacts. Office 365 calendar sharing is useful when you want to invite other users to an event, for example, a meeting. Exporting Outlook contacts in Office 365 can help you restore a contact list when you want to migrate from one mail client to another or if you want to migrate to an account of another mail service, for example, Gmail. If you use Outlook as a desktop application, in a case of a system crash, you can use the exported file to restore your contacts. This blog post explains Microsoft Office 365 calendar sharing and how to export Office 365 contacts.

Office 365 Calendar Sharing
Let’s look at how to share an Office 365 calendar step by step in Outlook Online.
Log in to Office 365 in a web browser by using your Office 365 account.
https://login.microsoftonline.com
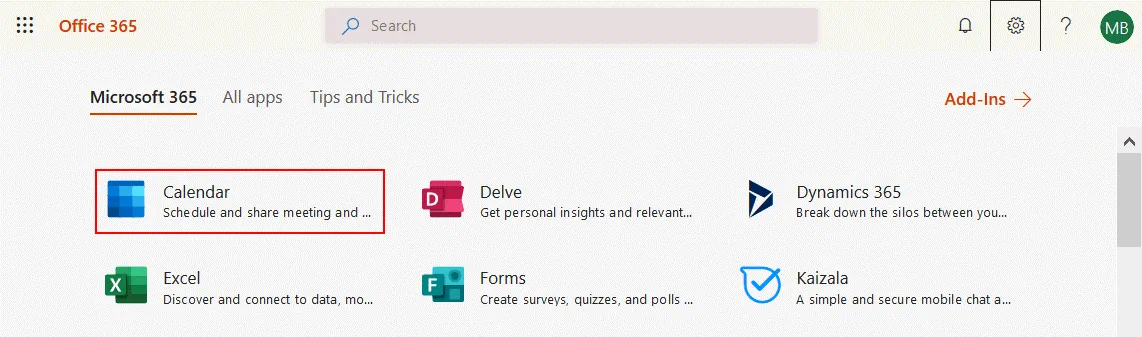
Select Calendar in the list of Office 365 applications.
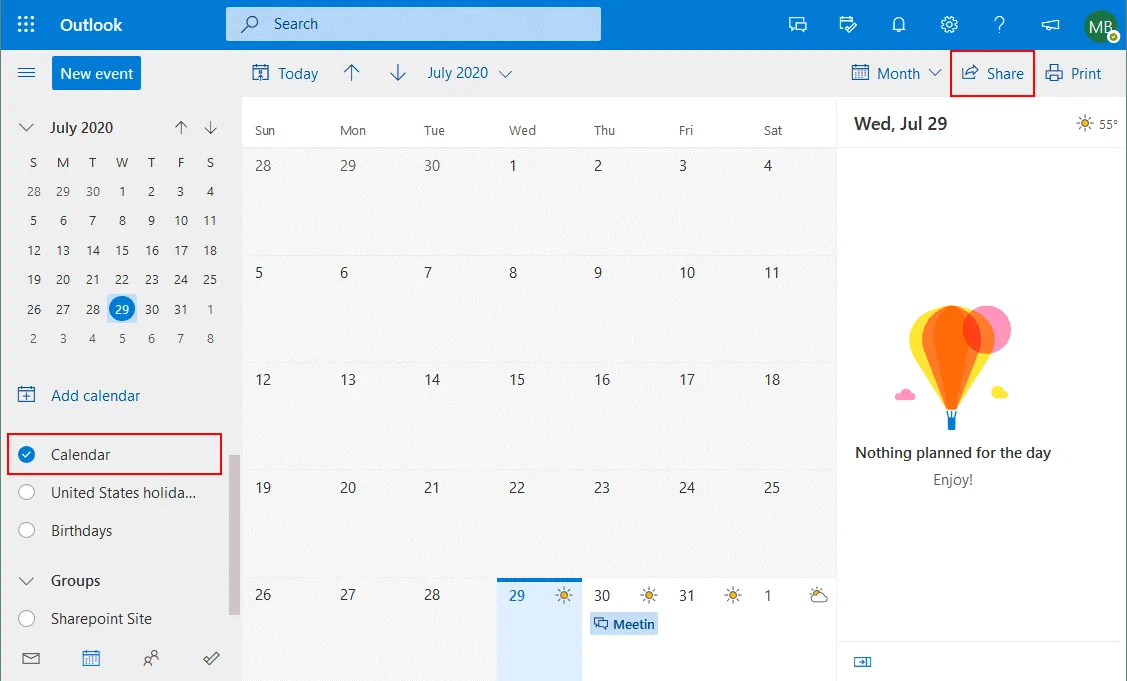
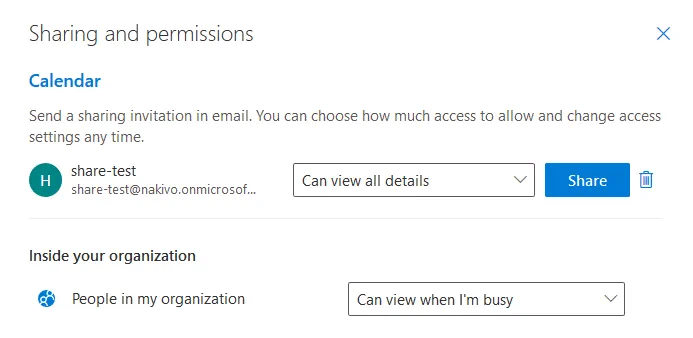
Your Outlook page with calendars opens in a new tab of the web browser. In the left pane of the window, select a calendar that you want to share. Click Share in the top right corner. As an alternative, right click the calendar name and, in the context menu, click Sharing and permissions.
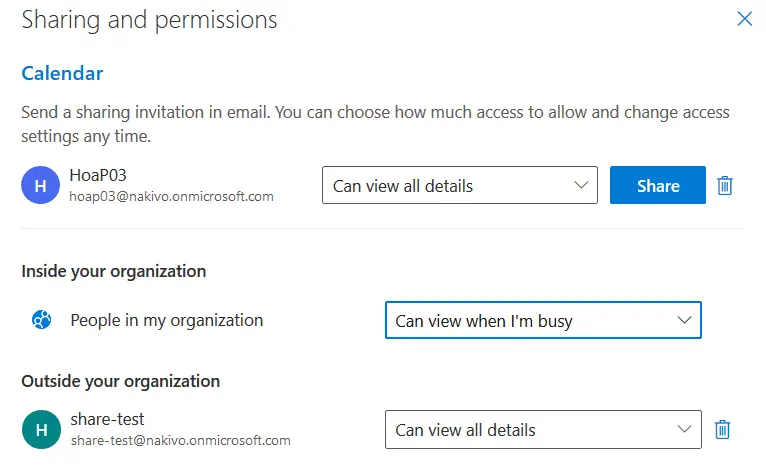
In the pop-up window, set sharing and permissions options. You have to control how others can use the shared calendar. Select an email address of a user or group with whom you want to share your calendar. Click the Share button. In the drop-down menu, select options for users inside your organization. The available permissions options are:
- Can view when I’m busy
- Can view titles and locations
- Can view all details
- Can edit
- Not shared
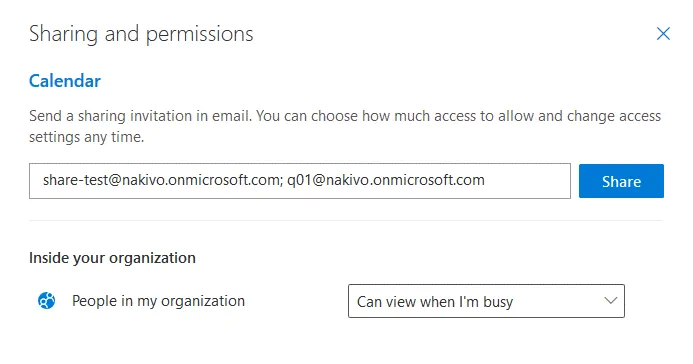
Once the needed user or group accounts are selected, define the needed permissions. In this example we have selected Can view all details for the selected users. People in my organization can view when I’m busy.
After sharing a calendar, Office 365 Outlook should send notifications to selected users with whom the calendar is shared. If you want to share Office 365 calendar with users outside your organization, you cannot provide them with edit permissions. Note that users that don’t use Office 365 or Outlook (for example users who use Gmail in a web browser), cannot access a shared calendar of the Microsoft format without third party applications because the calendar format is different for non-Microsoft email services. These users will receive an email message with a link to a shared calendar.
How to Publish Office 365 Calendar
Microsoft Office 365 allows you to publish your calendar for users outside your organization or for users inside your organization without allowing them to edit data. When Office 365 calendar is published, users who have access to the published calendar can only view the calendar and cannot edit the published calendar.
Configuration on the Administrator’s side
To configure, first of all, the administrator of your organization must enable Office 365 calendar sharing in global settings of the Microsoft 365 admin center. Log into the Office 365 admin center as administrator by using the link:
https://admin.microsoft.com/AdminPortal/
In the navigation pane click Settings > Org settings. Then hit Services on the Org settings page and click Calendar.
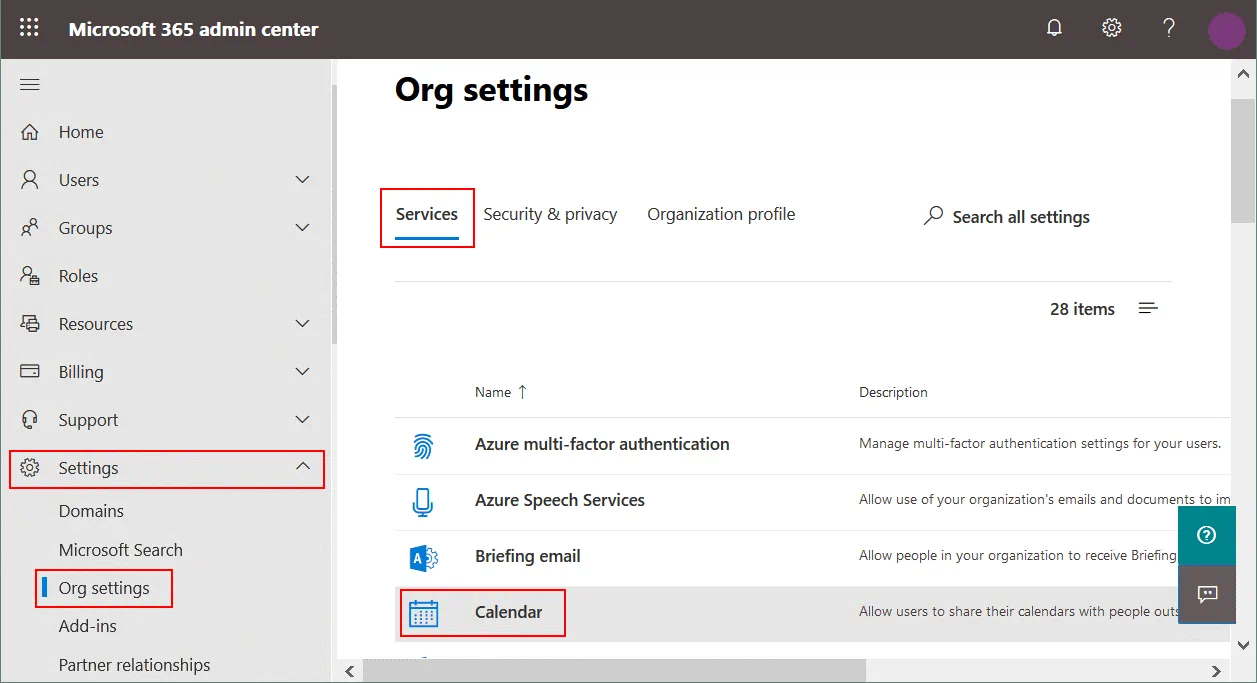
Allow Office 365 users of your organization to share their calendars with people outside of your organization. Allow anyone to access calendars with an email invitation. Select the appropriate checkboxes as shown on the screenshot below. Hit Save Changes.
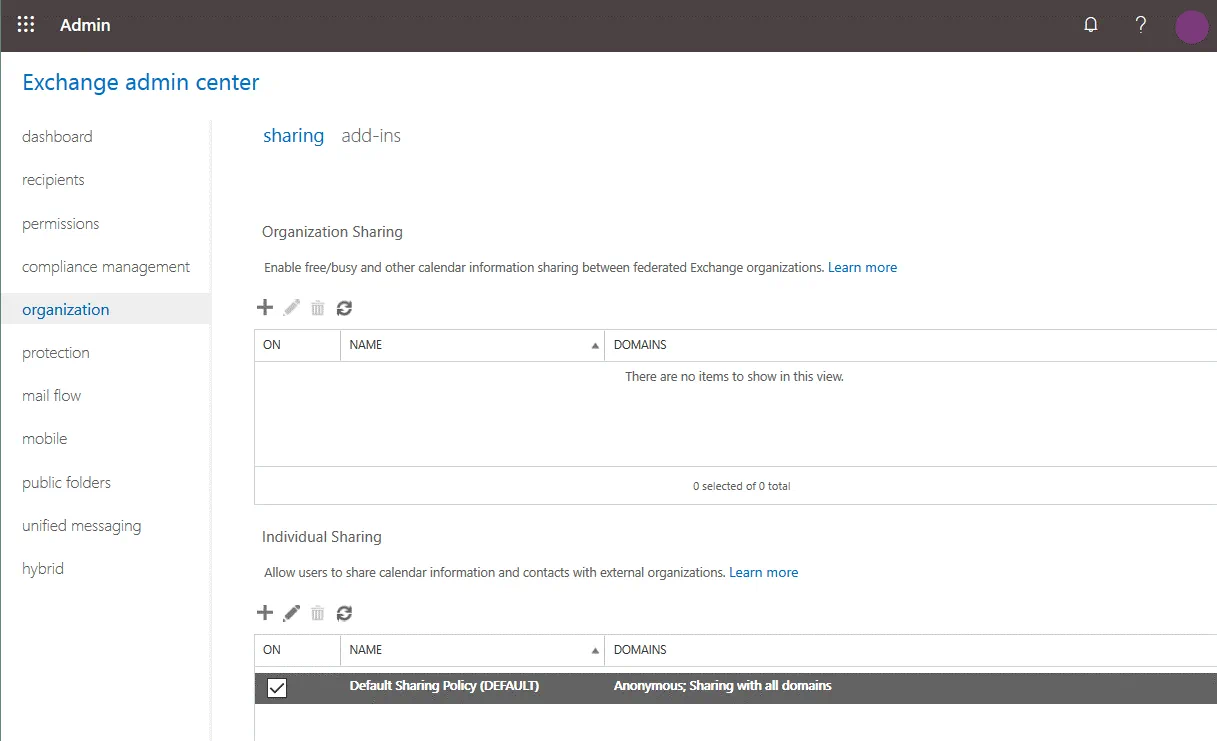
Go to the Exchange admin center to manage additional settings by clicking the appropriate link.

In sharing settings for an organization in the Exchange Admin center, you can configure organization sharing policies and individual sharing policies.
Now users of your organization can share their Office 365 calendars.
Configuration on the user’s side
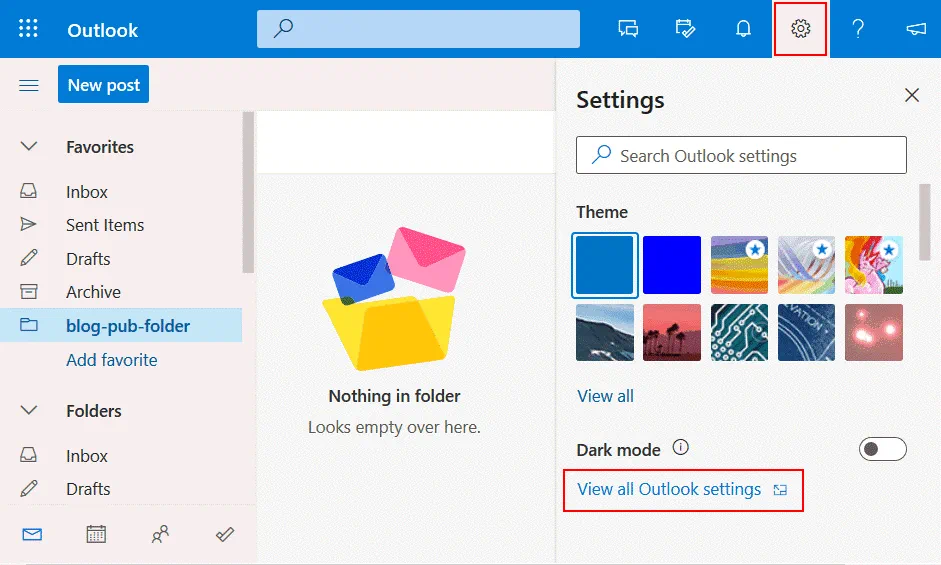
The configuration steps below can be performed by a regular user. You can configure Office 365 calendar sharing and publishing by opening Office 365 outlook Online by using your Office 365 user account. Click the Settings icon in the top right corner of the Outlook Online web interface. Then click View all Outlook settings.
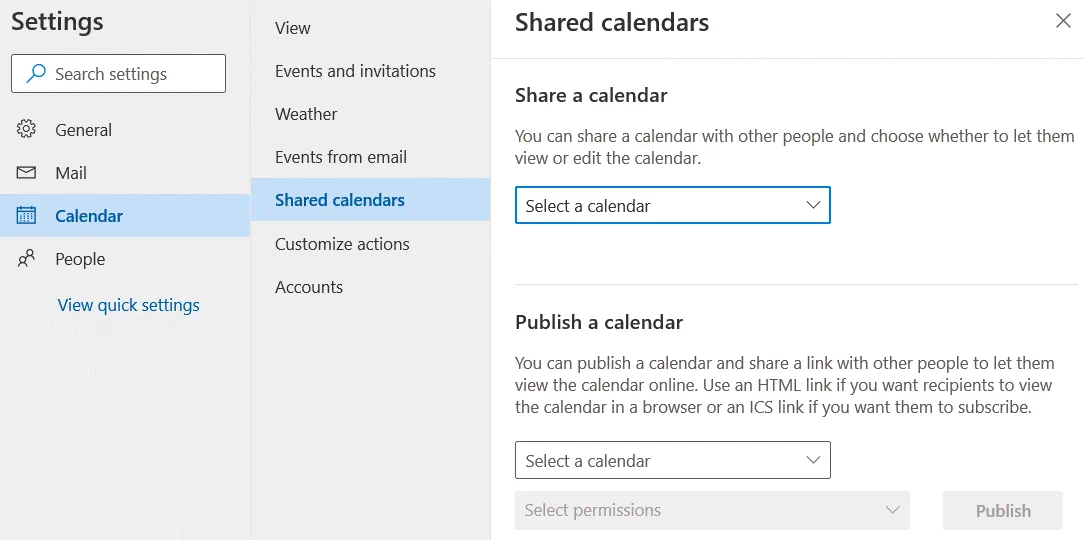
In the window that opens, go to Calendar > Shared calendars. In order to share a calendar, click Select a calendar in the drop-down menu of the Share a calendar section and select a name of your calendar that you want to share.
A window with sharing and permissions options is opened. Select the needed accounts of users or groups. Select permissions for users inside your organization and outside your organization. Hit the Share button.
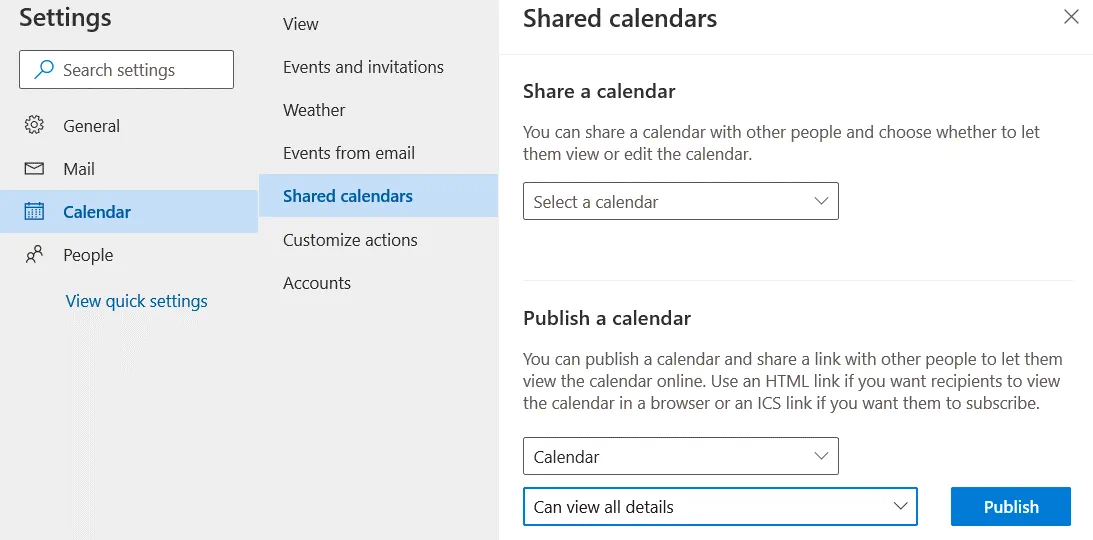
In order to publish a calendar in the Publish a calendar section of the Shared calendars options, select a calendar in the drop-down menu, select permissions for the published calendar in the second drop-down menu (for example, Can view all details) and click Publish.
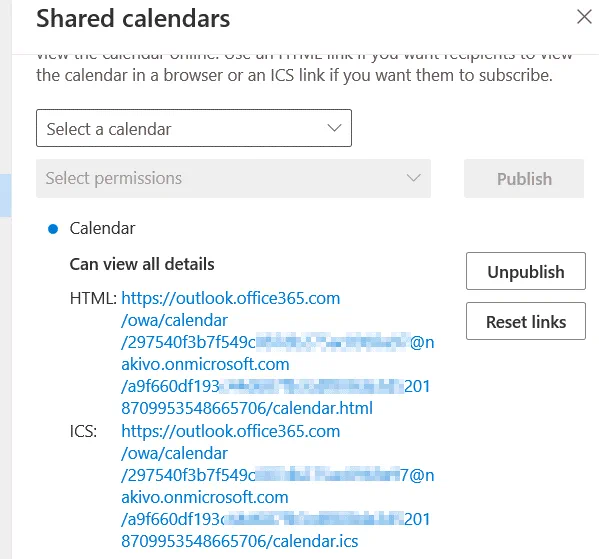
Wait for a few seconds until the calendar is published. Once the operation is completed, you can see links (public URLs) to access the published calendar for external users. Now users can view the calendar or subscribe to the calendar. A published calendar can be viewed by any user who has a link to the calendar.
How to Export Office 365 Contacts
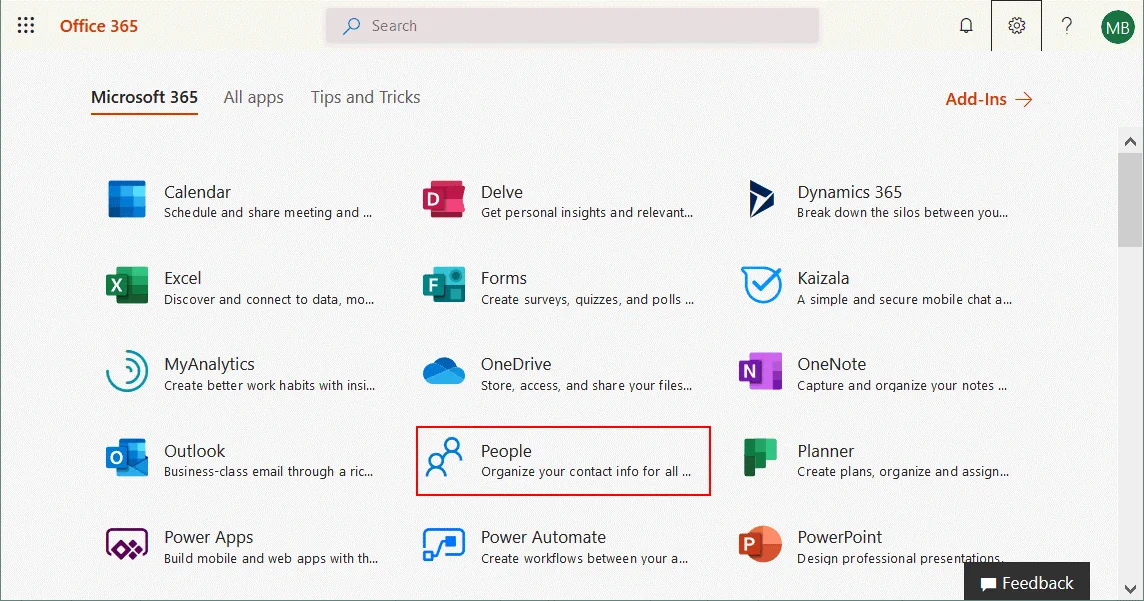
Once you have logged into Office 365 by using the web interface, go to the page with Microsoft Office 365 applications. Click the People icon to open a web page with Office 365 contacts for your account.
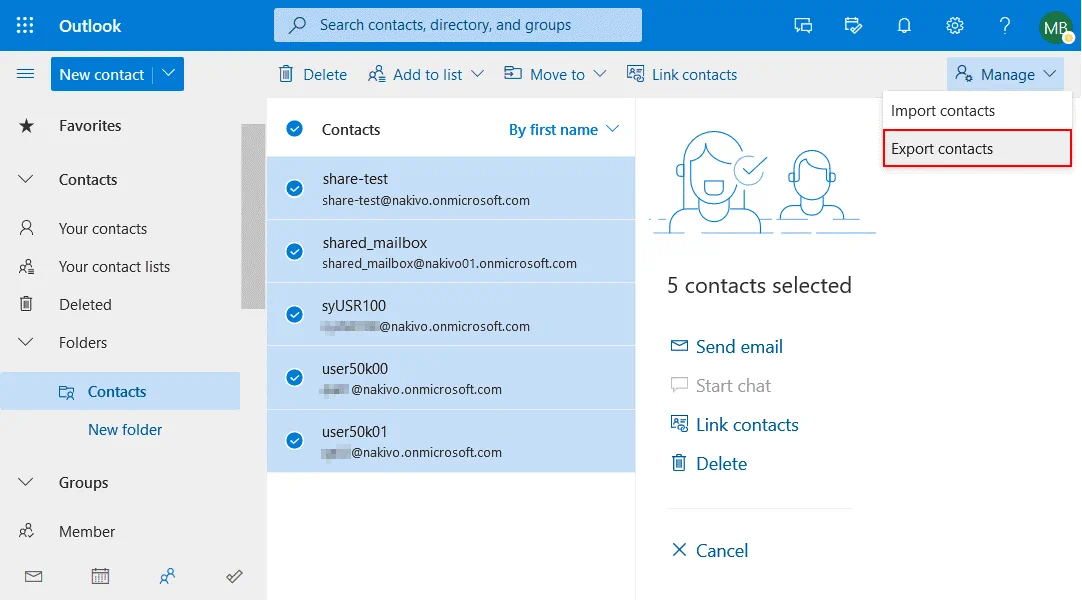
A page with your Office 365 Outlook contacts opens. Select your contacts and in the top right corner click Manage > Export contacts.
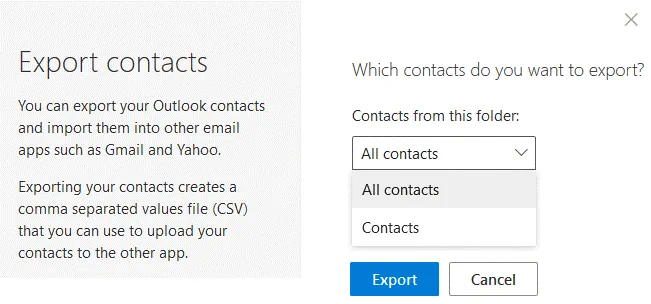
In the Export contacts window, select All contacts and click Export. Contacts are exported to a CSV (comma separated values) file that can be viewed in Excel and imported to email clients or email web services.
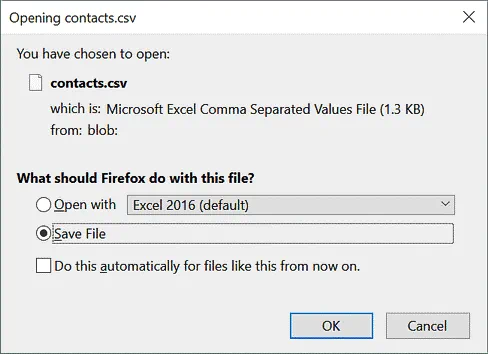
Save the contacts.csv file to a custom location.
Conclusion
Using Microsoft Office 365 calendar and contacts makes a working process more convenient and agile. You can schedule events, add them to the calendar, invite team members and share a calendar with users. Exporting contacts allows you to share contacts, migrate from one email client or email service to another. Exported Outlook contacts can be also used as a backup in case your computer with the email client crashes or your email account is down. This way you can restore your contacts and continue communication.
Despite the high level of reliability of Microsoft services, Microsoft Office 365 data protection is your responsibility. So it is recommended that you use reliable Office 365 cloud backup solutions to provide the highest level of protection and avoid data loss caused by human error or malware.