Complete Guide on How to Shrink and Compact Virtual Hard Disks in Hyper-V
When working with Hyper-V dynamically expanding disks, there is always a risk that those disks will grow uncontrollably and reach their maximum size in no time. The only way to deal with this issue is to regularly monitor disk size changes and then manually reconfigure the virtual hard disk properties. To ensure effective storage space allocation, you can either shrink or compact virtual hard disks.
Read today’s blog post to learn more about Hyper-V dynamically expanding disks, which steps should be taken to shrink or compact virtual hard disks, and how NAKIVO Backup & Replication can protect your virtual infrastructure.

All You Need to Know About Hyper-V Dynamically Expanding Disks
What is a dynamically expanding disk? – Dynamically expanding disks are a type of disk which allows you to effectively use physical storage space. When you first create a dynamically expanding disk, it is small in size and only takes up the storage space that it actually needs.
A dynamically expanding disk grows when new data is added to it, thus allowing you to minimize storage costs. Moreover, dynamically expanding disks work well in testing and development environments, and are greatly compatible with servers running non-disk intensive applications.
How can you reduce the disk size? – If not monitored properly, a virtual hard disk can expand to its maximum size, thus consuming a lot of physical storage space. However, deleting files from the virtual hard disk will not resolve this issue. The only way to do this is to manually reconfigure the disk through shrinking or compacting.
When the disk has reached its maximum size, you should open the Edit Disk wizard in Hyper-V Manager and select whether you want to shrink or compact a virtual hard disk. Remember that the virtual machine (VM) should be turned off for these operations to work.
What is the difference between shrinking and compacting virtual hard disks? – When shrinking a Hyper-V disk, you reduce its maximum size limit. When compacting a Hyper-V disk, the physical disk space consumed by a virtual disk is reduced and unused physical disk space gets reclaimed.
The shrink option reduces the storage capacity of the virtual hard disk, while the compact option allows you to compact the file size of a virtual hard disk, leaving the storage capacity intact.
How to Change the Disk Size of a Hyper-V VM
In Hyper-V environment, you can shrink, convert, expand, merge, reconnect or compact a virtual hard disk by editing the corresponding file using either the GUI or CLI tools. Below, I am going to demonstrate how you can shrink or compact virtual hard disks using the Edit Virtual Hard Disk Wizard, found in Hyper-V Manager.
How to shrink virtual hard disks in Hyper-V
Any virtual hard disk type (fixed, differencing, and dynamically expanding) has a fixed upper size limit, which can be reduced using the shrink operation. To shrink the virtual hard disk of the selected VM, you should do the following:
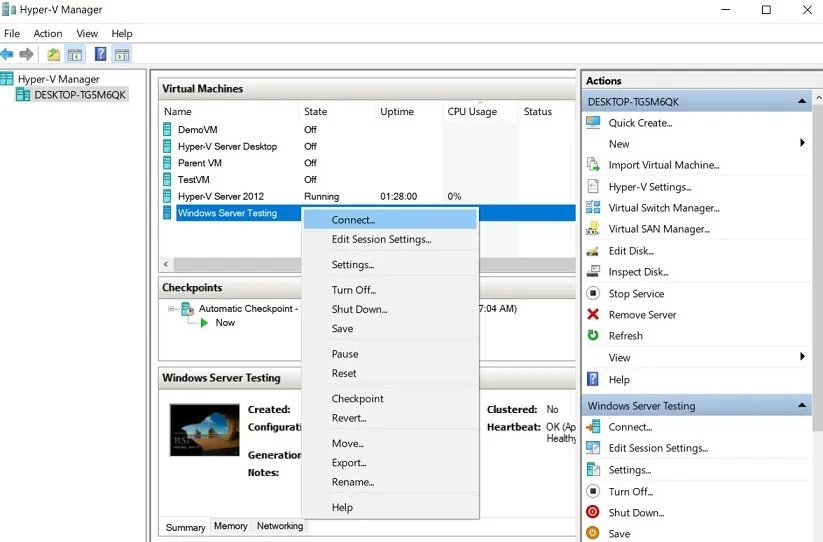
- In Hyper-V Manager, connect to the VM
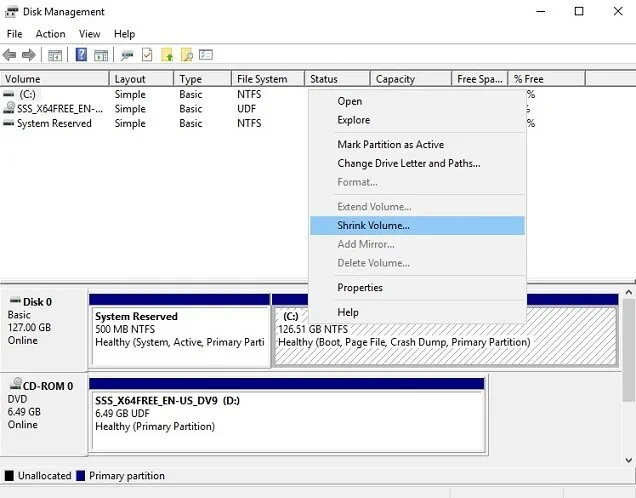
- After logging into the VM, launch the Disk Management utility by typing msc in the search bar.
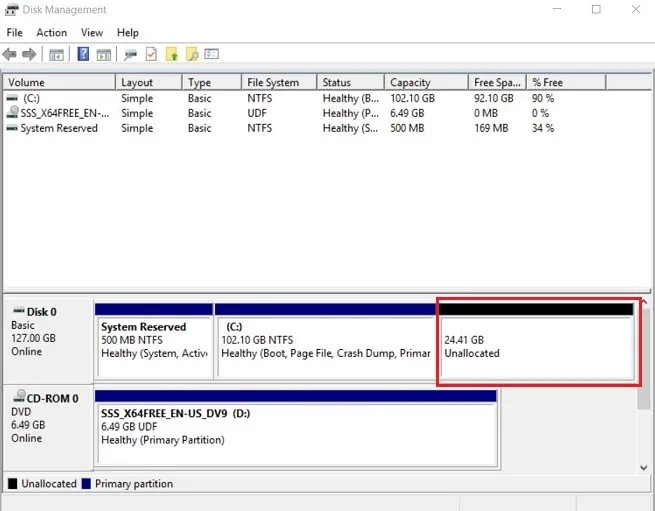
- Right-click the disk volume you would like to shrink, and select the Shrink Volume option.
- The next step is to enter the amount of space you wish to shrink in MB.
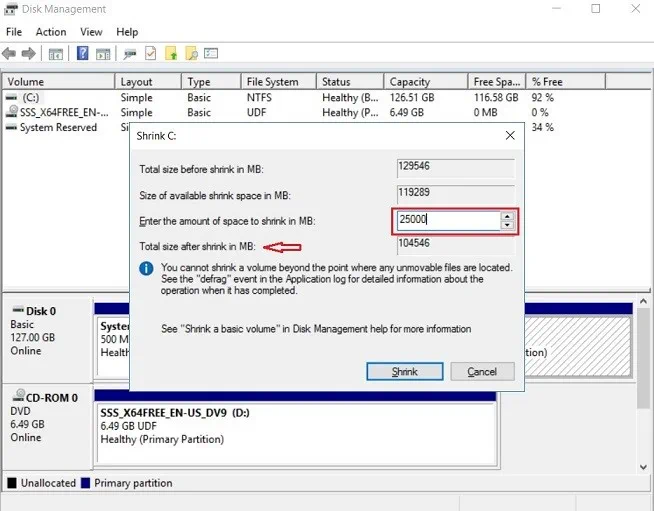 As you fill out this property, the Total size after shrink in MB value will change automatically, thus showing you what the disk storage capacity will be after the shrink operation is complete.
 - Click Shrink to start shrinking the disk volume. As a result, you will have roughly 25 GB of unallocated disk space.
- After that, shut down the VM.
- In Hyper-V Manager, right-click the VM and select Settings.
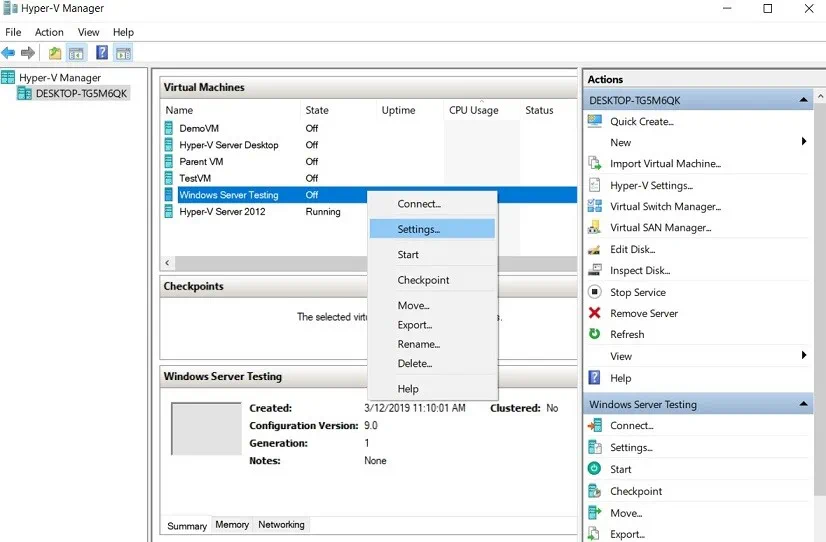
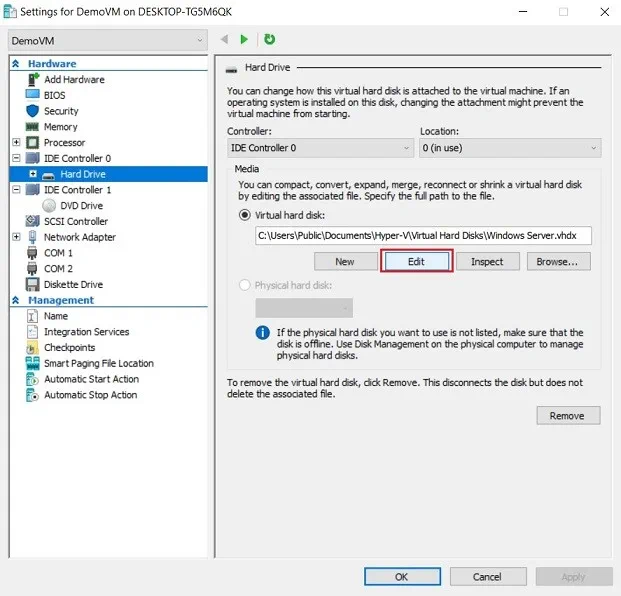
- In the Hardware section, click Hard Drive to get access to the virtual hard disk settings.
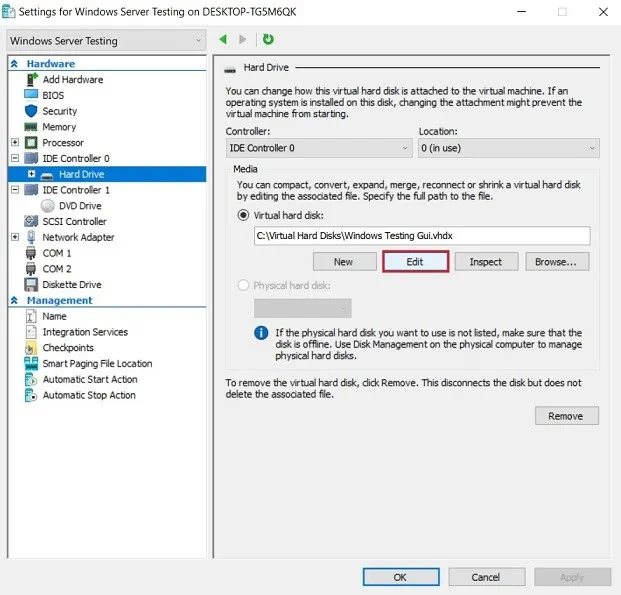
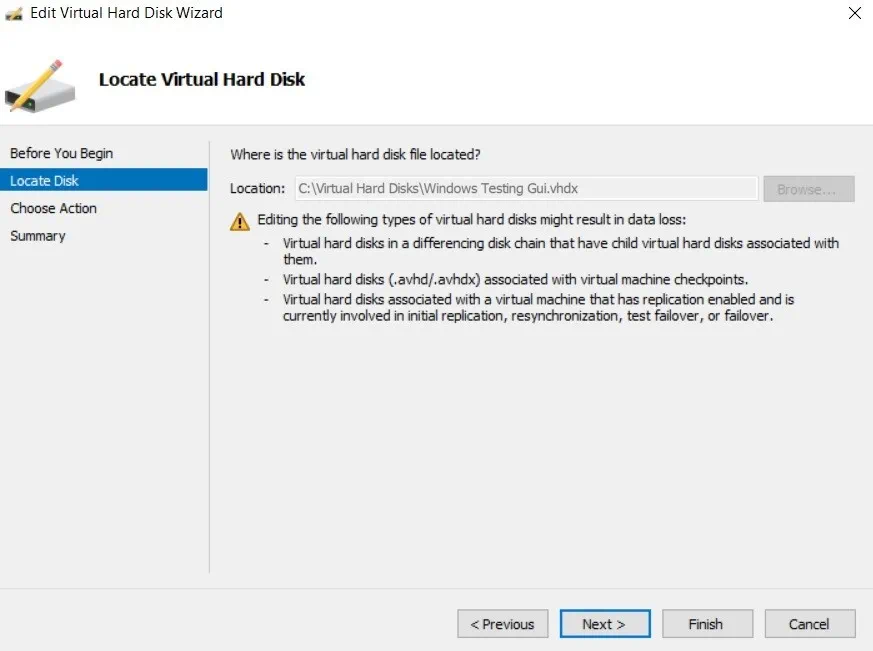
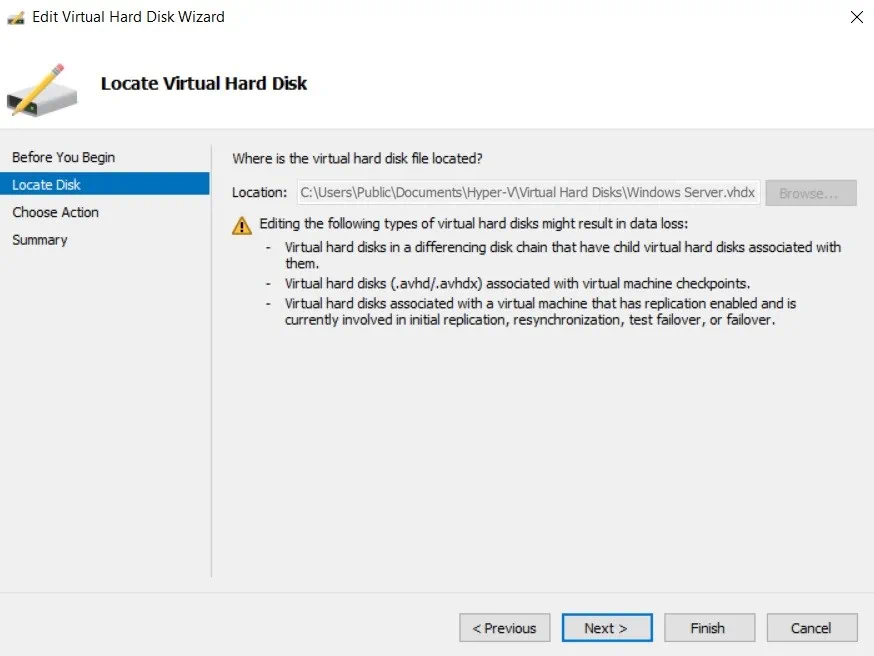
Select Edit to launch the Edit Virtual Hard Disk Wizard. - You can skip the Locate Disk step, as you have already selected which disk you would like to shrink. Click Next.
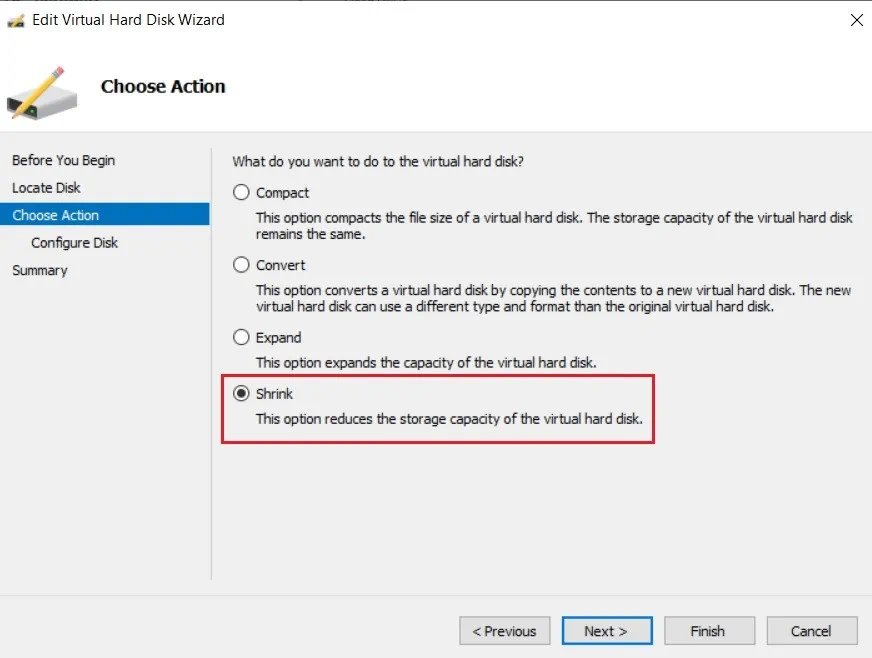
- In the Choose Action section, select Shrink and click Next.
- The next step is to configure the new size of the virtual hard disk.
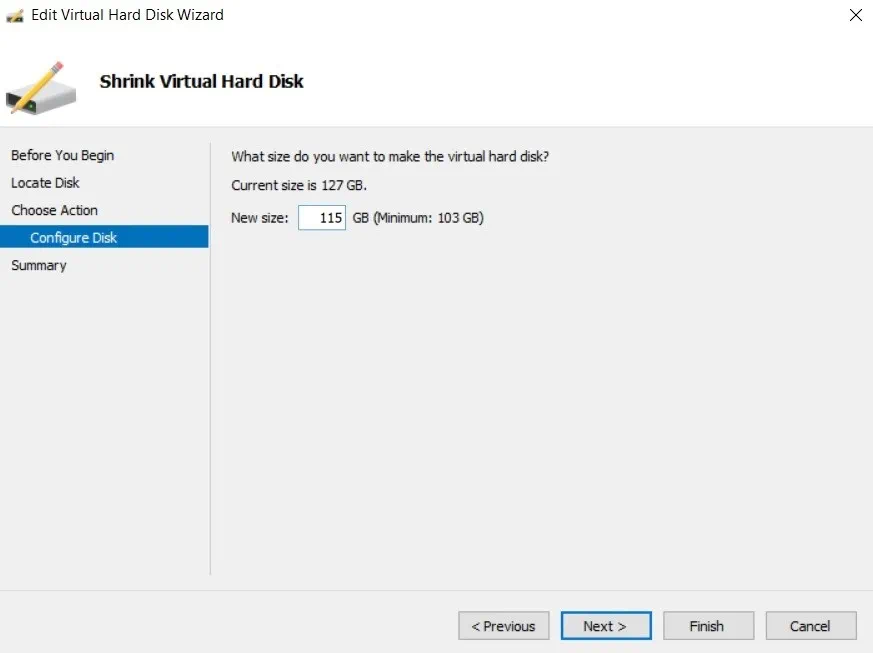
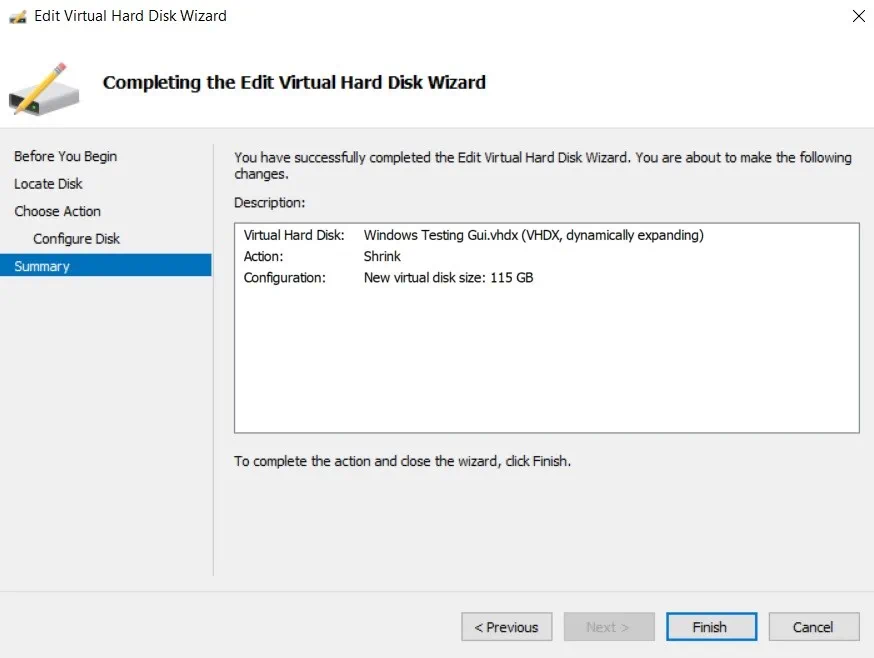
As you may notice, the difference between the current disk size and the minimum size is equal to the amount of extra disk space we have previously created inside the VM. - In the Summary section, you can look through the changes you are about to implement. Click Finish to complete the action and close the wizard.
- Click Inspect to verify that the disk size has actually changed and you have successfully shrunk the virtual hard disk.
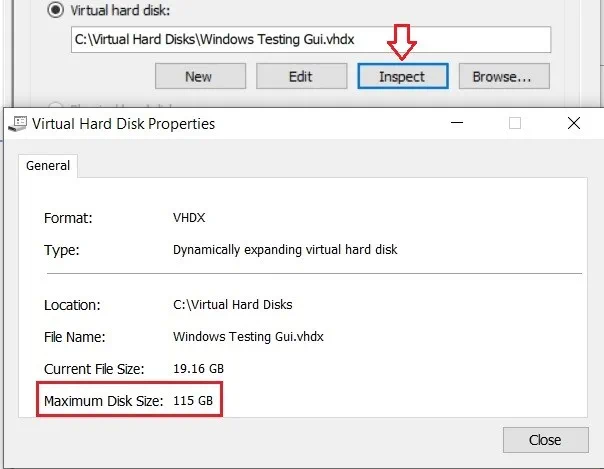
As you can see, the maximum disk size has been successfully reduced to 115 GB.
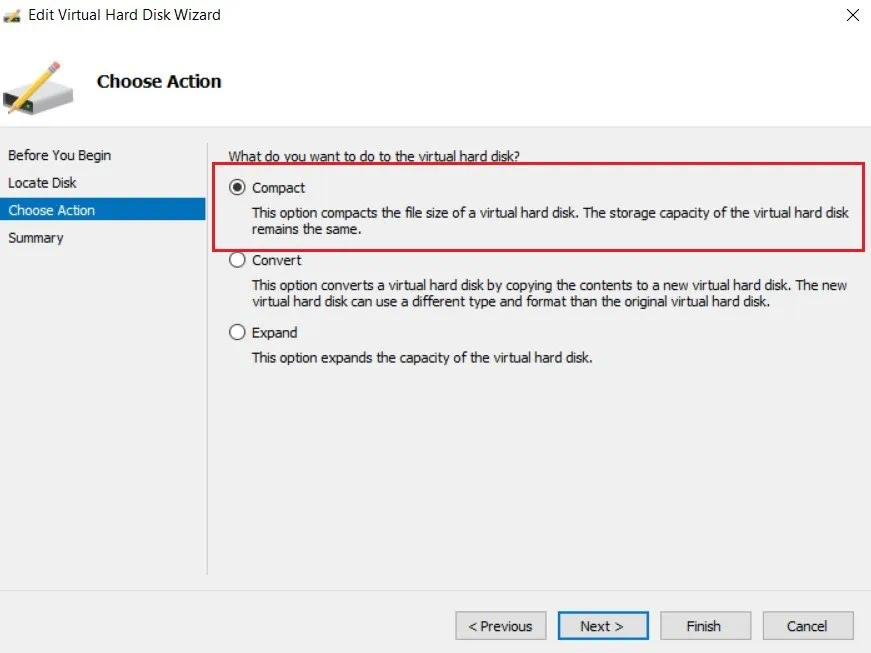
How to compact virtual hard disks in Hyper-V
Unlike shrinking, the compact operation doesn’t reduce the storage capacity of the virtual hard disk. This action reduces the file size of a virtual hard disk by removing empty blocks from the file. Note that you cannot compact fixed virtual hard disks.
Before compacting or shrinking a virtual hard disk, it is recommended that you empty the Recycle Bin, defragment the disk, and then create its backup to protect critical data in case of disk failure. Remember that the VM using the disk needs to be turned off for the compact operation to work.
- Open Hyper-V Manager.
- Right-click the VM and select Settings.
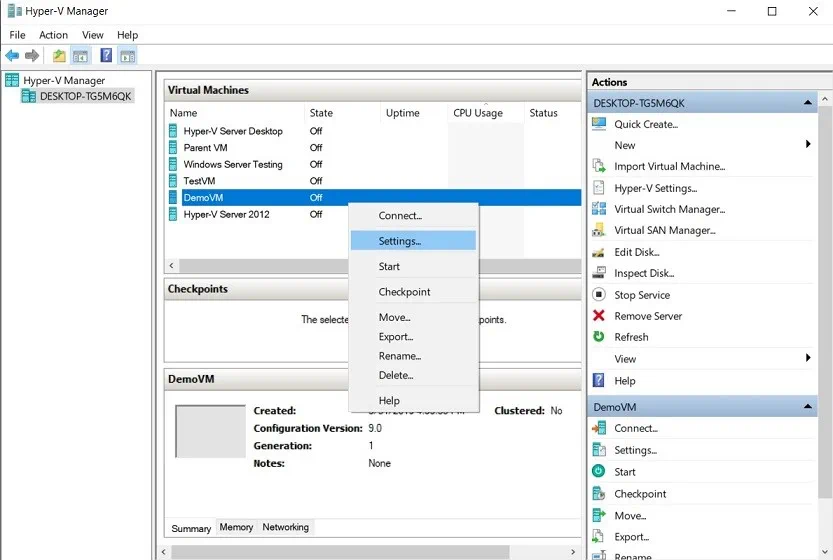
- Click Hard Drive to get access to the virtual hard disk attached to this VM.
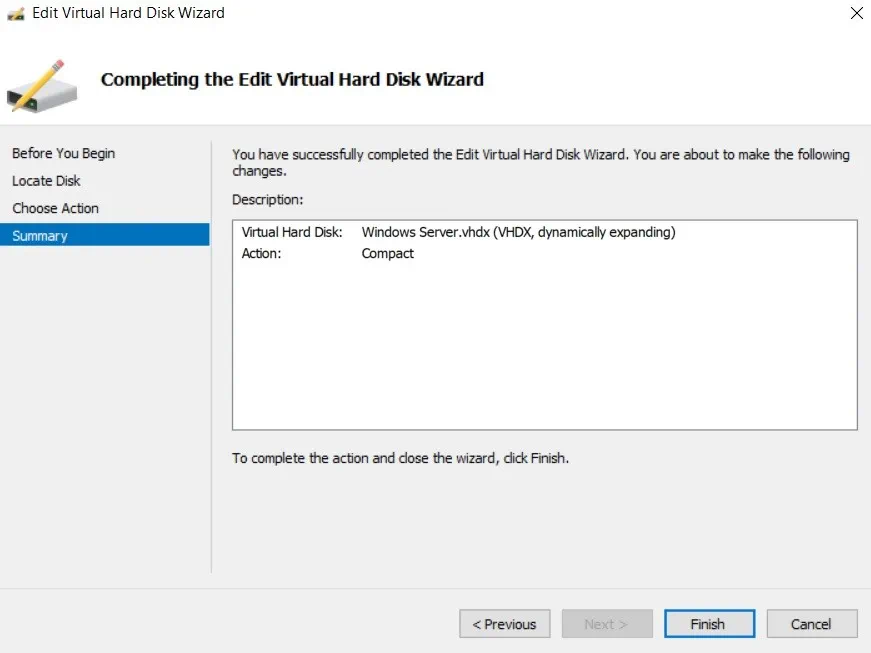
- Click Edit to launch the Edit Virtual Hard Disk Wizard.
- Skip the Locate Disk step as you have already selected the required virtual hard disk file, and click Next.
- Select the Compact action.
- In the Summary section, you can verify the changes that are about to be made to the virtual hard disk. Click Finish to complete the action and close the wizard.
- Click Inspect to verify that the disk file size has been actually reduced.
Wrapping Up
So, why do you need to shrink or compact virtual hard disks? The answer is simple. The size of the virtual hard disk can be reduced only manually. If you decide to simply delete content, you will clear up space on the virtual hard disk, and not on the physical disk. To free up physical disk space, you need to either shrink or compact virtual hard disks, depending on your needs.
Before you can start with shrinking or compacting the virtual hard disk, it is always better to prepare for the worst-case scenario. An unexpected system error or bug can make your infrastructure entirely inaccessible. For this purpose, you need to ensure that data stored on the disk is securely protected and can be successfully recovered in case of disk failure.
NAKIVO Backup & Replication is a simple, yet powerful data protection solution, which can help you protect your VMware, Hyper-V, Nutanix, and AWS EC2 environments from anywhere and at any time.