NAKIVO Backup & Replication Component: Director
NAKIVO Backup & Replication is a reliable data protection solution that is efficient, scalable, and flexible. This great functionality is delivered through the 3 core components of the NAKIVO solution: Director, Transporter, and Backup Repository. This blog post explains the Director, its purpose, and installation process.
What Is NAKIVO Director?
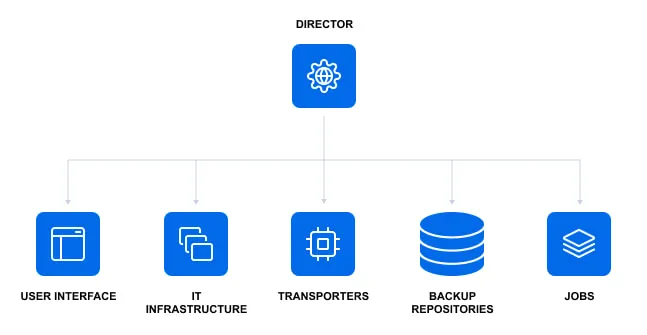
The Director serves as the primary control center for the solution, offering a web interface for managing various components, including inventory, job creation and execution, backup repositories, and Nodes (which include Transporters).
The Director component is a standalone application that serves as a user frontend to the NAKIVO data protection solution. The Director also manages the execution of user-initiated and scheduled jobs (for example, replication or backup), discovers and updates the hypervisor items in the inventory, communicates with remote components such as Transporters, and so on.
Installing one instance of the Director is enough per customer environment regardless of the number of sites to be protected. This instance of the Director can efficiently control multiple virtual, cloud and physical environments, backup repositories, and Transporters across different sites or geographical locations, serving as a centralized hub for data protection.
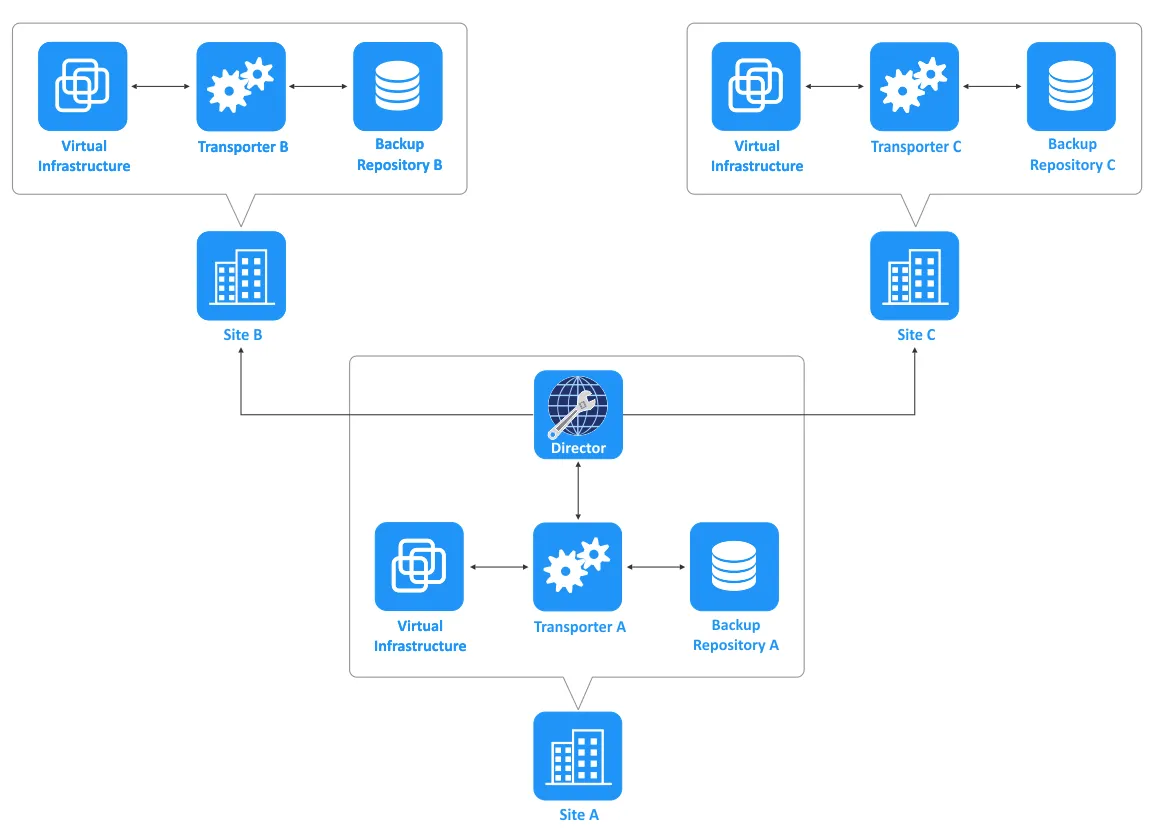
If you choose to install the full solution, the Director is installed along with the Onboard Transporter. Later you can install additional Transporters and create backup repositories on other machines and locations if needed. You can also choose to install the full solution with an Onboard Backup Repository.
Supported Platforms
NAKIVO Backup & Replication offers flexible deployment options. All the solution components can be installed on a variety of platforms:
- Linux and Windows OSs on physical and virtual machines
- Amazon EC2 instance
- Linux-based virtual appliance in VMware vSphere
- Network Attached Storage (NAS)
- Raspberry Pi
Requirements
The minimum requirements to install NAKIVO Backup & Replication with the Director and Onboard Transporter on a physical or virtual machine are:
- A two-core x86-64 CPU (central processing unit)
- 4 GB of RAM and 250 MB for each concurrent task (for example, 1 task can be the backup of 1 disk)
- If you plan to use a SaaS (software as a service) backup repository, for example, for Microsoft 365 backup, you need an additional 2 GB of RAM and 100 MB for each concurrent task
- 10 GB of free storage space
Requirements for Linux:
- The SELinux module on Linux must be disabled to install NAKIVO Backup & Replication on Linux.
- cifs-utils, open-iscsi, and ntfs-3g packages must be installed on Ubuntu and SUSE Linux.
- cifs-utils, iscsi-initiator-utils, ntfs-3g, and tar packages must be installed on RedHat Enterprise Linux.
You can check the full list of the requirements for each platform, including the list of all supported platforms, operating systems, and the required network ports.
Installation of the Director
Installation of the Director is similar to installing the Transporter on supported platforms. The general workflow is:
- Download the needed installer type by selecting the platform and included components. If you choose to install the virtual appliance, multiple options are available: Full Solution or Full Solution with Backup Repository.
- Running the installation file or importing/deploying the installation package.
- Following the installation wizard and selecting the needed options to install the Director and other components of NAKIVO Backup & Replication.
Installing the Director on Linux
To install the NAKIVO Director on a Linux machine:
- Download the installer for the needed platform after submitting the Free Trial form:
https://www.nakivo.com/resources/download/trial-download/
You can copy the download link from a web browser and download the NAKIVO installer directly in the Linux console with the following command like:
wget https://server_name_or_ip/path/NAKIVO_Backup_&_Replication_version_Installer-TRIAL.shAlternatively, you can use an SFTP or SCP client to copy the installer file to the Linux machine.
- After saving the installer file (version 10.9) to ~/Downloads/, we go to this directory:
cd ~/Downloads/ - Add the executable permissions for the installer file:
chmod +x ./NAKIVO_Backup_Replication_v10.9.0.75563_Installer-TRIAL.sh - Run the installer with root privileges:
sudo ./NAKIVO_Backup_Replication_v10.9.0.75563_Installer-TRIAL.sh - Read the license agreement. Press Enter to scroll down the text.
Type y to accept the license agreement and press Enter to confirm.
- Select which components to install:
- Full Solution (single tenant) – Director and Transporter (S)
- Full Solution (multi-tenant) – Director and Transporter (M)
- Transporter only (T)
Press S to install a full solution with the Director and Transporter in single tenant mode.
- Enter the installation location [/opt/nakivo]:
Press Enter if you want to use the default option in brackets [] or enter your custom setting and press Enter. This logic is true for each step of this installation wizard.
- You can input a certificate path (optional). Enter a path to a valid CA-signed certificate for the Transporter. That is:
/opt/casignedcertificate.pem
Note: Configuring the custom Transporter certificate is optional. If you do not wish to configure it, leave the field empty. In case no path to the custom transporter certificate is entered, a self-signed transporter certificate will be generated automatically.
- Define the Director HTTPS port [4443].
- Do you want to allow the automatic upload of support bundles to the NAKIVO support server? [Y/n].
- Define the Transporter port [9446].
- Set the Transporter data transfer ports range [9448-10000].
- Define the path for a backup repository [/opt/nakivo/repository].
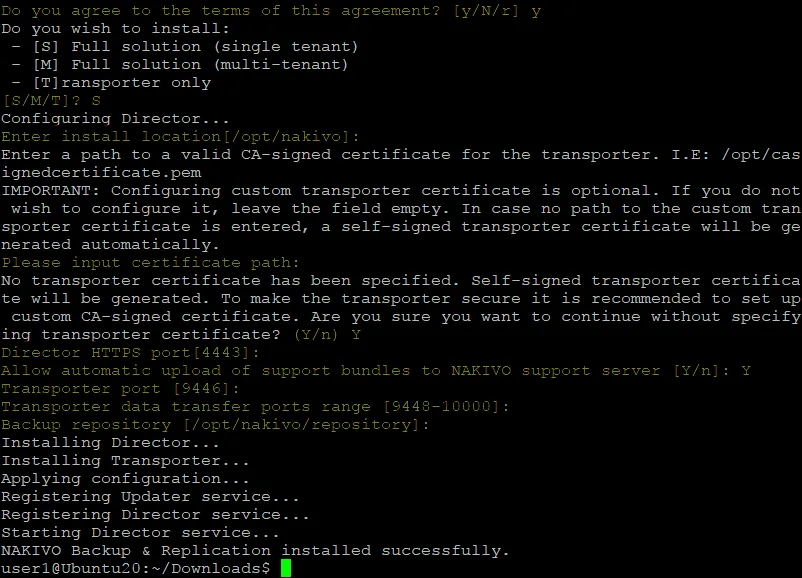
- Wait until the installation process is finished. After completing installation, you should see the message:
NAKIVO Backup & Replication installed successfully.
Installing the Director on Windows
Installing the Director component of NAKIVO Backup & Replication on Windows is relatively straightforward:
- Download the installer of NAKIVO Backup & Replication after submitting the Free Trial form:
https://www.nakivo.com/resources/download/trial-download/
We download the full solution for Windows to install the Director with the Onboard Transporter.
- Run the installer in Windows. In our case, the file name is:
NAKIVO Backup_Replication v10.9.0.75563 Installer-TRIAL.exe
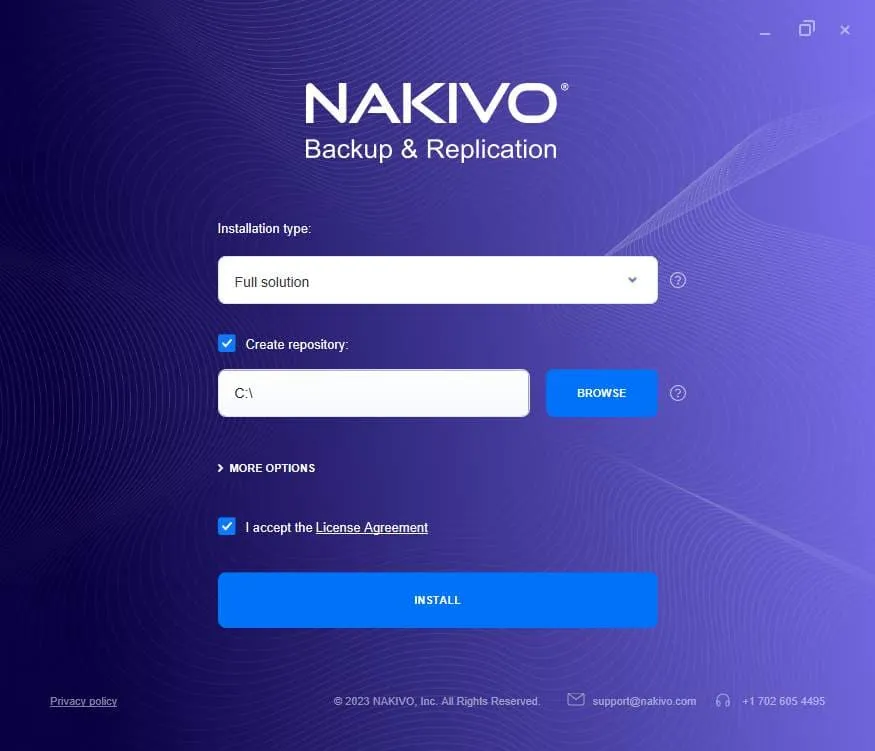
- A window with installation options opens. Configure the below installation options:
- Select the installation type – Full solution.
- Ensure that the Create Repository checkbox is selected if you want to create an Onboard Backup Repository and define the path for the repository in this case.
- You can expand more options to set the installation path, Director web UI port (4443 by default), Transporter port (9446 by default), and select a custom Transporter certificate.
- Select the checkbox to accept the License Agreement.
Click Install to start the installation process.
- Wait until the installation process is finished.
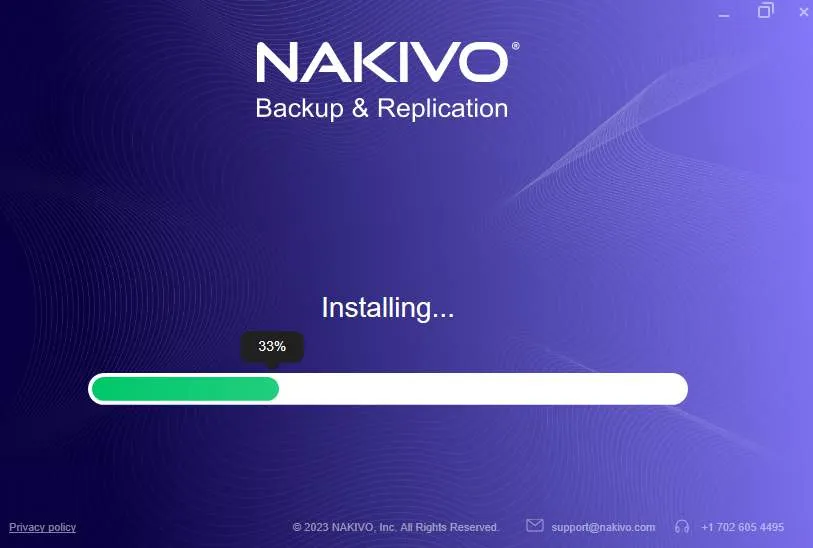
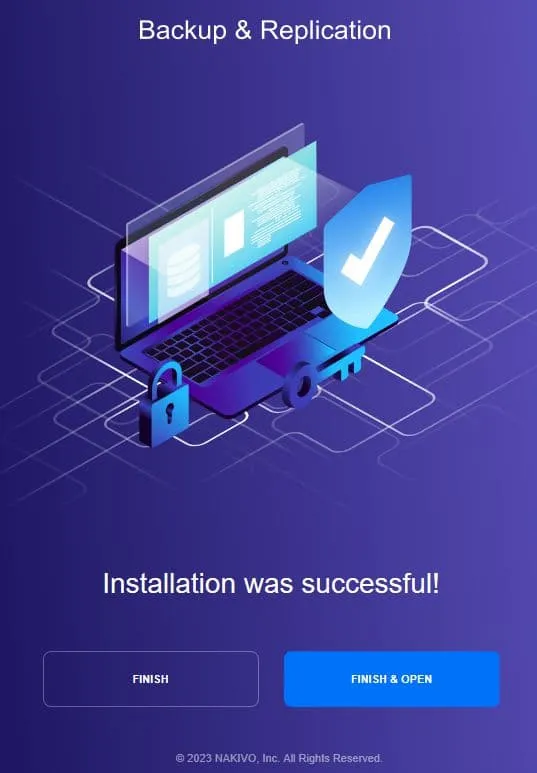
When the installation process is finished, the following message should appear:
Installation was successful!
- The Director and Onboard Transporter have been installed. Click Finish & Open to close this window and then the web interface of NAKIVO Backup & Replication opens automatically in the default web browser on the machine where you have installed the NAKIVO Director.
Installing the Director on NAS
If you have a Network Attached Storage (NAS) device in your infrastructure, you can choose to create a backup appliance based on your NAS. Such an appliance will combine software, hardware and storage and allows you to separate your data protection activities from your production environment.
NAKIVO Backup & Replication supports this option for a range of NAS devices from popular vendors like QNAP, Synology, ASUSTOR, NETGEAR, etc., and you can install all the NAKIVO solution components (Director, Transporter, and Backup Repository) directly on your NAS. Thus, you can manage the product and store backups on a NAS device. You can make a scalable and distributed backup system by adding more NAS devices or other supported devices to store backups with the NAKIVO solution.
Use the NAS vendor’s marketplace to install NAKIVO Backup & Replication on your NAS. Alternatively you can get the NAS installer and proceed with manual installation after submitting the Free Trial form: https://www.nakivo.com/resources/download/trial-download/.
Click Installer for NAS to expand the list of available installation packages for supported NAS devices and download the needed package.
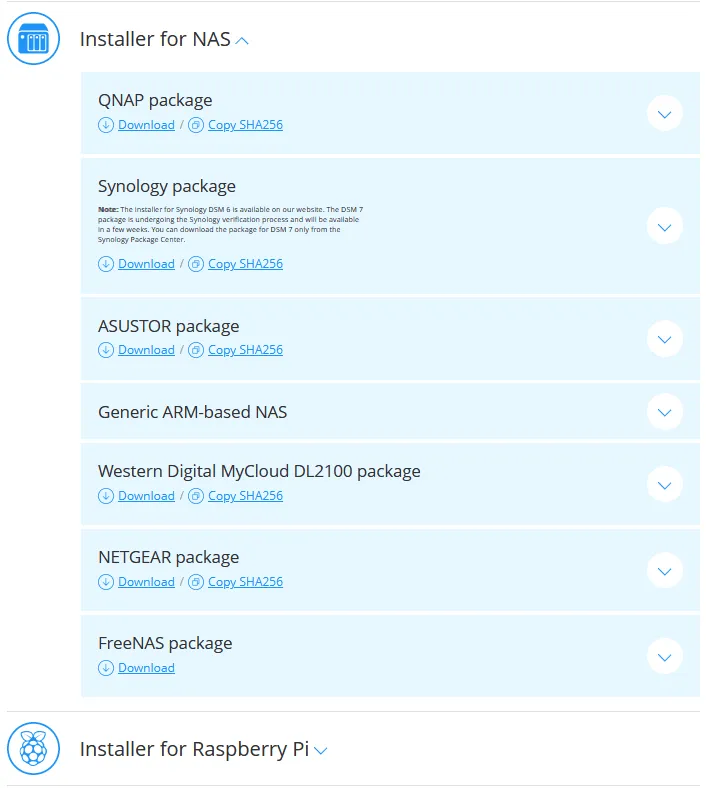
The installation process for NAS models of different vendors can vary. Refer to the documentation for installing NAKIVO Backup & Replication for a particular NAS vendor. On particular NAS models, you can install NAKIVO components such as Director and Transporter using the web interface of the NAS operating system from online software repositories for this NAS vendor.
NOTE: Learn more about installing the NAKIVO solution on Synology NAS and deploying a backup appliance on QNAP NAS.
Installing a VMware virtual appliance
If you have ESXi hosts and VMware vSphere in your infrastructure, one of the most convenient ways to deploy the NAKIVO Backup & Replication Director is by deploying the NAKIVO virtual appliance for VMware vSphere. A virtual appliance (VA) is a virtual machine that is deployed from a pre-configured VMware VM template.
NOTE: Read the detailed instructions about how to deploy NAKIVO Backup & Replication, including the Director, as a virtual appliance.
Post-Installation Configuration
After completing the installation of the Director, you should configure some options in the web interface to make it possible for the Director to interact with other components of the NAKIVO solution such as Transporters and backup repositories.
- Open the web interface of NAKIVO Backup & Replication (which is enabled by the Director) by visiting the IP address and port of the machine on which the Director is installed. You can use a web browser like Mozilla Firefox or Google Chrome to access the web interface. Port 4443 is used by default. In our case, we use the link:
https://192.168.101.210:4443
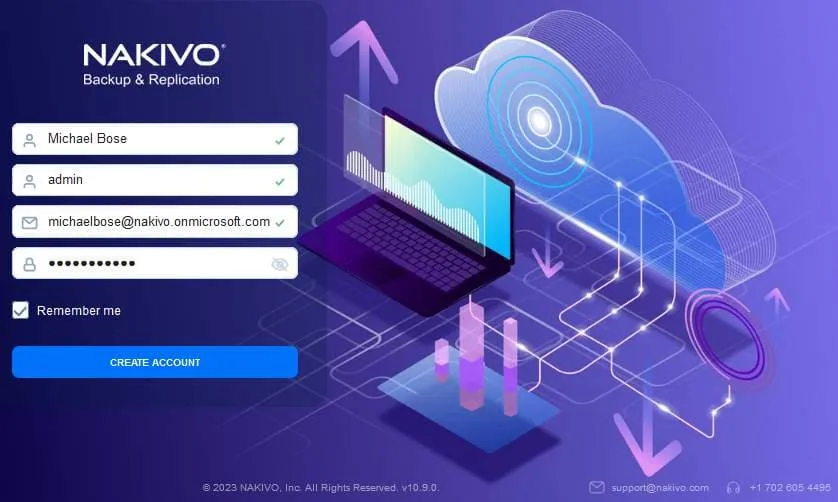
- Set your username and password for the account to be used to log in to the web interface of NAKIVO Backup & Replication. You should also enter your full name and email address to send reports and notifications if issues occur. We use the Office 365 email account on Microsoft 365 Exchange Online in this example.
Click Create account.
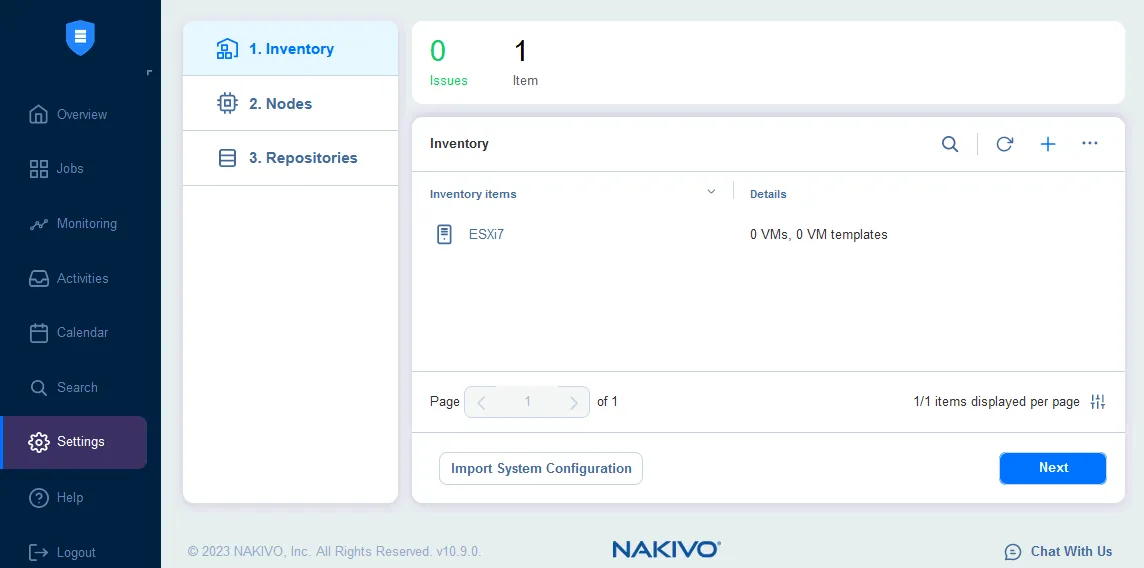
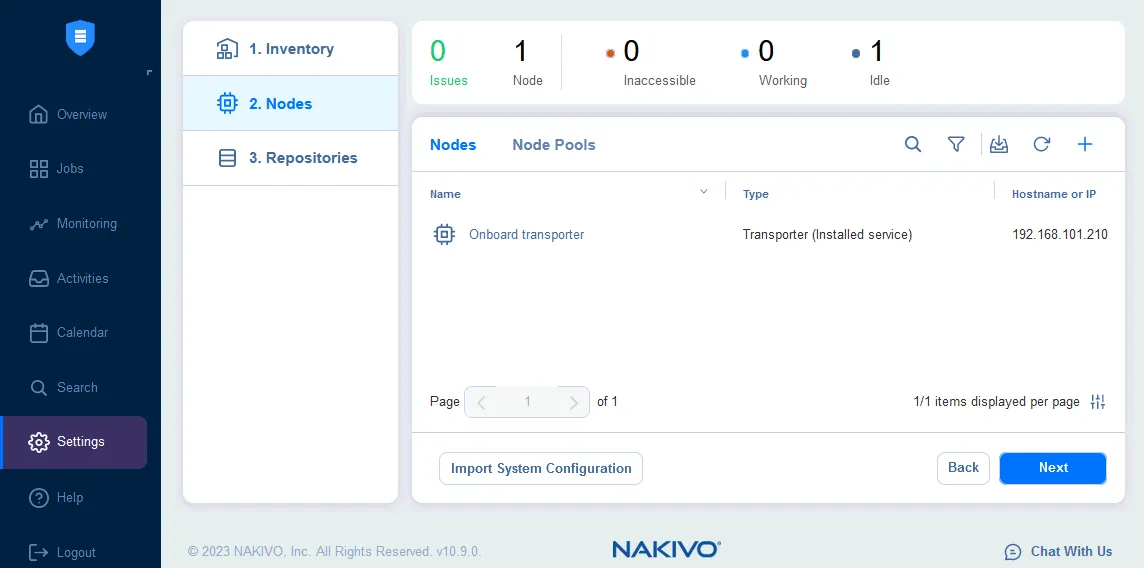
After you create your account and log in to the web interface of NAKIVO Backup & Replication, the initial setup wizard opens. The wizard contains 3 steps to be configured: Inventory, Nodes (Transporters), and Repositories.
- At the Inventory step, you should add inventory items, such as virtualization servers, that is, ESXi hosts, vCenter servers, Hyper-V hosts, physical servers, etc. Click + to add the needed items to the inventory. Once done, click Next to continue and proceed to step 2.
- Add Transporters to the list of Nodes at the second step. The Onboard Transporter is installed by default. This is enough for basic configuration. If you do not have additional Transporters deployed in your infrastructure yet, you can click Next and go to the next step. You can add additional Transporters later.
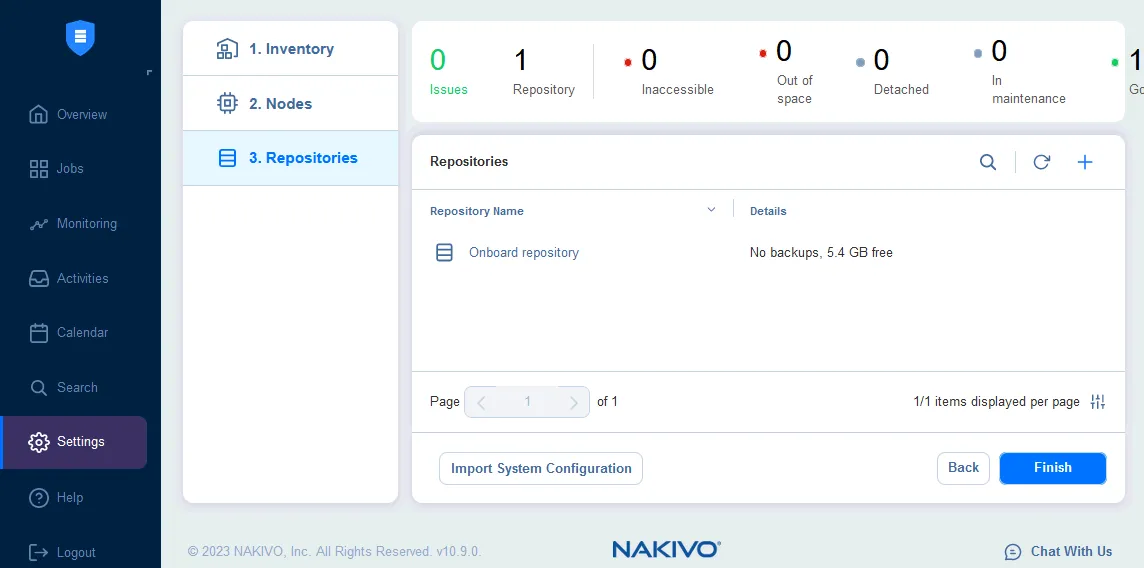
- You can add existing backup repositories or create new backup repositories at this step. If you have selected the installation type that includes the Onboard Backup Repository, you can use this repository to store backups. Click Finish to finalize the initial configuration wizard.
The installation and basic configuration of the NAKIVO Backup & Replication Director is complete. You can go to settings and configure any other options, such as adding or creating Transporters and backup repositories and adding items to the inventory at any time. You can learn more in the post about Backup Repositories in the NAKIVO solution.
How to Change the Director Web HTTPS Port?
You can change the port used to access the NAKIVO solution web user interface. In general, the configuration file needs to be updated with a new port value, and then the Director service needs to be restarted. Make sure no jobs are running when restarting as they will fail. In the following examples, the port is changed from 4443 to 443 on Windows and Linux.
Note: By changing the port in our examples, the Director will listen to TCP port 443 instead of port 4443. This configuration does not violate the port 443 set on VMware ESXi servers and vCenter servers used by the Director and Transporter to access the VMware vSphere infrastructure (ESXi and vCenter listen to port 443).
In Linux:
- Log in to the machine where the NAKIVO solution is installed (you can connect via SSH to this machine using the appropriate machine credentials).
- Type the command in the Linux console:
nano /opt/nakivo/director/userdata/config.properties - Change the existing webui.port 4443 to 443
- Save changes by pressing the Ctrl+O combination and exit the nano text editor by pressing Ctrl+X.
- Restart the Director service by using the following command:
/etc/init.d/nkv-dirsvc restart
In Windows:
- Log in to the machine where the solution is installed. You should act as administrator.
- Open the userdata/config.properties file in the solution installation folder with a text editor.
- Change the existing value from webui.port 4443 to 443.
- Save changes to the file.
- Restart the service NAKIVO Backup & Replication Director. This can be done in Control Panel > Administrative Tools > Services.
After completing the steps above, you can log in using a new port.