How to Set Up an SMB Share as a Backup Repository in NAKIVO Backup & Replication
NAKIVO Backup & Replication is a universal data protection solution that can be installed on different devices and operating systems, including Windows machines, Linux machines, NAS devices, and Raspberry Pi. When you install this backup solution, you should define a repository to store your backups. By default, the Onboard Backup Repository is created on the machine on which NAKIVO Backup & Replication is installed.
However, you may need to create another backup repository located on another machine that is accessible in the network. In this case, creating an SMB share and using this shared storage as a backup repository can help you. NAKIVO Backup & Replication supports the usage of an SMB share as a backup repository. In this blog post, I explain how to set up an SMB share as a backup repository in NAKIVO Backup & Replication.
What Is SMB?
Invented by IBM, SMB (Server Message Block) is a file-sharing client-server network protocol that is used to access files and folders on a file level. CIFS (Common Internet File System) is the Microsoft implementation of SMB in Windows to allow users to exchange files via networks with read/write access. Shared folders are also called shares or SMB shares if the SMB file sharing protocol is used. Nowadays, SMB is more commonly used than CIFS, and, often, CIFS is used to refer to SMB. SMB has been in use since the release of Windows NT 4.0. SMB v1 with Windows 2000. SMB v2 and SMB v3 are newer versions of the protocol and are more secure than SMB v1. SMB works over TCP, a transport protocol, and is also used to share printers in local networks.
The following ports must be open in the firewall:
TCP 137-139 for NetBIOS name resolution (nbsession)
TCP 445 for transferring data
UDP 137 for broadcast lookups
UDP 138 – nbdatagram
After getting familiarized with the SMB definition, we can move on to the practical part.
Creating an SMB Share
You can create an SMB share on a Windows machine, a Linux machine, and NAS devices. In the following example, I explain how to create an SMB share in Windows. The workflow in Linux is different, as you should install and configure Samba. As for NAS devices, you should create a user account, create a folder, and set permissions. However, the user interface is different on NAS devices from different vendors.
Requirements:
- A directory must be created and shared, and write permissions must be provided for the user account used to access a shared folder.
- The SMB share must be accessible from the machine on which the assigned Transporter is installed.
- SMB v2 or later must be used to set up the share.
Let’s look at how to configure SMB shares on a Windows machine in Workgroup. Windows Server 2016 is used in this example with the following parameters:
IP address: 192.168.101.209
Hostname: Server2016-01
A local path to a shared folder: D:\backup\nakivo-repo
A network path to an SMB share: \\192.168.101.209\nakivo-repo or \\Server2016-01\nakivo-repo
NAKIVO Backup & Replication is running on a machine whose IP address is 192.168.101.208 in our case. I’m going to create a new user in Windows, share a folder, and set the write permissions of the shared folder for this user. Then I can create a new Backup Repository in NAKIVO Backup & Replication by using the SMB file share.
Configuration in the Windows GUI
Configuring SMB file sharing is straightforward in the Windows graphical user interface (GUI).
First, create a backup folder. In my case, I’m using D:\backup\NAKIVO-repo\
Create a user. Let’s create a new Windows user account to access the shared folder. In my example, I’m creating a new user on a local computer running Windows Server 2016 in Workgroup.
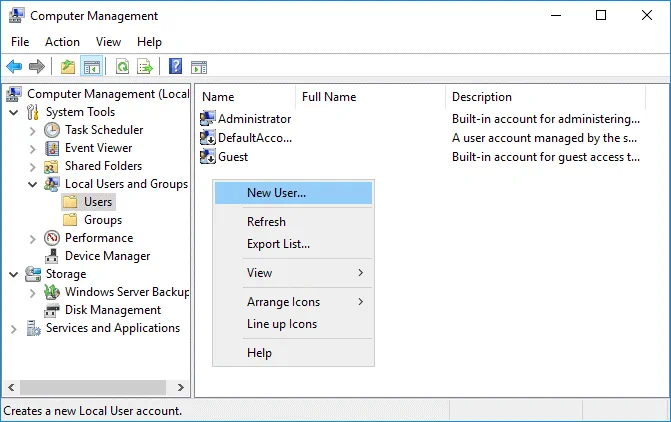
Open Computer Management in Windows (go to Server Manager > Tools > Computer Management or run compmgmt.msc in CMD).
In the Computer Management window, go to Local Users and Groups > Users.
Right-click an empty place, and, in the context menu, hit New User.
In the New User window, set the needed parameters.
User name: backupuser
Password: Enter a strong password.
Select these options:
- User cannot change password
- Password never expires
Hit Create, then click Close.
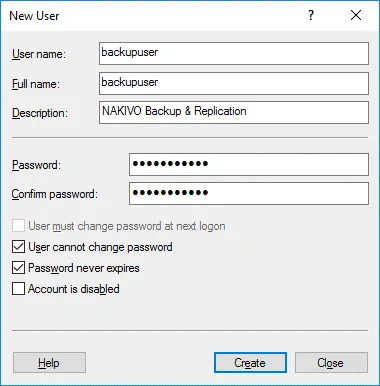
A user is now created. You can see the result in the screenshot below.

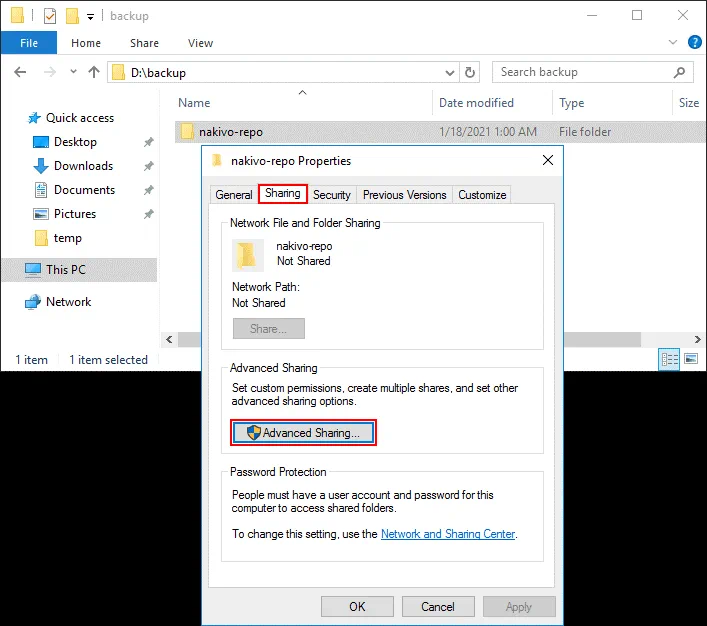
Share the folder. Right click the nakivo-repo folder, and in the context menu, hit Properties.
Open the Sharing tab, and hit Advanced Sharing in the folder properties window.
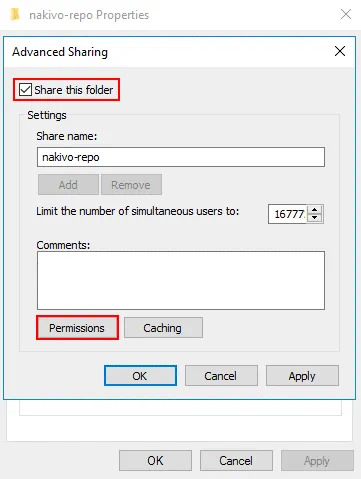
Select the Share this folder checkbox.
Enter a share name: nakivo-repo.
Click Permissions.
By default, everyone can read contents in a shared folder. Click Add to add a user or a group.
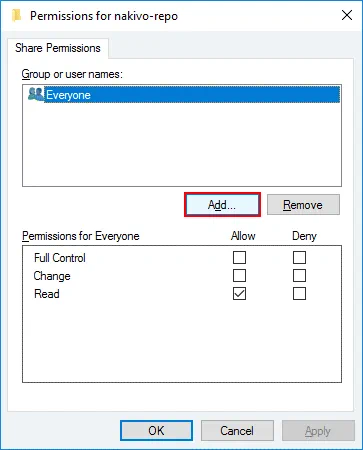
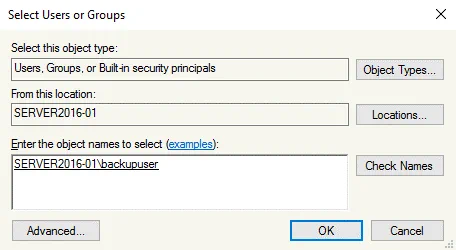
Enter the object names to select: backupuser (select the user that was created before).
Click Check Names.
If you entered a name correctly, the name is underlined after checking. Hit OK to save settings and close this window.
Select the backupuser and select the Allow Full Control checkbox in the Permissions section. You can deselect the read permissions that are set by default. Hit OK to save settings, and close the window.
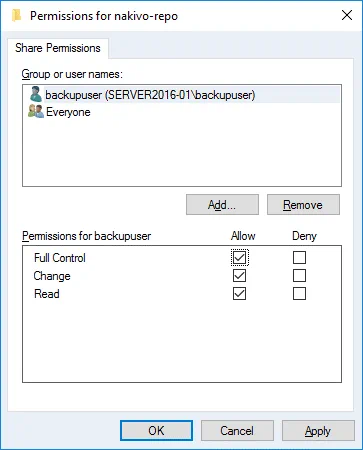
Then hit OK once again to close the parent window. Click Close in the folder properties window.
A shared folder is configured now.
Configuration in the command line interface
If you use the Windows Server edition without the GUI or prefer using the command line, you can perform the same configuration in the command line interface.
Run CMD as an administrator.
Create a folder that you want to use for the Backup Repository:
mkdir d:\backup\nakivo-repo
Create a backup user in Windows:
net user backupuser password /add
Enter a strong password instead of password.
If you need to add a user to a group, use a command like:
net localgroup groupname username /add
Set the password to never expire. First, check whether the password expires:
net user backupuser | findstr /C:expires
Check whether a user can change the password:
net user backupuser
Run this command to disable changing passwords for the backupuser:
net user backupuser /Passwordchg:no
Share the folder that you have created. Grant all permissions to backupuser.
net share nakivo-repo=d:\backup\nakivo-repo /GRANT:backupuser,FULL
Configuration in an Active Directory domain
If a computer on which you want to create a shared folder is a domain member, you can create a domain user in Active Directory Users and Computers on a domain controller. Add the created domain user to a domain group if needed. You can also log in to a computer on which you want to share a folder as a domain administrator, open Local Users and Groups and add a domain user to a local computer to the needed local group (optional). When configuring the sharing options for a folder, select the needed domain user and set full permissions for this user to access the folder. When accessing a shared folder using the domain user account, enter a domain user name in the following format:
domainname\username
For security reasons, don’t use a user account with domain administrator permissions to access shared folders.
Creating a Backup Repository
If you have not installed NAKIVO Backup & Replication yet, download the product and install it in your environment.
Open the web interface of NAKIVO Backup & Replication. In my example, I use the address:
https://192.168.101.208:4443
Go to Settings > Repositories.
Click Add Backup Repository, and in the menu that opens, hit Create new backup repository.
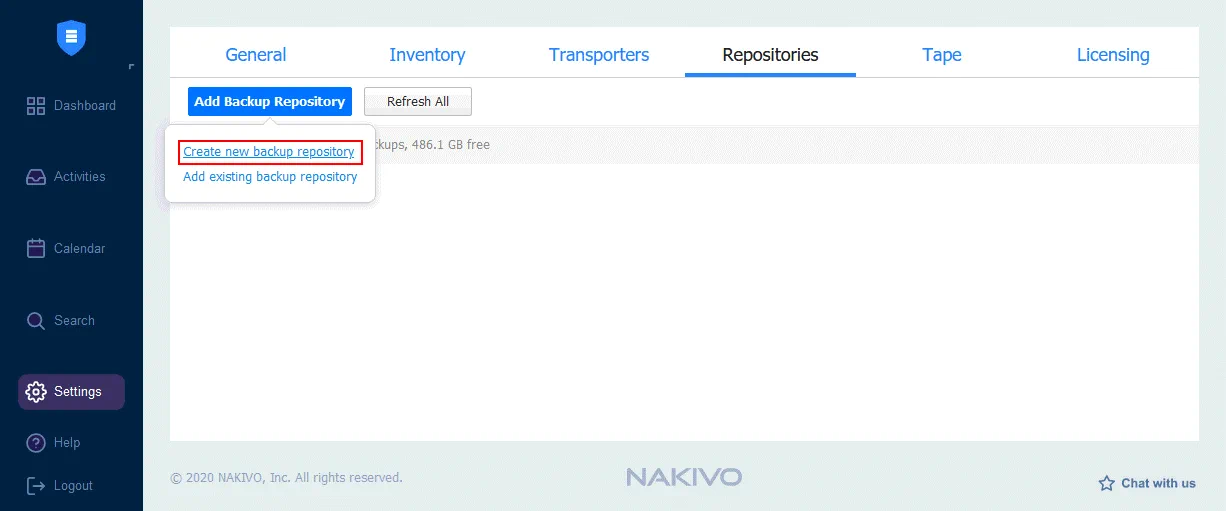
A three-step wizard opens.
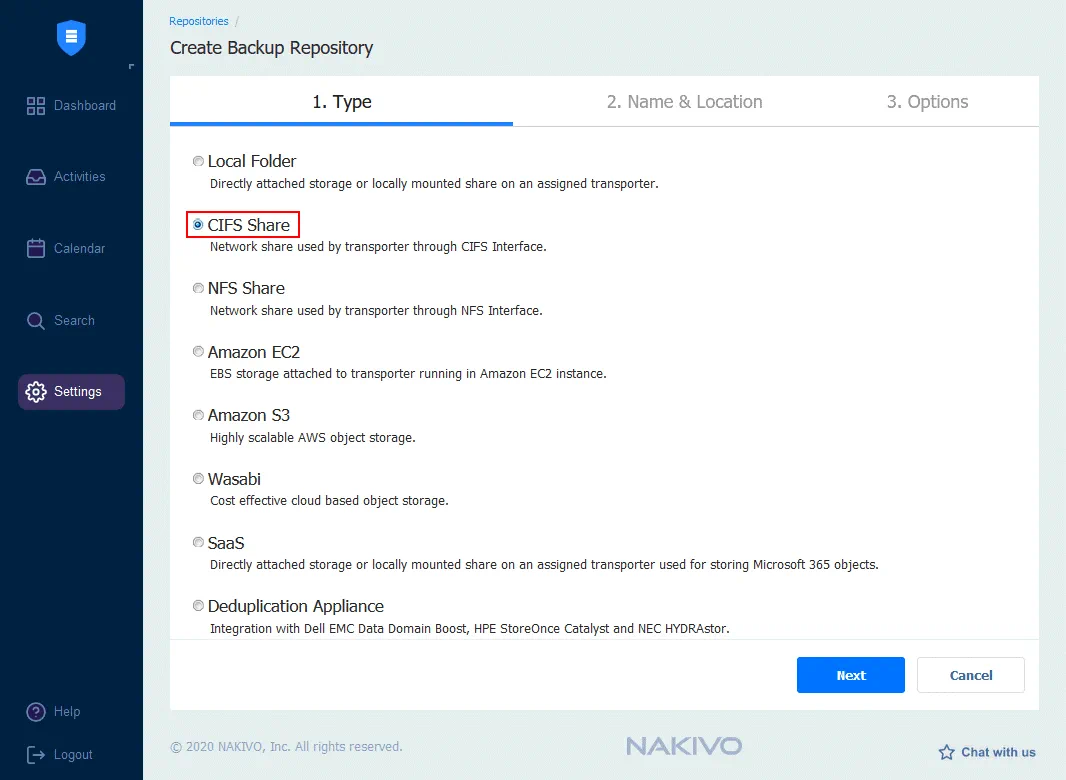
1. Type. Select CIFS Share, and click Next to continue.
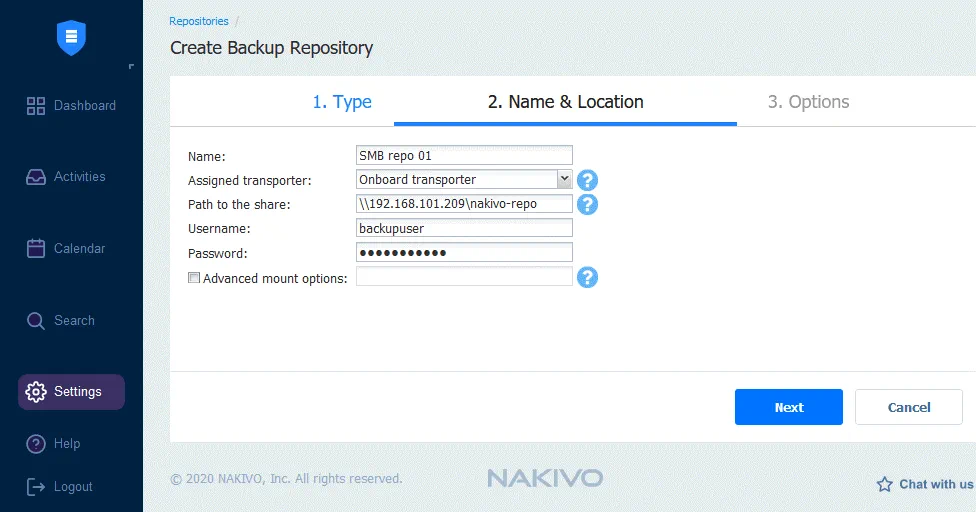
 2. Name & Location. Enter a repository name to be displayed in NAKIVO Backup & Replication and define the parameters of the SMB share (CIFS Share) to create the Backup Repository.
Name: SMB repo 01
Assigned Transporter: Onboard transporter
Path to the share: \\192.168.101.209\nakivo-repo or \\Server2016-01\nakivo-repo (DNS names must be resolved)
Username: backupuser
Password: *********
If you use a domain user account to access the shared folder, enter a user name in the format: domainname\username.
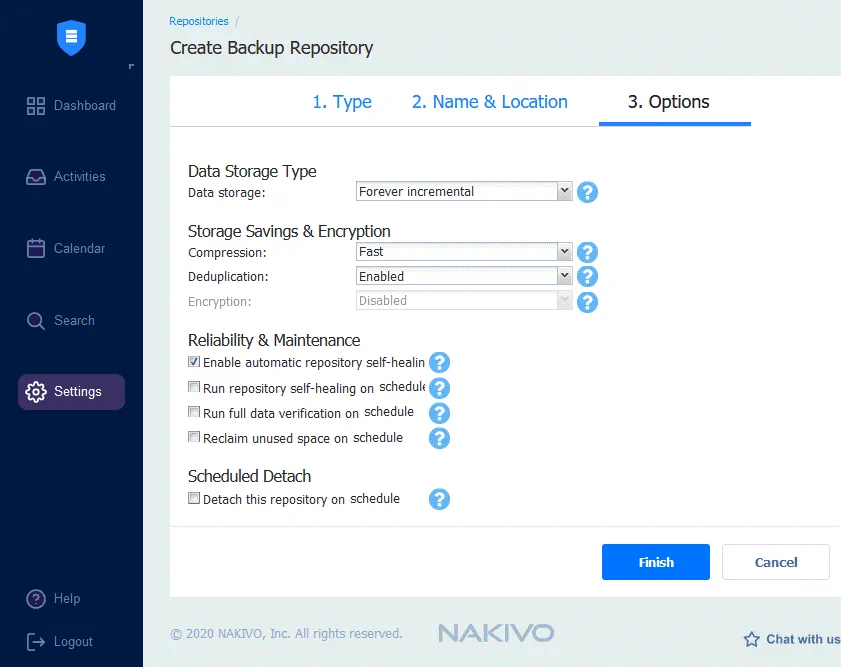
3. Options. Set options for the new Backup Repository, including data storage type, compression, deduplication, and repository self-healing.
Hit Finish.
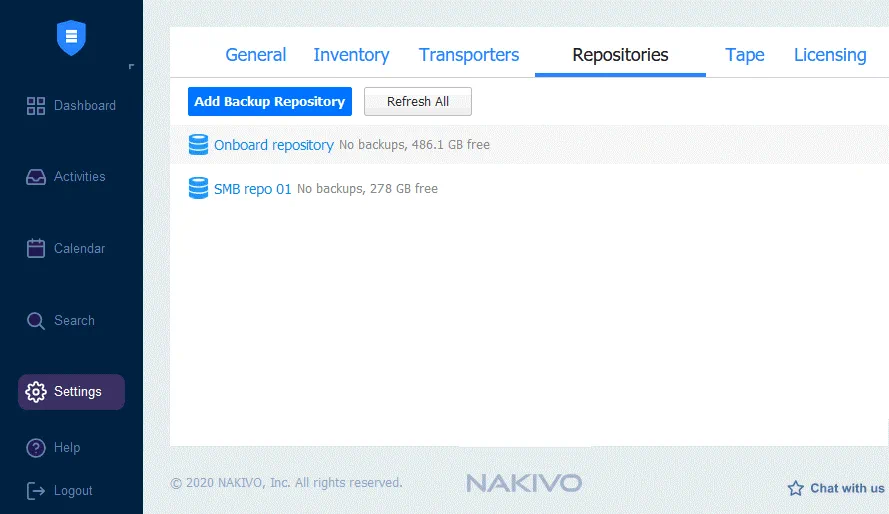
Wait for a while until the repository is created. Once the Backup Repository is created, this repository is displayed in the Repositories tab.
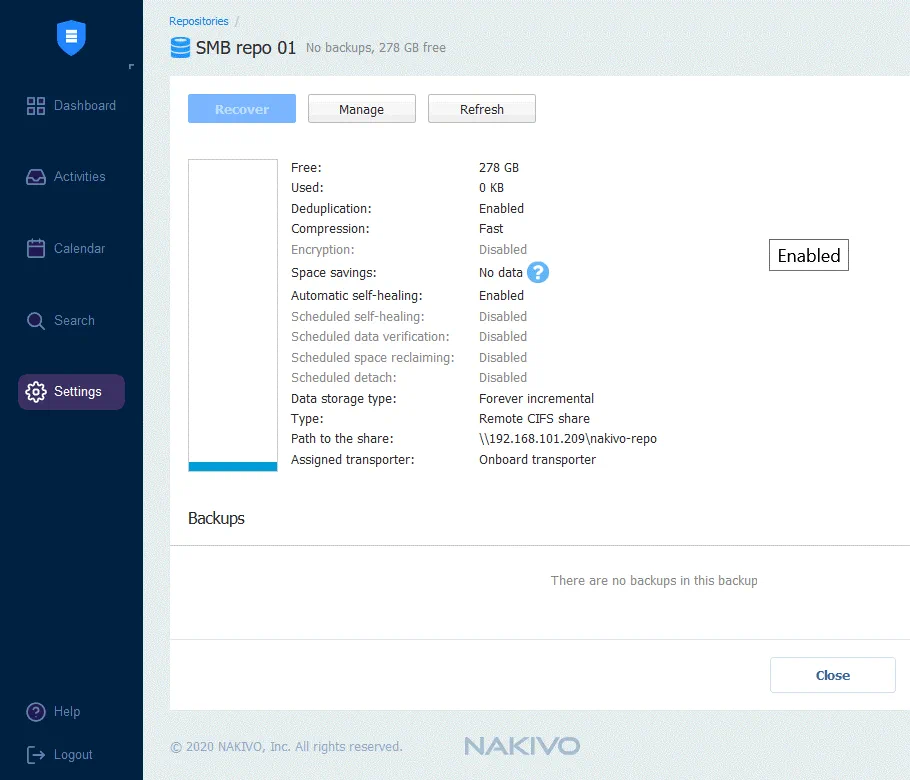
You can click the Backup Repository name and see detailed information about this repository.
A Backup Repository has been set up to store backups in an SMB share. Now you can create backup jobs and back up data to the created repository. Read also about backup of VMware vSphere VMs, Microsoft Hyper-V VMs, physical Linux machines, Windows machines, and Amazon EC2 instances. You can back up these source machines to SMB shares with NAKIVO Backup & Replication.
You can download the Free Trial of NAKIVO today to start exploring all the features and functionality of NAKIVO Backup & Replication without any limitations!

Conclusion
This blog post has covered the creation of SMB shares in Windows and using them to create Backup Repositories in NAKIVO Backup & Replication. Configuration requires creating a folder on a server, creating a user account, configuring SMB file sharing settings and user permissions for a shared folder, and, finally, creating a backup repository in NAKIVO Backup & Replication using the shared folder accessible via the network. The SMB protocol is widely used and is convenient to store files in local networks. You can also create SMB shares on Linux machines and NAS devices to store backups.