How To Configure an Out of Office Notification in Office 365
Microsoft Office Outlook is a powerful email client that can work with different email servers and provides many automation options. After releasing Office 365, which is a suite of cloud-based Microsoft Office apps and services, it became possible to use Outlook as a web application (Outlook Online) with Microsoft mail servers only. Outlook can sort incoming email messages to different email folders according to configured rules.
For example, it can be configured to save spam messages in the Junk Email folder. Besides incoming mail, you can configure other custom rules. Both editions of Outlook – Outlook Web App and the standalone Outlook application – allow you to configure out of office notifications and automatically send a message to a sender if you cannot reply. An out of office notification can be used when you migrate from one email address to another. In that case, you use such a notification to inform senders to your old email address about your new email address. This blog post explains how to set out of office in Outlook 365 and Outlook 2016.

Office 365 Out of Office Setup in Outlook Online
Log into Outlook Web App (that is also called Outlook Online or Outlook 365) by using your user account:
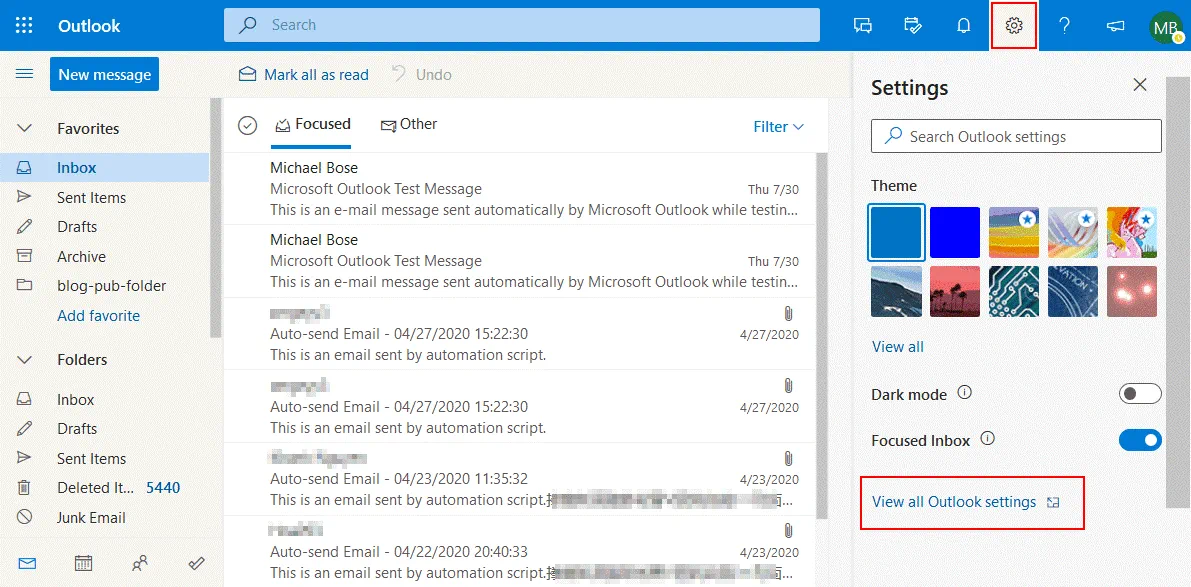
In the top right corner of the Outlook Online web interface, click the Settings icon and, in the Settings section that opens, click View all Outlook settings.
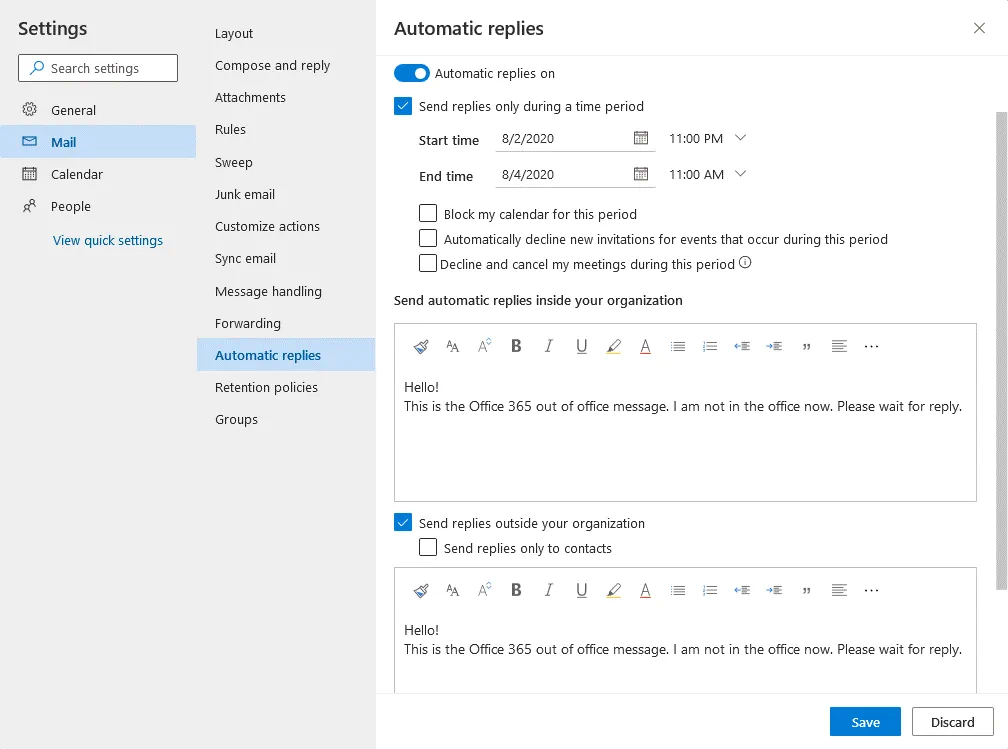
In the window with settings that opens, go to Mail > Automatic replies. Click the switch to turn automatic replies on.
- Send replies only during a time period. Select this checkbox if you want to enable sending an Office 365 out of office message only during a defined time period. This option allows you to control when to use the feature.
You can also select the following checkboxes if needed:
- Block my calendar for this period
- Automatically decline new invitations for events that occur during this period
- Decline and cancel my meetings during this period
Send automatic replies inside your organization
Write the text that will be sent to senders when the out of office Outlook 365 rule is enabled. For example:
Hello!
This is the Office 365 out of office message. I am not in the office now. I will get back to you as soon as possible.
- Send replies outside your organization. Select this checkbox to send out of office notifications to senders who have email addresses outside your organization.
- Send replies only to contacts. Select this checkbox if you want to enable sending an Office 365 out of office message only to specified contacts.
Hit Save to save settings and finish Office 365 out of office setup.
Note: If you don’t use your old email address, you can notify users that they should use your new email address for communication by using the out of office Outlook 365 notification, for example:
Hello!
I will no longer be using this email address (old-address@company1.microsoft.com). Please send emails to my new email address: new-address@domain2.com
Now you’re done configuring the Office 365 out of office message. Note that the out of office notification is sent once to the same sender from your Office 365 email account. If the same sender sends a second email message to you, the automatic Office 365 out of office reply is not sent.
Out of Office Notification Setup in Microsoft Office Outlook
Microsoft Office Outlook is a standalone email client application. It can work with both Microsoft email servers and Office 365 accounts. In a previous post, we look at how to configure Microsoft Office Outlook to work with Office 365 and which SMTP and POP3 settings to use. Let’s now look at how to configure an out of office notification in Microsoft Office Outlook 2016.
On the Home tab of Microsoft Office Outlook 2016 click New Email.
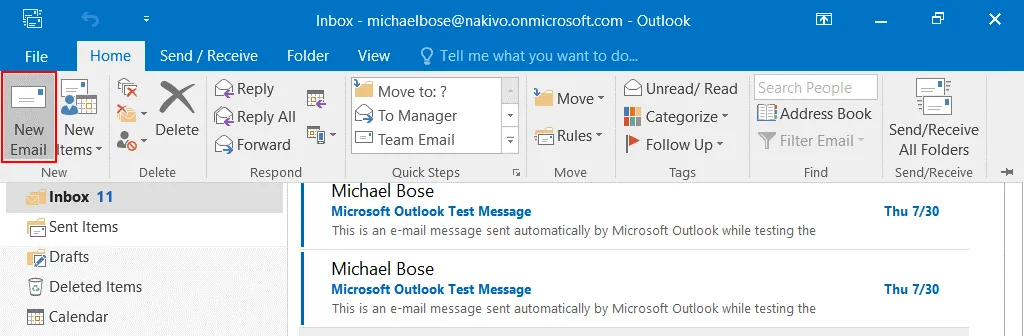
A new window opens. Create a new email message that will be used as the Office 365 out of office message.
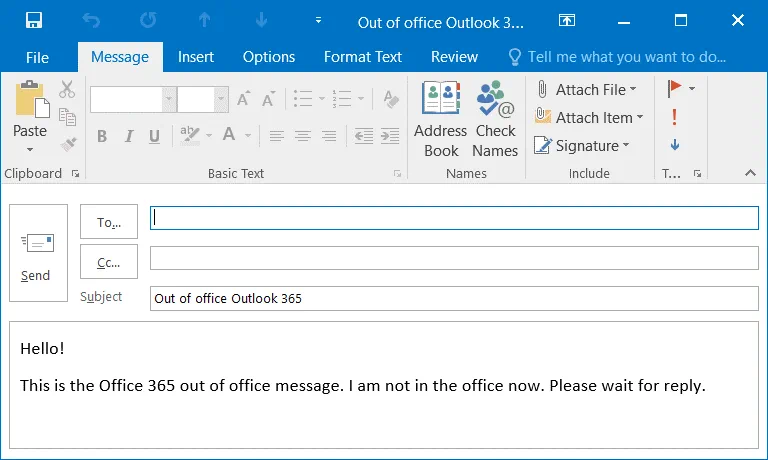
To: Leave this field empty.
Subject: Enter a subject name for your message, for example, Out of office Outlook 365.
Compose the text in your out of office notification, for example:
Hello!
This is the Office 365 out of office message. I am not in the office now. I will get back to you as soon as possible.
Click File > Save As to save this email message as a template.
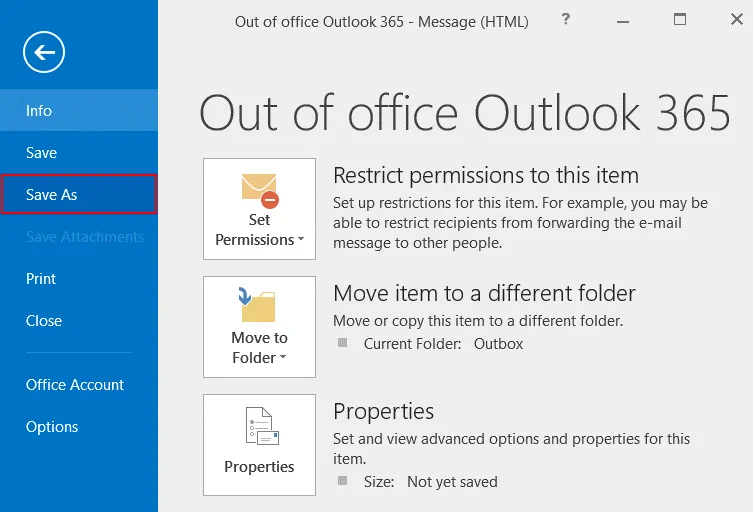
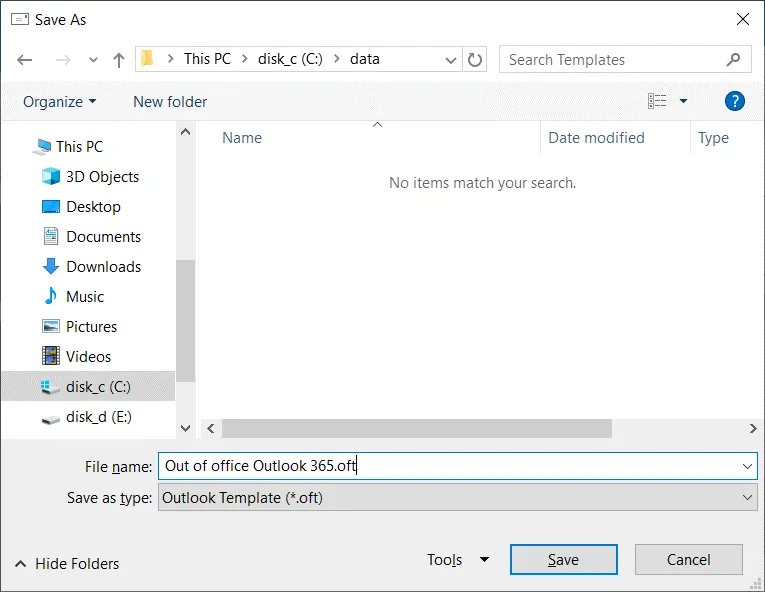
Select path (we save the file to C:\data\ in this example), the Outlook template file type, and file name.
Save as type: Outlook template (*.oft)
File name: Out of office Outlook 365.oft
Click Save.
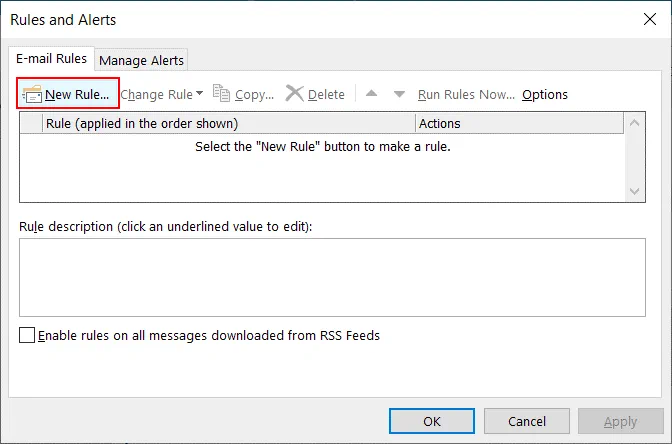
The email message template is saved. Now go to the Home tab in the main window of Microsoft Office Outlook 2016. Click Rules > Manage Rules & Alerts.

The Rules and Alerts window opens.
In the E-mail Rules tab click New Rule.
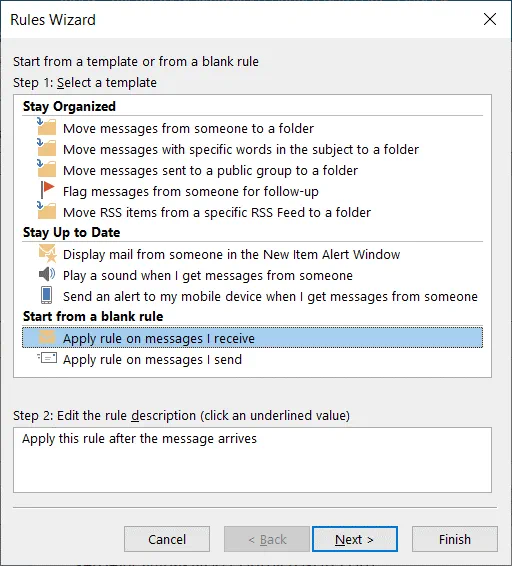
A Rules Wizard window is opened.
Step 1: Select a template. Click Apply rules on messages I receive. Click Next at each step of the wizard to continue.
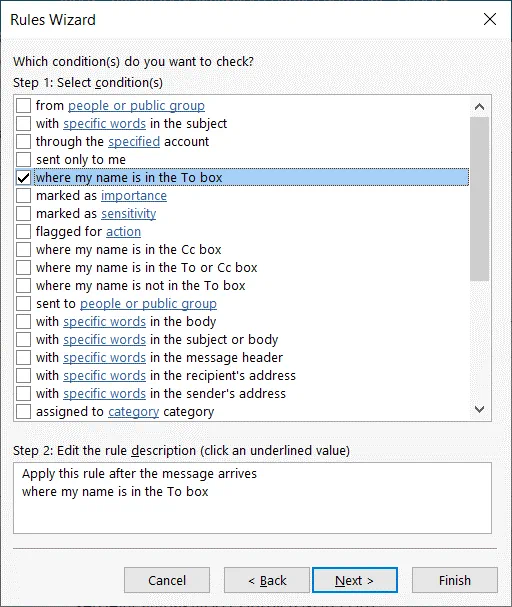
Step 1: Select condition(s).
Select the checkbox where my name is in the To box.
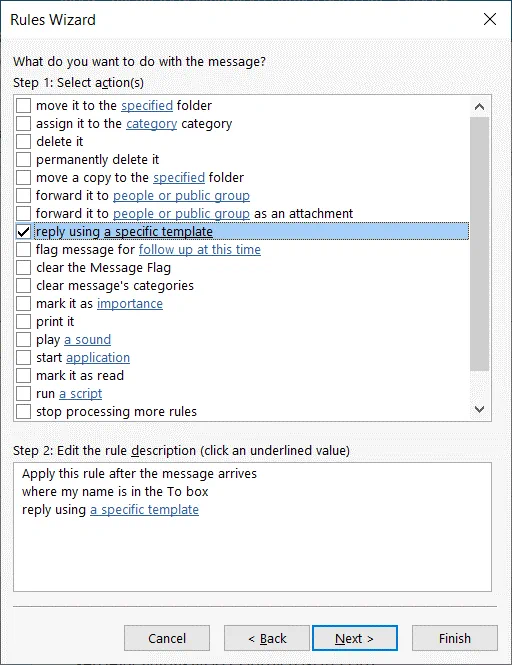
Step 1: Select action(s)
Select the checkbox reply using a specific template.
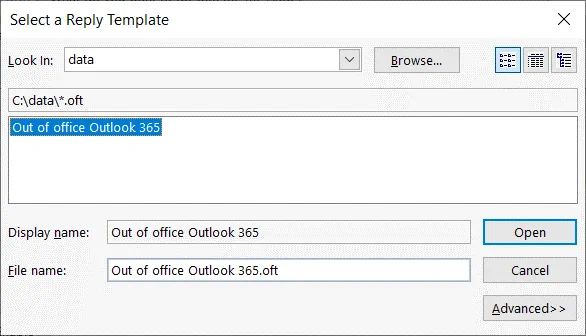
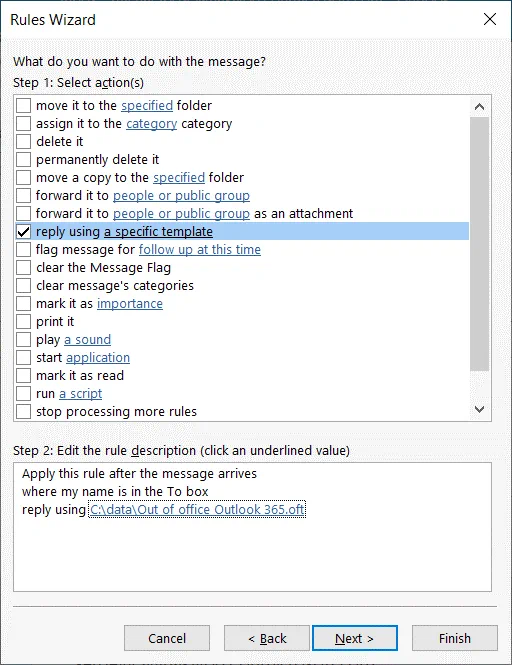
Step 2: Edit the rule description (click an underlined value). Click a specific template in this case.
Select the template you have created before (click Browse and select the file). In our case, we select the C:\data\Out of office Outlook 365.oft file. Hit Open.
Now the template file is selected. You can go to the next step.
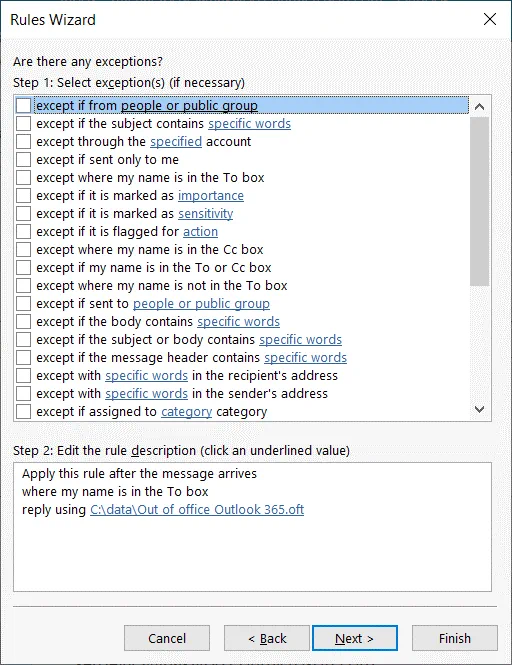
Are there any exceptions? If you don’t need to configure any exceptions, don’t change the settings and just skip this step.
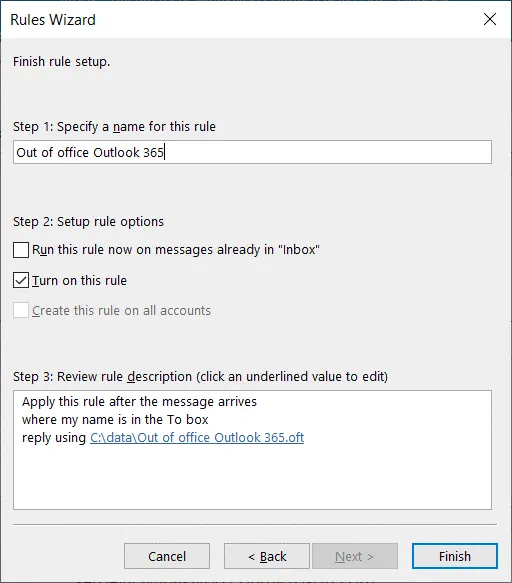
Finish rule setup.
Step 1: Specify a name for this rule: Out of office Outlook 365
Step 2: Setup rule options
Turn on this rule – select this checkbox.
Hit Finish to save settings and enable the rule to send out of office notifications.
As you can see on the screenshot below, the checkbox at the Out of Office Outlook 365 rule is selected. If you want to disable the rule, deselect the checkbox. You can close the Rules and Alerts window.
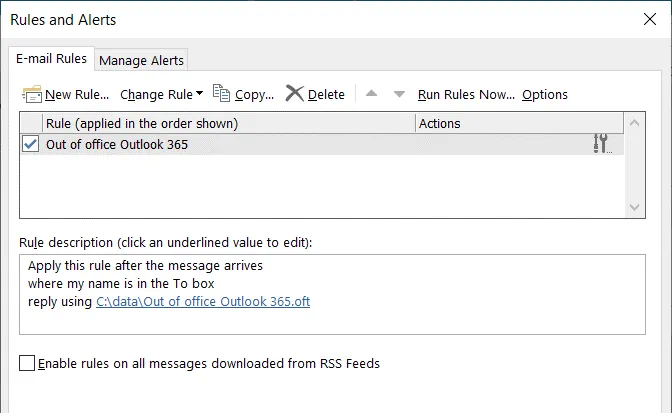
Now the out of office notification is configured in Microsoft Office Outlook 2016. You can combine this rule with other rules to fine-tune the email client.
Enabling an Out of Office Notification in the Admin Center
If a user in your organization is already on vacation but this user has forgotten to enable sending the Office 365 out of office message, a system administrator can configure it. The administrator doesn’t need to know the user’s password or to reset the password. The administrator can perform Office 365 out of office setup from the Office 365 admin center (that is also called the Microsoft 365 admin center).
Log in to the Microsoft admin center as administrator.
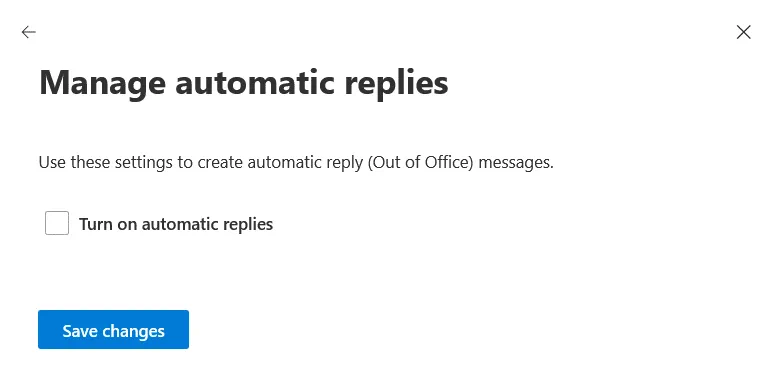
Go to Active users, select a user account for which you want to enable an out of office notification. In our example, we select the account of Michael Bose. Once the user account is selected, in the window that opens, go to the Mail tab and in the bottom of the page click Manage automatic replies.

In the pop-up window select the checkbox Turn on automatic replies.
Click Save Changes.
Office 365 out of office setup in the Microsoft admin center is finished.
Conclusion
This blog post has covered how to configure sending an Office 365 out of office message to notify senders that you won’t be able to reply immediately to their messages. You can notify people that they should not expect a same-day reply or that you have change your email address to a new email address that should be used for future communication. Office 365 out of office setup is not difficult and can be performed by a regular user or by an Office 365 administrator in the web interface of Office 365. A standalone Microsoft Office Outlook 2016 email client can also be configured to send an out of office notification. If you use Microsoft Office 365, don’t forget about backing up Office 365 to ensure the highest level of protection for your data.