How to Back Up Data to Azure Blob Storage
Azure Blob Storage is Microsoft’s cloud storage optimized for storing large amounts of unstructured data such as different files, including images, video, audio, text files, etc. Azure Blob can be used to store data backups as well as primary data. This blog post explains how to create Blob Storage in Azure and back up data to it.

Azure Storage Accounts Pricing
Azure storage accounts pricing is quite flexible and allows you to select the optimal cloud storage solution under a pay-as-you-go model or as a reserved capacity that you commit to for 1 to 3 years.
The cost of Azure Blob Storage depends on multiple factors:
- Region
- Storage pricing. This is the price you pay for the gigabytes of data stored in the Azure cloud.
- Operation pricing. This is the price charged for performing different operations, such as reading, writing, and deleting data in Azure Blob Storage.
- Access tiers provide different price policies depending on the storage tier chosen:
- The hot tier is the fastest but comes at a high price with the highest availability for frequent access.
- The cool tier is available for a lower price and is optimal if you access data infrequently and store data for at least 30 days.
- The cold (Archive) tier is available for the lowest price, but you cannot access data immediately. You need to wait before you can access data after you request it. The minimum retention period is 180 days.
The price per gigabyte stored is less for cooler storage but the cost of accessing the data there goes up. Selecting the access tier that better meets your requirements allows you to optimize Azure Blob Storage costs.
Note: You can use the Azure pricing calculator to estimate costs before creating an Azure backup storage account.
Azure Blob Storage Security
Azure uses strong server-side encryption using algorithms such as 256-bit AES and a FIPS 140-2 compliant block cipher. You cannot disable encryption that is enabled by default using Microsoft-managed keys.
Before configuring the Azure backup Storage account, make sure that you follow these recommendations for a better level of Azure storage security:
- Secure your account access keys
- Follow the principle of least privilege
- Disable anonymous public access
- Regenerate keys periodically
- Enable firewall rules for storage accounts
- Restrict network access – enable network access for trusted hosts/networks
- Use versioning and immutable blobs
- Use Azure AD to authorize access
How to Create Blob Storage in Azure
An Azure storage account is a logical unit in the Azure cloud that can contain different types of storage: Blobs, Tables, Files, Queues and Disks. Data in a Blob storage account is stored as blobs, which stands for Binary Large OBjects. To store data in Azure Blob, you must create a blob storage account. Let’s create an account to send backups there.
Go to Azure Portal at http://portal.azure.com/ and sign in using your Microsoft account.
Registering an app
In this guide, we use NAKIVO Backup & Replication for creating a backup workflow to the Azure cloud. NAKIVO Backup & Replication fully integrates with Azure Blob Storage for streamlined backup and backup copy to the cloud.
To use the NAKIVO backup solution for backup to Azure Blob Storage, we need to register the backup app first. Then we will create our Azure backup storage account and configure it to store backups.
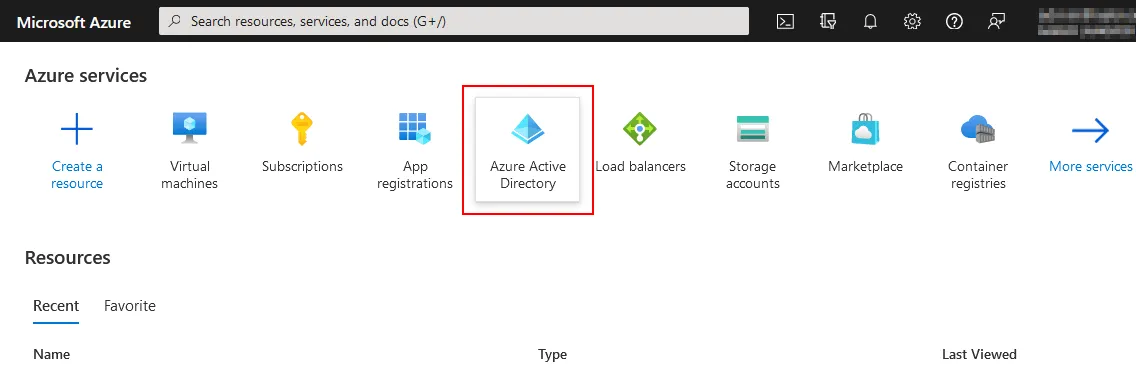
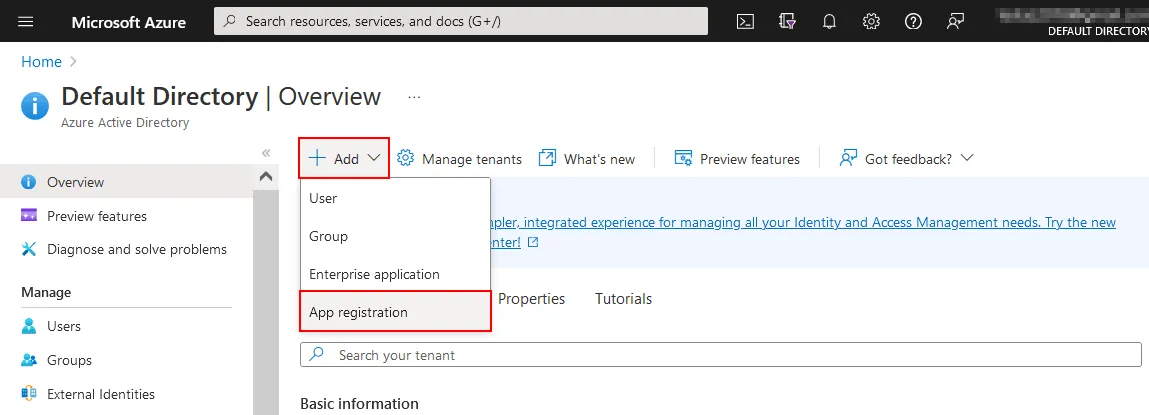
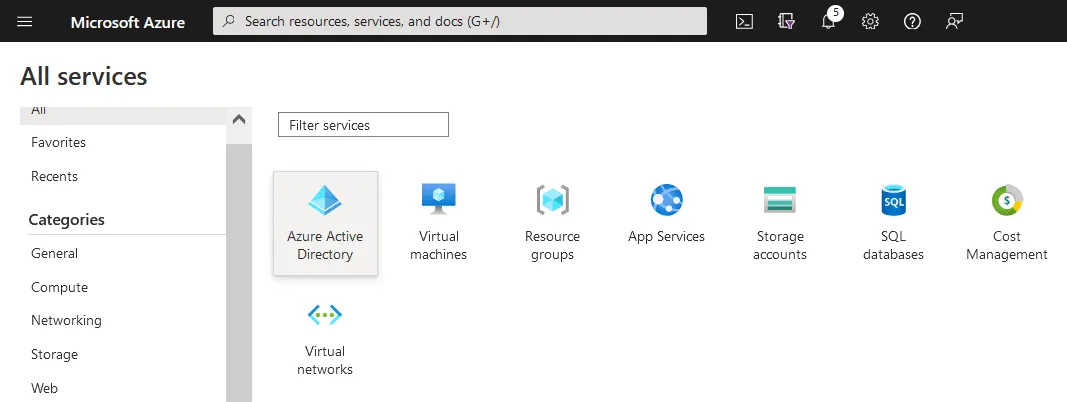
- Go to Azure services and click Azure Active Directory in the Azure web interface.
- Click Add > App registration on your Azure Active Directory page to register a new backup application to access Azure storage to store backups. This will allow the application to use the Azure API to access the needed cloud storage functionality.
- Enter a name for the application to register, for example, Nakivo-Blob. Select who can use this application or access this API. Then click Register.
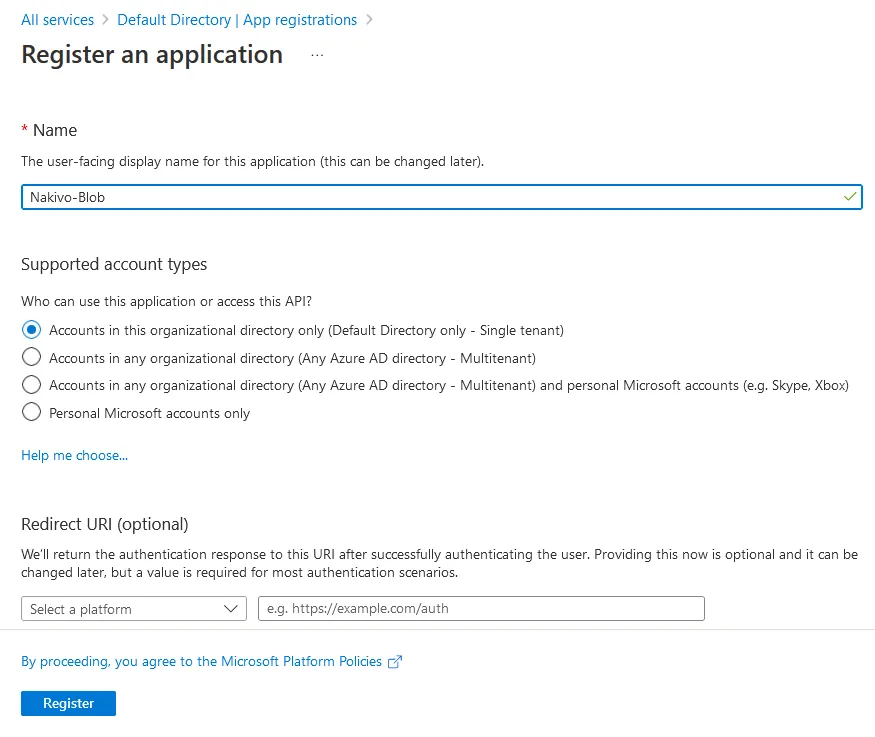
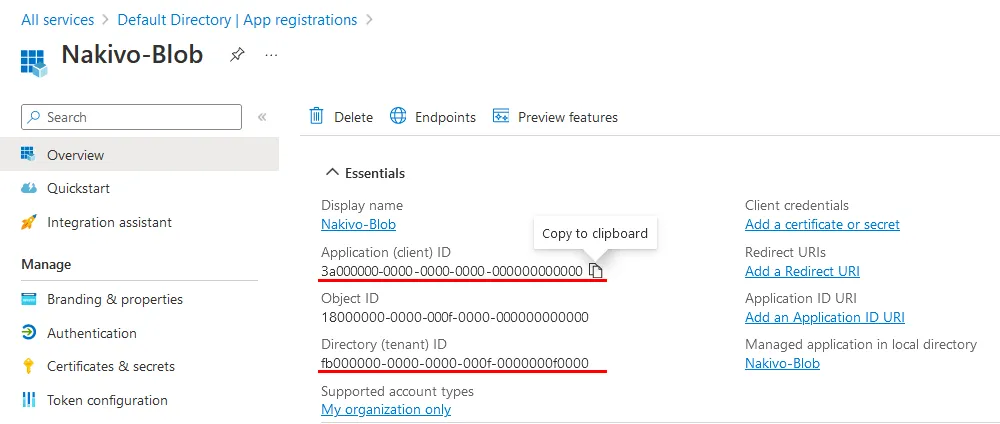
- After registering the application, you can see the following identifiers:
- Application (client) ID
- Object ID
- Directory (tenant) ID
We will need these IDs later. Now we can create the storage account.

Creating a storage account
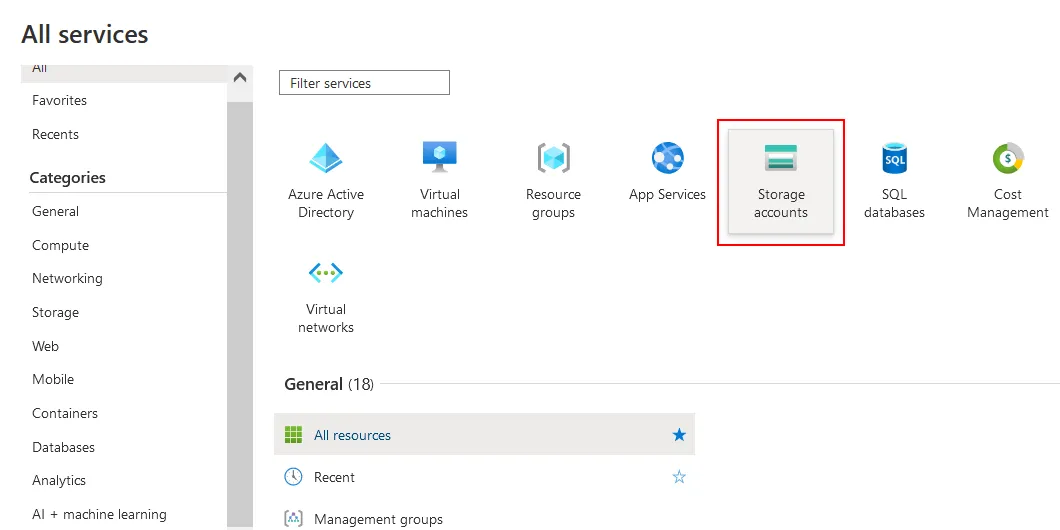
- Go back to the Azure homepage and go to All services > Storage accounts.
- Click the + Create button on the Storage accounts page.
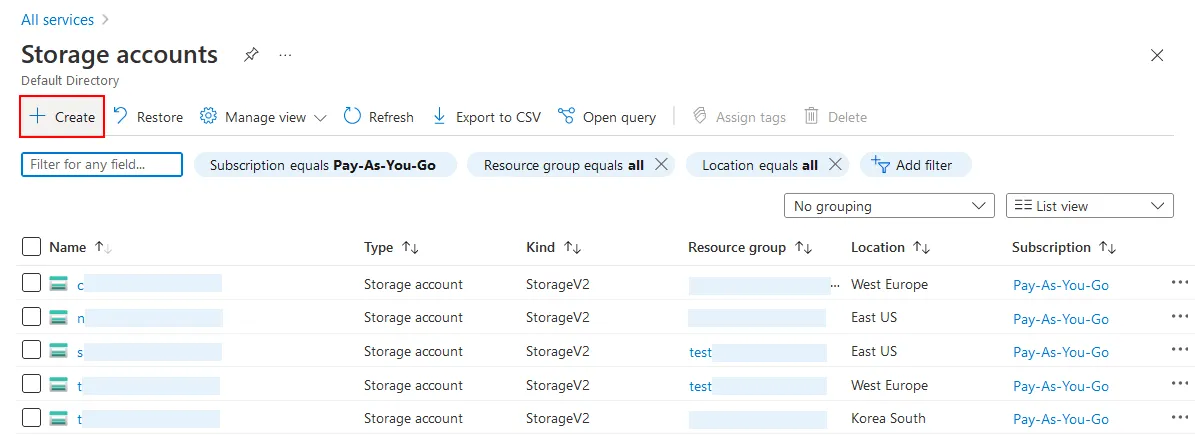
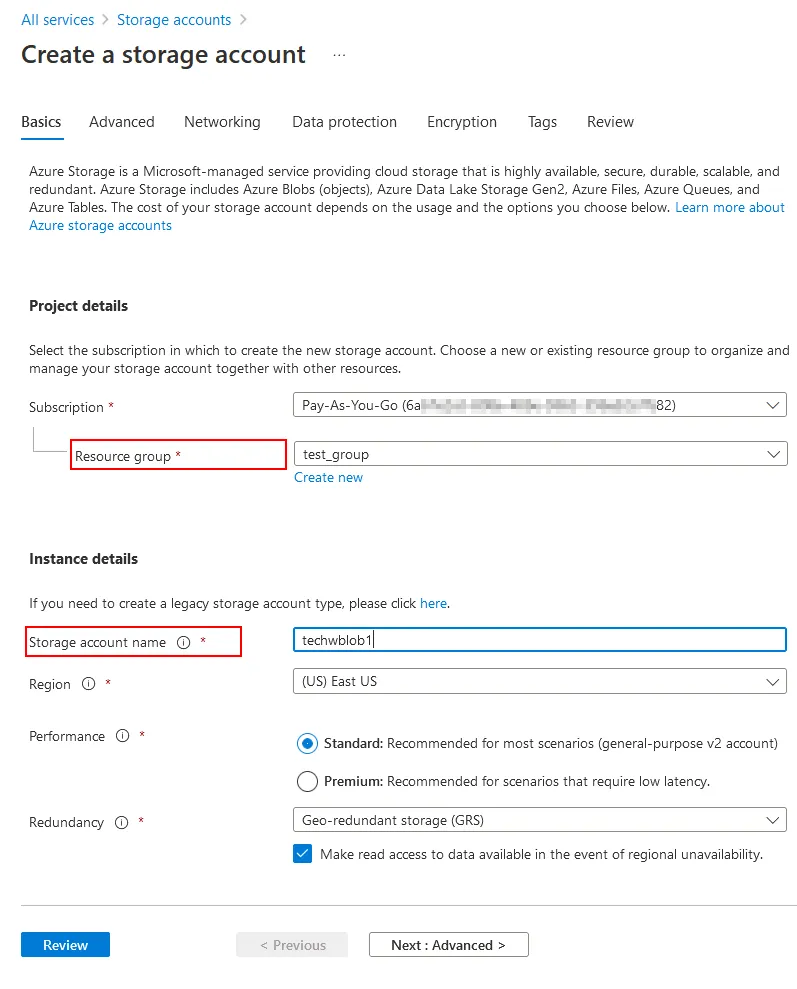
- The Create a storage account wizard opens.
- Select a resource group or create a new one.
- Enter a storage account name, for example, techwblob1.
- Select a subscription type, region, performance, and redundancy level. Remember that these options impact the price you will need to pay for Azure storage.
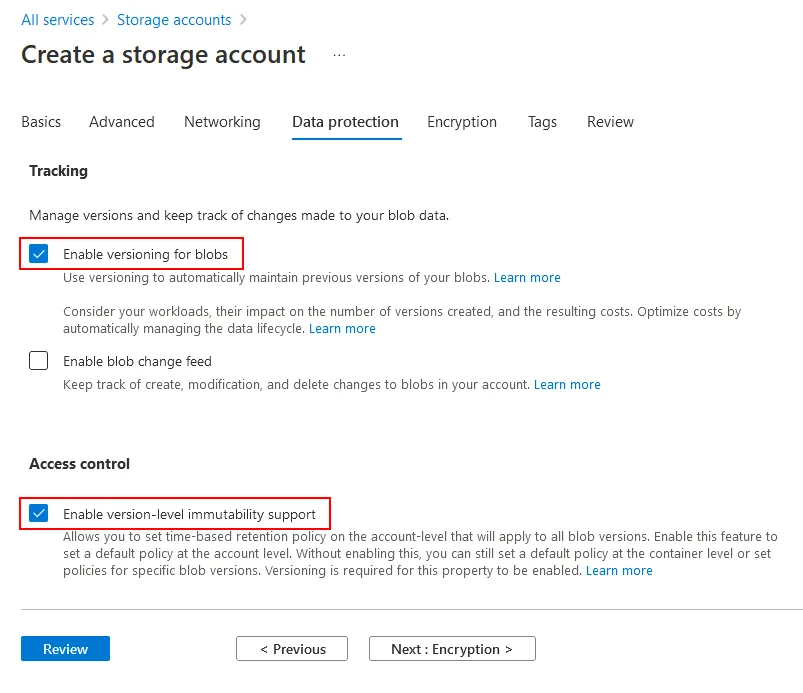
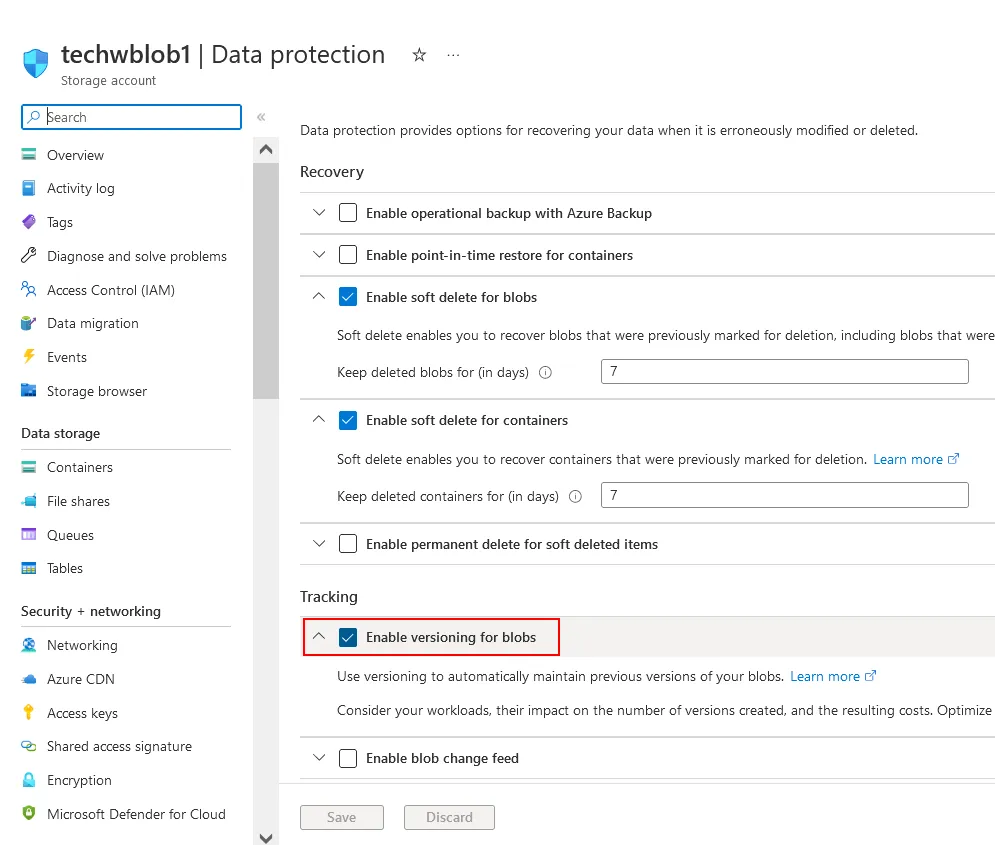
- The next settings we need to configure are located on the Data protection tab.
To allow NAKIVO Backup & Replication to create backups that are protected against ransomware, select these two checkboxes:
- Enable versioning for blobs
- Enable version-level immutability support
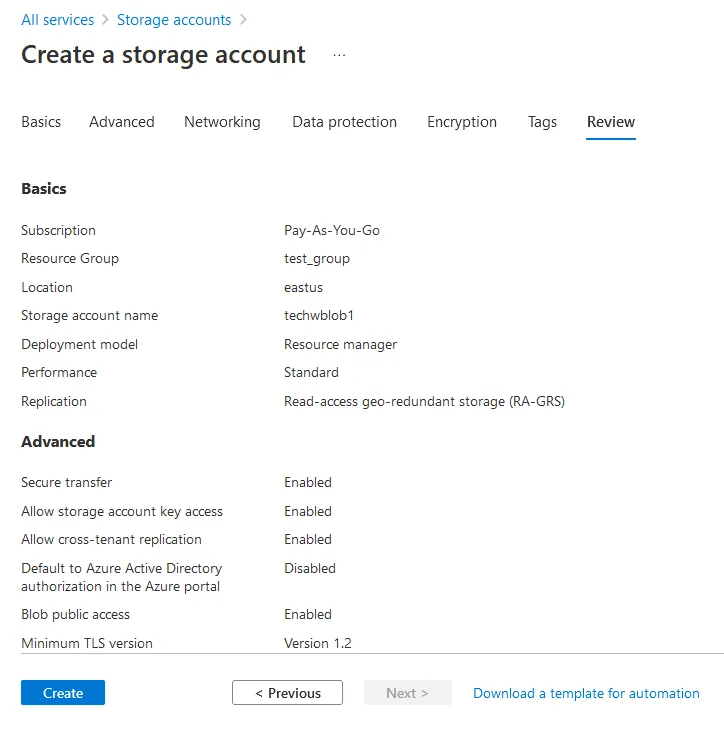
Go to the next step if you want to configure options in other tabs or click Review to check settings and finish creating the Azure storage account.
- Verify the configuration in the Review tab and hit Create. Wait until the storage account is created.
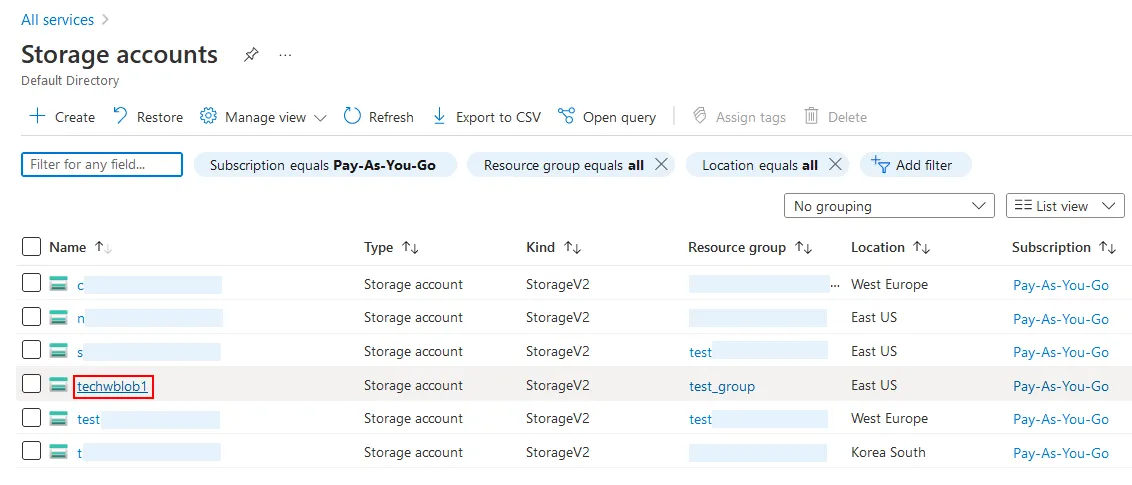
- A new storage account has been created in Azure. Click the account name. We need to assign roles and enable access to Blob storage for the backup application.
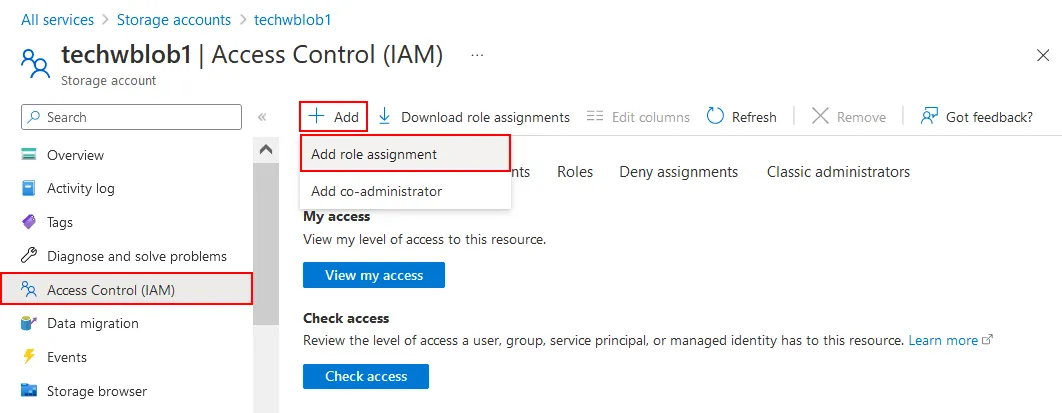
- Click Access control (IAM) in the left pane of the storage account page. Then Click + Add > Add role assignment.
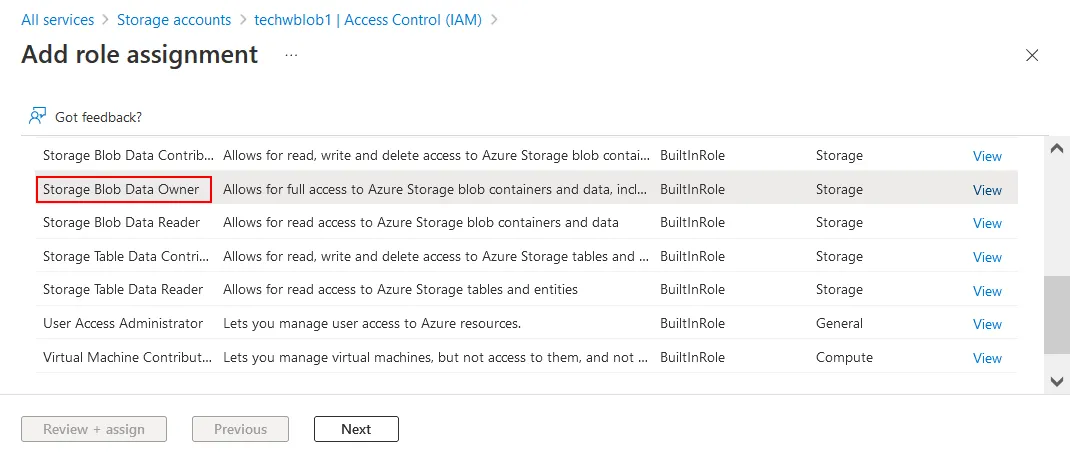
- Select Storage Blob Data Owner in the list of roles and click Next. The NAKIVO backup application must have enough permissions in Azure to write the backup data to Azure Blob Storage.
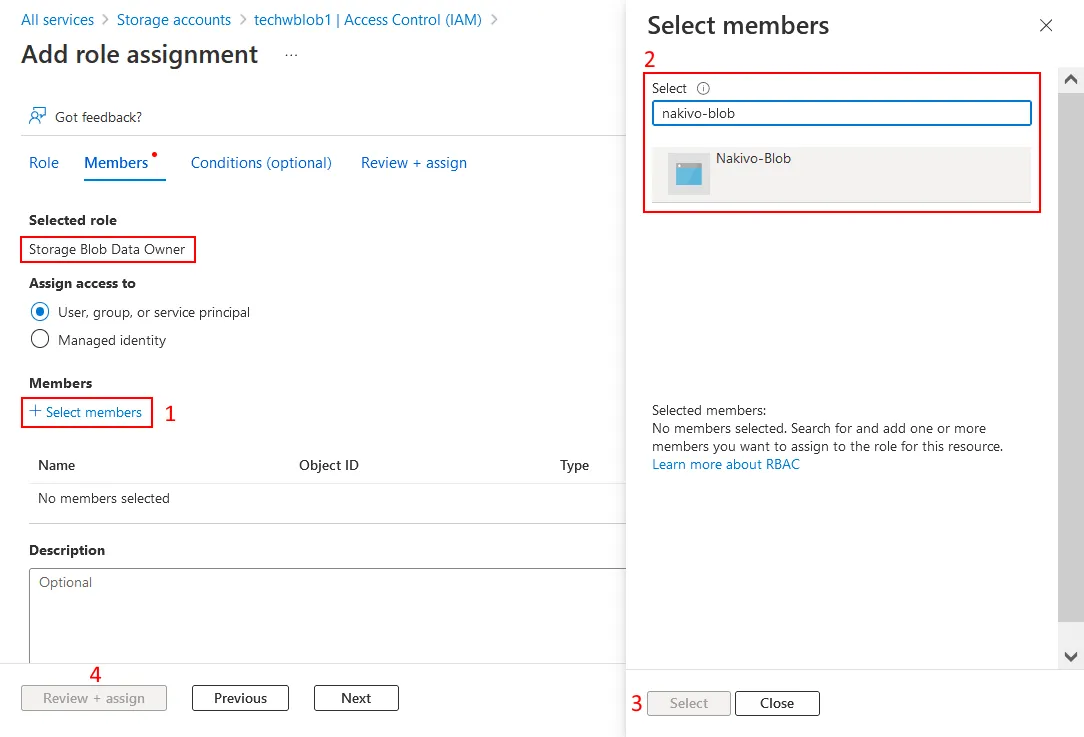
- Select Assign access to
User, group or service principal
- Click + Select members.
- Enter a name, for example, nakivo-blob and select this item. Click the Select button.
- Then click Review + Assign and finish the role assignment.
Creating a container
Now you can add one or multiple storage containers to your Azure Blob Storage account. A container in Azure Blob Storage is the analog of an Amazon S3 bucket for object storage in AWS.
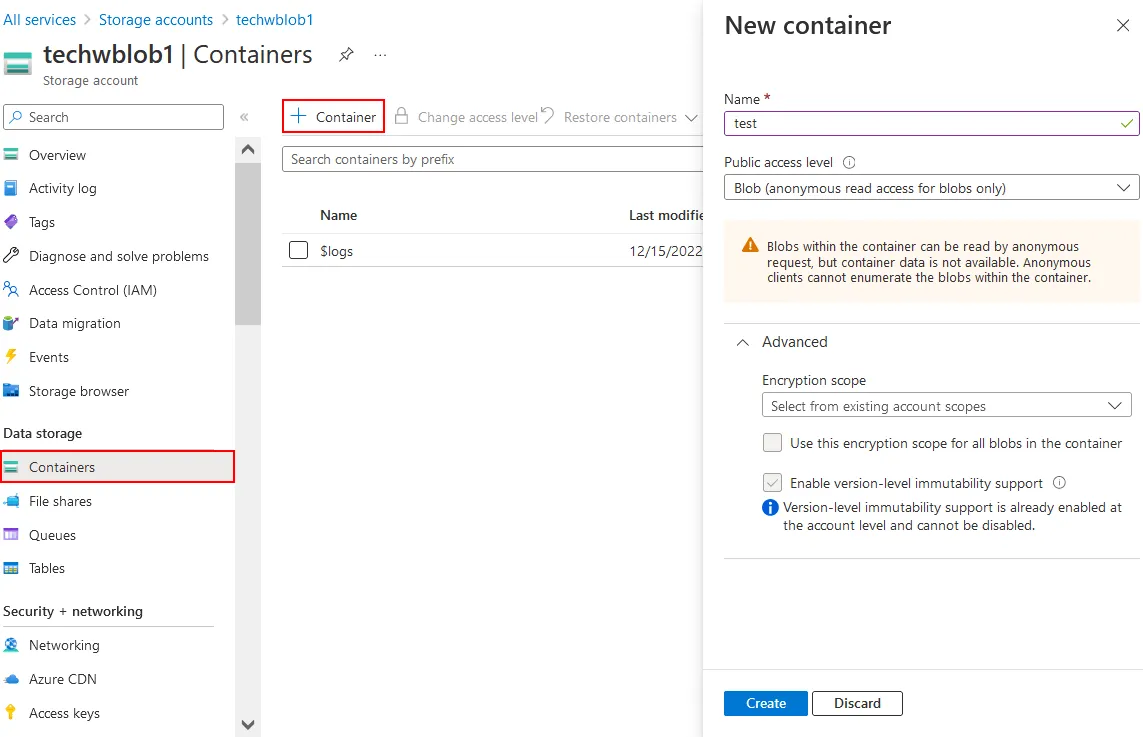
- Select your storage account and click Containers in the left pane.
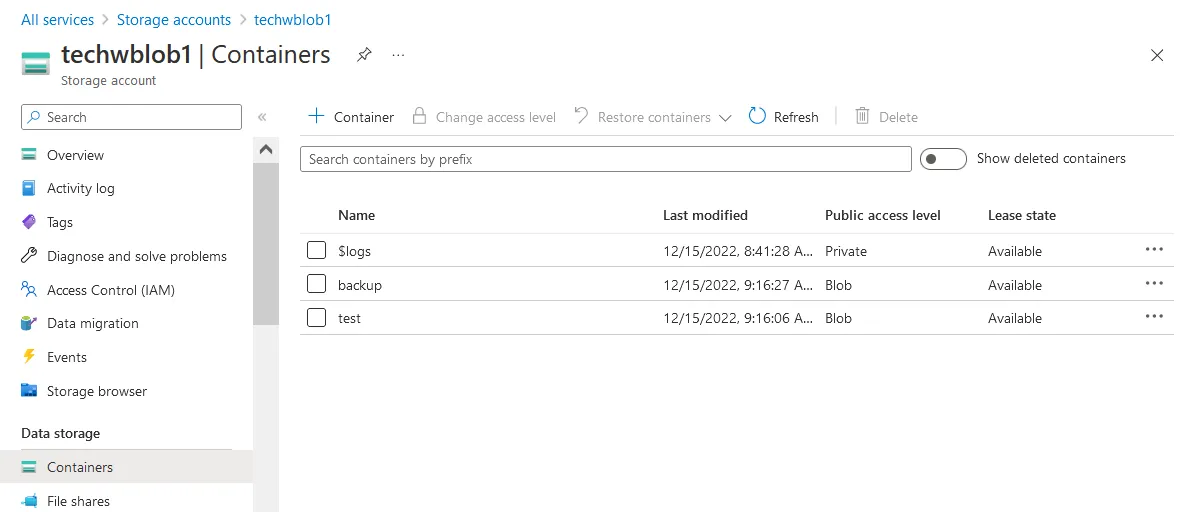
- Click + Container. A popup window on the right side of the screen appears. Enter a container name, select the public access level, and select the Enable version-level immutability support checkbox. Then click Create. We have created two containers: backup and test.
- Go to All Services > Storage accounts, select your storage account (techwblob1 in our example) and click Overview. Ensure that Versioning is enabled before storing backups in Blob containers. In the screenshot below, versioning is enabled and the Enabled link is clickable. If versioning is disabled, click Disabled to edit versioning settings.
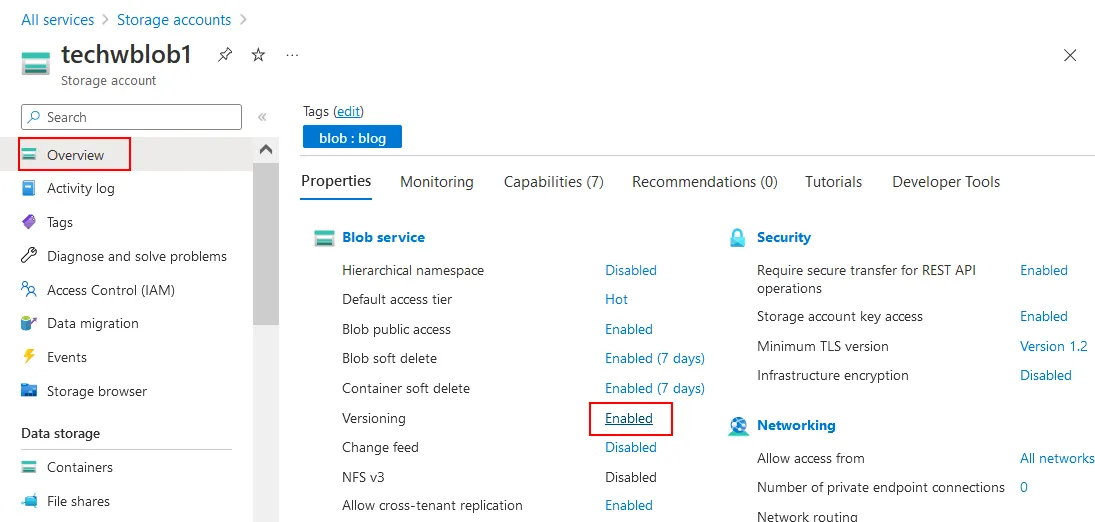
- The Enable versioning for blobs checkbox must be selected.
Microsoft Azure Credentials
We have created an Azure Blob Storage account, configured Blob storage options, and created storage containers. Now we need to obtain Azure credentials and use them in NAKIVO Backup & Replication to access Blob storage via the Azure API.
- On the main Azure dashboard of the Azure portal, select All services and click Azure Active Directory.
- Click App registrations in the left pane and click Owned applications.
- Find the name of the application you registered earlier. In our case, we click the application name Nakivo-Blob to see more information.

- Copy and save the Application (client) ID and Directory (tenant) ID. Your ID will be different.
Application (client) ID:
3a000000-0000-0000-0000-000000000000
Directory (tenant) ID:
fb000000-0000-0000-000f-0000000f0000
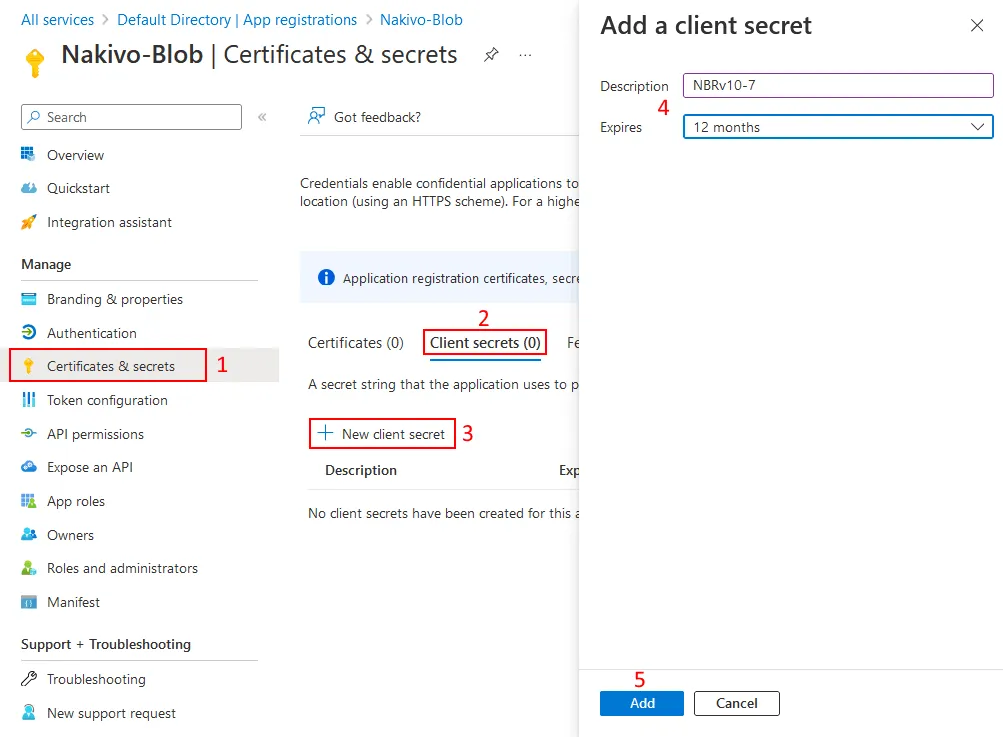
- Click Certificates & secrets in the left pane, click Client secrets and then click + New client secret.
- Enter the description, for example, NBRv10-7, and set the expiration period. Hit Add.
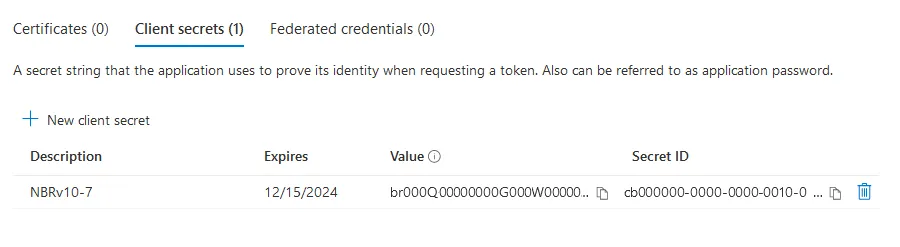
- A secret has been generated and added to the list of client secrets. Copy the value and secret ID to a safe location. Here are our values (yours will be different):
Value:
br000Q00000000G000W00000_00000000-000~00
Secret ID:
cb000000-0000-0000-0010-000000000000
Configure Backup to Azure Blob Storage
Now that we have created and configured a container in Azure Blob Storage, we can configure NAKIVO Backup & Replication to perform backup to Azure Blob Storage.
Adding Azure Blob Storage to Inventory
First, we need to add the Azure storage account to the backup solution inventory.
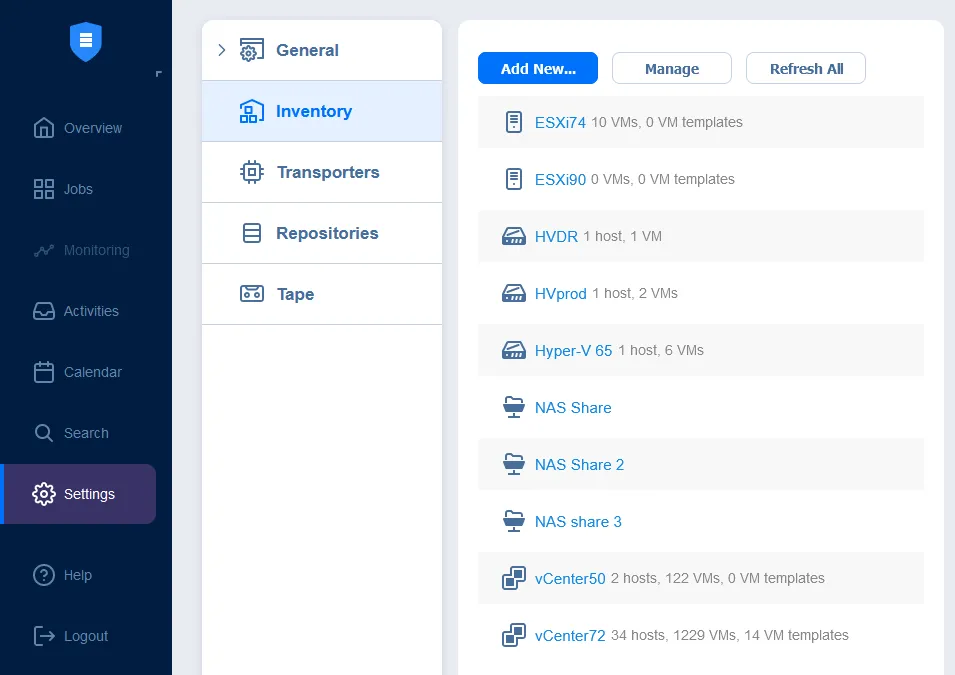
Open the web interface of NAKIVO Backup & Replication and go to Settings > Inventory. Click Add New.
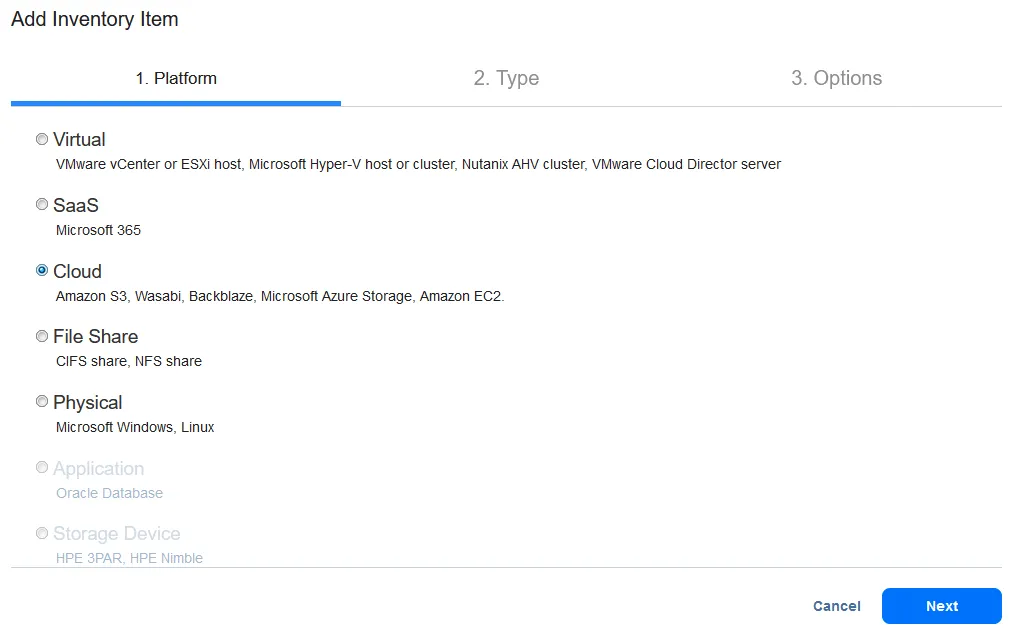
The Add Inventory Item wizard opens with three steps to complete.
- Platform. Select Cloud.
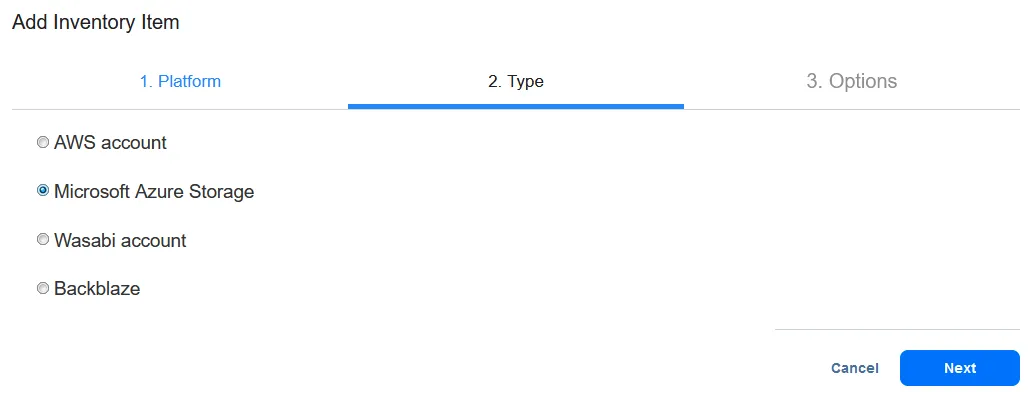
- Type. Select Microsoft Azure Storage.
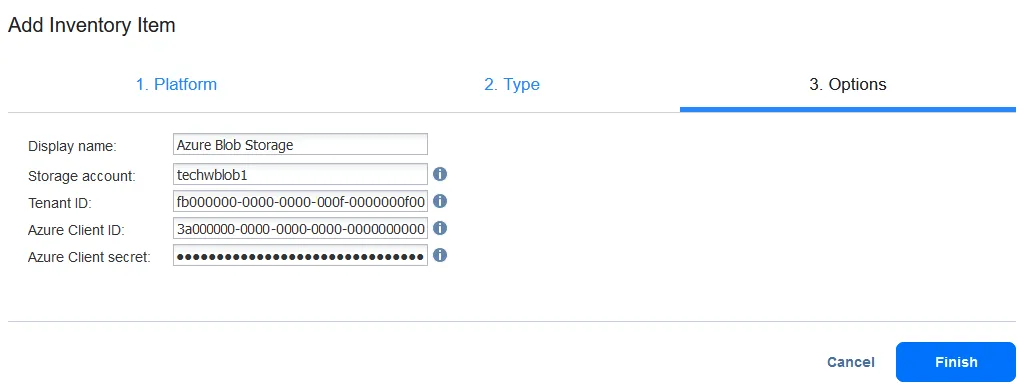
- Options. Enter the required parameters to add Azure Blob Storage.
- Display name: Azure Blob Storage
- Storage account: techwblob1 (this is the name of a storage account we created in Azure Portal before)
- Tenant ID: fb000000-0000-0000-000f-0000000f0000
- Azure client ID: 3a000000-0000-0000-0000-000000000000
- Azure Client secret: br000Q00000000G000W00000_00000000-000~00
We copied these strings from the Azure web interface earlier. Your IDs and secret will be different.
Click Finish.
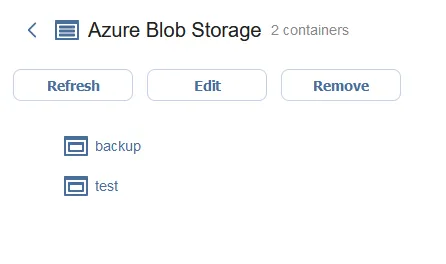
The Azure Blob Storage account with the two containers (backup and test) has been added to the solution inventory.
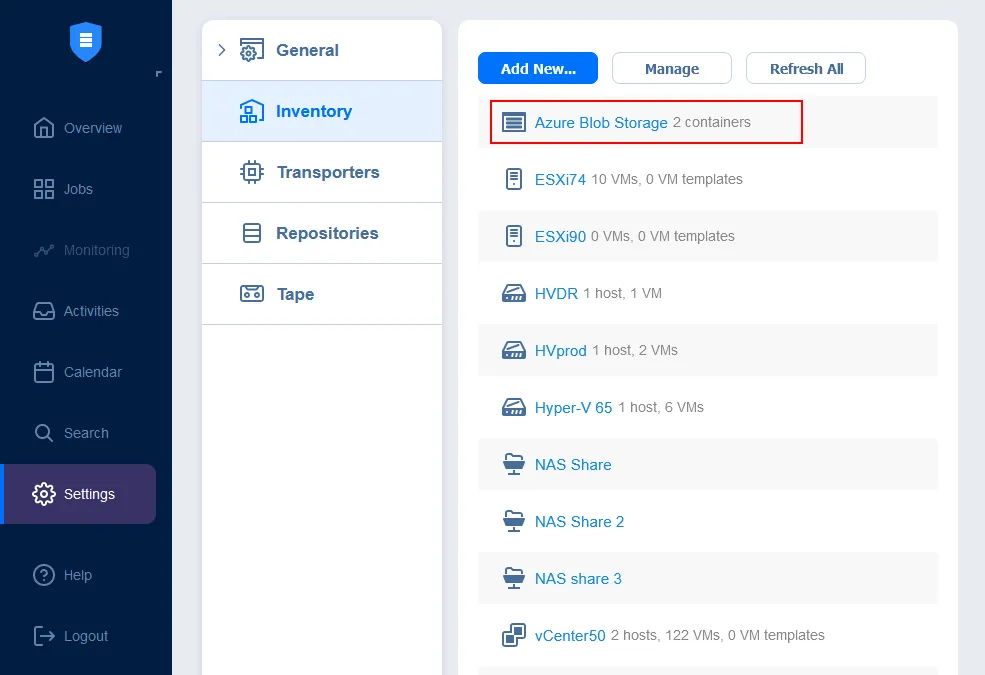
You can click Azure Blob Storage in the inventory to see the details.
Creating a backup repository
Now we need to create a backup repository in Azure Blob Storage.
Go to Settings > Repositories in the web interface of NAKIVO Backup & Replication. Click Add Backup Repository > Create new backup repository.

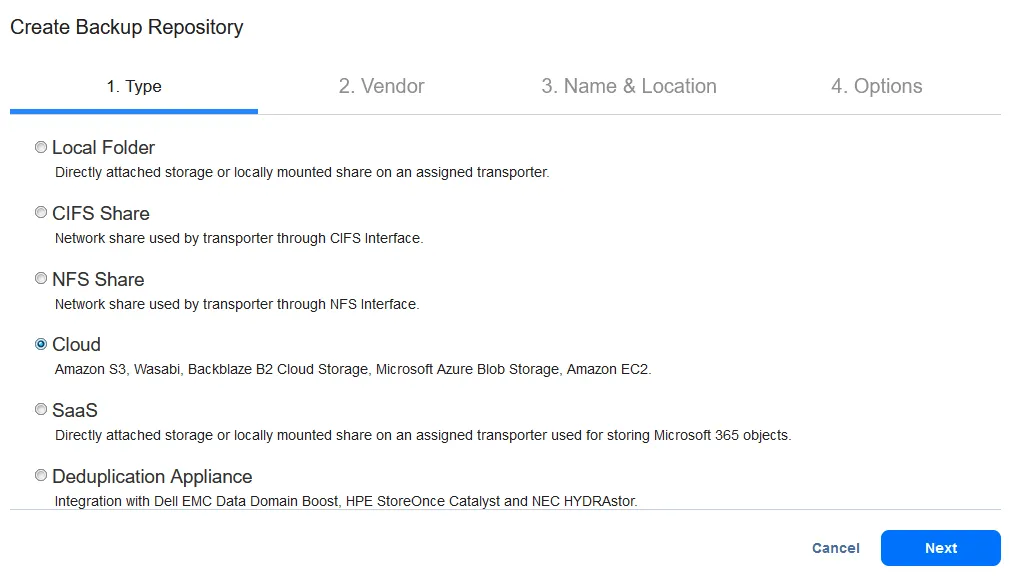
The Create Backup Repository wizard that contains four steps opens.
- Type. Select Cloud as a backup repository type. Click Next to continue.
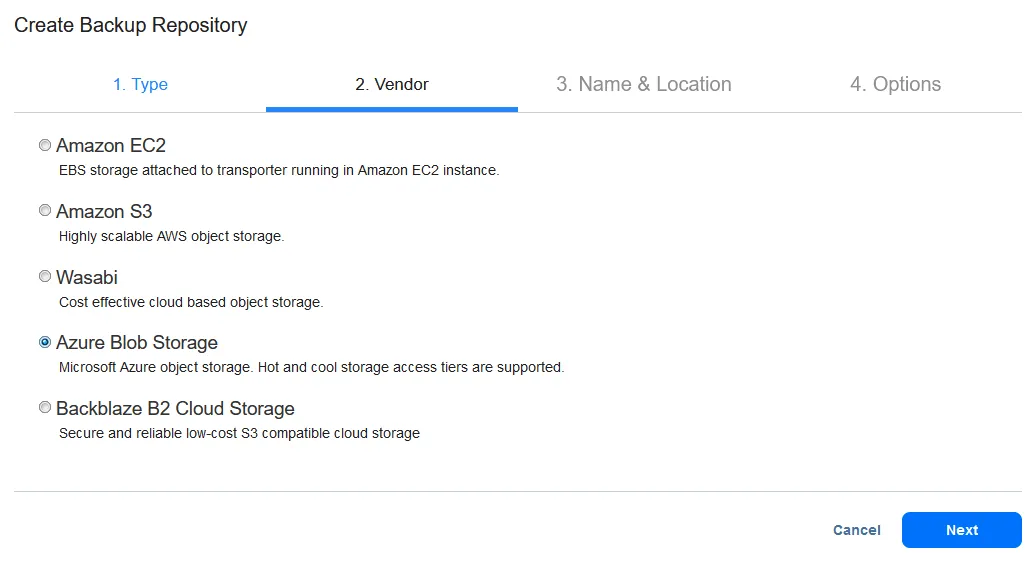
- Vendor. Select Azure Blob Storage.
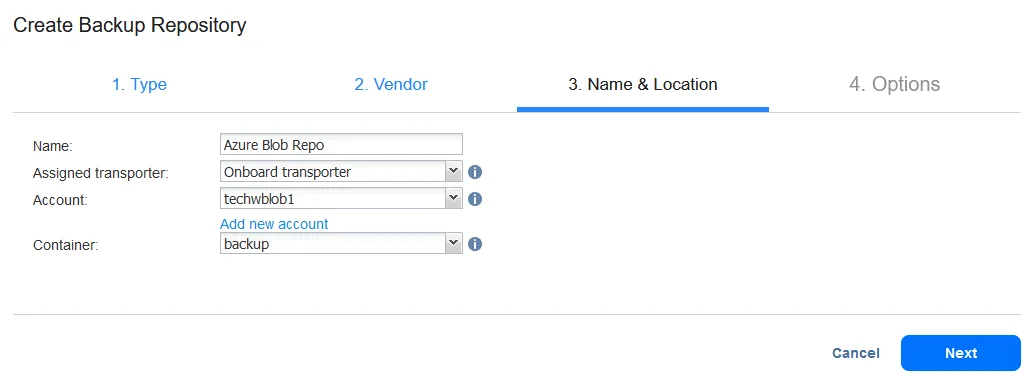
- Name & Location. Enter a name for your backup repository, select the assigned Transporter, Azure storage account and a container in this account to be used for storing backups. We use the following parameters in our example:
- Name: Azure Blob Repo
- Assigned transporter: Onboard transporter
- Account: techwblob1
- Container: backup
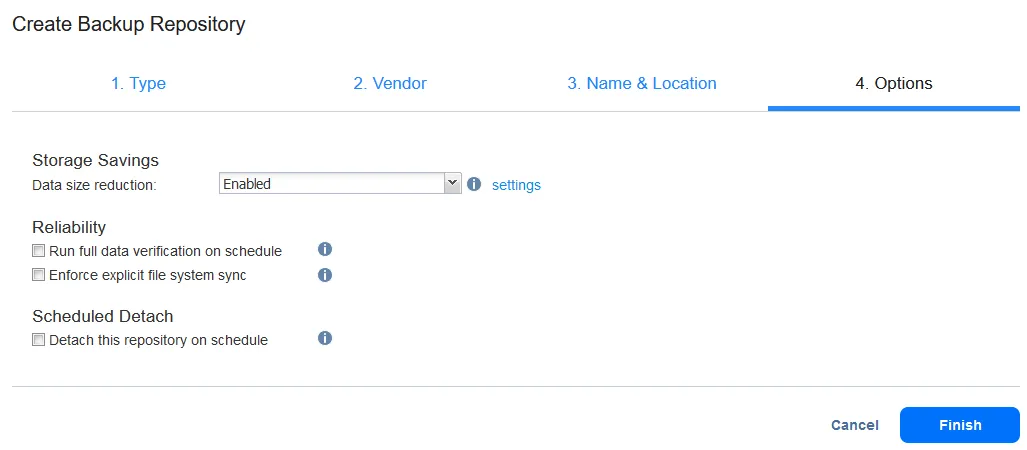
- Options. Select the needed options for storage savings, reliability, and scheduled detach. Click Finish.
Creating a backup job
We have added an Azure storage account to the inventory and created a backup repository in Azure Blob storage. Now we can create a backup job and back up data, for example, back up a virtual machine to Azure. Similarly, you can create a backup copy job if you already have a backup located in a local backup repository.
Open the Jobs dashboard and click Create > VMware vSphere backup job.
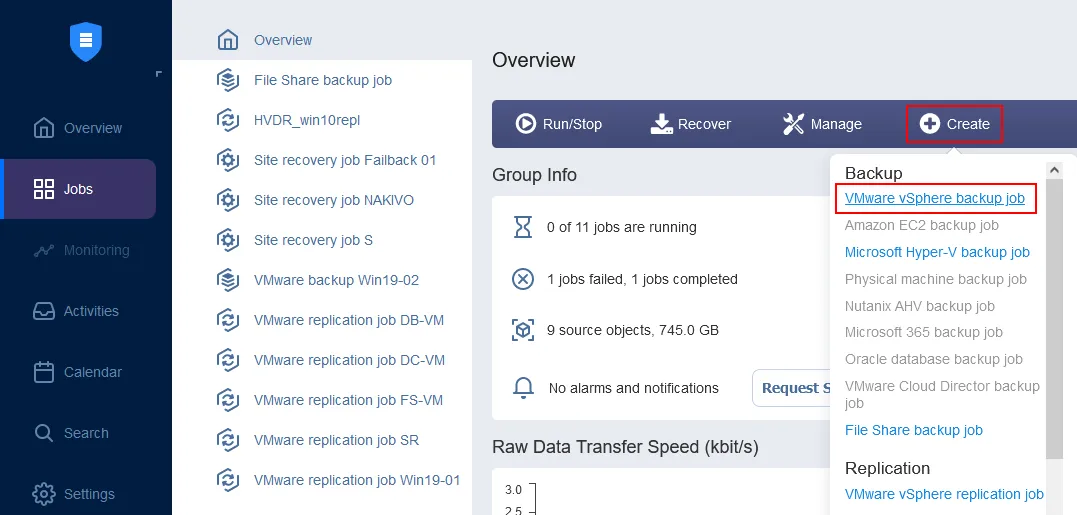
A new backup job wizard for VMware vSphere opens. Let’s have a look at important settings for configuring backup to Azure Blob Storage.
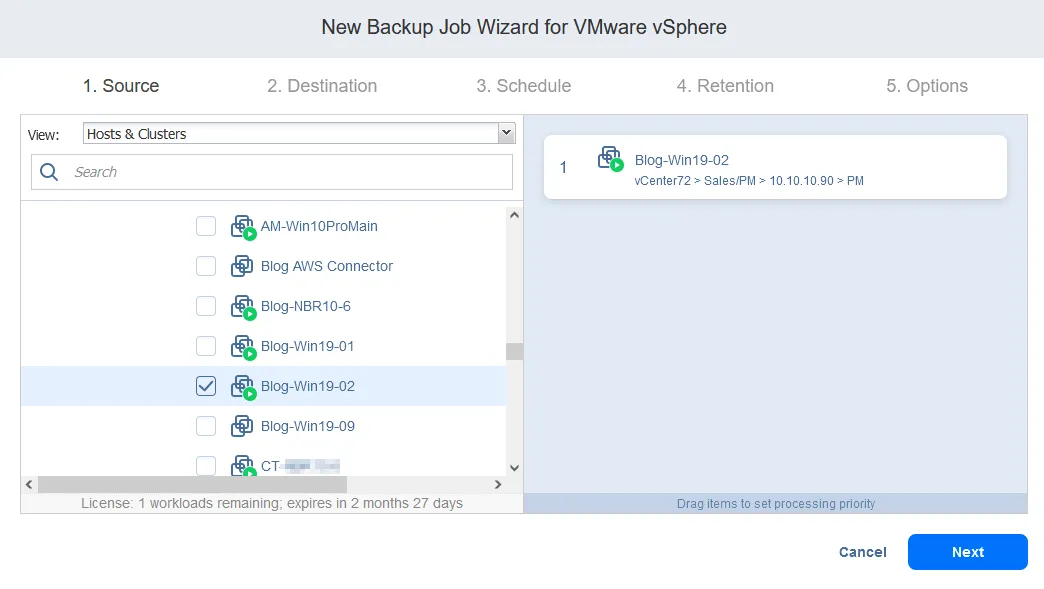
- Source. Select the VM that you want to back up. This VM must reside on an ESXi host or vCenter that has already been added to the inventory.
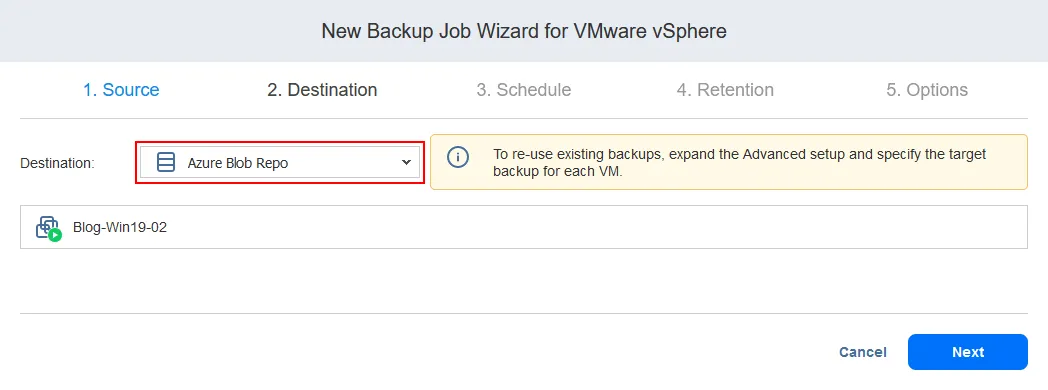
- Destination. Select the backup repository located in Azure. The name of our backup repository is Azure Blob Repo.
- Schedule. Select the scheduling settings.
- Retention. Configure the retention settings.
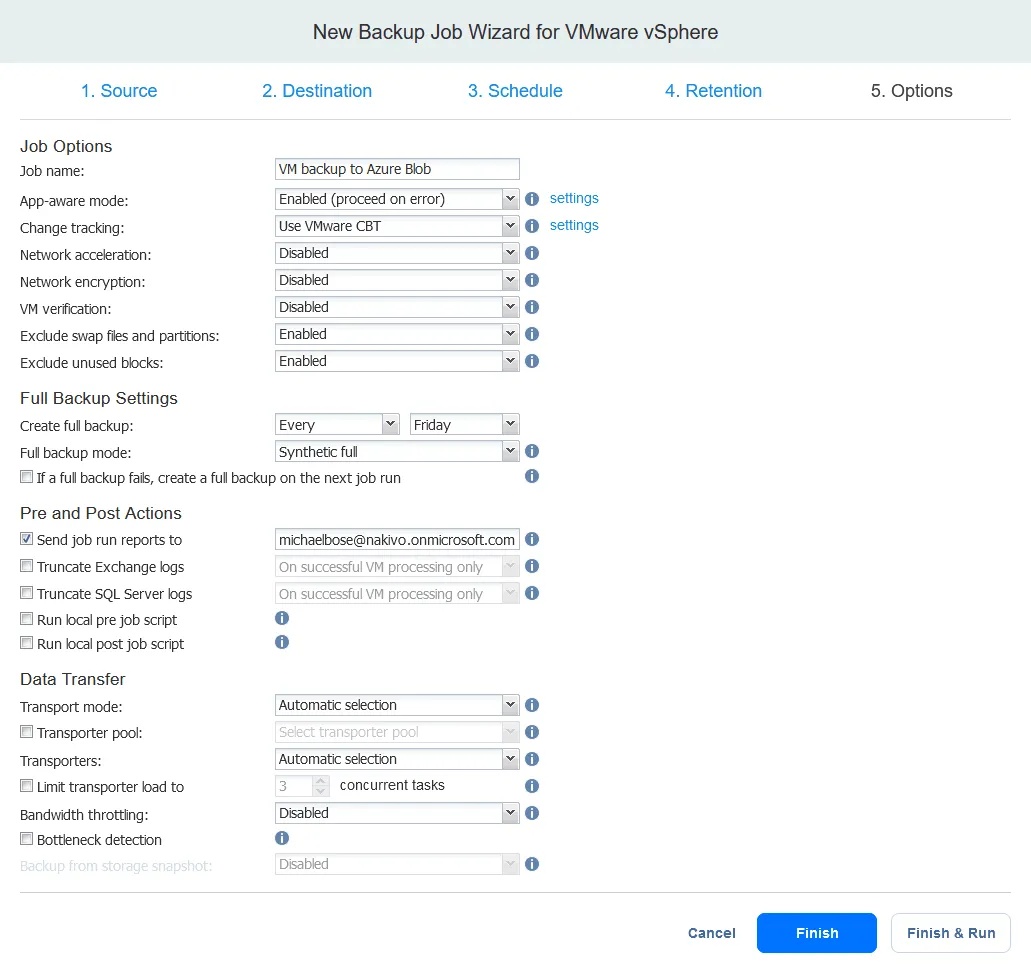
- Options. Configure the backup job options. Enter the job name, for example, VM backup to Azure Blob. Click Finish or Finish & Run to save settings and run a backup to Azure Blob Storage.
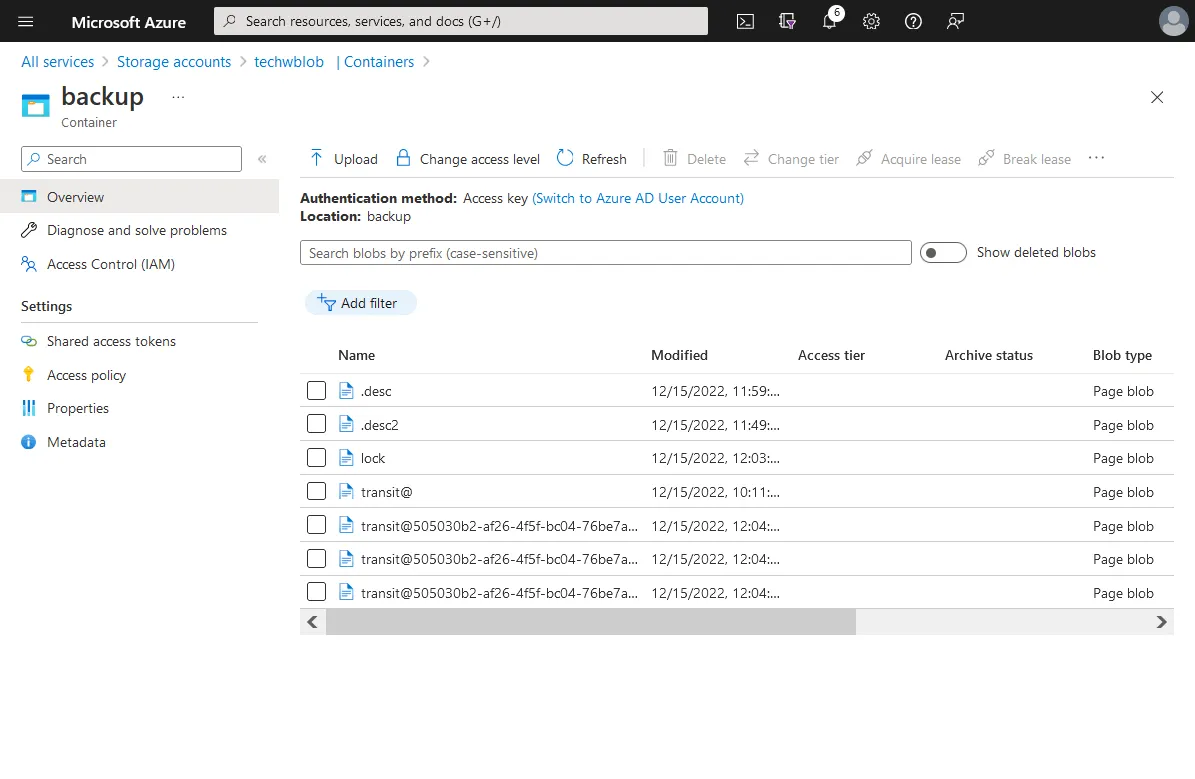
Open the web interface of Azure Portal, go to your Azure Blob storage account, and open the storage container. You should see files of the backup repository created by NAKIVO Backup & Replication. Now we have configured backup to Azure Blob Storage with the NAKIVO solution.