Initial VMware ESXi Host Configuration
The initial ESXi configuration after installation is an important step in making sure the host is functional, that is ready to serve as a standalone host or as part of a vCenter cluster. In the previous post, we explained the interactive ESXi installation step by step.
Once the installation is done, you need to complete some initial ESXi configuration in the Direct Console User Interface (DCUI) and embedded VMware Host Client.

How to Configure ESXi Host Server Step By Step in DCUI
When you reboot the server after installing ESXi, the Direct Console User Interface (DCUI) of the server is displayed. The splash screen presents basic information about the hardware (CPU and memory) as well as the ESXi build number, the IP address, etc.
DCUI is a menu-based interface and is used for the initial configuration changes to provide network connectivity to the host. This allows you to connect either via the host web UI (user interface) or with VMware vSphere Client to perform the other necessary steps in configuration, such as setting up storage on the host.

The DCUI is crucial to the setup process, as up until now, you may not have network access to the ESXi host. This interface allows you to establish that basic connectivity to move forward. You may need to set up an IP address, VLAN, or other configuration for connectivity.
Getting started with DCUI
- To log in to the DCUI interface, hit F2 Customize System/View Logs, where you will be prompted to log in with the root account specified during ESXi installation.
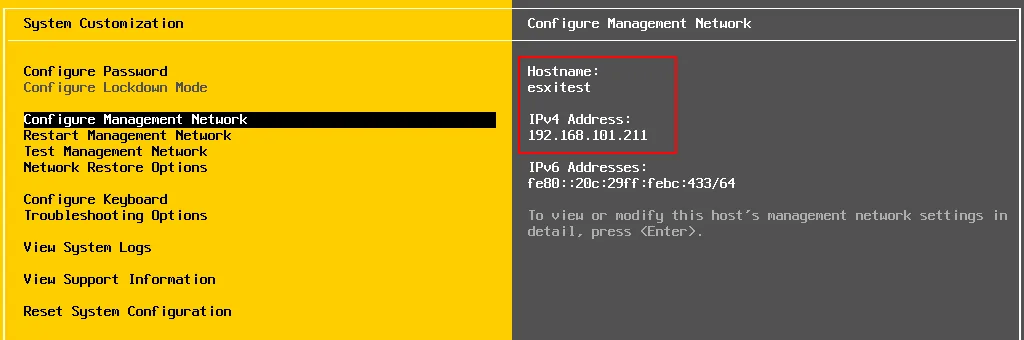
- Once logged in, you will see the System Customization menu, where you can set up most of the essential configuration for the network and turn on Troubleshooting Options and View System Logs.
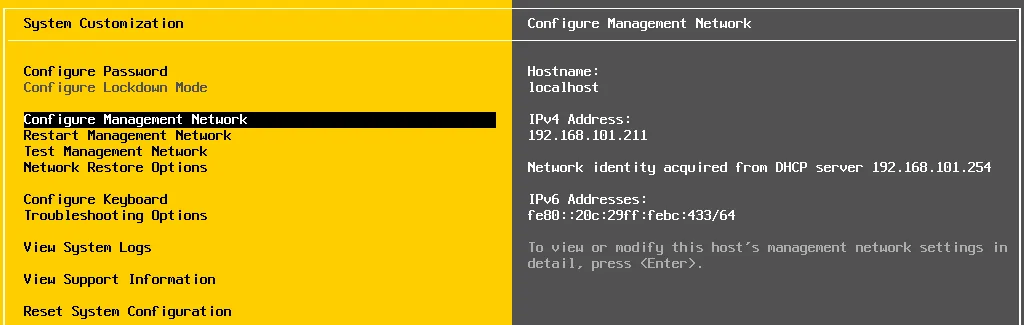
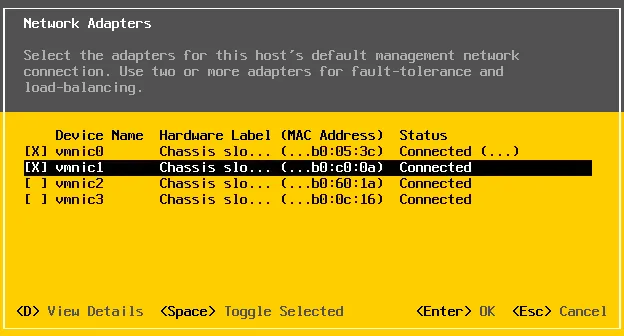
- Choose the Configure Management Network menu entry. On this screen, you can select Network Adapters and VLAN, as well as configure IPv4/IPv6 addresses, DNS, and custom suffixes.

- Press the space bar to place an “X” next to the adapter(s) you want to include in the default management network connection.
- ESXi VLAN setup. VLAN tags can be configured here as well: Configure Management Network > VLAN (Optional). VLANs or virtual LANs allow us to logically separate local area networks on the same physical infrastructure (switches, etc.) by adding a VLAN tag to the Ethernet frame header. This header identifies which VLAN the traffic traverses. ESXi management traffic can be segmented on a different VLAN than other traffic. If this is the case, this ESXi configuration needs to be populated with the correct VLAN information. If no special VLAN is set up for management traffic, it is safe to leave this option unset.

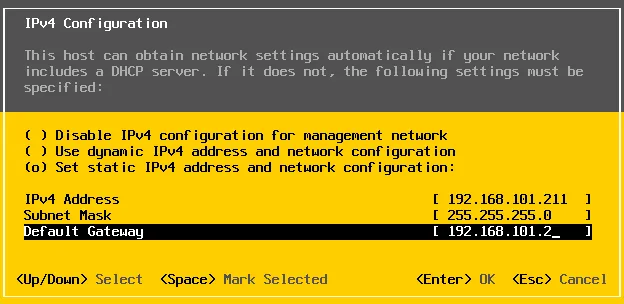
- Going back to the main System Customization page, you can set up a network address for the management network: Configure Management Network > IPv4 Configuration. This will be the address used to connect with the vSphere Client or embedded VMware Host Client to finish the ESXi configuration.
- DNS configuration can also be set up from the System Customization screen: Configure Management Network > DNS Configuration.

- Once you have completed the configuration for the management network, you should restart the management network to instantiate the changes. When you hit Esc to exit the Configure Management Network screen, you are prompted to restart the management network.
- Press Y (Yes) to apply changes and restart the management network.

- Once the management network is restarted, you see the network address and hostname changes displayed on the System Customization screen for verification.
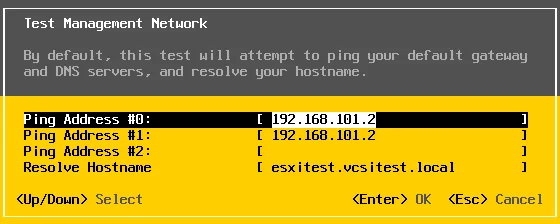
- A valuable tool to use once you have configured your management network is the Test Management Network option which will ping your gateway, DNS server, as well as resolve the hostname you have chosen for your host via DNS.
- Another useful menu is the Troubleshooting Options.
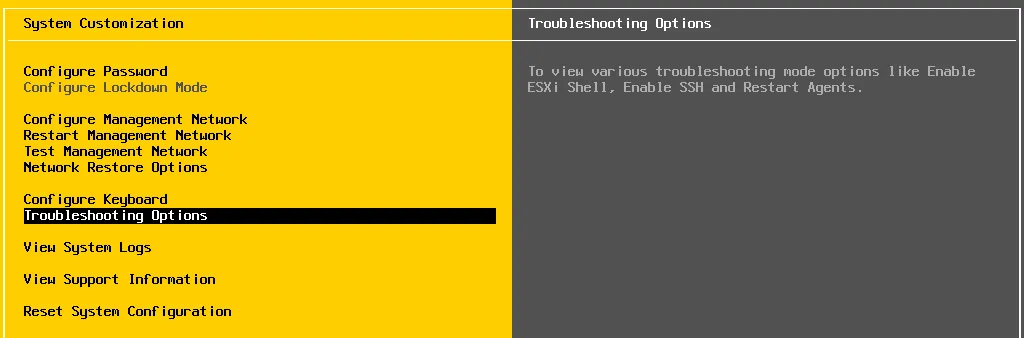
- In Troubleshooting Options, you can enable the ESXi shell and remote SSH access (enable SSH server on ESXi), as well as restart the management agents. All of these are excellent options when troubleshooting connectivity and other issues.

Connecting to Your Host in ESXi Host Configuration
One of the first things you want to do is connect to your ESXi host to complete the initial ESXi configuration, including setting up storage and licensing if you choose to do that at this point. To connect to the ESXi host, simply navigate to your Host IP Address via HTTPS in a web browser: https://〈your-host-IP〉/
This brings you to the informational splash page, which contains helpful links for moving forward with the ESXi install. Two links to highlight are displayed in the screenshot.
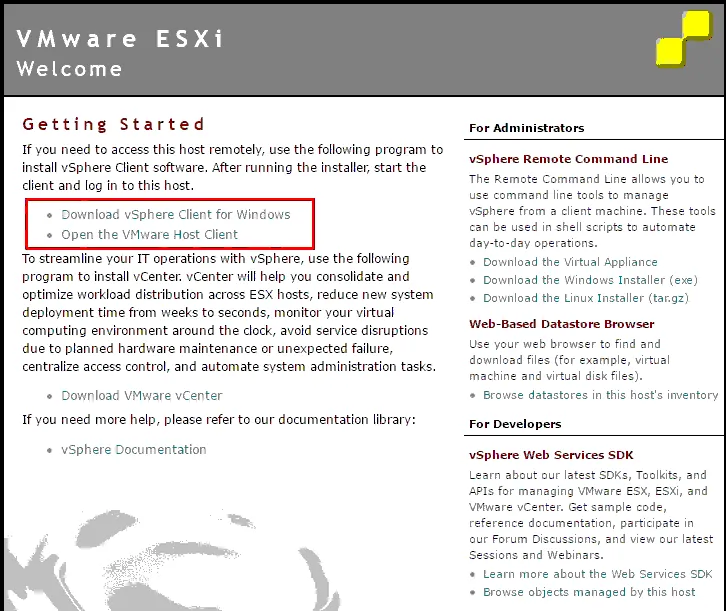
Note: ESXi versions newer than ESXi 6.0 redirect you to the login screen of the VMware Host Client web interface after opening this page (https://〈your-host-IP〉/) without displaying the splash welcome page.
The vSphere Client for Windows is the “fat” client installation of the vSphere Client that allows the management of ESXi. However, the standalone VMware vSphere Client for Windows has been deprecated by VMware because VMware has implemented a multi-platform HTML5 vSphere Client that can be used in web browsers.
The VMware Host Client is the web UI counterpart to the standalone vSphere Client for Windows. To directly access the web UI, you can navigate to https://〈your-host-IP〉/ui
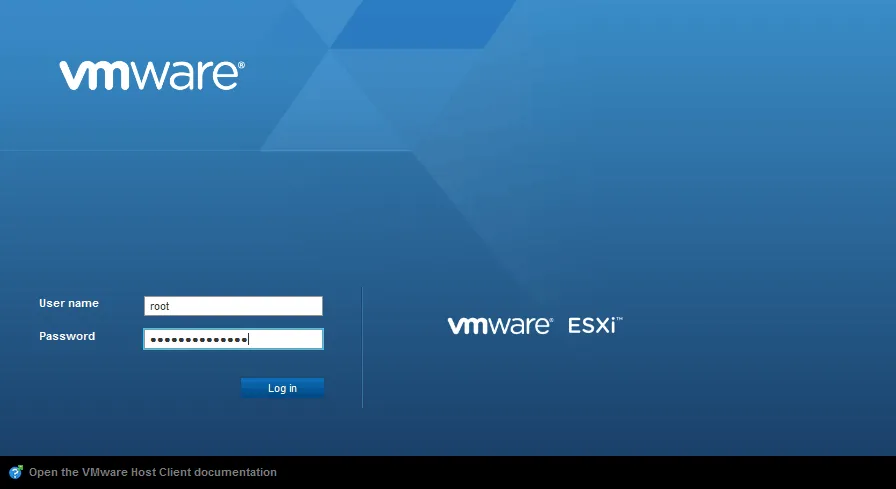
Let’s use the web UI of the embedded VMware Host Client and log in with the root account in the web UI.
Configuring Local Storage
The steps below show how to configure a local storage volume on the ESXi host. The configuration of a datastore is similar to that of local and remote storage such as an iSCSI or other targets. You may not want to create local VMFS datastores on your ESXi host, especially if it is to be a member of a vSphere cluster with vCenter in the mix. However, let’s configure a local datastore volume to see the process of configuring a datastore to store VM files.
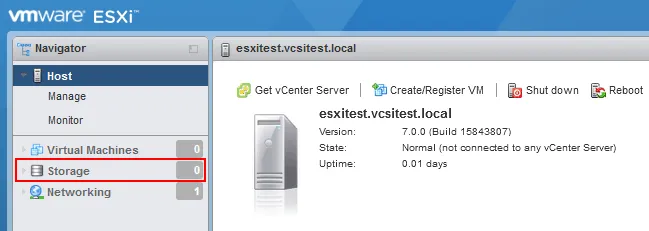
- Log in to the host web UI and click the Storage link in the left-hand Navigator pane to get the storage for the host setup.
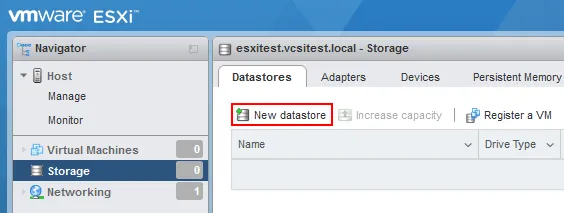
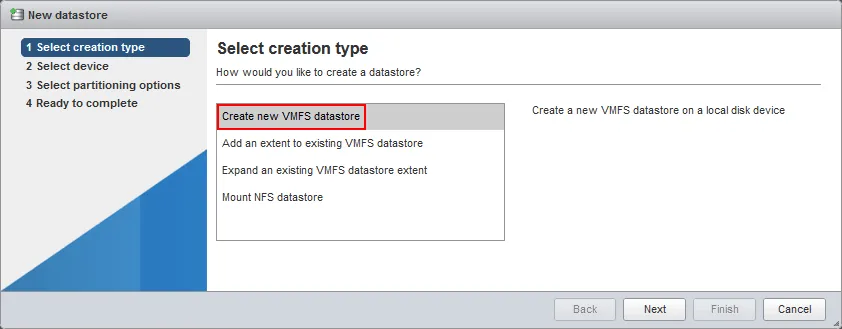
- Go to Storage > Datastores and click New Datastore.
- The New datastore creation wizard opens. Select to Create new VMFS datastore. Click Next at each step of the wizard to continue.
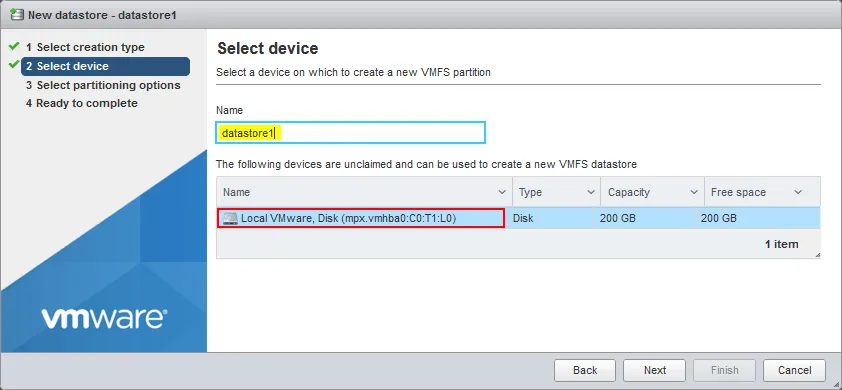
- Select a disk device where you want to provision storage and enter a datastore name.
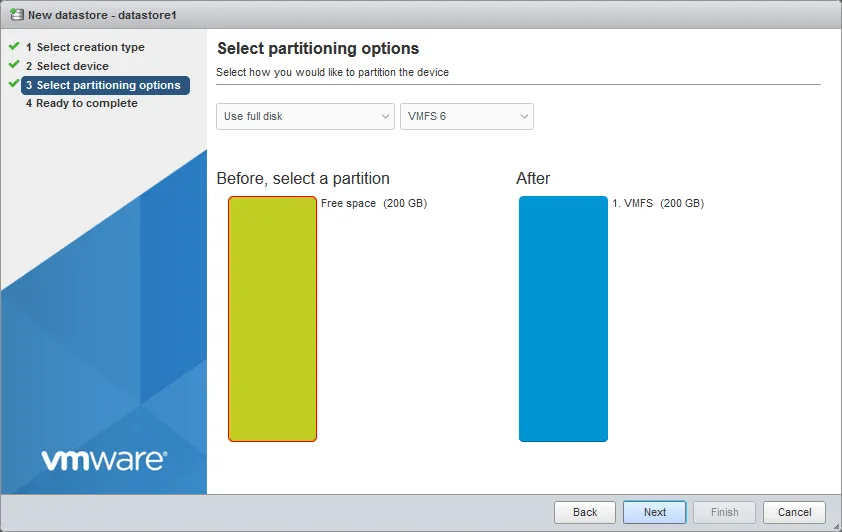
- Now select the partitioning scheme to partition and format the volume with VMFS. You can either Use Full Disk or select a Custom partitioning scheme. We select VMFS 6 as the latest VMware file system version at the moment.
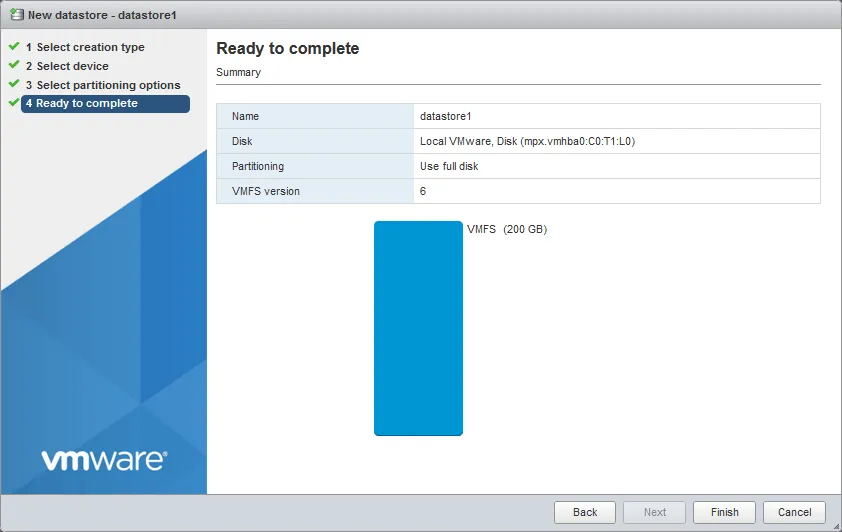
- Now you are ready to finish the VMFS datastore creation process.
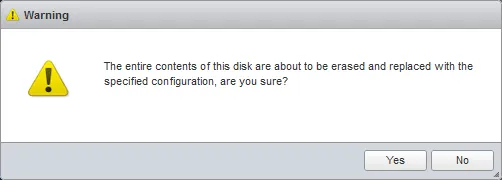
- You see a warning that you are about to potentially destroy data by erasing the volume. Click Yes to erase the volume and continue.
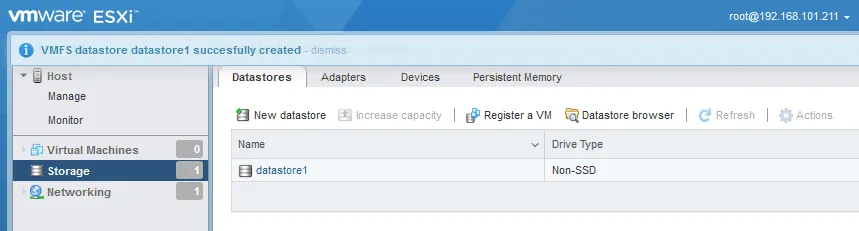
- The newly created datastore is available on our ESXi host.
We have finished our basic ESXi setup and configuration. Now we can create virtual machines, configure virtual switches, VM networks, ESXi storage networks, and configure VMware VM backup using a dedicated backup solution like NAKIVO Backup & Replication.