Hyper-V Disaster Recovery Best Practices
In virtual environments, the expectations for service availability and business continuity are very high. Companies today are expected to run their operations and provide services to their customers without interruption.
To maintain availability against disruptions caused by different factors, you should create and constantly update a disaster recovery plan. Such a plan allows you to maintain the required level of availability and data loss prevention targets as well as ensure quick recovery with minimal data loss. This blog provides useful tips for Hyper-V disaster recovery.
What Is VM Disaster Recovery?
Disaster recovery is a set of policies, procedures, and tools that are aimed at minimizing downtime and recovering business functions as quickly as possible after a major incident. Disaster recovery (DR) for virtual environments, including Hyper-V disaster recovery, generally includes:
- Block-level image-based VM backup and replication
- Retention of VM backups and replicas at a remote DR site
- Failover to VM replicas in case of disaster
- Use of VM backups for long-term storage and reliable recovery
VM Disaster Recovery in a Hyper-V Environment
Microsoft Hyper-V includes a set of inherent features that enable efficient VM disaster recovery. The budget, infrastructure, and scale of your business operations determine which features should be included in your disaster recovery plan. However, VM disaster recovery in a Hyper-V environment is typically based on the following:
- DR site. A location to which an organization can move its processes during an incident until the production site/systems are made operational again.
- Alternative virtual platform and database servers. In case of a disaster, the servers and virtual platform software must be ready at the DR site to host virtual machines. Thus, downtime is minimized, and business continuity is guaranteed.
- Virtual backup and replication software for DR. Hyper-V uses the Volume Shadow Copy Service (VSS) technology, enabling the creation of backups or snapshots, even when they are in use. While Hyper-V replication allows the use of the copies (replicas) of running VMs as a means to restore the VM in case of disaster. Modern software solutions combine backup and replication functinality to help you with disaster recovery.
This set of means can help organizations create and successfully implement a VM disaster recovery plan in a Hyper-V environment.
Insider Tips for Successful Hyper-V VM Disaster Recovery
Here is a list of tips for successful Hyper-V VM disaster recovery:
- Run and test VM backups regularly. Set the backup schedule based on your organization’s needs and priorities. Regularly test the validity and integrity of the created backups.
- Create and test replicas regularly. Depending on how critical a particular application or VM is for business continuity, you can set up replication to ensure almost instant recovery. Test your replicas regularly to verify their integrity and usability.
- Conduct failover testing. Testing allows you to verify the ability to transfer critical operations to a DR site in case of a DR incident. Failover testing helps identify weaknesses that can potentially undermine the DR process.
- Regularly update your data protection solution. Given that Microsoft is constantly updating its products, it is important to update your data protection solution to make use of new APIs and Hyper-V extensions.
- Store backups and replicas at a remote site. Keeping this data at a distant location allows you to eliminate the risk of a single point of failure.
- Apply Windows updates to each VM to patch security vulnerabilities. Hyper-V is changing and developing rapidly, and Microsoft tries to keep its Hyper-V Integration Services updated.
- Test for hardware and software errors. Conducting RAM and disk verification tests, along with checking for disk warnings, is essential if you want to avoid system failure and potential data loss.
- Keep adequate disk space on your physical machines and VMs. Free disk space enables reliable backups and fast replication, while a lot of RAM is crucial when restarting a VM. Thus, to ensure successful backups and replications, it is practical to install a data protection solution that can manage storage space and send notifications about the critical level of RAM.
- Install and implement a data protection solution that supports VSS. VSS monitors the performance and the state of VMs during backup and replication jobs. You should also configure VSS to effectively optimize backups and replicas.
How to Protect Your Infrastructure with NAKIVO’s DR Solution
Given that Hyper-V VM disaster recovery relies on VM backups and replicas, both options should be considered when choosing a data protection solution to implement a DR plan. NAKIVO Backup & Replication is one solution that provides comprehensive data protection for Microsoft Hyper-V VMs and includes both backup and replication functionality.
- Microsoft Hyper-V VM backup. If using a modern image-based solution like NAKIVO Backup & Replication, a point-in-time copy of the VM is created, which includes the OS, configurations, etc. In case of a DR incident, a VM can be recovered from the backup in the same state in which it was during the backup process. You can, for example, instantly boot a Hyper-V VM or recover it as a VMware vSphere VM.
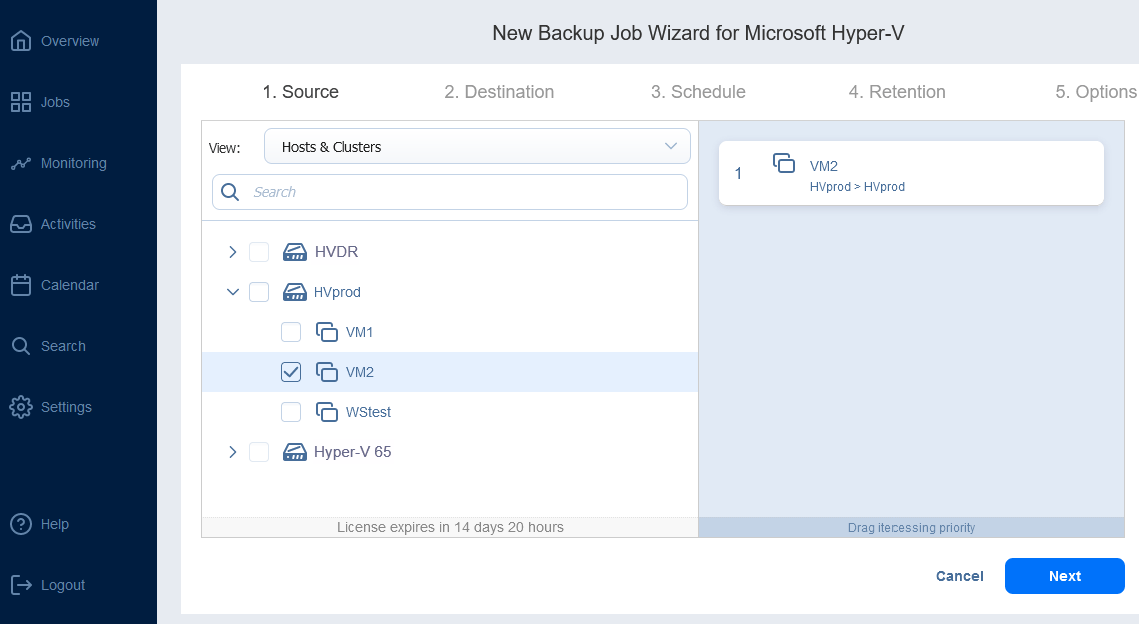
You can back up Hyper-V VMs with NAKIVO by creating a new backup job from the main screen after adding the Hyper-V host to the solution Inventory.
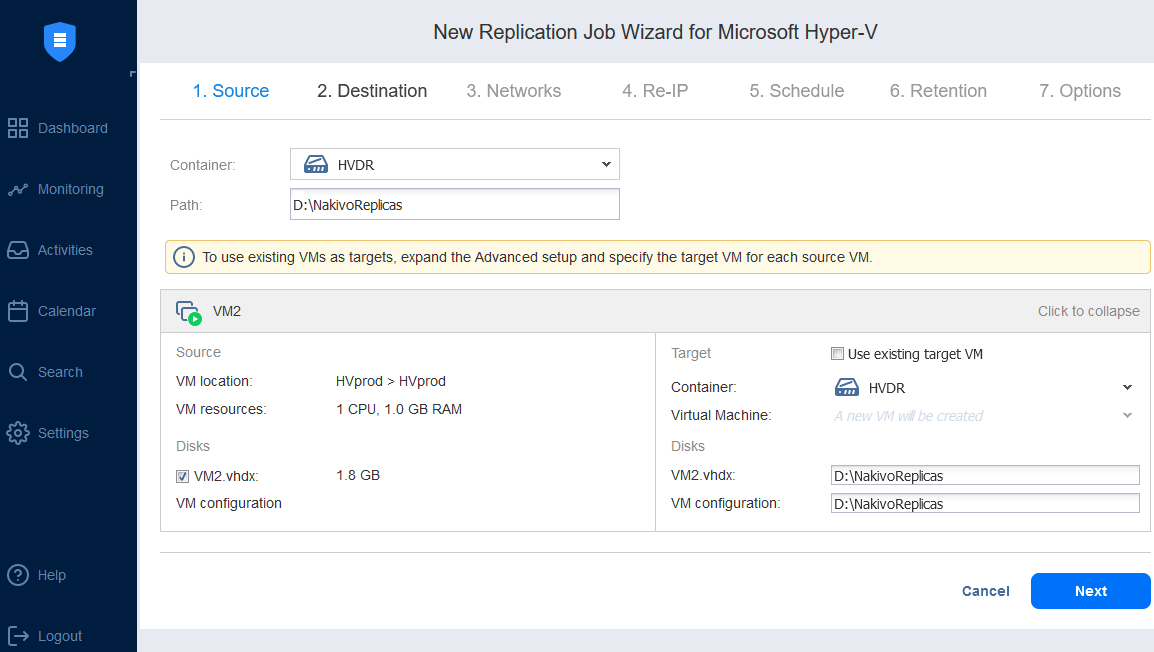
- Microsoft Hyper-V VM replication. By using Hyper-V VM replication, you can create an identical copy of a primary VM, known as a VM replica, which can simply be powered on in case of a DR event when an immediate recovery is required. Failing over workloads to the replica (that is, moving VMs and systems to the DR site) to recover operations at the DR site is essential to maintaining business continuity and high availability.
Configuration of a Hyper-V replication job with NAKIVO allows you to configure network mapping and re-IP rules.
- RTO and RPO. The recovery point objective (RPO) and the recovery time objective (RTO) are key metrics to establish when planning Hyper-V VM disaster recovery. RPO and RTO should be defined in your DR plan for the different critical workloads and will dictate the frequency of backup/replication.
- RPO signifies the amount of data that a business can afford to lose without harming the business (measure as a time interval between two backup/replication jobs).
- RTO is the period of time within which business operations must be recovered after a disaster before the incident has a negative impact on an organization. VM replication and failover operations allow much shorter RTOs than recovery from VM backup.
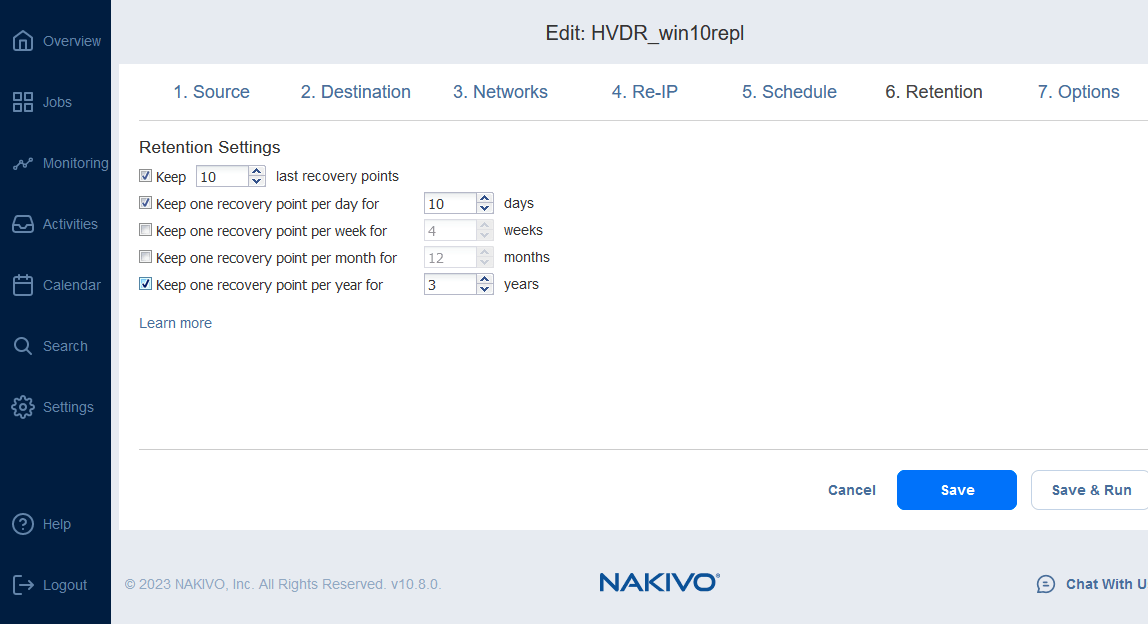
You can configure retention settings by implementing the grandfather-father-son retention policy. These settings determine the number of VM replicas you keep and you can use for Hyper-V disaster recovery.
Hyper-V Disaster Recovery Orchestration with NAKIVO
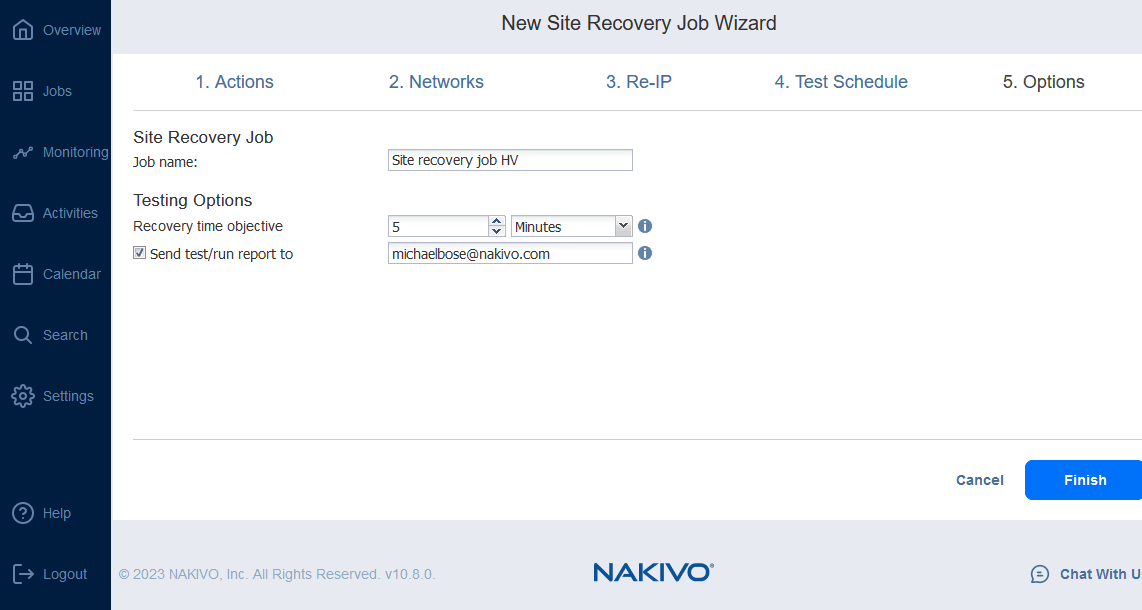
NAKIVO Backup & Replication has a set of features, including the advanced Site Recovery functionality supporting VMware, Hyper-V, and AWS EC2 environments. Site Recovery represents a set of actions and procedures that can be arranged in a particular way to create a VM disaster recovery workflow (job). Site recovery workflows in NAKIVO Backup & Replication enable the orchestration and automation of a DR process across multiple sites.
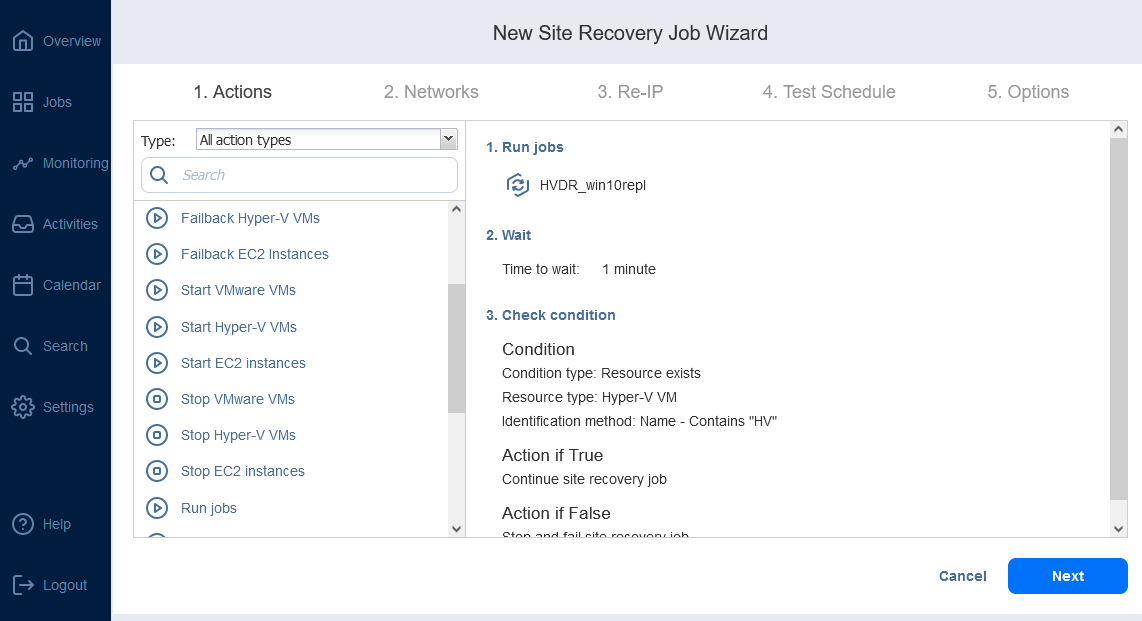
Site Recovery jobs can include (among other DR actions) automated failover, which allows the recovery of an entire site in just a few clicks. Moreover, NAKIVO Backup & Replication provides two types of failover: planned and emergency.
- Planned failover is generally used to protect a system from an oncoming disaster or during maintenance operations on the primary site. In this case, the solution performs one last data sync and then moves the workload from the primary site to the VM replicas.
- Emergency failover is activated when your primary site has already been hit by an incident. The solution moves the workload from the primary site to the VM replica without the data sync (to save time) and reduce downtime.
Furthermore, NAKIVO Backup & Replication can run a Site Recovery job in testing mode (scheduled or ad hoc), which is an ideal way to find out whether your recovery workflows function as planned and whether your RTOs can be met.
The possibility of creating a site recovery workflow with the help of NAKIVO Backup & Replication offers a significant advantage to any company. You can create a DR strategy that matches your specific business needs, set it up beforehand, and run it in just a few clicks if disaster strikes. In addition, you can constantly test and optimize your DR strategy to achieve the best possible results (zero downtime, shorter RTOs, high availability, and lower costs).