File Recovery from VM Backup with NAKIVO
When it comes to recovery from backups, one of the core functionalities needed is recovering a file or files that may have been accidentally or intentionally deleted, corrupted by a system failure, or a possible ransomware infection. When it comes to file recovery, we want to be able to quickly and easily recover from a backup and have the flexibility to choose the restore points we need.
This blog post explains how to recover particular files directly from a backup without spending a long time restoring the entire backup.
File Recovery with NAKIVO
NAKIVO Backup & Replication provides a powerful platform for recovering files from VM and physical machine backups quickly and easily and offers you the following benefits:
- Allows you to pull files directly from Windows server and Linux server backups
- Needs no special file recovery or guest operating system agent to perform recovery of files from VM backups
- Can perform file recovery over both LAN and WAN
- Allows you to download or email the recovered files
- Allows recovery to the source location
How to Recover Files from a VM Backup
Read the requirements for file recovery to ensure that the recovery process can be done. Using the very intuitive NAKIVO Backup & Replication web interface, perform the following steps to recover files.
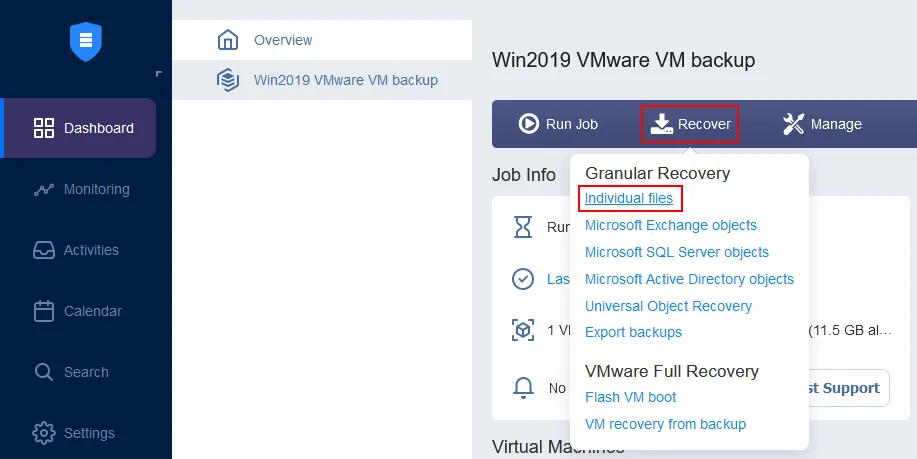
- Select the backup job associated with the appropriate VM backup in the Dashboard.
- Choose Recover > Individual files to start the File Recovery Wizard.
- The File Recovery Wizard opens. Complete all the steps.
- Backup. Choose the backup you need from the list of available backups. This has to be the backup of a virtual or physical machine that contains at least one backup job run to create a recovery point.
Next, select the recovery point. If you have more than one point in time available to choose from, select the point that you want to pull the file from. This is important with file recovery. If an end-user deleted a file from the server and a backup job ran after this deletion, you need to be able to go back to a recovery point created before the file was deleted.
Click Next at each step of the wizard to continue.
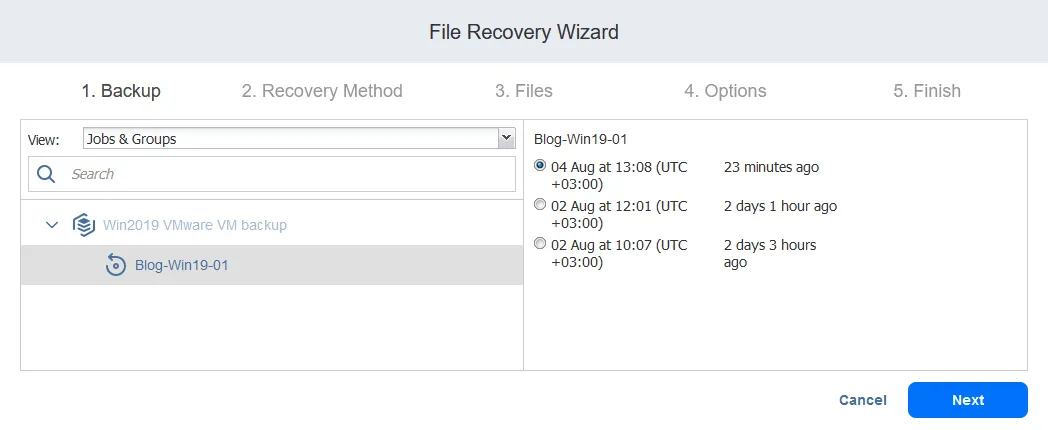
Once you select the recovery point and move forward, the recovery point will be prepared for the file recovery.

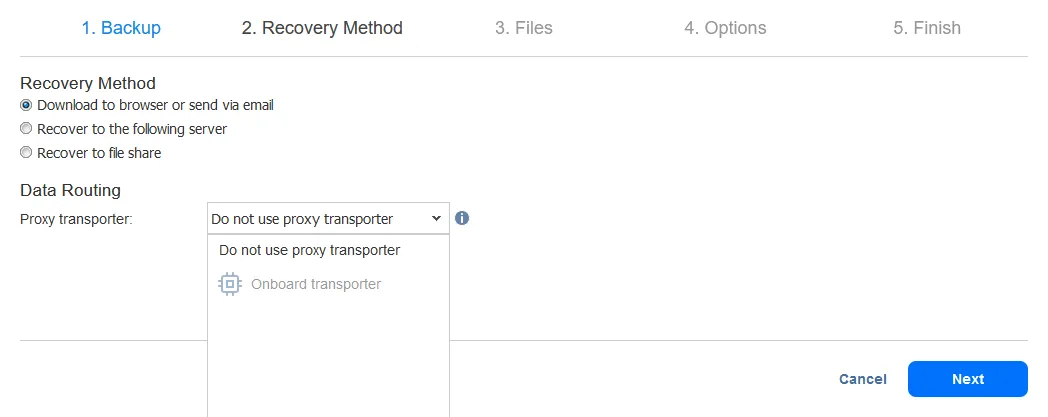
- Recovery Method. Select how you want to get the recovered files. There are three recovery options:
- Download to browser or send via email
- Recover to the following server
- Recover to file share
Let’s look at the workflow for each file recovery option.
Option 1: Downloading files to a browser or sending via email
When you click Download to browser or send via email in the Recovery Method, you can select a proxy transporter (the solution component responsible for data transfers) or proceed without it.
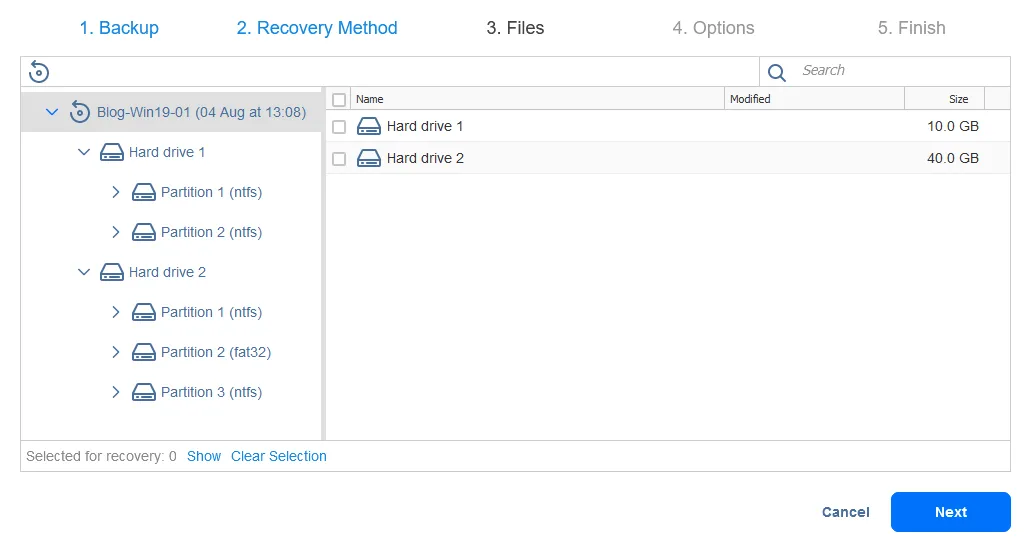
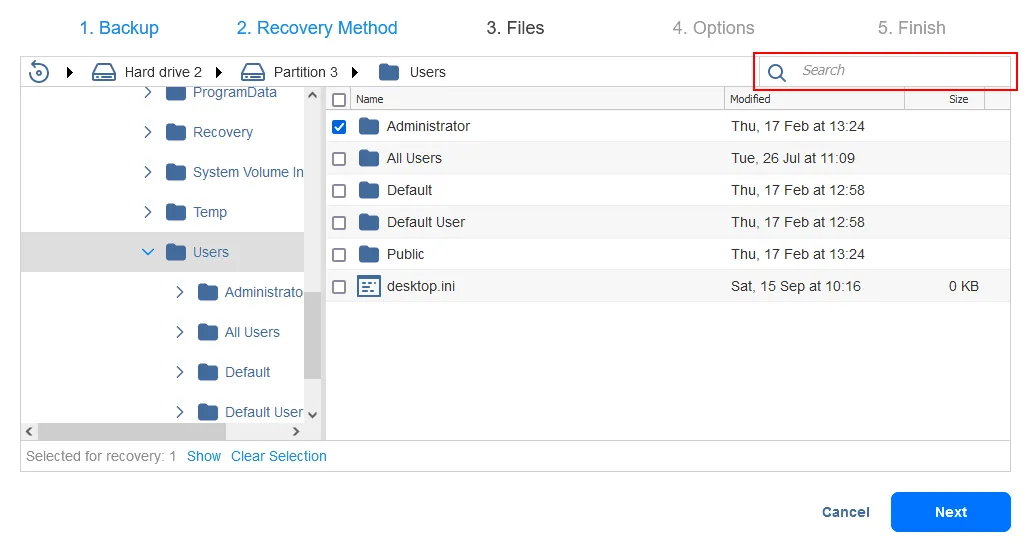
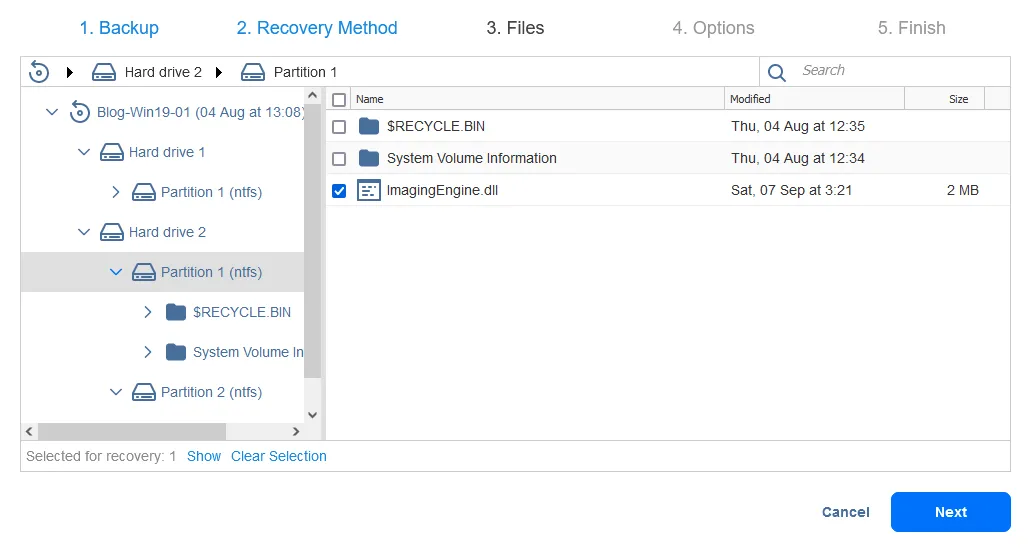
- Files. The NAKIVO Backup & Replication interface allows you to browse hard drives/partitions.
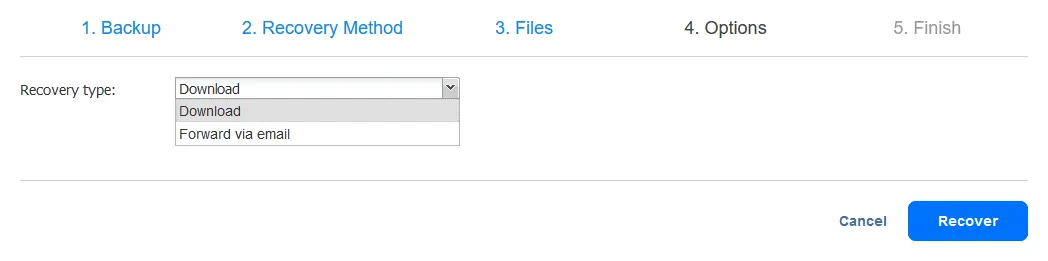
- Options. Select one of the two recovery types:
- Download
- Forward via email
Select the needed recovery type.
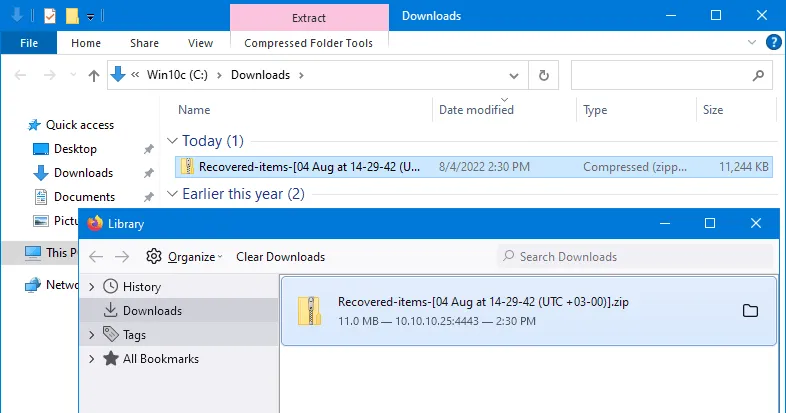
- If you choose to Download the file and click the Recover button, you will have a .zip file created and downloaded in a web browser. This file will contain the files selected in the File Recovery Wizard. Once the downloading process is completed, extract the contents of the archive and place the recovered files in the needed location.
Warning: Wait until the file downloading starts before exiting the wizard.
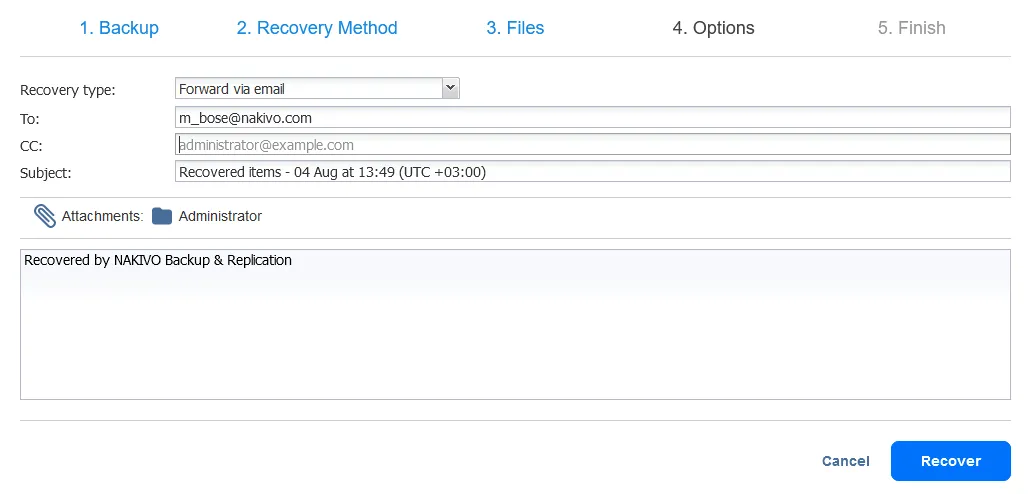
- If you choose to Forward via email, an email dialog box appears, allowing you to enter the recipients of the recovered files. Note that you have the Attachments with the files you selected in the File Recovery Wizard. Simply hit Recover to send the recovered files.

- Finish. Wait until the file recovery process is completed. You can view the file recovery progress in the Activities tab. After you recover the files, close the File Recovery Wizard.
Option 2: Recovering files to a specific server
If you clicked Recover to the following server in the Recovery Method, you need to select the recovery server settings.
- Recovery server: Select a server or a virtual machine (from the inventory) to which you want to recover files.
- Server hostname or IP: Enter the IP address of the destination machine if it is not detected automatically.
- Username: Enter a username for the account with administrative privileges to have the permissions to write recovered files.
- Password: Enter the password for this user account.
Click Test Connection to ensure that you have entered the correct parameters for the target machine to recover files.
In this walkthrough, we recover files to a Windows server running on a VMware VM.
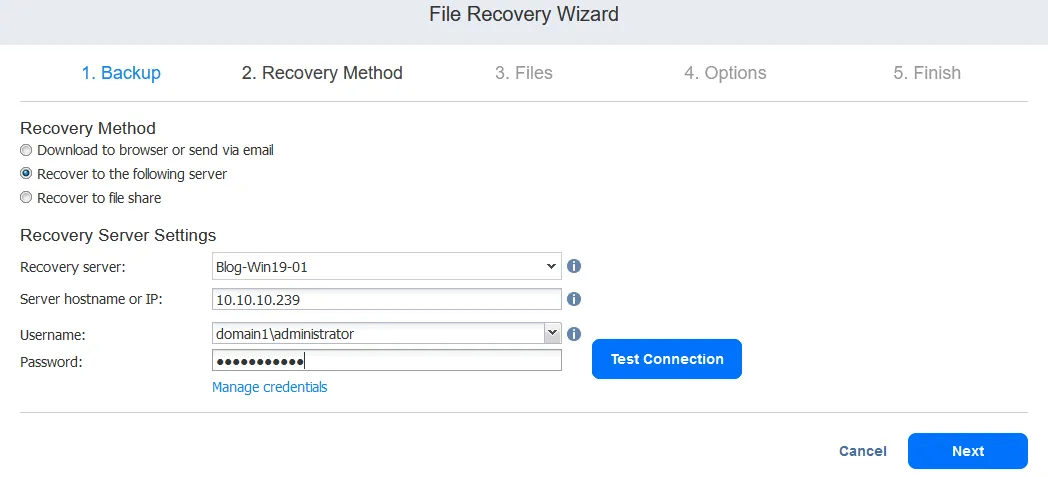
Once you have passed the connection test, read the notification message and move on to the next step.

- Files. For step 3 of the File Recovery Wizard, follow the same actions outlined for the first file recovery method.
- Options. Select file recovery options. All available options are listed below:
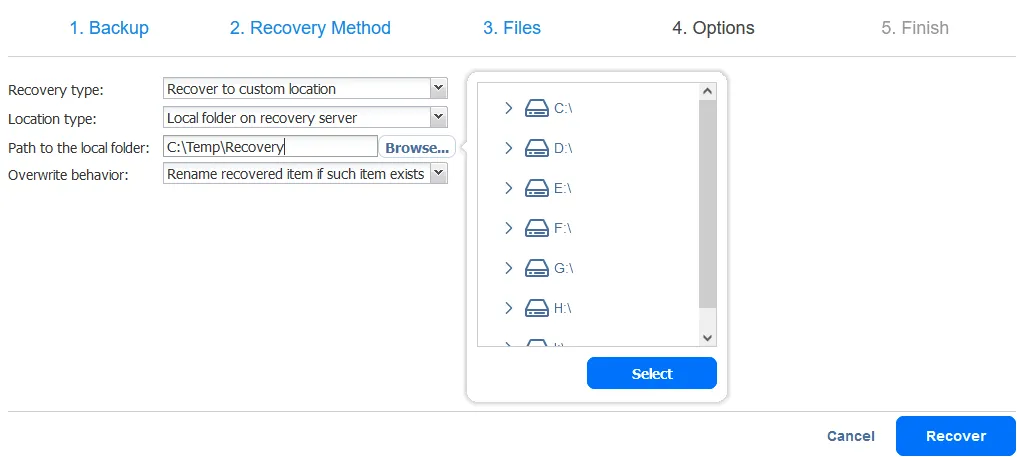
- Recovery type: Recover to the original or a custom location.
- Location type: Choose a local folder on the recovery server or a CIFS share/NFS share.
- Path to the local folder: Enter the path to the needed location depending on the selected location type.
- Overwrite behavior
- Rename recovered item if such item exists
- Skip recovered item if such item exists
- Overwrite the original item if such item exists
We want to recover files to a custom location that is a local folder on a recovery server (C:\Temp\Recovery). You can enter the path manually or click Browse and select the needed folder.
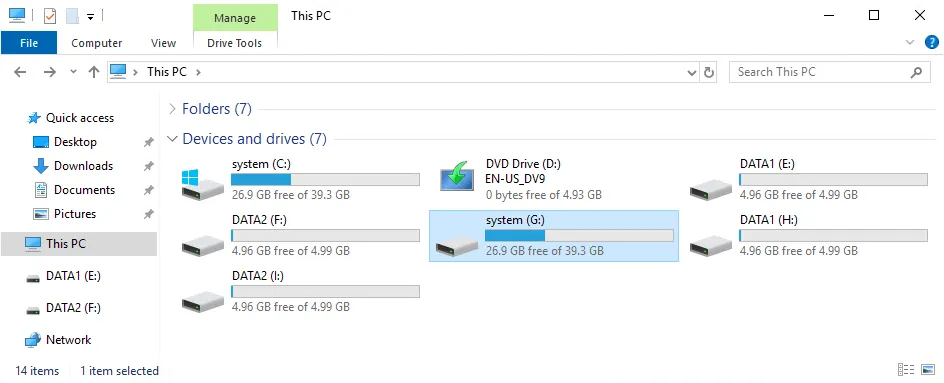
Our source virtual machine (the backup of which we’re using to recover files) has three disk partitions. We mount a VM backup to this machine running on an ESXi host and see the three partitions of the VM and three similar partitions mounted from the VM backup. In total, we see six partitions, as shown in the screenshot below.
If we open the user interface of the target Windows machine, we see the same disk partitions (mounted volumes) in Windows Explorer. This is because the iSCSI initiator in our Windows machine mounts virtual disks from the backup as iSCSI targets. We can also browse the files on the mounted disks on this machine.
- Finish. Wait until file recovery with the second method (Recover to the following server) is completed.
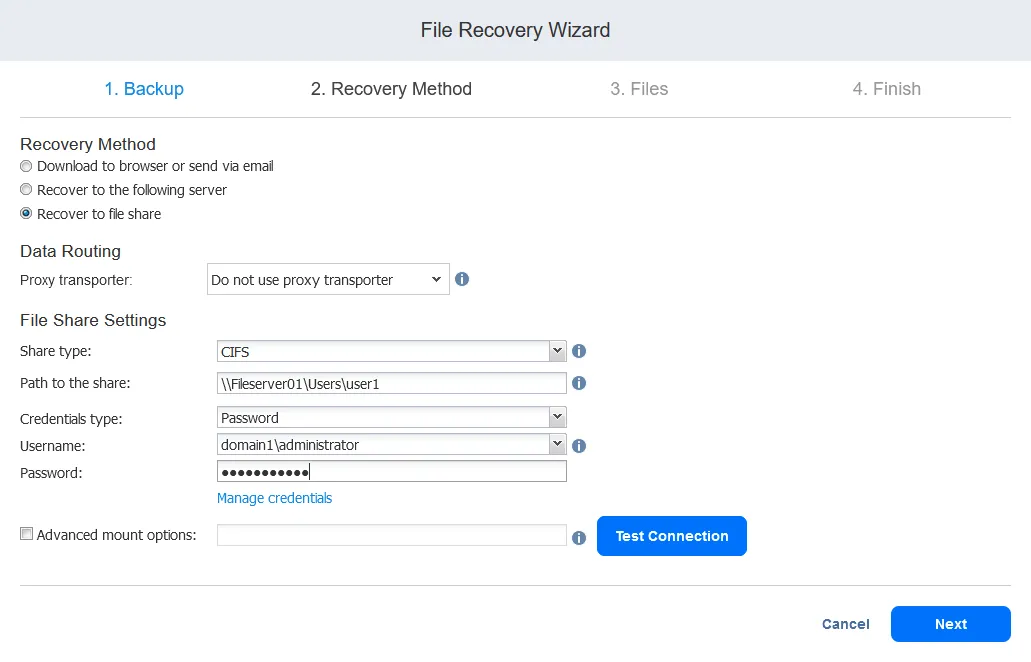
Option 3: File recovery to a file share
If you selected Recover to file share in the Recovery method, you need to select the proxy transporter (as mentioned earlier, the transporter is the solution component responsible for data transfers).
- In the Data routing section, select whether to use a proxy transporter.
- Configure file share settings.
- Share type: CIFS or NFS
- Path to the file share: Enter the full path to the file share starting from the IP address or hostname of your file server.
- Credentials type: Fill in the password and private key. If you use credentials with a password, enter credentials of the user account with the permissions needed to write files to the selected file share.
Hit Test connection. If you pass the test, continue to the next step.
- Files. Select the files to recover as shown for the previous two options.
- Finish. Wait until the recovery process is completed.
Thoughts
Restoring files from backups allows you to save time when you need to restore some deleted or corrupted files without the need to restore the full data set from a backup. This approach to restoring only needed files allows you to save time spent on data recovery and avoid downtime of a machine to which you restore files. Don’t forget about regular data backup to be prepared for recovery of files or full machines when needed.
The NAKIVO solution allows you to back up and recover Windows and Linux servers and full VMware vSphere and Microsoft Hyper-V VMs. Download NAKIVO Backup & Replication Free Edition and be prepared for recovery.