Installing Android on VMware ESXi: A How-To Guide
Android is a very popular and prolific operating system on mobile devices such as smartphones and tablets. Most of the time, there is no practical reason to install Android on a physical computer, but there may be some cases when you need to run Android on a virtual machine (VM), for example, when developing applications for Android and testing them. Fortunately, you can install Android on VMware Workstation, VMware Player, VMware ESXi, and VirtualBox.
Once you install Android on VMware Workstation or ESXi, you will get all features available for Android installed on a smartphone. The advantages of using an Android VMware VM include the possibility of creating snapshots and cloning a VM during the development or testing process. This blog post explains how to install Android on VMware ESXi step by step with screenshots.

Prepare Your Environment
Android 8.1 and VMware ESXi 6.5 managed by vCenter 6.5 will be explored in today’s blog post. You can read how to install ESXi, configure ESXi and deploy vCenter in our blog posts, including the blog post about VMware home lab. You can create an Android VMware VM on a standalone ESXi host without vCenter. If you need to install Android on VMware Workstation to use a VM on a personal computer, you can use the algorithm explained in this blog post since it is nearly the same for both VMware ESXi and VMware Workstation.
Download the Android Installer
First, download the Android installation image. In this example, we are using the 64-bit version of Android Oreo (the third release). While the ARM and ARM64 architecture is used on most smartphones and tablets, the image applied in this example is ready for devices using the x86-64 architecture. You can also see all available images for different architectures on the official web site of the Android project.
Create a New Virtual Machine
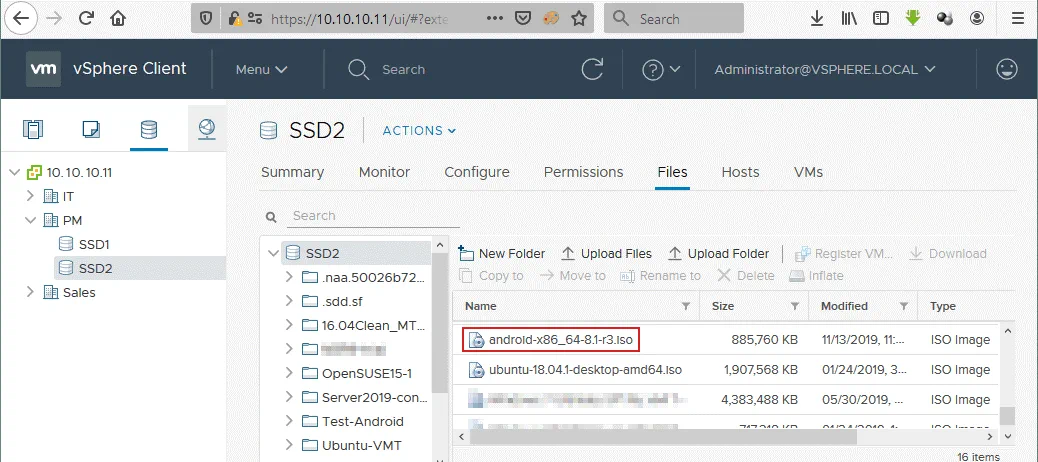
Open VMware vSphere Client in a web browser, go to Storage, select a datastore connected to the ESXi host on which you plan to install the VMware Android VM, select the Files tab, and upload the installation ISO image to the selected datastore (click Upload Files and select the needed file). In this example, the android-x86_64-8.1-r3.iso file is uploaded to the SSD2 datastore that is connected to the ESXi host whose IP address is 10.10.10.74.
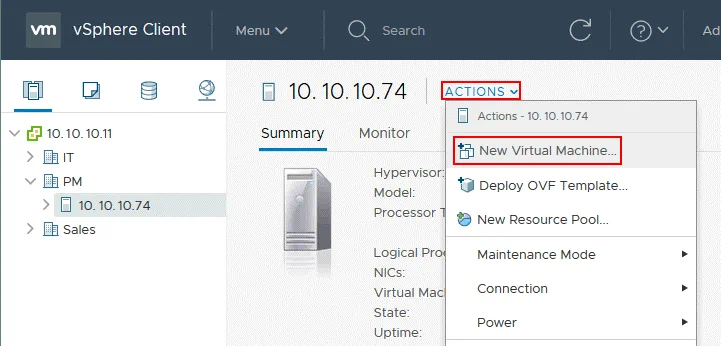
Go to Hosts and Clusters in VMware vSphere Client, select the necessary ESXi host (10.10.10.74 in this case), click Actions and in the displayed menu, hit New Virtual Machine.
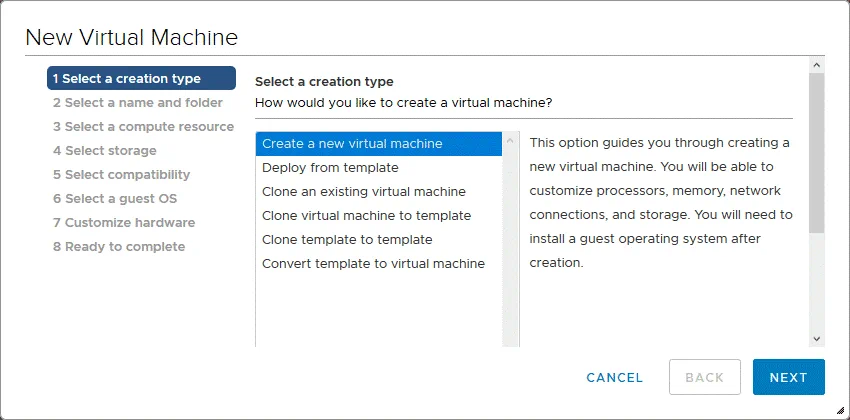
The New Virtual Machine wizard is opened.
1. Select a creation type. Choose Create a new virtual machine. Click Next to continue to the next step.
2. Select a name and folder. Enter a name for the new virtual machine, for example, Test-Android. Select a datacenter and a VM folder in vCenter as a location for the VM.

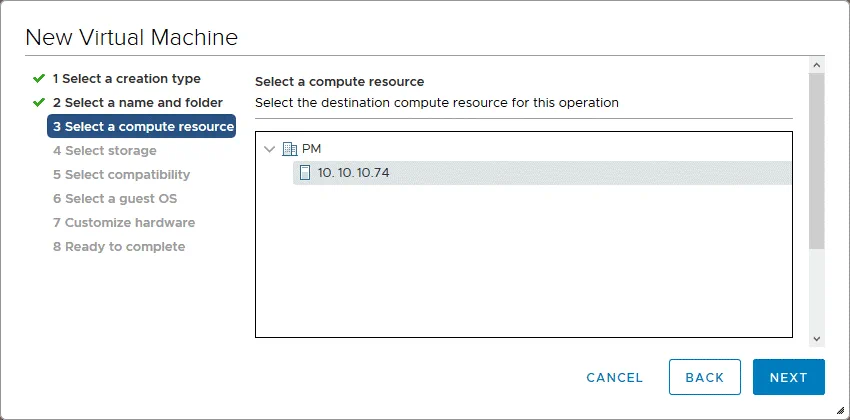
3. Select a compute resource. Select the destination ESXi host on which a VMware Android VM must be run. In our case, we are using the 10.10.10.74 ESXi host.
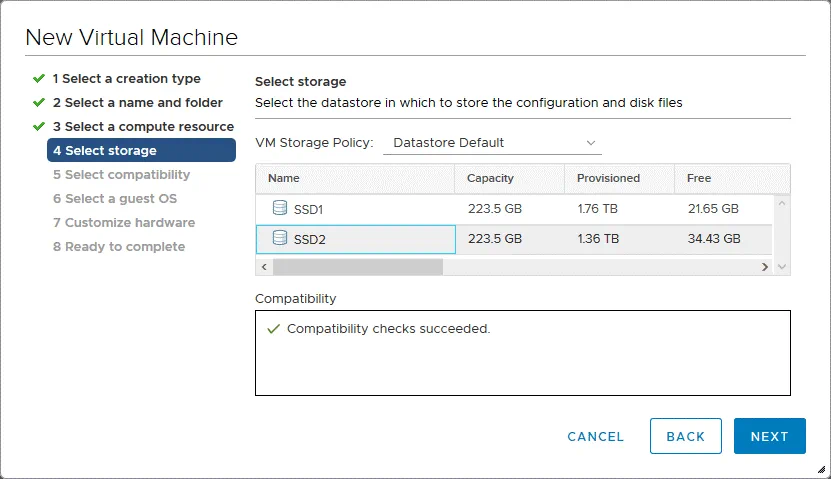
4. Select storage. Select a datastore in which to store the configuration and disk files of the Android VMware VM. You can leave the default value for the VM storage policy. If you see the compatibility checks succeeded message, go to the next step of the wizard.
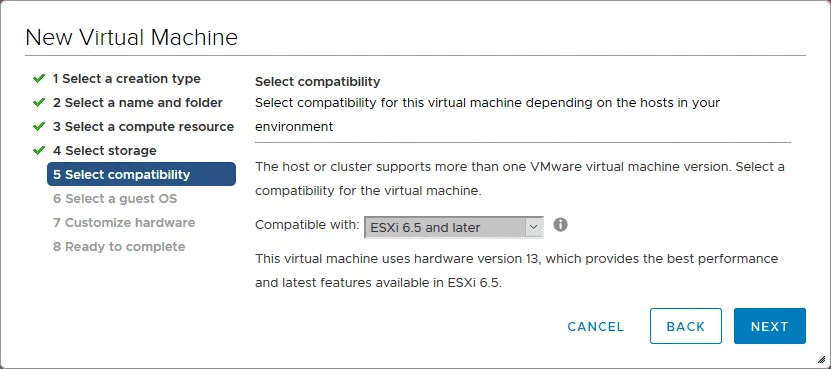
5. Select compatibility. Select the required hardware version for your Android VMware VM. The higher the VM version you select, the better VM performance you get. The newest VMware features are available for the latest hardware versions of virtual machines. The Android version that is installed on VMware ESXi in this example is compatible with ESXi 6.5 VM hardware version. Hence, ESXi 6.5 and later is selected as the virtual hardware version.
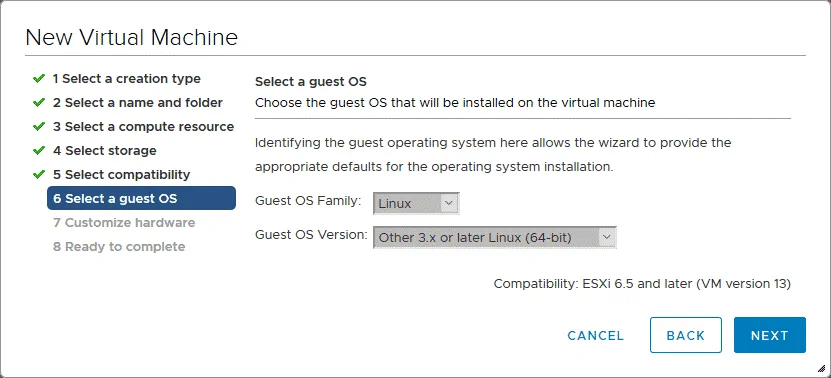
6. Select a guest OS. A selected guest operating system allows the wizard to provide the appropriate default VM settings for installing an operating system. As Android is based on a modified Linux Kernel version, you can select Linux as the guest OS family. The guest OS version may be selected as Other 3.x or later Linux (64-bit). If you wish to install a 32-bit version of Android on a VMware VM, select the appropriate (32-bit) version of the guest OS.
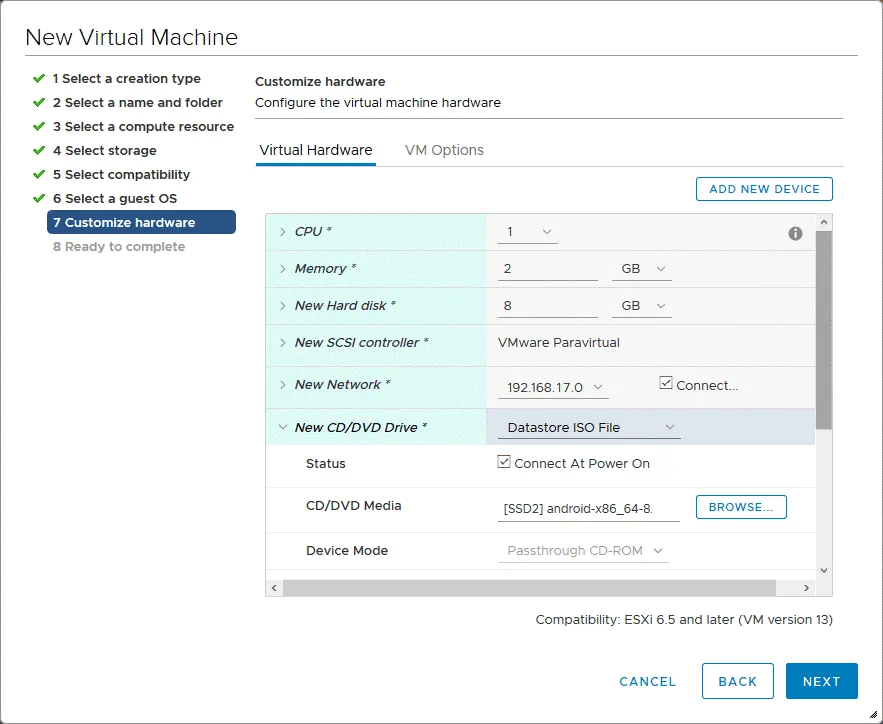
7. Customize hardware. Configure hardware for the virtual machine. Edit the following settings for your Android VMware VM.
CPU: 1 (1 CPU, 1 core)
Memory: 2 GB
New Hard Disk: 8 GB (or more)
In the New CD/DVD Drive settings, select the Datastore ISO file option in the drop-down menu, select the Android ISO installation image file (android-x86_64-8.1-r3.iso that was uploaded to the ESXi datastore in this case), and tick the Connect At Power On checkbox. Other settings may have default values.
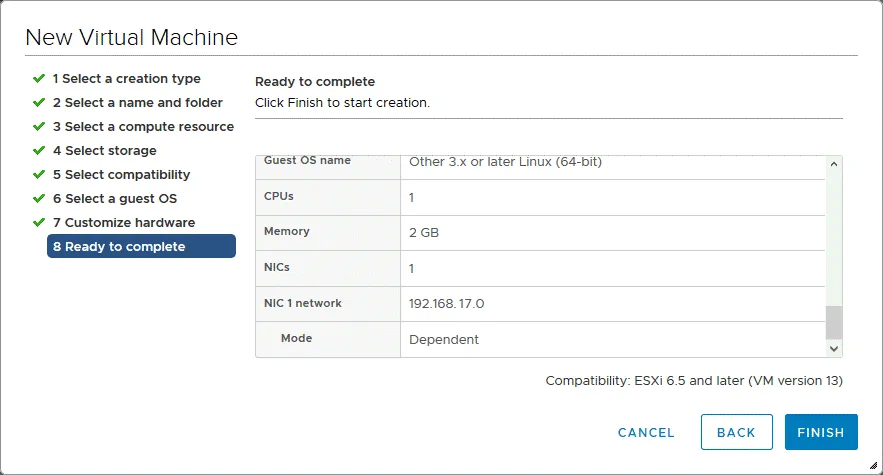
8. Ready to complete. Check your settings, and if everything is correct, hit OK to finish the new Android VMware VM creation.
Install Android on VMware ESXi
After creating a new virtual machine, power on the VM and boot from the virtual ISO image (android-x86_64-8.1-r3.iso) you selected to use by a virtual CD/DVD drive during the Android VMware VM creation.
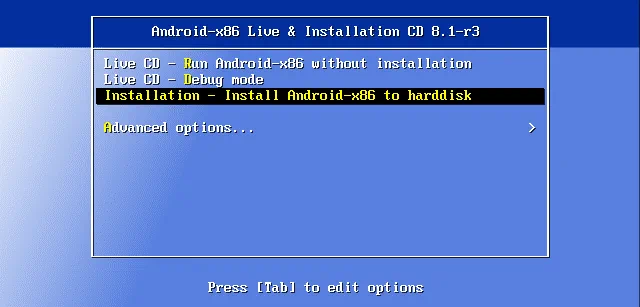
Once the VM has booted from a virtual DVD disk, on the boot screen, select the third option with the arrow keys: Installation – Install Android-x86 to harddisk. Then press Enter to boot.
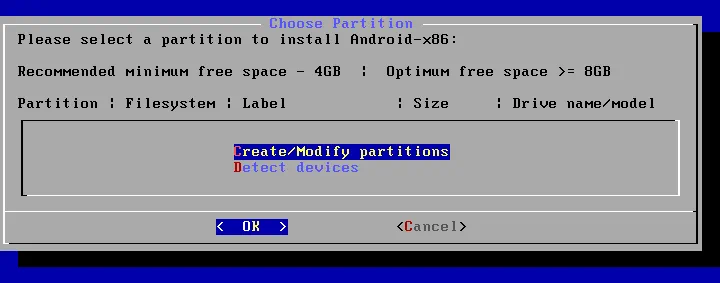
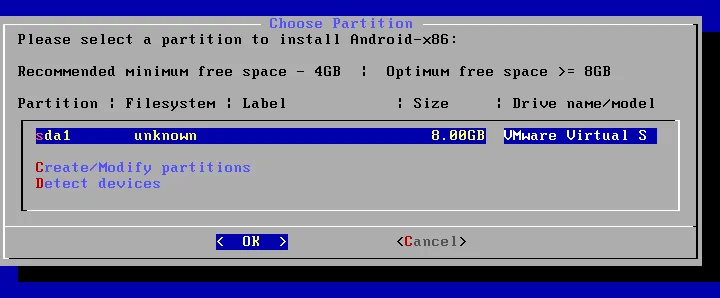
Choose Partition. When the Android installer is loaded, on the Choose Partition screen select Create/Modify partitions and hit OK.
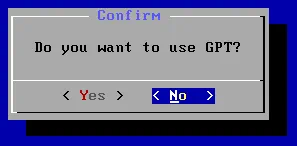
Confirm. Select No when you see the “Do you want to use GPT?” question.
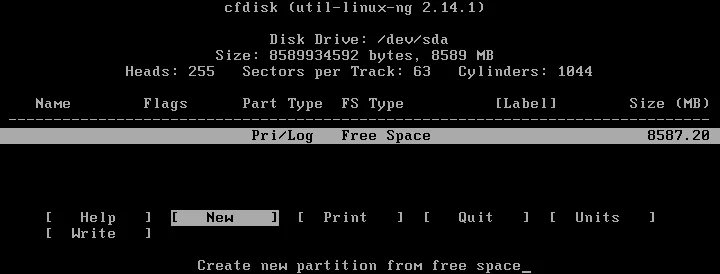
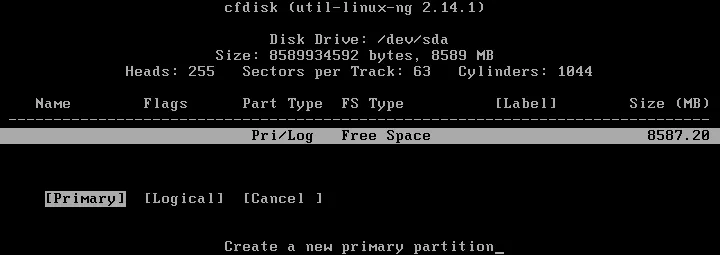
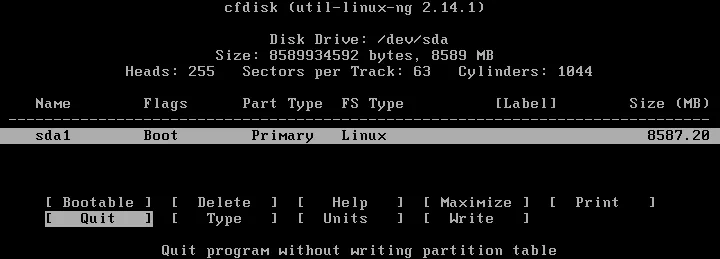
The cfdisk utility is now opened. Select New to create a new disk partition.
Select Primary to create a primary partition.
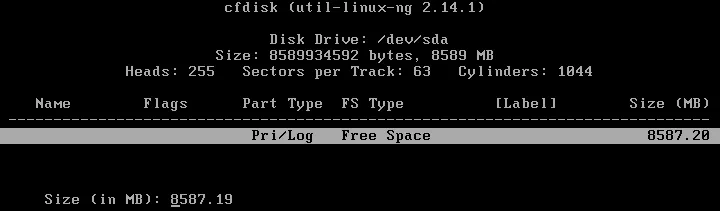
Set all available space of the 8-GB virtual disk to be used as a partition to install Android on VMware.
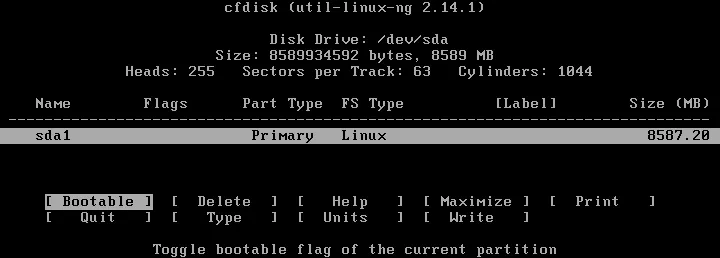
After creating a new partition, make the partition bootable. Select the partition, navigate to the Bootable option, and press Enter.
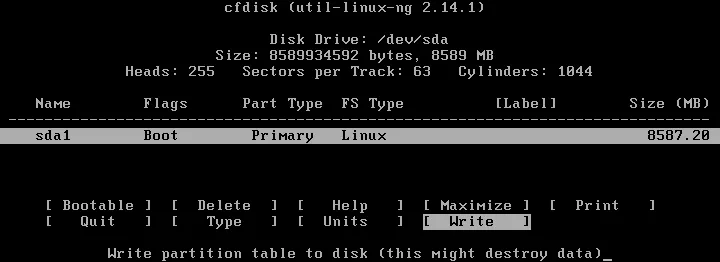
When the Boot flag is set for the partition, write changes to the disk. Navigate to the Write option and press Enter. After that, you will see the question: Are you sure you want to write the partition table to disk? (yes or no)
Type yes and press Enter.
Now the partition has been created. You can quit the cfdisk by selecting the Quit option.
Now on the Choose Partition screen, you can see the created 8-GB partition. Select this partition and hit OK to continue.
Choose filesystem. Select ext4 as a filesystem to format the sda1 partition created during the previous step.
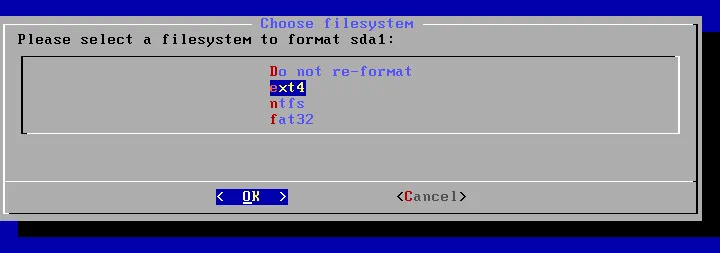
Confirm. Select Yes to confirm that you want to format the sda1 partition.

Do you want to install boot loader GRUB? Hit Yes.

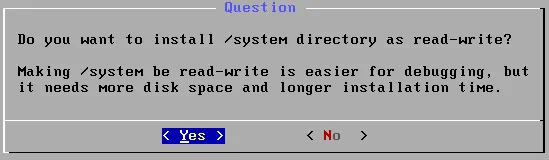
When you see the next question (Do you want to install /system directory as read-write?), select Yes.
Congratulations! Android-x86 is installed successfully. Hit OK to reboot the machine.
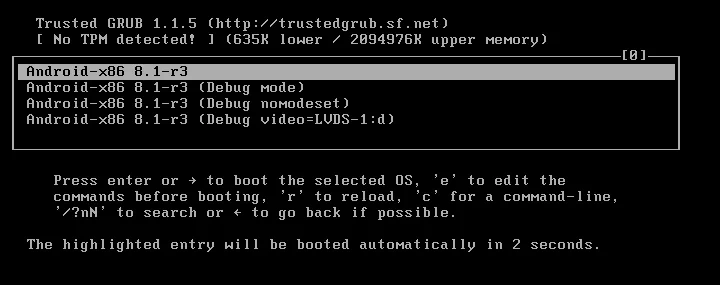
Once the Android VMware VM has been rebooted, you will see the GRUB boot menu displayed. If you do nothing, the first (highlighted) boot option automatically gets selected, but Android won’t boot correctly. You should be able to see only the command prompt.
In order to fix this issue, select the first boot option and press e to edit the boot commands before booting.
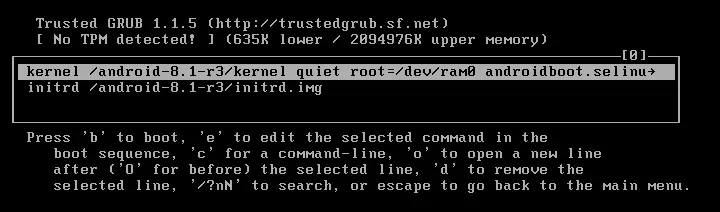
After that, you can see existing boot commands in the boot sequence. Select the upper item as shown on the screenshot below and press e once more to edit the boot command for GRUB.
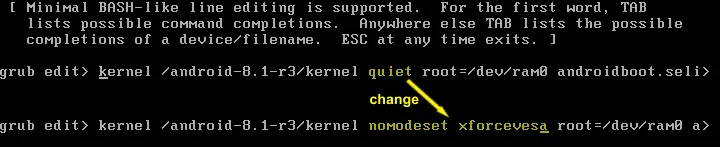
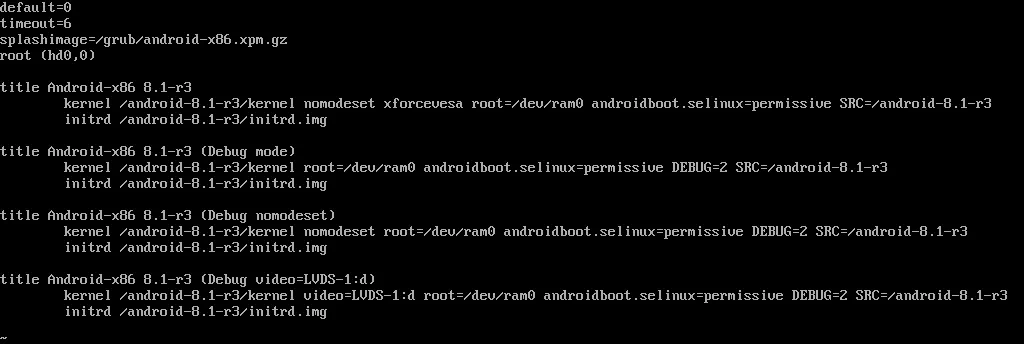
Edit the string and change quiet to nomodeset xforcevesa
Finally, your boot command for GRUB must be:
kernel /android-8.1-r3/kernel nomodeset xforcevesa root=/dev/ram0 androidboot.selinux=permissive SRC=/android-8.1-r3
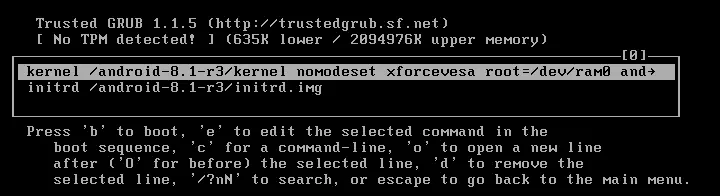
After editing the boot command, press Esc to exit back to the boot menu. Select the first boot option that you have edited and press Enter to boot.
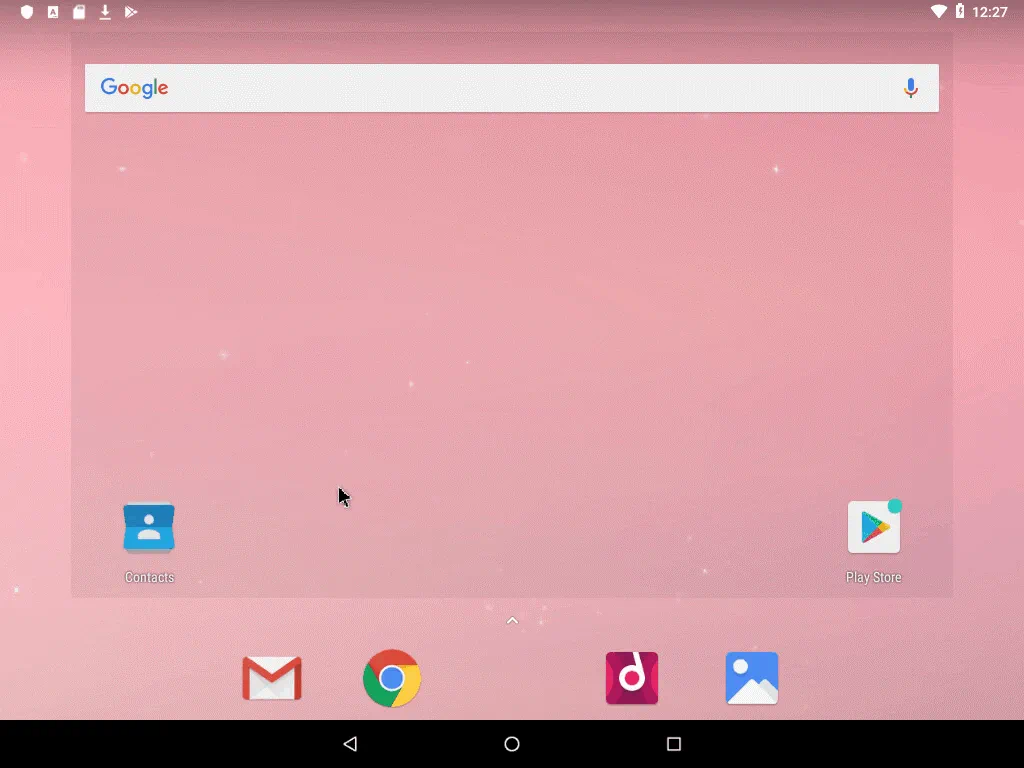
Now the Android VMware VM is booted and you can see the graphical user interface of Android. Select your preferred language and hit Start. In this walkthrough, English (United States) is used.

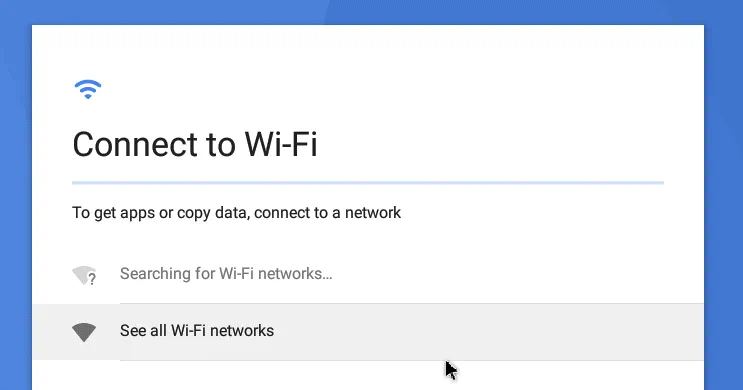
Connect to Wi-Fi. Android is intended for use on mobile devices that don’t have a RJ-45 Ethernet port and are dependent on a wireless network connection. For this reason, Android doesn’t determine wire networks. Click See all Wi-Fi networks anyway, since the network connection is essential for the majority of applications developed for Android.
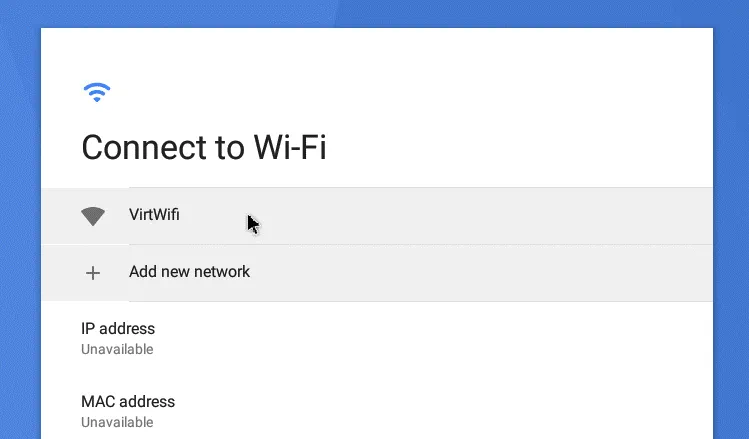
On the next screen, you should see the VirtWiFi network. This is the name of your network to which a virtual Ethernet controller of your Android VMware VM is connected. You can try to use a USB Wi-Fi adapter and connect the adapter directly to the VM as explained in our blog posts about installing Kali Linux on VMware and VirtualBox hypervisors. To do this, insert a USB Wi-Fi adapter to the USB port of a physical computer running a VMware hypervisor (VMware ESXi or VMware Workstation) and use the USB pass-through feature.
Configure Date & time, user name, and log in by using a Gmail account, configuring Google services options if needed. After passing all steps of the Android configuration wizard, you will reach the main interface of Android.
Edit GRUB Configuration
As you recall, we have edited GRUB configuration to boot the Android VMware VM. However, the edited settings are not saved after the VM reboot. Let’s make the boot loader configuration changes permanent by editing the GRUB configuration to make edited settings permanent.
After loading Android, press Alt+F1 to open the console. In the console, run the commands.
Create a directory to which a virtual disk will be mounted:
mkdir /mnt/sda
Mount the virtual disk to the created directory:
mount /dev/block/sda1 /mnt/sda
Edit the GRUB bootloader boot menu with the text editor vi:
vi /mnt/sda/grub/menu.lst
Much as you have done before, edit the first boot option and change quiet to nomodeset xforcevesa
After editing, the first boot loader option string must appear as the following:
kernel /android-8.1-r3/kernel nomodeset xforcevesa root=/dev/ram0 androidboot.selinux=permissive SRC=/android-8.1-r3
Press Esc, then type :wq to write changes to the file and quit.
After that, you can reboot the Android VMware virtual machine and Android should boot successfully without manual manipulations. Disable the sleep mode. You can configure the sleep mode by going to Setting > Display > Sleep. You can also enable graphics acceleration (Accelerate 3D graphics) in the VM settings. Notice that there are no VMware Tools compatible with the Android operating system.
Conclusion
Deploying an Android VMware virtual machine may be useful for software development and testing. As Android is optimized for devices with a touch screen, using this operating system on a desktop is not a practical option.
The installation algorithm is quite simple – you need to download the ISO image, create a new VM, boot the Android installer from the ISO image mounted to the VM, create a new bootable partition on the virtual disk, and install the Android operating system. Android is provided on mobile devices whose vendors collaborate with Google. When you have an Android VMware VM, you can back up that virtual machine to different backup repositories including Google Cloud.