Hyper-V Server Core vs GUI Installation: How They Compare
Starting with Windows Server 2008, Hyper-V has been available as a Windows Server role and as a standalone Hyper-V Server. There are essentially three Hyper-V installation options to choose from: GUI installation on Windows Server, Server Core installation on Windows Server, and Hyper-V Server installation. This blog post compares these Hyper-V installation options and provides an answer to the following question: why would you choose the GUI installation vs the Server Core?
In short, the main reasons why you should choose the GUI installation over the Server Core option include the following:
- Full installation of Windows Server, implying that all server roles and features are supported
- Availability of the GUI for simplified Hyper-V management
- Provision of free licensing for guest OSs running Windows
- Ease of use with help from multiple management and configuration tools
- Full hardware and software support
- A feasible option for small and medium-sized businesses
However, when comparing the Server Core installation vs GUI, it becomes clear that each of these installation options have their own advantages as well as disadvantages, which we will discuss in detail below.

What Is Hyper-V?
Microsoft Hyper-V is a native hypervisor that you can use to create and manage virtual machines (VMs) and their resources. Each VM acts as a separate computer and allows you to run multiple guest operating systems (OSs) in isolation. With Hyper-V, you can virtualize servers and their workloads, and consolidate them on a single physical server. Hyper-V can help you improve resource utilization, build development and testing environments, and ensure business continuity.
Microsoft Hyper-V is available as:
- An optional feature of Windows Server 2008 and later, as well as Windows 8, Windows 8.1, and Windows 10
- A standalone Hyper-V Server
Hyper-V Installation Options
As mentioned above, we can install the Hyper-V role on Windows Server and use it for building and managing an entire virtual environment. Windows Server provides the following installation options for the Hyper-V role:
- The Server Core option is a minimal installation option which provides enough functionality to run core server roles and applications in addition to eliminating redundant features and services.
- The GUI installation (also known as Server with Desktop Experience) option is a full installation option which supports all server roles and features.
Alternatively, there is the option of Hyper-V Server as a stand-alone product. This option includes only the Windows hypervisor, a Windows Server driver model, and virtualization components. Essentially, installation of a Hyper-V Server is similar to Microsoft Windows Server Core Installation.
When comparing the Server Core installation vs GUI, the main distinction that comes to mind is the availability of a standard graphical user interface (GUI).While Hyper-V Server doesn’t contain a traditional GUI tool, Windows Server allows you to choose between the GUI-based or Core mode during the installation operation. Note that the hypervisor technology in Hyper-V Server is identical to that on the Hyper-V role on Windows Server.
Server Core Installation vs GUI: Best Hyper-V Installation Practices
Before you can start the Hyper-V installation process, be sure to check whether your computer meets the system requirements for Hyper-V. After that, download the ISO file of Hyper-V Server or Windows Server from the Evaluation Center and install the OS. Now you are ready to install Hyper-V role and see which installation option (Server Core vs GUI) is the best for you.
GUI installation on Windows Server
In this installation scenario, you will first perform a full installation of Windows Server and then enable the Hyper-V role using Server Manager. Server Manager is a management console used for managing and provisioning remote and local Hyper-V hosts and VMs in addition to enabling and configuring various server roles.
To perform Hyper-V GUI installation, take the following steps:
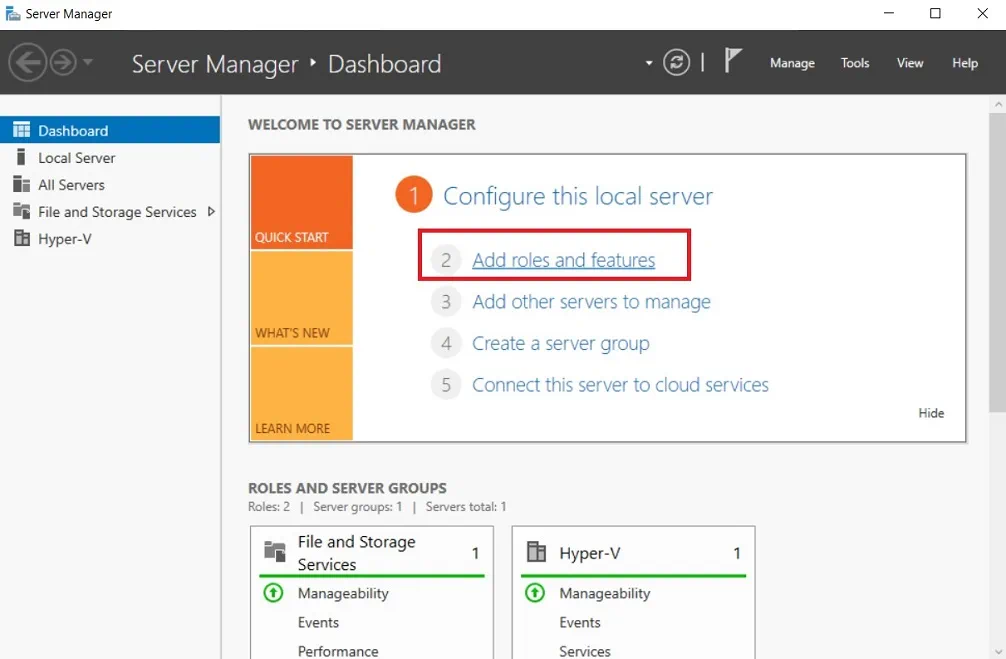
- Open Server Manager.
- Click Manage in the top menu bar and select Add roles and Features.
- Read the guidelines and requirements on the Before you begin page.
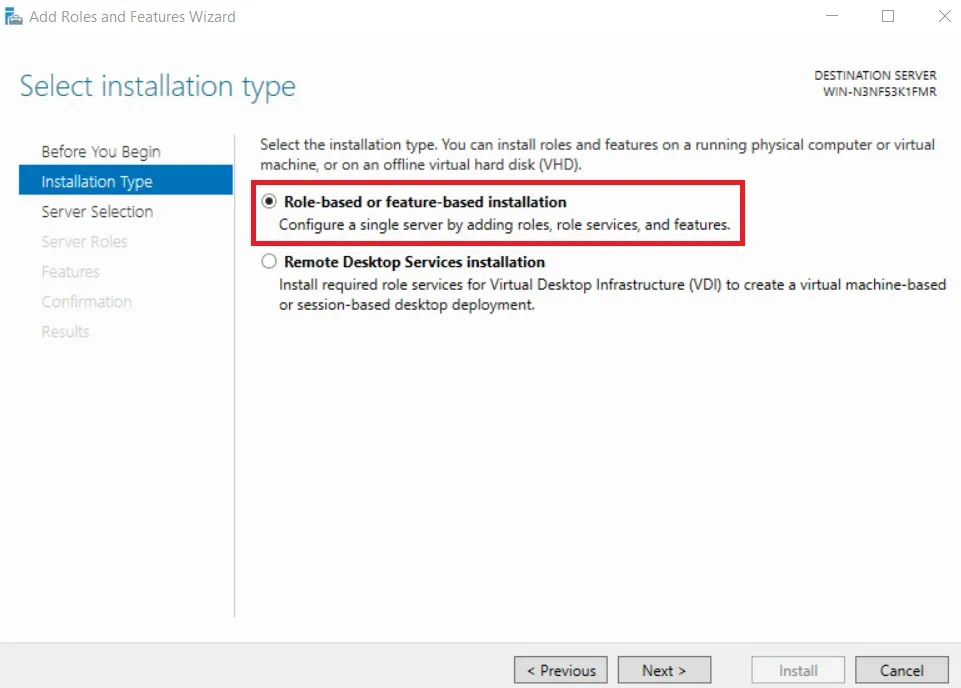
- On the next page, select Role-based or feature-based installation, which allows you to add roles, role services, and features to a server.
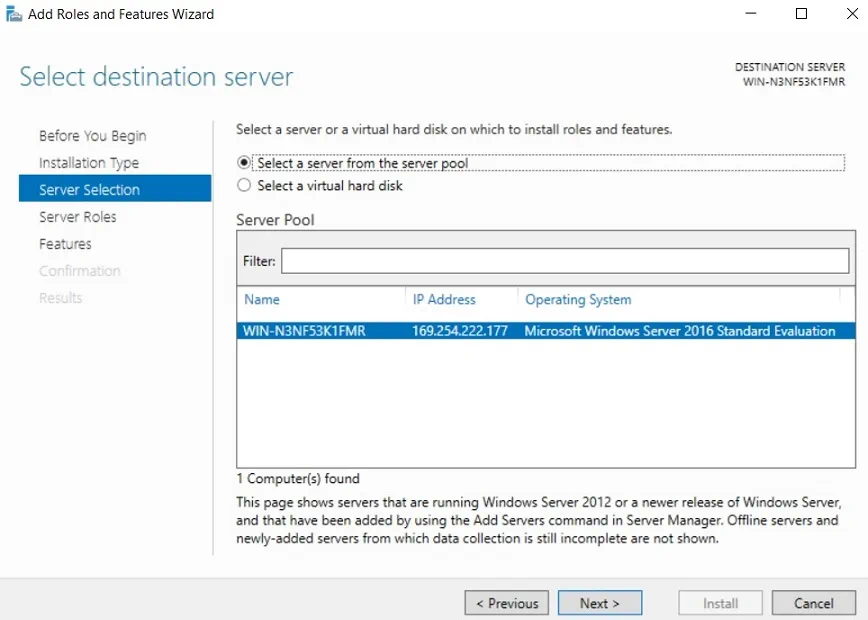
- Select a server from the server pool on which the Hyper-V role is to be installed.
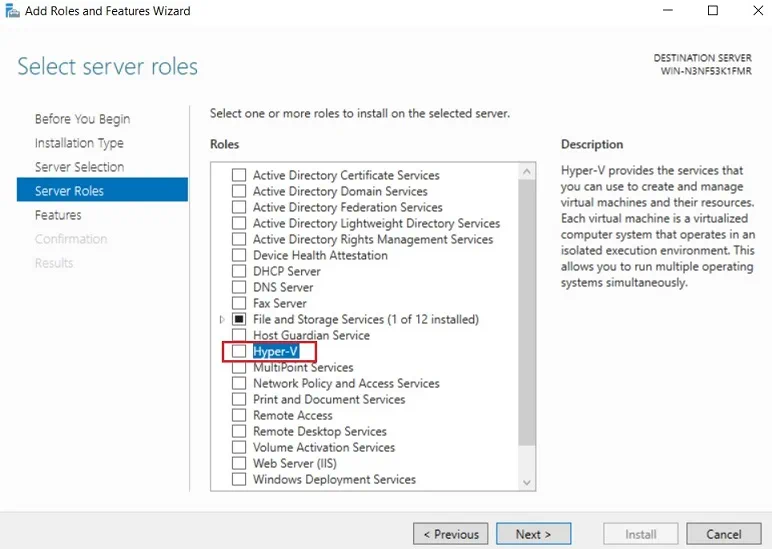
- Check the Hyper-V box in order to install the role on the server.
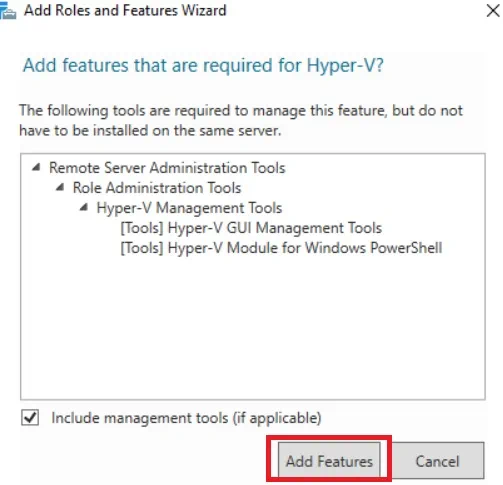
- The Add Roles and Features wizard will open. Select the tools you require for managing this feature. Click Add Features.
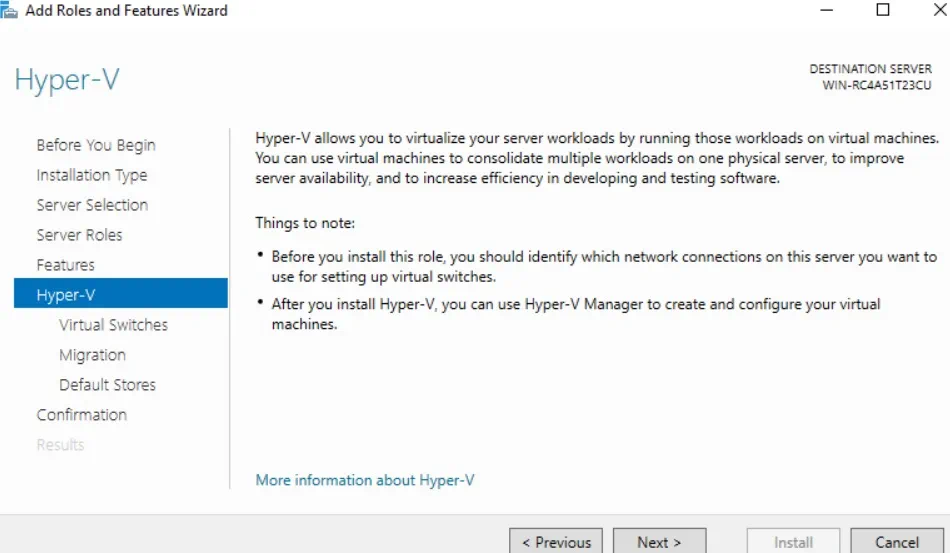
- On the Hyper-V page, you are provided with a summary of basic information about Hyper-V and its installation prerequisites.
- Before installing the Hyper-V role, you should set virtual switches to enable communications between hosts and VMs, select the authentication protocol for executing VM live migrations, and assign default locations for virtual hard disk files and VM configuration files. Select the appropriate options on the corresponding pages.
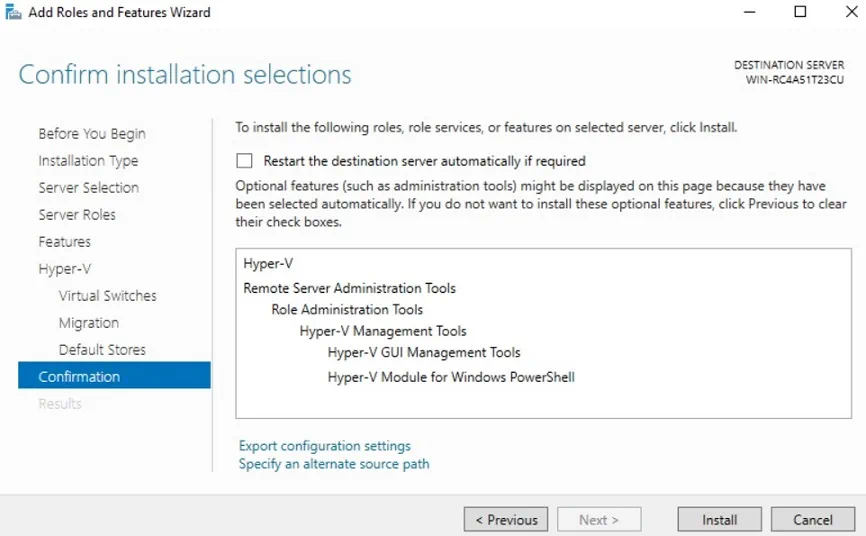
- On the next page, you can look once again at all of the features you selected and confirm the changes you would like to make. Check the box Restart the destination server automatically if required and click Install.
- After the installation is complete, the automatic reboot will start.
Server Core installation on Windows Server
In this installation scenario, you must first perform Windows Server Core installation then enable the Hyper-V role using a command-line interface. For this purpose, PowerShell or Command Prompt can be applied. This Hyper-V installation option works equally well on both Windows Server Core and Windows Server with Desktop Experience.
When you start Windows Server Core, the first thing you see is the Command Prompt, which is the tool used for performing various tasks and operations by running commands or scripts. We recommend that you enable PowerShell because it is easy to use and provides multiple configuration options.
To run the Hyper-V Server Core installation, take the following steps:
- In the Command Prompt, type PowerShell and press Enter.
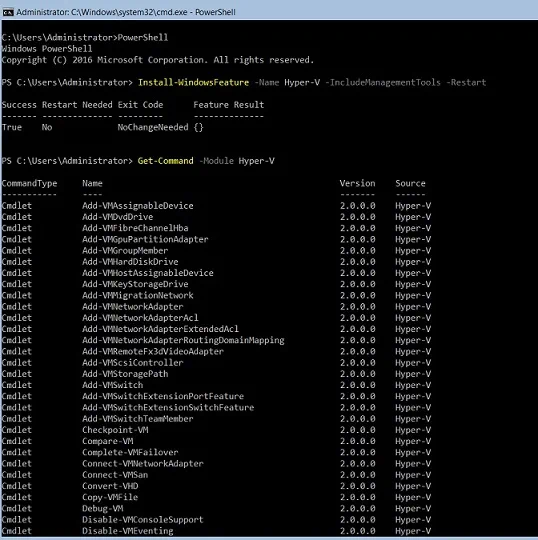
- To install Hyper-V on a server, run the following command:
Install-WindowsFeature -Name Hyper-V -IncludeManagementTools -Restart
- After that, the server will restart automatically to adopt all the changes.
Once the installation operation is complete, you can use Hyper-V to build and manage your Hyper-V environment. Microsoft provides you with numerous PowerShell commands which can be arranged into scripts. With their help, you can simplify and automate the Hyper-V management process.
To look at all of the available options, run this cmdlet:
On your screen, you should see the full list of cmdlets which can be used for performing various tasks and actions.
The Hyper-V Server Core installation option installs only the Hyper-V Module for Windows PowerShell on your computer. However, you can also manage and configure a Hyper-V host remotely using Hyper-V Manager (the GUI tool) on another computer.
Hyper-V Server installation
This installation option implies that the standalone product, which includes only the Hyper-V role, a Windows Server driver model, and virtualization components, will be installed on your computer. Thus, Hyper-V Server can only be used for virtualization purposes and doesn’t allow for the adding of other server roles.
With Hyper-V Server installation, you need to take the same steps as during the Windows Server Core installation operation. To install Hyper-V Server, do the following:
- Download the ISO file from Microsoft Evaluation Center.
- Burn the file to a DVD or a USB installation media and boot from it.
- Select Language, Time and currency format, and Keyboard or input method. Click Next.
- Click Install now.
- Read the license terms and then check the box I accept the license terms.
- Select Custom: Install the newer version of Hyper-V only (advanced).
- Choose the disk where you wish to install Hyper-V Server.
- The installation operation should start.
- After the system reboot, you will be asked to enter a new password and confirm it before signing in. Press Enter.
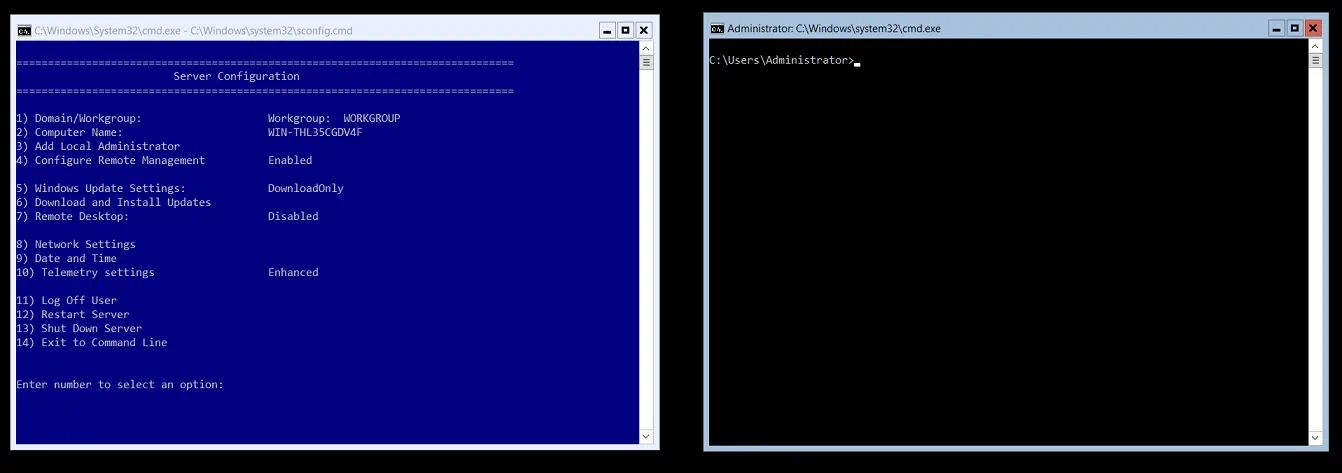
- The Command Prompt as well as the Sconfig tool should automatically open. Thus, the hypervisor is ready to work without additional configuration.
Note that if you find managing a virtual environment using the command line interface challenging, the computer running Hyper-V Server can also be managed remotely with the help of Remote Server Administration Tools (RSAT).
Why Would You Choose the GUI Installation vs the Server Core?
Below, we will answer the question: why would you choose the GUI installation vs the Server Core? For this purpose, we need to discuss pros and cons of these Hyper-V deployment options. They are highlighted in the table below.
| GUI Installation | Server Core Installation | Hyper-V Server |
| OS licensing on a per-core basis is required. The Windows Server Standard Edition provides licenses for 2 VMs running, whereas Datacenter Edition allows for licensing an unlimited number of Hyper-V VMs. | OS licensing on a per-core basis is required. Windows Server Standard Edition provides licenses for 2 VMs running, whereas Datacenter Edition allows for licensing an unlimited number of Hyper-V VMs. | Hyper-V Server is available for free, but you need to purchase licenses for each guest VM. |
| Standard graphical user interface and other server management tools are available or can be later enabled manually.
You can use both command line and graphical user interfaces to manage your Hyper-V environment. |
GUI-based tools are not available. All operations are performed using the command line interface.
You can use Remote Server Administration Tools (RSAT) to remotely manage Hyper-V hosts and VMs from another computer. |
GUI-based tools are not available. All operations are performed using the command line interface.
You can use Remote Server Administration Tools (RSAT) to remotely manage Hyper-V hosts and VMs from another computer. |
| Has the largest footprint among the three options because multiple features and components are included. | Has a small footprint because the Windows Server Core includes most but not all server roles. | Has the smallest footprint among the three options because only the core components are installed. |
| Consumes a large amount of hardware resources for running various operations. | Ensures efficient resource consumption. | Less disk space is occupied and less memory is used. |
| Has a large number of patching and servicing requirements.
Thus, many updates and restarts would need to be performed. |
Less patching and servicing is required, meaning that the system undergoes fewer reboots. | Less patching and servicing is required, meaning that the system undergoes fewer reboots. |
| Has the largest attack surface among the three options because of the multiple components that it includes; thus, the server has more potential vulnerabilities. | Has a relatively small attack surface because only essential server components are installed, thus reducing the number of potential vulnerabilities. | Has the smallest attack surface because the server includes a limited number of core components, which makes it less vulnerable to attacks. |
| Full hardware and software support. | Limited hardware and software support. | Limited hardware and software support. |
As you can see, when choosing between the Server Core Installation vs GUI, you should take into account each of their advantages and disadvantages. Below are just a few reasons why you could choose the GUI Installation vs the Server Core:
- Availability of the standard graphical user interface makes Hyper-V management and configuration easier.
- Not all IT administrators have the required expertise to manage a GUI-less environment. Thus, training would be required.
- If any issues occur, it is easier to detect and eliminate them using the GUI.
- Windows Server Core and Hyper-V Server both work extremely well for for production server environments due to their efficient resource consumption, reduced attack surface, better security, and minimum server management. However, Windows Server in the GUI mode also provides enough functionality and computing capacity to perform tasks and operations for small and medium-sized businesses.
- When comparing the Server Core Installation vs GUI, it becomes clear that the GUI-based server provides you with more server roles and features which can be enabled using a large set of Hyper-V management tools.
Data Protection with NAKIVO Backup & Replication
If you have finally made the choice between the Server Core Installation vs GUI, you are now ready to build a new virtual infrastructure. However, for you virtual environment to work seamlessly and without interruption, you need to ensure that all critical data and applications are securely protected and can be rapidly recovered if needed.
NAKIVO Backup & Replication is a fast and reliable data-protection solution which can help you back up and replicate the VMs running on a standalone Hyper-V Server, on Windows Server with the Hyper-V role enabled, as well as VMs running in a Hyper-V Failover Cluster. With NAKIVO Backup & Replication, you can run image-based, incremental, application-aware Hyper-V backup and Hyper-V replication jobs, meaning that data in applications and databases running in VMs is consistent and that only unique data blocks are copied to the backup repository.
These VM backups and replicas can be stored locally or offsite. Backups can be copied and sent to a private or public cloud, whereas replicas of the source VMs can be transferred to a remote location and used for failover in case of disaster recovery.
Regarding disaster recovery, NAKIVO Backup & Replication allows you to create site recovery (SR) workflows by combining various actions and conditions into an automated algorithm. SR workflows can be of any complexity and serve various purposes (disaster avoidance or planned migration of your data centers, etc.). By using this feature, you can orchestrate and automate the entire disaster recovery process, meaning that SR workflows permit you to easily implement your disaster recovery plan with minimal input on your part.