Hyper-V Virtual Switches: Types and Configuration
Microsoft Hyper-V is one of the leading hypervisors used to deploy a virtual infrastructure and create virtual machines (VMs). In an environment with multiple VMs, IT administrators use Hyper-V virtual switches to enable these machines to communicate with each other, the host and external networks.

Types of Hyper-V Virtual Switches
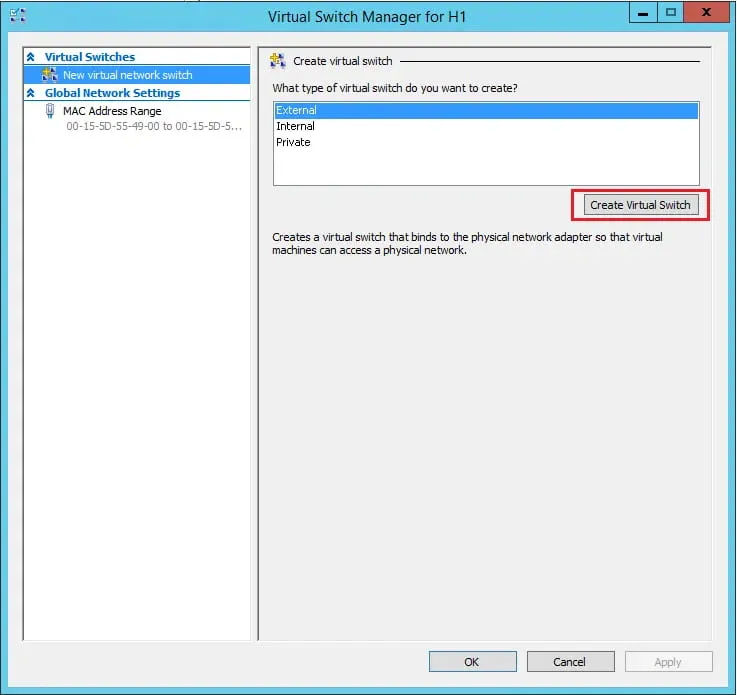
Using Virtual Switch Manager, you can create three types of Hyper-V virtual switches:
- External switches are bound to the physical network cards located in the host. They provide VMs located on them access to the physical network to which the Hyper-V host is connected. The External switch can also share management traffic and VM traffic on the same switch, which is one of the options that can be set when creating the external switch.
- Internal switches are not bound to a physical network card. They only allow traffic between VMs and the host itself. However, in 2016, new functionality was added to allow external connectivity via NAT from the Hyper-V host: the NAT forwarding internal switch.
- Private switches are only used for virtual machines to communicate with each other. This type can be useful for specific types of traffic such as a cluster network only if you are using one host (as it can’t be used between hosts).
How to Create Virtual Switches in Hyper-V
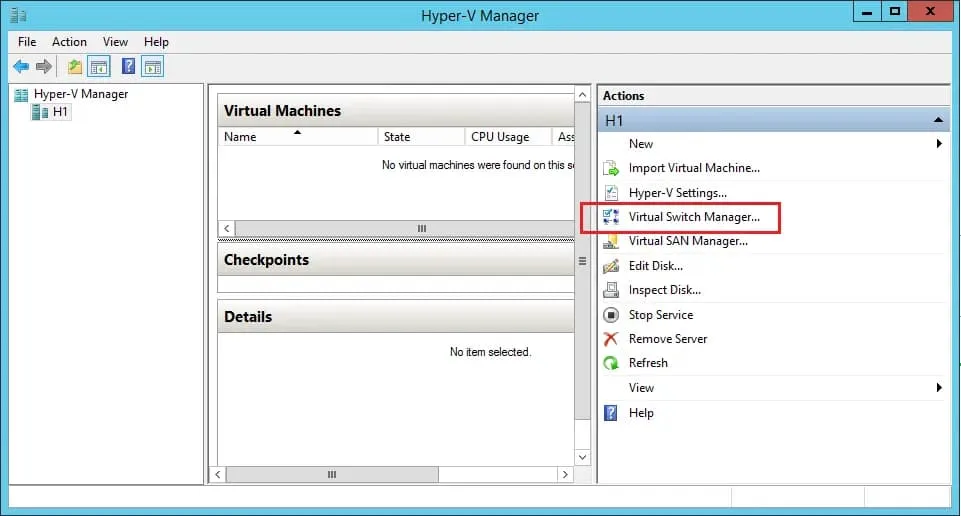
To create a Hyper-V virtual switch, open the Hyper-V Manager and follow the steps below.
Note: The described process is identical for all versions of the Virtual Switch Manager (Windows Server 2012, 2016 and 2019).
- Click the Virtual Switch Manager…
- Click Create Virtual Switch. Here, you can choose the type of virtual switch you want to create. This example explains how to create an external switch as this type is required to allow connectivity between guest VMs and the physical network.
- Add a meaningful name for the Virtual Switch and choose the physical network adapter to use for connectivity.
Additionally, you can choose to allow management operating system to share this network adapter, which means management connectivity to your Hyper-V host will also use this adapter. Deselect this box if you have a separate management network adapter or if you want to create one manually at a later time. If you deselect, a message appears warning you that you may lose access to the host unless you have another network adapter used for management communication.
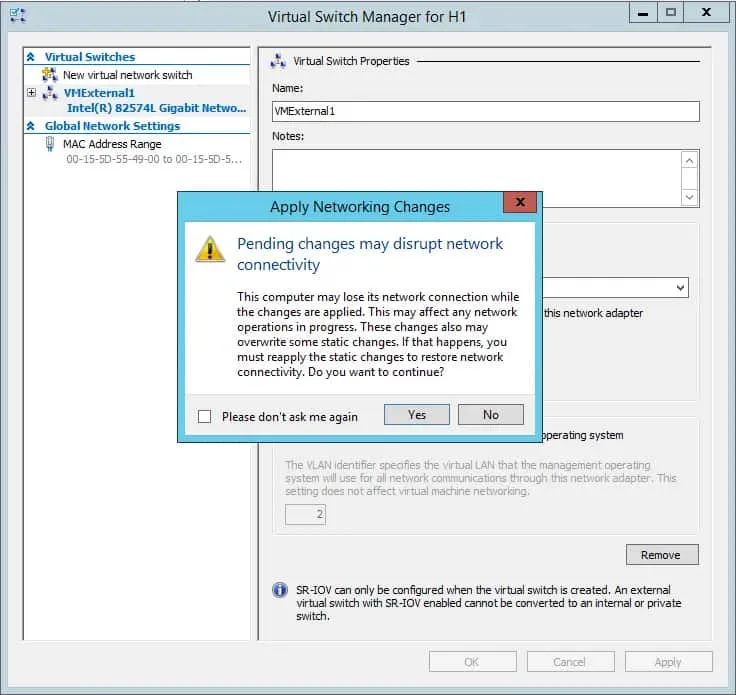
Keep in mind that applying these changes will result in a lost ping or two, but no major disruptions.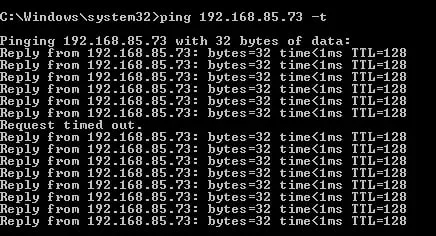
- You now have a virtual switch that you can use when creating a virtual machine for network communication to outside networks.
Conclusion
The three types of Hyper-V virtual switches provide different kinds of connectivity between VMs, the host and external networks. You can configure the type you need to ensure proper communication between your workloads.
Make sure you protect your Microsoft Hyper-V virtual environment using a robust data protection solution like NAKIVO Backup & Replication. The solution includes advanced features such as incremental backups, granular recovery, full VM recovery and replication/DR for Hyper-V.