How to Create a Virtual Machine Using vSphere Client 7.0
VMware released vSphere 7 in April 2020. VMware ESXi 7 and VMware vSphere Client 7 are the key components of this updated virtualization platform. Creating a new virtual machine is a common action with virtualization, but are there any differences between VMware vSphere 7 and previous vSphere versions? This blog post explains step-by-step how to create a new virtual machine in VMware vSphere Client 7.0.
One of the advantages of using virtual machines in VMware vSphere is the ease of performing backups. Get advantage of modern VMware offsite backup solutions like NAKIVO Backup & Replication. The solution offers universal data protection, supports VMware vSphere 7 and can back up VMs on a host level even if VMs are running in a cluster and are fault tolerant.

How to Create a VM in vSphere Client 7.0
In the example used in this article, multiple ESXi hosts are managed by VMware vCenter Server.
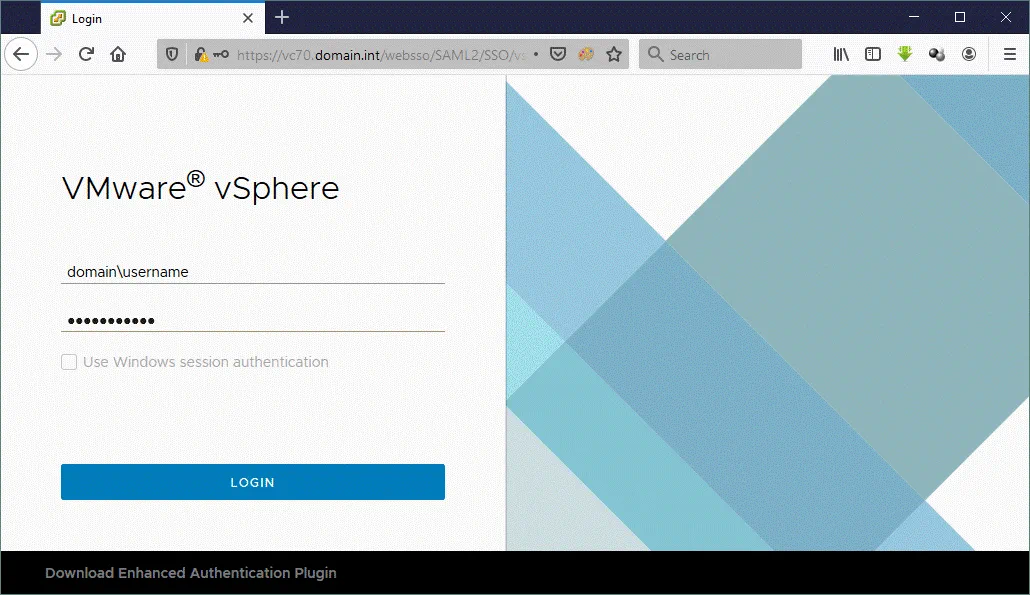
Open your web browser and enter the IP address of your VMware vSphere Client 7. In this example the IP address of vCenter is 10.10.20.7. Click Launch vSphere Client (HTML5).
Enter your user name in the domain\username format and then enter your password. You can use an administrative account or another account that has enough permissions to create virtual machines in vCenter. Click Login.
Once you have logged in to vCenter 7, click Hosts and Clusters, select your data center, and click the ESXi host on which you want to create a new virtual machine. In our case, we are going to create a VM on the ESXi 7 host with IP address 10.10.20.86. After selecting the ESXi host, make sure that there are enough free resources available, such as CPU, memory, and storage capacity. Click Actions > New virtual machine to start creating a new VM on the selected ESXi host by using VMware vSphere Client.

The New VM Wizard
A new virtual machine wizard opens.
1. Select a creation type. Click Create a new virtual machine because you need to create a new VM from scratch. If you need to clone a VM or deploy a VM from a template, choose one of the other options. Click Next at each step to continue.

2. Select a name and folder. Enter a name for the new virtual machine. As we are going to install Ubuntu Linux on the new VM, the name of the VM used in this example is blog-Ubuntu1. Then select a location for the virtual machine. We will store the new VM in the QA data center.

3. Select a compute resource. Select the ESXi host to run a new virtual machine. As we want to create a new VM on the ESXi host with IP address 10.10.20.86, we select this host in the list. Compatibility checks succeeded means that everything is correct and you can continue.

4. Select storage. Select a datastore where the virtual machine files, including the virtual disk files, will be stored. Make sure that there is enough free space on the selected datastore. In this example, the 86-HDD-R1 datastore is selected.

5. Select compatibility. Select compatibility for this virtual machine depending on the ESXi hosts used in your environment. VMware vCenter 7.0 can be configured to manage ESXi 7.0, ESXi 6.7 and ESXi 6.5 hosts. The ESXi compatibility level defines the virtual machine hardware version. The ESXi 7.0 compatibility level is used for the VM hardware version 17 and supports all vSphere 7 features.
The available options are:
- Hardware version 16 – VMware Workstation 15 and ESXi 7.0
- Hardware version 15 – ESXi 6.7 U2 and later
- Hardware version 14 – ESXi 6.7 and later
- Hardware version 13 – ESXi 6.5 and later
If you have older ESXi hosts (ESXi 6.5, ESXi 6.7), select the lowest ESXi version to be able to migrate virtual machines to those ESXi hosts from a host running ESXi 7. In this example, we select the newest compatibility option because we don’t plan to migrate this virtual machine to older ESXi hosts.

6. Select a guest OS. Select a guest OS family and then select a guest OS version. In this example, Ubuntu Linux 19 x64 is installed.
Guest OS Family: Linux
Guest OS Version: Ubuntu Linux (64-bit)
Selecting the correct guest OS in the list allows the wizard to provide the suitable default configuration of the VM for installing an operating system on the VM.

7. Customize hardware. Configure virtual hardware for the virtual machine. Click the type of hardware to expand settings. In most cases, you can leave the default settings except for:
CPU – select the number of processors and CPU cores.
Memory – define the amount of RAM.

New Hard disk – select the size of a virtual hard disk and the provisioning type. You can select Thin Provision, Thick Provision Lazy Zeroed, or Thick Provision Eager Zeroed. Read more about Thick and Thin provisioning in the blog post. If your new VM needs to use multiple virtual disks, you can create more disks by clicking Add New Device > Hard disk. Similarly, you can add network adapters, CD-ROM, and other devices. It is possible to edit VM settings after VM creation. Thin Provision is used in the current example.
New Network. Select the network to which a virtual network adapter of the VM must be connected. Read more about virtual switches and virtual networks in this blog post. In this example, we connect the new VM to the 10.10.23.0/24 network.
New CD/DVD Drive. You need to configure a CD/DVD drive to boot from the operating system installation media and install the operating system. There are multiple options.
Client Device – an optical disc inserted into a CD/DVD drive on a client machine is used to boot the operating system installer. You need to insert an optical medium into the DVD-ROM of the computer on which you’re using VMware vSphere Client.
Datastore ISO File. Upload an ISO image of the installation disc to the datastore attached to the ESXi host on which you are creating a new VM and are going to install an operating system. Then select the ISO file uploaded on the datastore.
Content Library ISO File. Select the needed ISO image file from the Content Library. You should upload the ISO file to the Content Library before you can select the image.
For Status, select the “Connect At Power On” checkbox.

8. Ready to complete. Check configuration for your new VM and hit Finish to create the new VM. If you forgot to configure some settings, go back and edit the needed settings.

Starting a new VM
Now you can see in vSphere Client that a new VM is created. Select the virtual machine and start the VM. Click the Play button or click Actions > Power > Power On to start the VM. Once the VM is started, you can see a preview of the virtual display of the VM in the interface of VMware vSphere Client. In order to open the virtual display in the full resolution you need to launch the Web Console or Remote Console.

Click Launch Web Console to open the Web Console in a new tab of your web browser by using VMware vSphere Client. As an alternative, you can install VMware Remote Console (VMRC) that is a standalone application used to connect to a virtual machine display and manage the VM by using input devices such as keyboard and mouse. You can download VMware Remote Console from the VMware website. It is also possible to use VMware Workstation for connecting to a VM and VM management instead of using the Web Console or VMware Remote Console. If VMware Workstation or VMware Remote Console is installed, clicking Launch Remote Console will initiate starting the appropriate application. If both applications are installed, you are able to select which one to run for connecting to a VM for management.
If you click the display preview of a running virtual machine, a window with two options will be displayed. Select Web Console or VMware Remote Console similarly as explained above.

In this example we use the Web Console in the web browser (see the screenshot below). After creating a new VM, starting the VM and booting from the installation media you should install an operating system. Ubuntu 19 x64 is installed in this example. The installation process is the usual for Ubuntu Linux operating systems so I won’t go into the details of Ubuntu installation in this article.

On the next screenshot, you can see how a VM running on ESXi 7 can be managed in VMware Workstation.

Installing VMware Tools
Once the operating system is installed on the new virtual machine, you have to install VMware Tools. VMware Tools is a set of drivers and utilities that improve VM performance and user experience. Read how to install VMware tools on different guest operating systems in this blog post.
You can see a warning message in the web interface of VMware vSphere Client that VMware Tools are not installed on this virtual machine. If you click Install VMware Tools on this page, a virtual ISO disk that contains the VMware Tools installer will be mounted to the VM.

The confirmation message is displayed if you click Install VMware Tools.

As we are using Linux as a guest operating system on our virtual machine, it is better to install VMware Tools from online software repositories for the current Linux distribution (Ubuntu in this case). The latest version of VMware Tools is available in online repositories.
Run the command to install VMware Tools for Ubuntu with a graphical user interface (GUI):
sudo apt-get install open-vm-tools-desktop
If there is only the command line interface in your Ubuntu Linux, run this command:
sudo apt-get install open-vm-tools
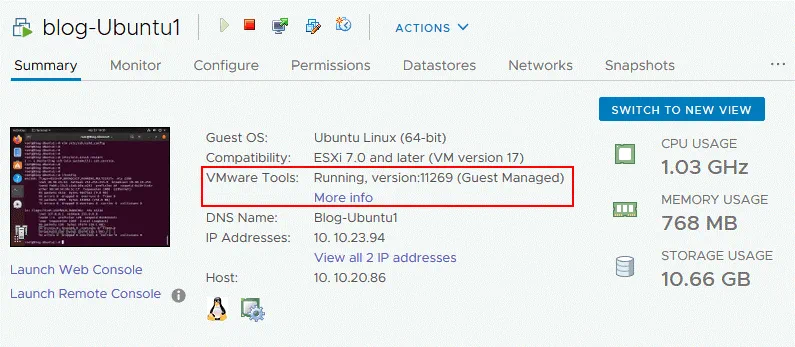
After installing VMware Tools, it is recommended to reboot the virtual machine. Then you can see the running status of VMware Tools and the VMware Tools version.
Creating a new virtual machine on ESXi 7 by using VMware vSphere Client 7 is finished.
Conclusion
Creating a new virtual machine in VMware vSphere Client 7 provided by vSphere 7 is similar to creating a new VM in the previous vSphere versions such as vSphere 6.7 and vSphere 6.5. You can also create a new VM on an ESXi host by using VMware Workstation after connecting to vCenter Server or ESXi host. Another method is to use VMware Host Client by connecting to an ESXi host in a web browser (it must be allowed by vCenter if the ESXi host is managed by vCenter). VMware PowerCLI can be used to create new VMs on ESXi hosts if you want to create a high number of VMs and automate this process.