How to Create and Set Up VMware vSphere Host Profiles
A standardized configuration of ESXi hosts in an organization makes troubleshooting easier, as an inconsistent configuration of VMware ESXi hosts can impact performance in a vSphere environment. Having the same security configuration on ESXi hosts allows you to avoid data breaches. When you need to configure a large number of ESXi hosts in a data center with identical configuration (for example, ESXi hosts within a cluster), the process of configuring each host manually is can be tedious and take a long time. VMware allows you to automate mass configuration of a large number of ESXi hosts in VMware vSphere with VMware vSphere Host Profiles.
This blog post explains what VMware Host Profile is and how to configure VMware Host Profiles.

What is VMware Host Profile?
VMware Host Profile is a template used to extract configuration from one VMware ESXi host and import that configuration to other ESXi hosts for standardizing and unifying host configuration in a data center. One VMware vSphere host profile can be applied to any number of custom ESXi hosts and to the entire cluster, including all hosts that are members of the cluster.
Hosts within the cluster must be connected to the same datastores and networks, that’s why VMware Host Profiles are especially used to configure VMware ESXi hosts within clusters. The first ESXi host from which the host profile is extracted is called a reference host or master host. This host profile is used as a baseline for other hosts that you want to have an identical configuration. VMware Host Profiles can be used in conjunction with VMware Auto Deploy for automated deployment. Administrators can copy settings from one profile to another and create a hierarchy of host profiles.
Requirements:
ESXi hosts must be managed by VMware vCenter Server. VMware vSphere Enterprise Plus is the only vSphere edition that supports VMware Host Profiles. You must have this license in your vSphere environment to use host profiles. Read more about VMware vSphere licensing in this blog post.
The workflow is the following:
- Configure your reference ESXi host
- Extract configuration from the reference ESXi host to the host profile
- Install new ESXi hosts that should use the unified configuration
- Import configuration by using the host profile to new ESXi host
- Customize the host configuration, such as hostnames (you can change ESXi hostname) and IP addresses because they must be unique for each VMware ESXi host. You can use a CSV file to edit the configuration for each host and then apply this configuration to a group of needed hosts in one action.
ESXi hosts can be configured by using VMware Host Profiles in the web interface of VMware vSphere Client and in the command line interface of Power CLI. I use VMware vSphere Client in this tutorial.
VMware vSphere Configuration Used in This Tutorial
In this tutorial, I use VMware vSphere 6.7, including vCenter 6.7 and ESXi 6.7. The IP addresses of these machines are:
vCenter: 192.168.101.103
ESXi hosts: 192.168.101.205, 192.168.101.207, 192.168.101.208

Creating a New VMware Host Profile
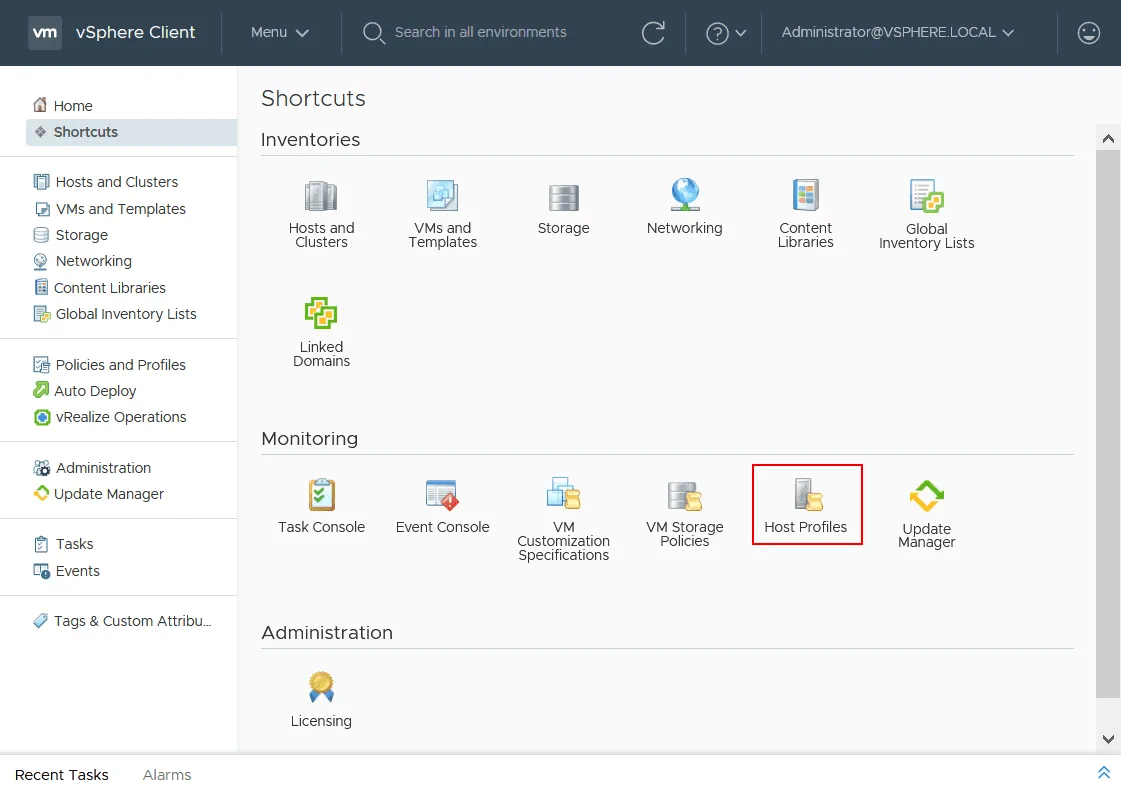
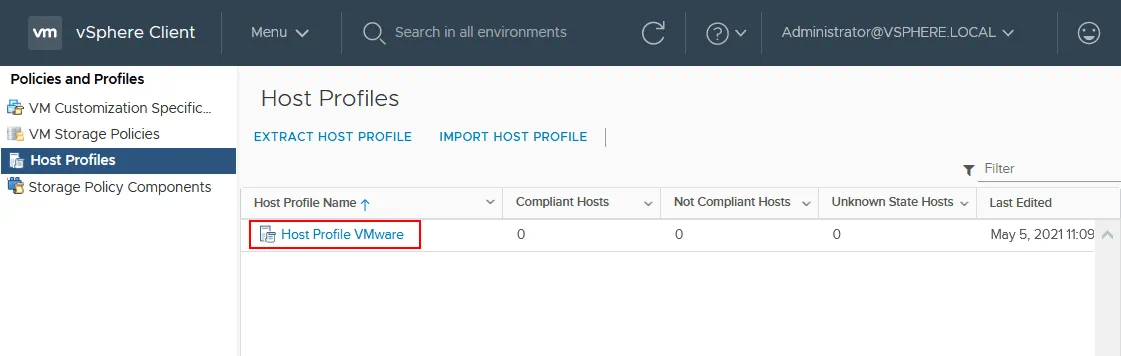
Configure your reference ESXi host to have a configuration template to be applied to other ESXi hosts. You can configure security settings, network settings, storage, etc. Once you have configured your first ESXi host, which is the master ESXi host, open the main page of VMware vSphere Client and, in the Monitoring section, click Host Profiles.
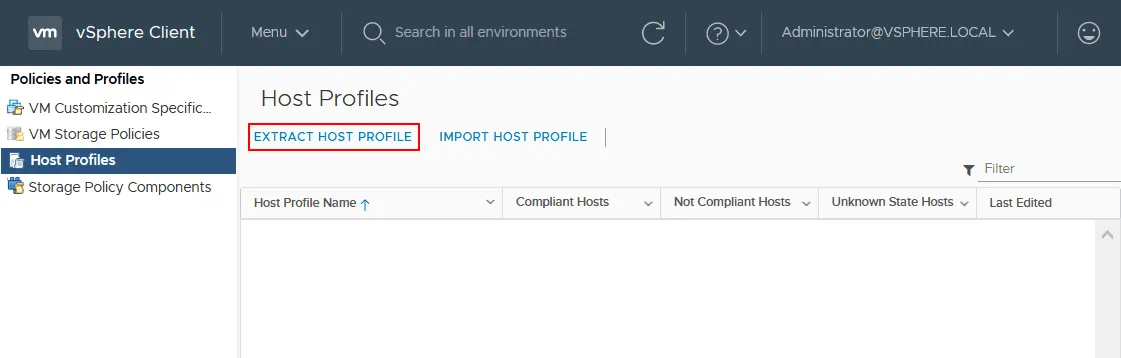
On the Host Profiles page, click Extract Host Profile to extract a new host profile.
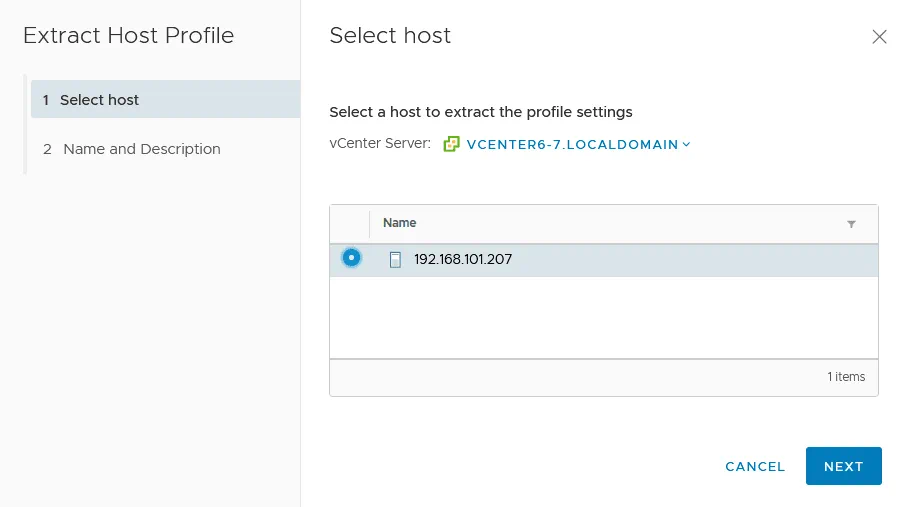
Select host. Select a host to extract the profile settings. Select vCenter Server (if you have multiple vCenter servers). Then select your reference host, which was configured before. Hit Next to continue.
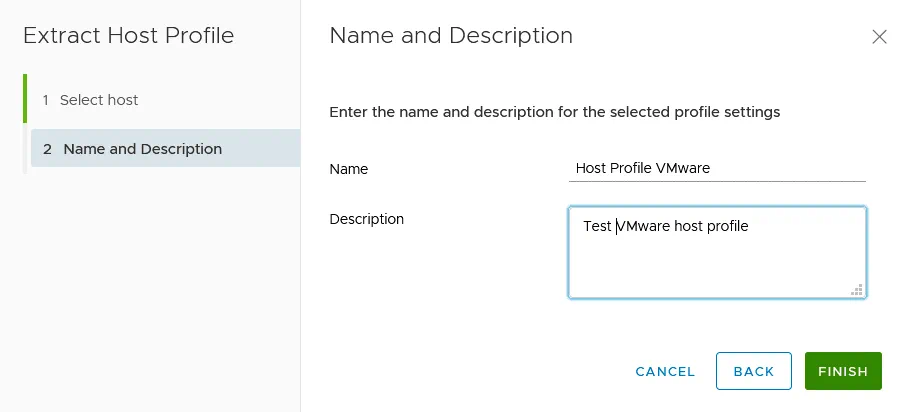
Name and Description. Enter the name and description for the selected profile settings.
Name: Host Profile VMware
Description: Test VMware host profile
Click Finish to finish creating the new host profile.
Editing a Host Profile
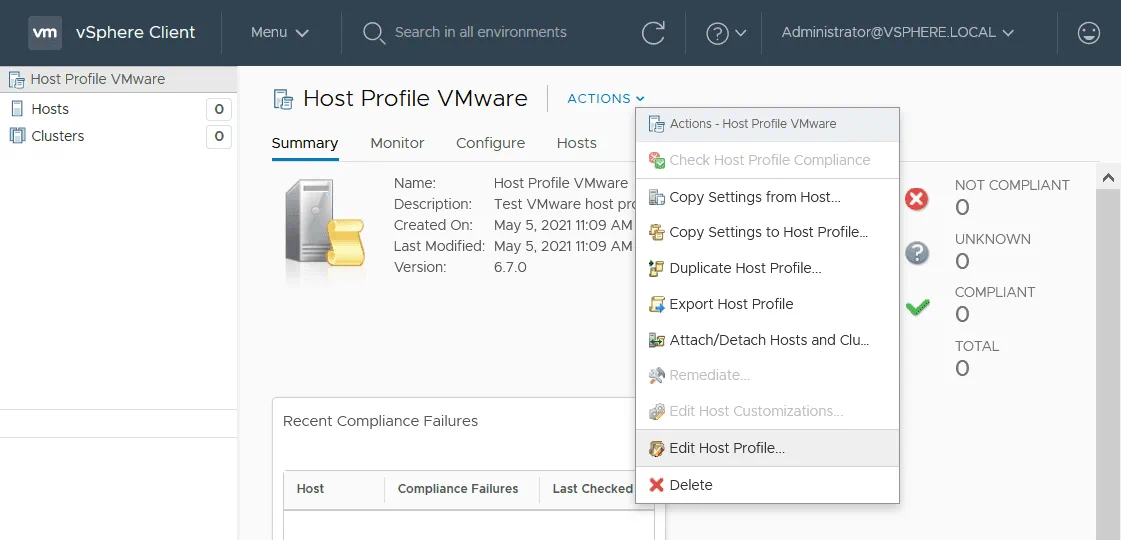
Now we can see the Host Profile VMware on the Host Profiles page in the list of VMware Host Profiles. Let’s click Host Profile VMware that was created at the previous step to see profile details. You can edit your host profile created before and save additional configuration to the profile before applying this profile to ESXi hosts.
Click Actions > Edit Host Profile to make changes with the host profile.
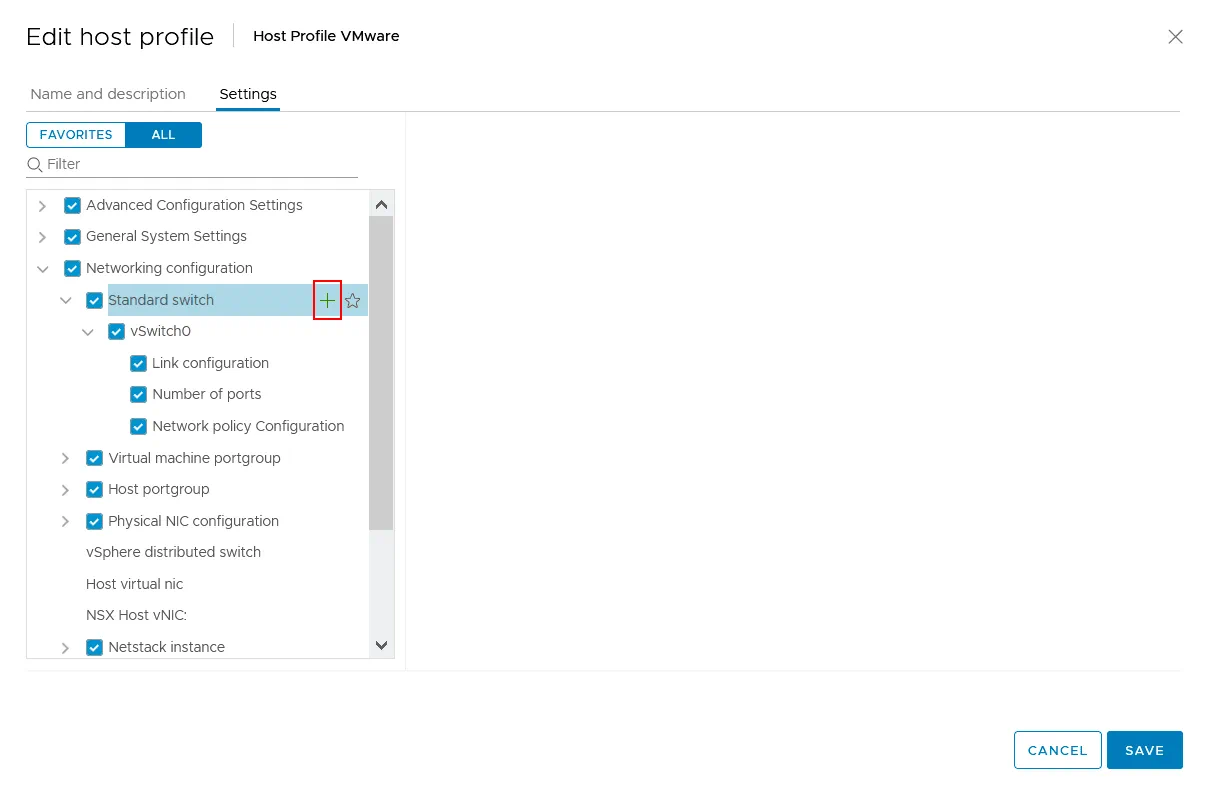
Now you see the Settings tab for your VMware host profile whose name is Host Profile VMware. There is a tree view of the items that must be created and configured for your profile. Let’s create a new standard virtual switch. After applying this host profile, the new standard vSwitch will be created on selected ESXi hosts. In order to add a new standard vSwitch, expand Networking configuration and hover the mouse cursor over the Standard switch item. You should see the Plus (+) icon. Click this icon to add a new virtual switch. On the screenshot below you can also see vSwitch0 that was extracted to the host profile from the reference ESXi host.
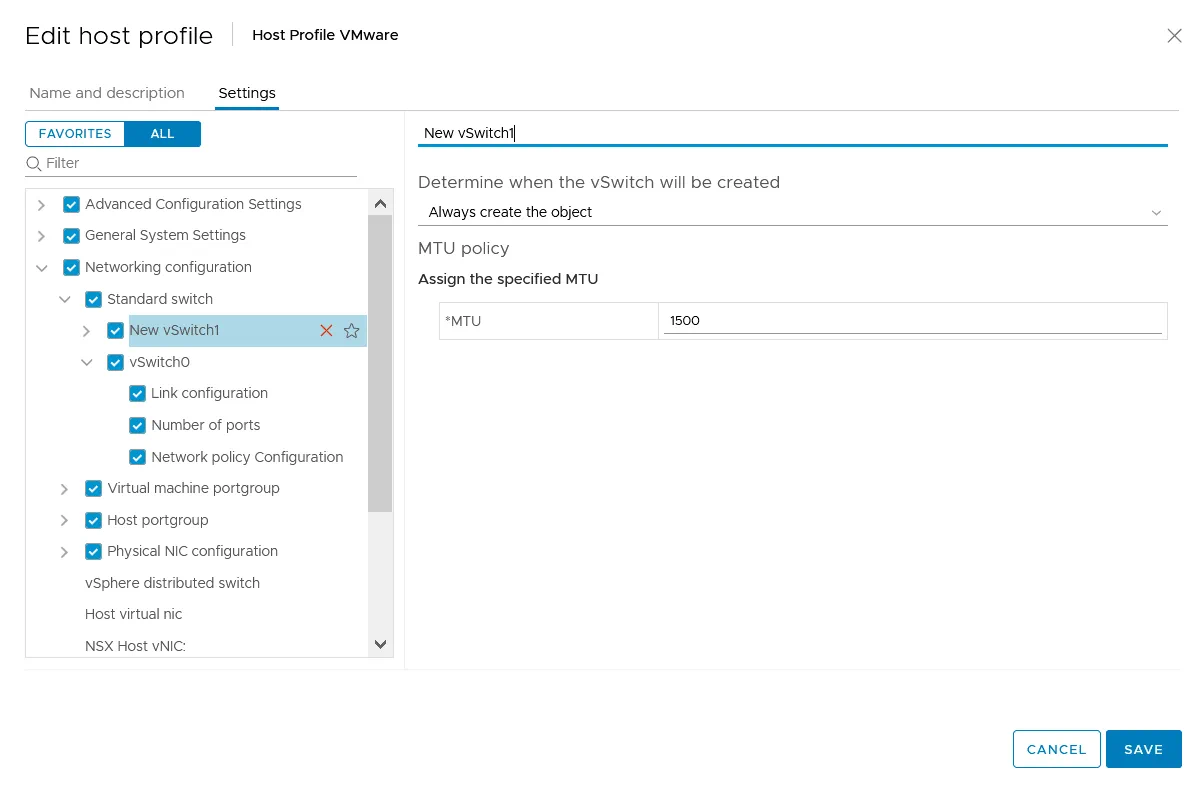
Enter the name for a new switch, for example, New vSwitch1, set the MTU (Maximum Transmission Unit) value. Hit Save to save configuration to the host profile. If you want to delete the configured item from the host profile, hover the item and click the X icon.
Attaching a Host Profile
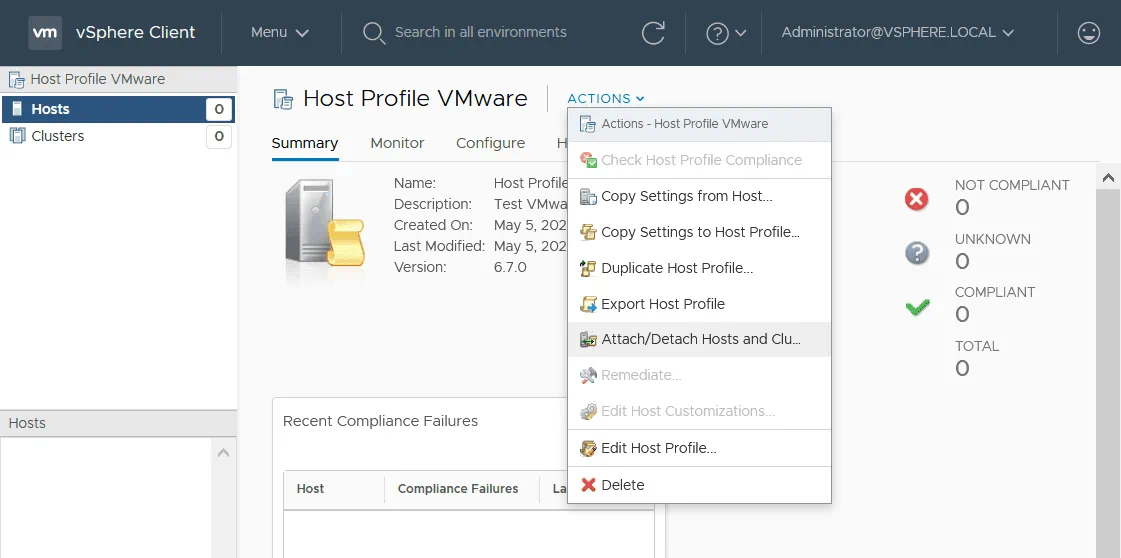
Now you are ready to attach a prepared VMware host profile to ESXi hosts that are not configured and to which you want to apply the configuration from the host profile. Select your host profile on the Host Profiles page in VMware vSphere Client. On the details page of the selected Host Profiles, click Actions > Attach/Detach Hosts and Clusters.
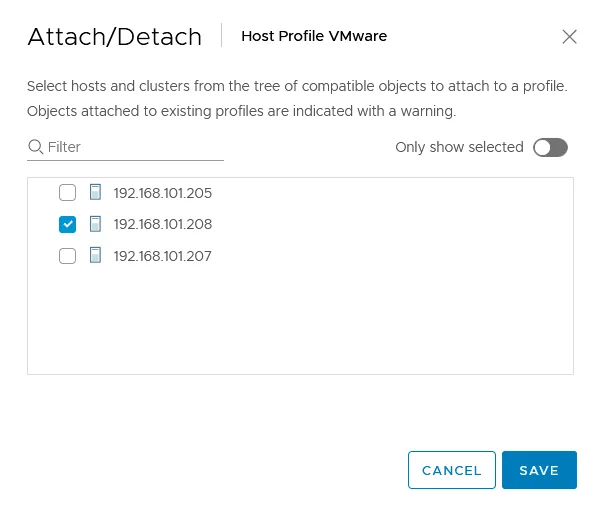
In the Attach/Detach window, select the ESXi host you want the host profile to apply to. Click Save to save settings and attach configuration to the selected host.
As an alternative, you can go to Hosts and Clusters, right click an ESXi host or cluster in the navigation pane, and then in the menu, click Host Profiles > Attach Host Profile.
Checking Compliance
After attaching a host profile to the ESXi host, you should check host profile compliance. If the configuration of the target host is different from the configuration saved in the host profile, the status will be not compliant, and you can apply the host profile configuration to this ESXi host. Compliance check is a comparison between the configuration of a host profile and the current configuration of the target VMware ESXi host.
Now the compliance status is Unknown.
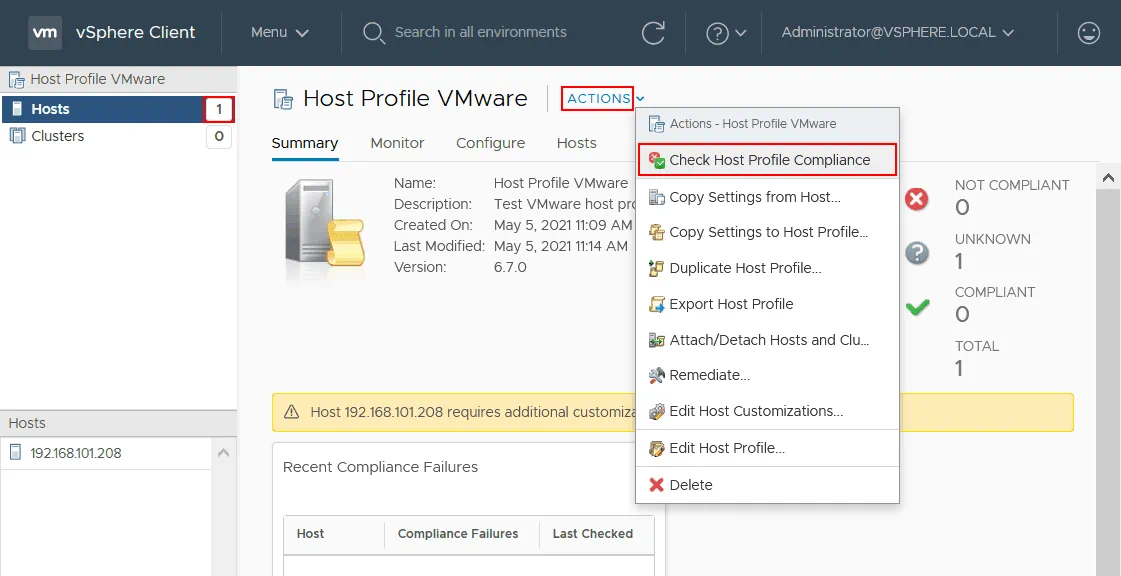
On the Host Profiles page, click your host profile and on the host profile details page, click Actions > Check Host Profile Compliance.
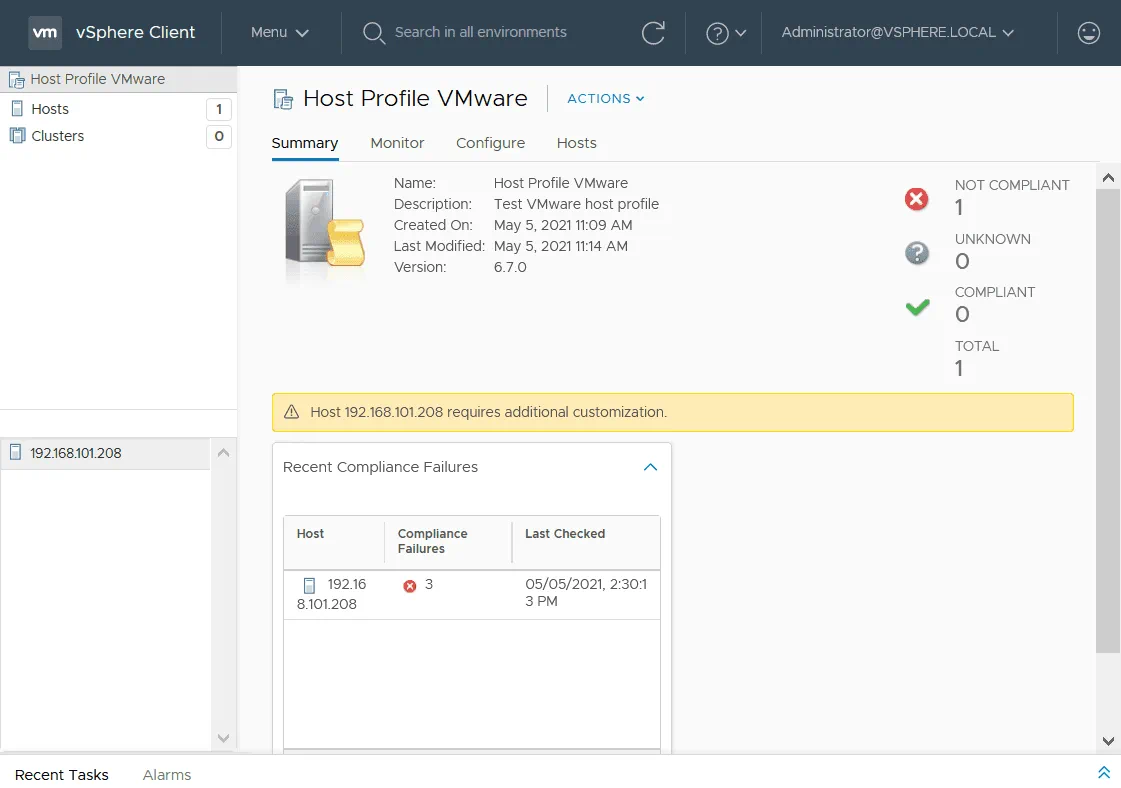
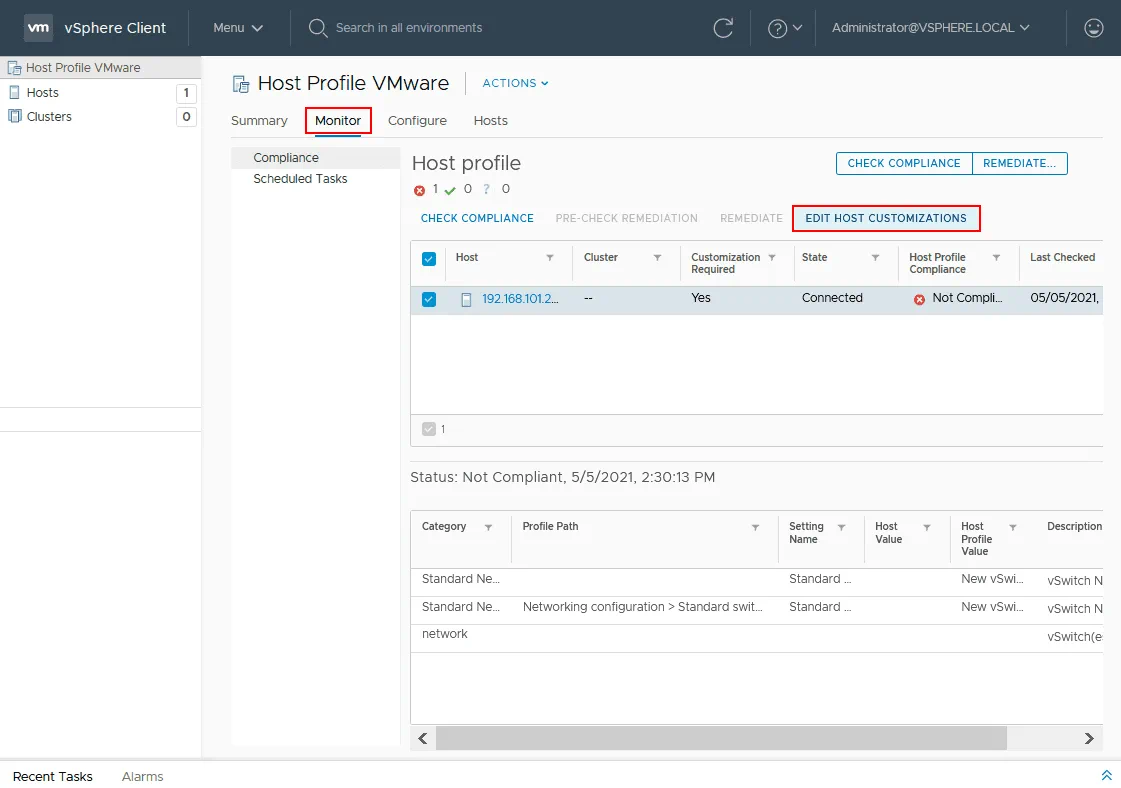
After checking is complete, the status of my target VMware ESXi host is not compliant. It means that settings saved in the host profile differ from the current configuration of the target ESXi host. As you see on the screenshot below, my host requires additional customization.
Host Customization
Click the Monitor tab, select the target ESXi host, and then click Edit Host Customizations.
In the Customize hosts window, set the unique hostname and IP address for the target ESXi host. You can also set MAC addresses for network adapters. Hit OK to save customization settings for your VMware ESXi host.
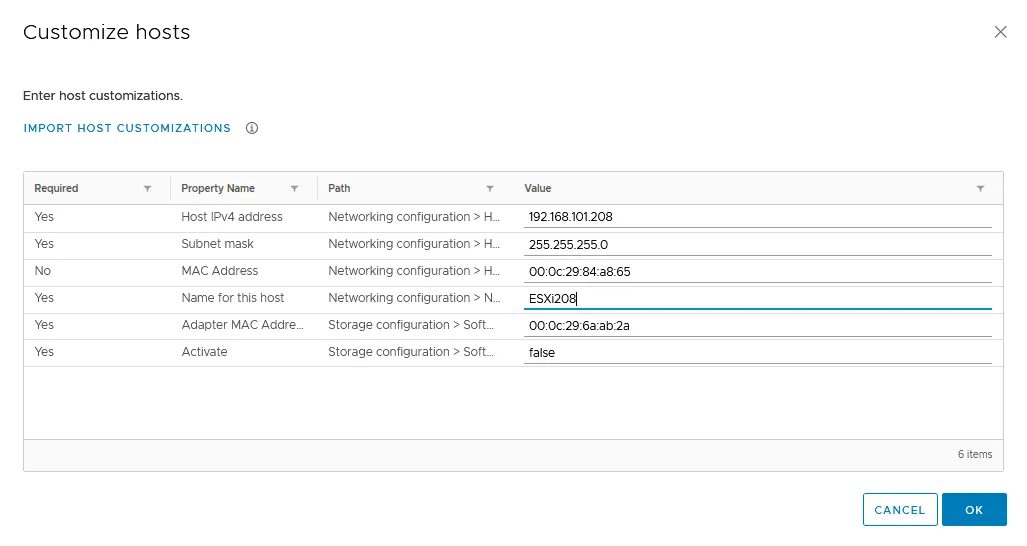
After applying configuration from a host profile, you can export customizations to a CSV file. This option is explained below in the end of this blog post.
Pre-check remediation
Pre-check remediation must be performed before you can remediate the target ESXi host with your VMware host profile. Remediation is the process of applying changes to the target ESXi host.
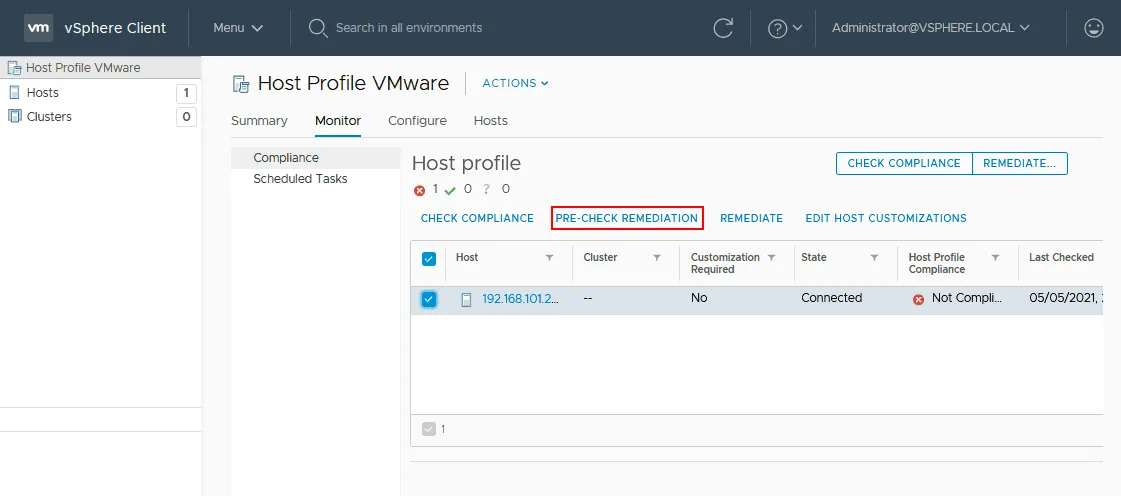
Select your ESXi host in the Monitor tab of your VMware host profile, and click Pre-Check Remediation.
We see the message that remediation cannot start. Put the host in the maintenance mode to start remediation.
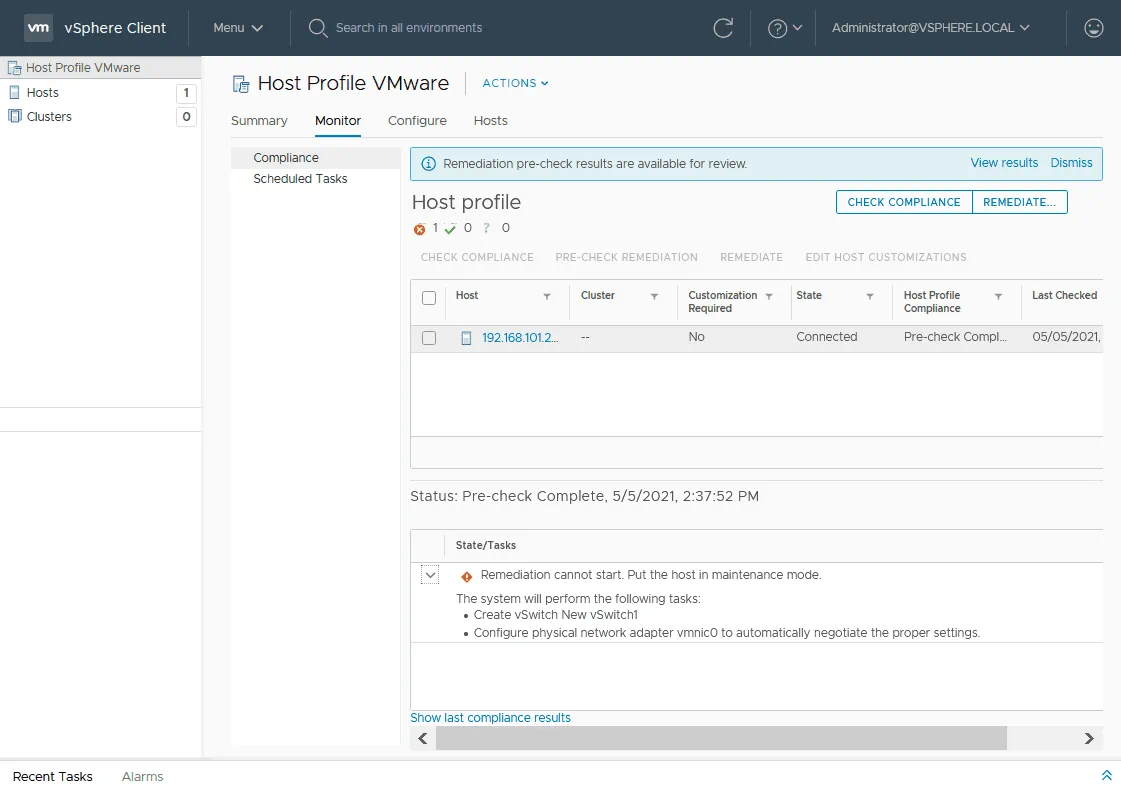
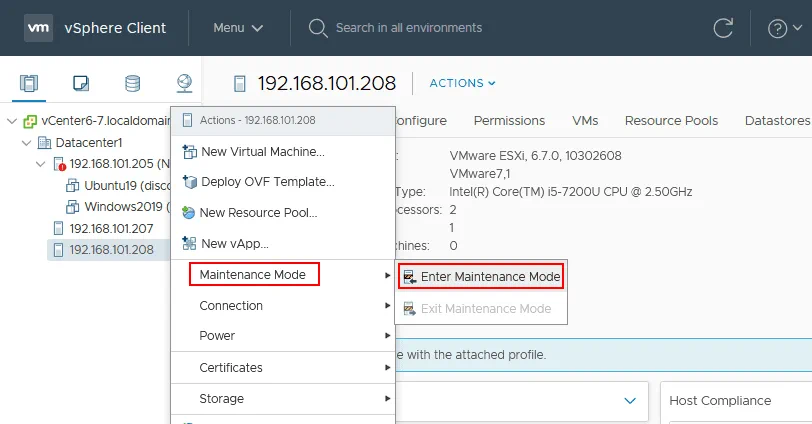
Go to Hosts and Clusters in VMware vSphere Client, select the target ESXi host that must be configured by using the host profile. Right click the host and in the menu that opens, click Maintenance Mode > Enter Maintenance mode.
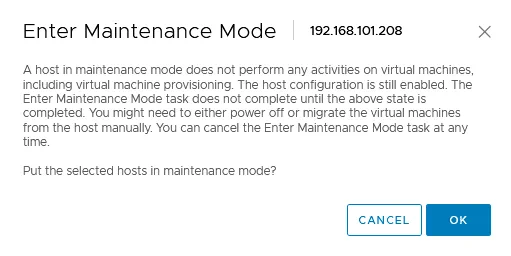
The confirmation message is displayed. Click OK to put the selected host in the maintenance mode.
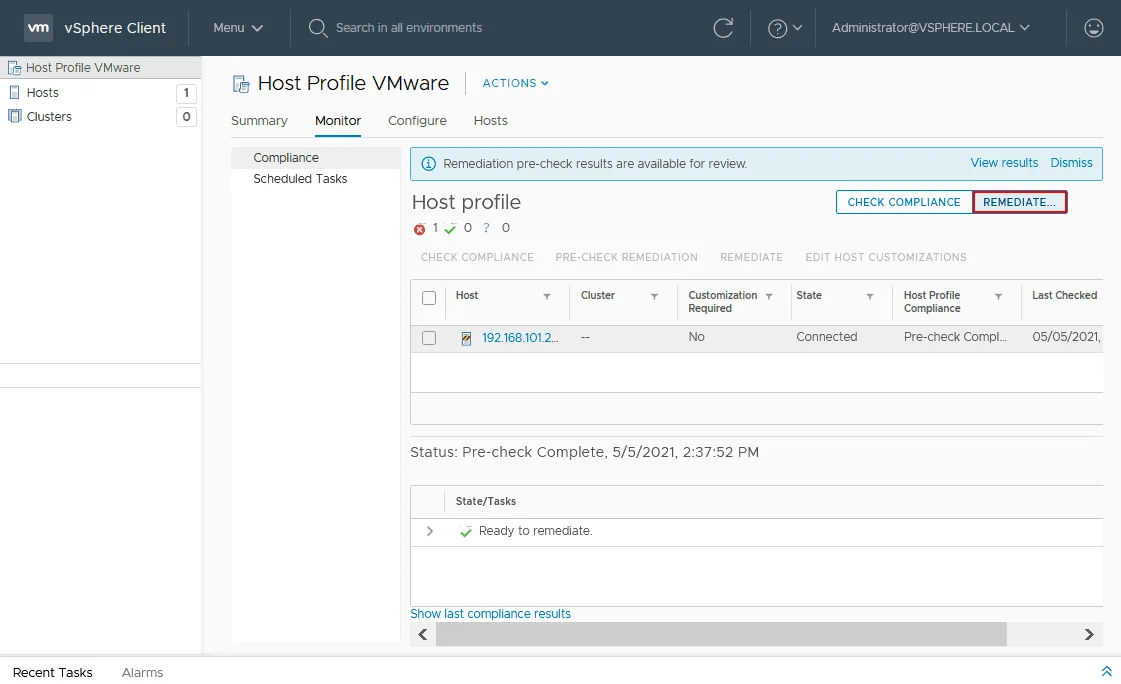
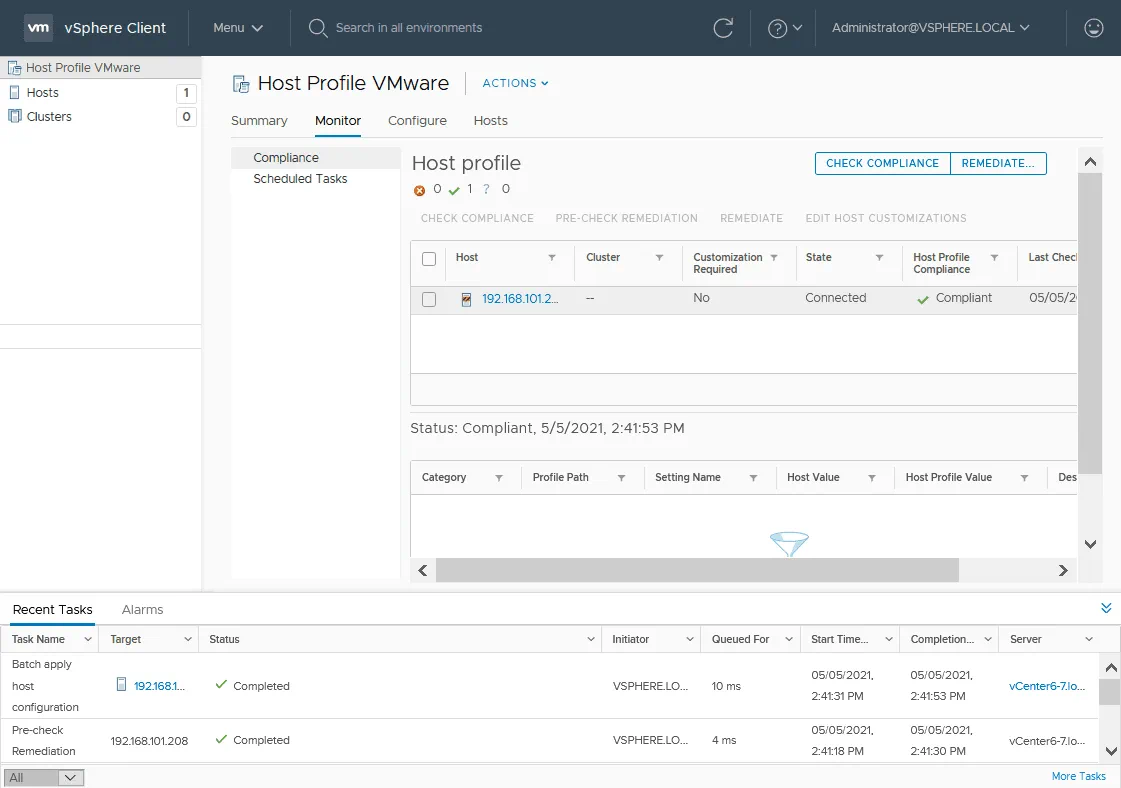
Now the host is in maintenance mode, and the status of the target VMware ESXi host is Ready to remediate.
Click the Remediate button to start remediation.
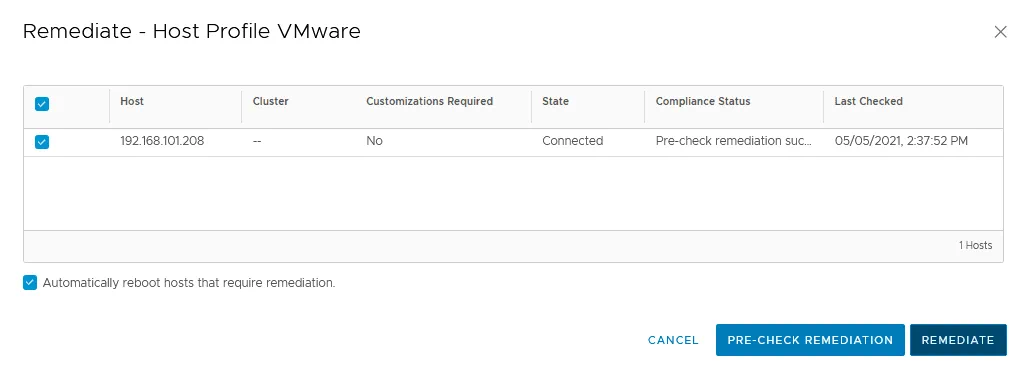
A new window opens in the web interface of VMware vSphere Client. If you have not performed remediation pre-check yet, you can do this operation now. I have already done pre-check remediation and met the requirements. Select the checkbox to automatically reboot hosts that require remediation if needed. Click Remediate to start remediation and apply the configuration from the ESXi host profile to the target ESXi host.
Wait for a while until the configuration is imported to the target VMware ESXi host. Expand the Recent Tasks panel in the bottom of the web interface of vSphere Client to check the status of applying host configuration after you start remediation. When the task status is Completed, it means that the task has completed successfully. After remediating, the host is in compliance with the host profile.
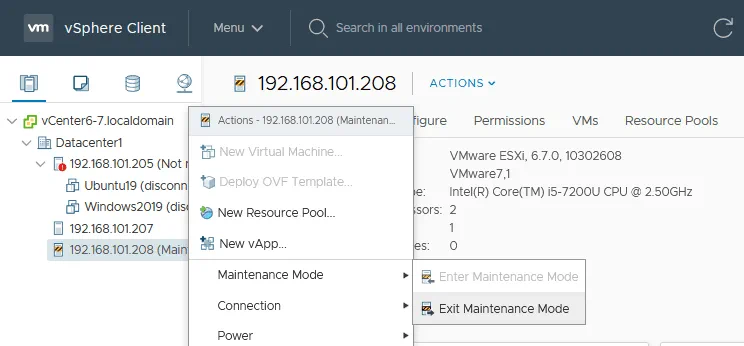
Exit the ESXi host from maintenance mode. Go to Hosts and Clusters, right click the ESXi host and in the menu that opens, click Maintenance Mode > Exit Maintenance Mode.
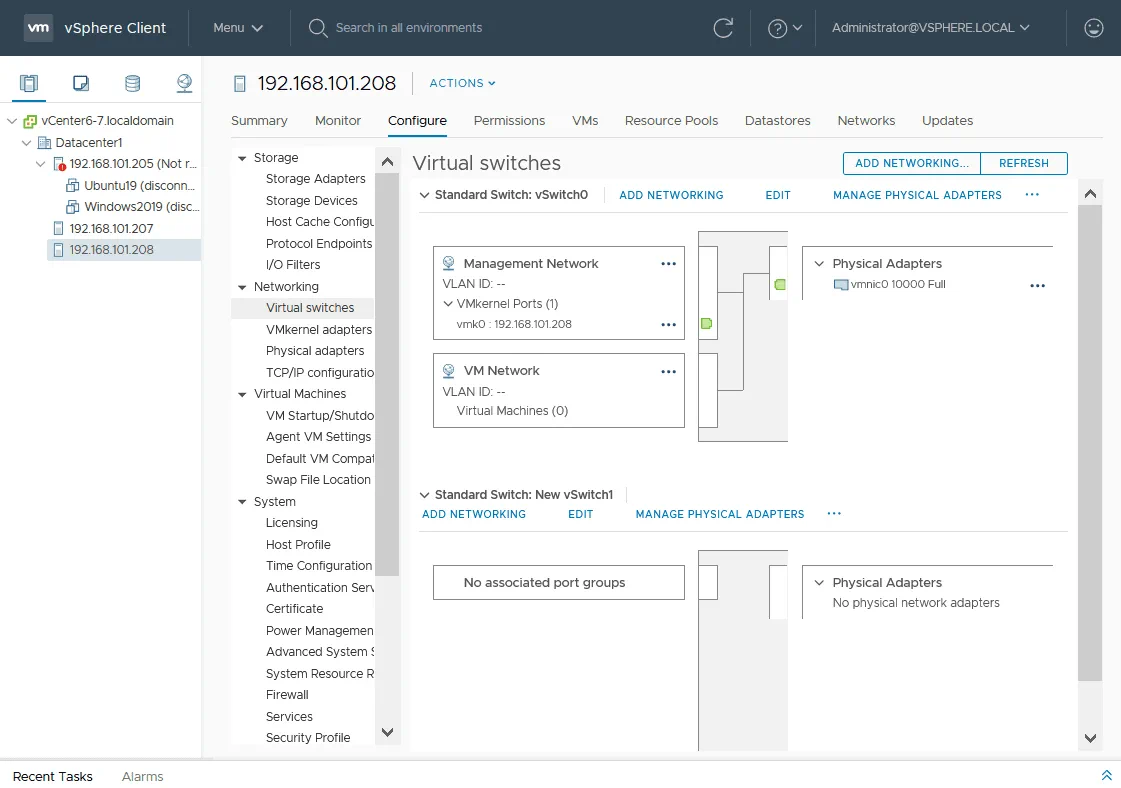
As you recall, I edited my VMware host profile after creation, and added a new virtual switch for testing purposes. Let’s check whether the configuration changes have been applied to the target host. Select the ESXi host in the Host and Clusters page, then click the Configure tab and select Virtual switches in the Networking page. As you see on the screenshot below, a new virtual switch has been created on the target host. This virtual switch is created for testing purposes and is empty. You should create port groups for different networks and associate the switch with the network adapter of the ESXi server when configuring host profiles in the production environment. You can practice configuring VMware Host Profiles in a test environment before going on to configure your production environment. Read the blog post about VMware home lab 6.7 and 7.0 to learn how to deploy VMware vSphere for testing.
Exporting a Host Profile
You can export a host profile in VMware vSphere Client to a file and then import this host profile to a VMware ESXi host managed by other vCenter Server in another VMware vSphere environment. As a result, you can have standardized configuration across multiple VMware vCenter environments.
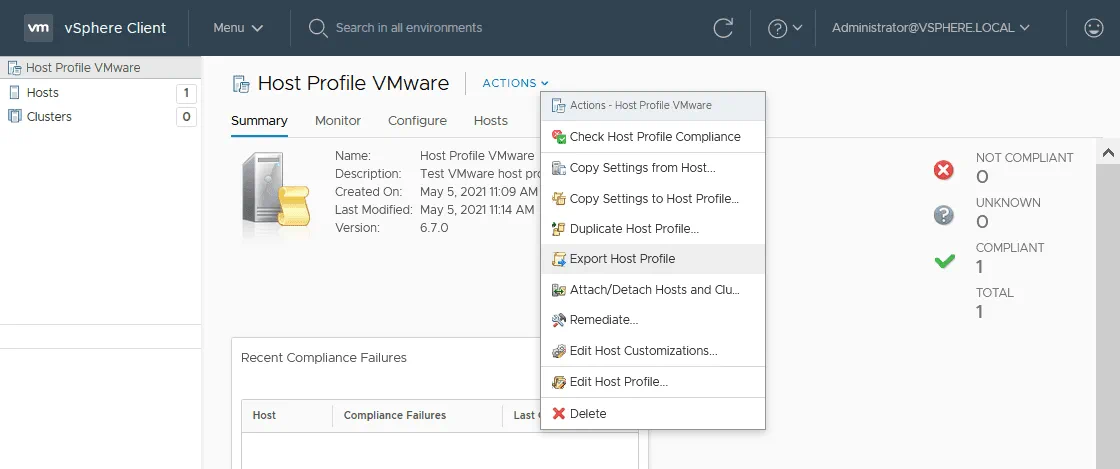
In order to export a host profile, select your profile and then on the host profile page, click Actions > Export Host Profile.
Note: You can also use this menu to copy settings from a host, copy settings to a host profile, and duplicate a host profile. The Copy Settings from Host option allows you to update an existing host profile if you want profile settings to match the settings of the selected host. Use the Copy Settings to Host Profile option if you need to copy settings from one VMware host profile to another.
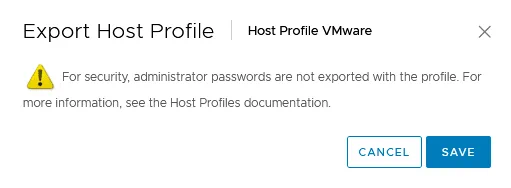
Administrator passwords are not exported with the profile for security reasons. Later you should define passwords manually for the ESXi hosts. Click Save to continue and save the exported profile to the file.
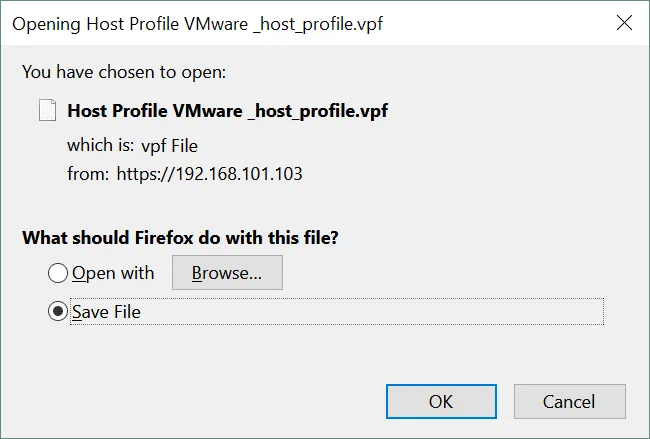
Save the VPF file to the custom location. The VPF file is similar to an XML file, but file extension is different.
The host profile has been exported.
Export to CSV files
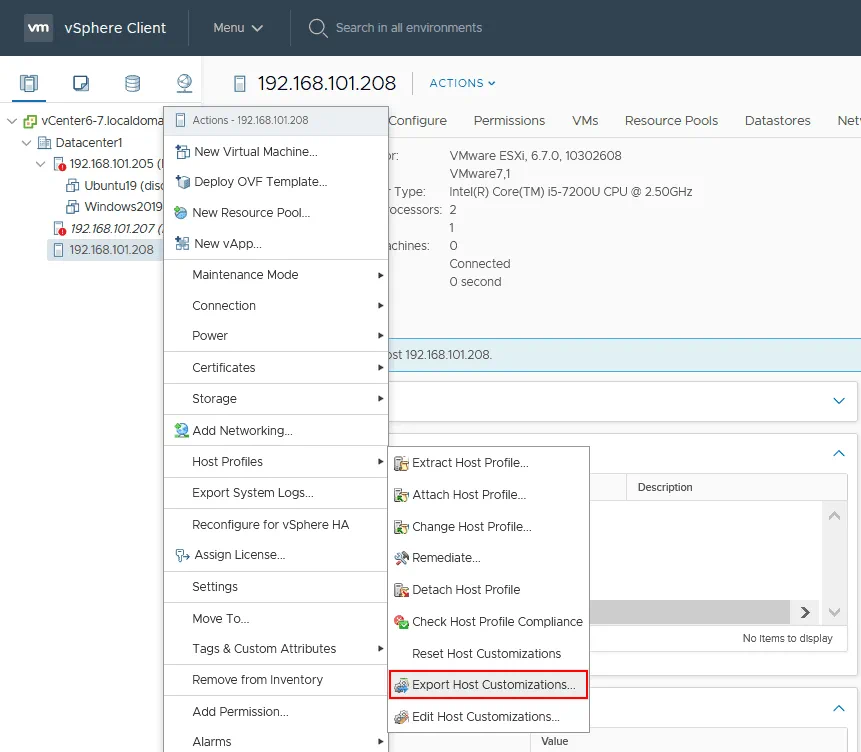
You can export VMware host profiles to CSV files. In order to export host customizations to CSV files, go to Hosts and Clusters in VMware vSphere Client, right click the ESXi host whose profile you want to export, in the menu that opens, click Host Profiles > Export Host Customizations. If you select a cluster that has a host profile, customization settings of the ESXi hosts in the cluster are exported to a CSV file.
The notification message is displayed. Passwords are not exported due to security reasons. Saving passwords in files as plain text is not secure. Save a CSV file to a custom location. Then you can open this file in Microsoft Excel or other editor that supports CSV files.
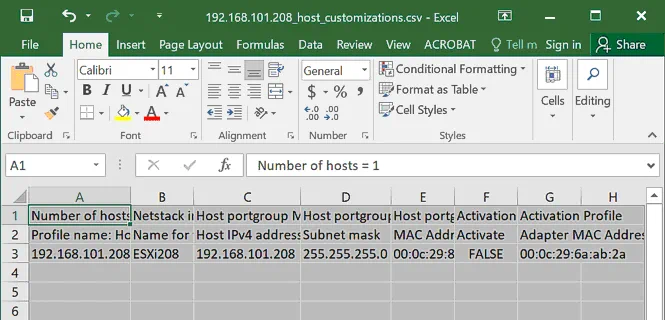
In the table shown on the screenshot, the Number of hosts = 1. You can add more rows and specify customization settings such as IP addresses, MAC addresses, hostnames for other ESXi hosts and then attach the customization configuration from the CSV file to multiple hosts. If you have exported customizations for N ESXi hosts, then you should see the Number of hosts = N and N lines related to each host (where N is the number of hosts).
Importing a Host Profile
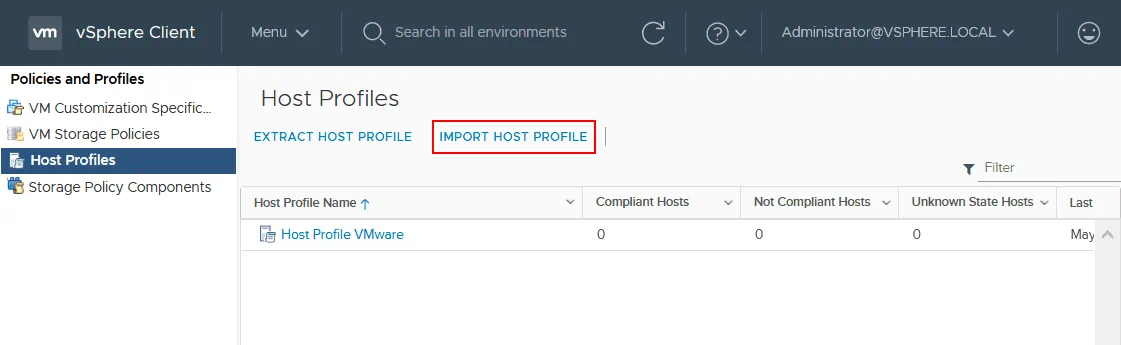
Now you can import the VMware host profile to an ESXi host that is not configured. Click Import Host Profile on the Host Profiles page.
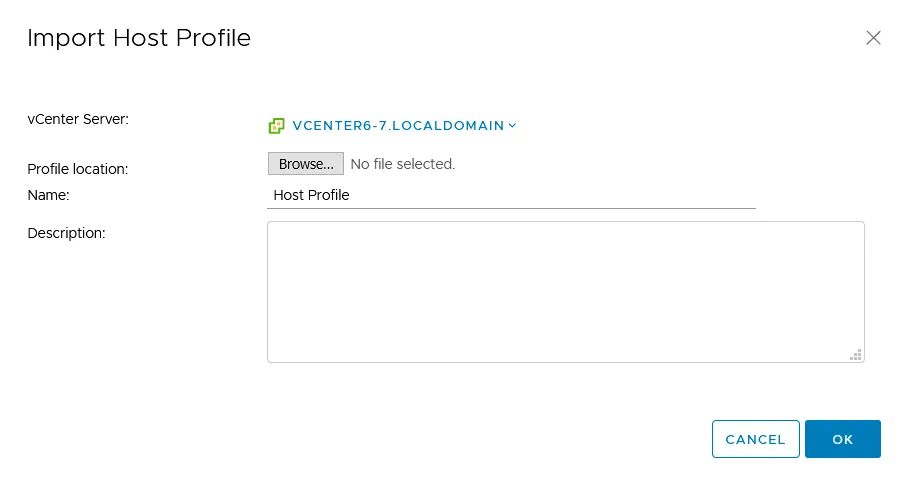
In the Import Host Profile window, select the needed vCenter Server if you have multiple vCenter servers. Click Browse, select your host profile file and hit OK to finish.
Conclusion
VMware vSphere Host Profiles is a useful feature that allows you to configure a master host and export the configuration of the master host to a host profile. Then you can attach the configuration from the host profile to other VMware ESXi hosts managed by vCenter. Using standardized configuration on all hosts makes troubleshooting easier and ensure better performance. If you have multiple VMware vSphere environments managed by different vCenter Servers, you can export a host profile to a file and then import the configuration from this file. VMware Host Profiles help you save time and avoid manual configuration that takes a lot of time. You can attach the standard configuration to the entire cluster and it will apply to all hosts in the cluster.
When you work with VMware virtual machines, having a VMware backup tool is essential to ensure data protection and recovery in case of an outage. Download the Free Edition of NAKIVO Backup & Replication and try the latest version of the comprehensive data protection solution for VMware vSphere.