How to Configure an ESXi vMotion Network
The vMotion feature in VMware vSphere enables the live migration of running virtual machines over the network between ESXi hosts without any downtime. vMotion enables moving VMs to another host as a result of hardware maintenance, updates, or other service interruptions at the physical layer while ensuring services high availability for these running VMs. Moving to another host with no interruptions is crucial, especially for clusters.
For the best performance of vMotion, you should configure vMotion networks on each ESXi host in your cluster or datacenter. Read this blog post to learn about VMware vMotion network configuration in accordance with vMotion network best practices and vMotion network requirements.

vMotion Network Requirements
The vMotion network requirements are:
- At least one physical network adapter must be used for a vMotion network on an ESXi host.
- A vMotion network should be a dedicated, secure network with enough bandwidth.
- At least 250 Mbps (megabit per second) bandwidth for each concurrent VM migration. Higher bandwidth provides higher performance. Even though you can use 1-Gbit Ethernet network adapters, it is recommended that you use 10-Gbit adapters.
- Use a low-latency network. It is recommended that the latency doesn’t exceed 10 milliseconds. The maximum round trip time for long-distance vMotion (latency higher than 4 ms) is 150 milliseconds.
- The same subnet must be accessible for a vMotion network on all ESXi hosts participating in VM migration.
- ESXi hosts must be licensed with a vSphere license, and the license must support vMotion.
Our Equipment for this Workflow
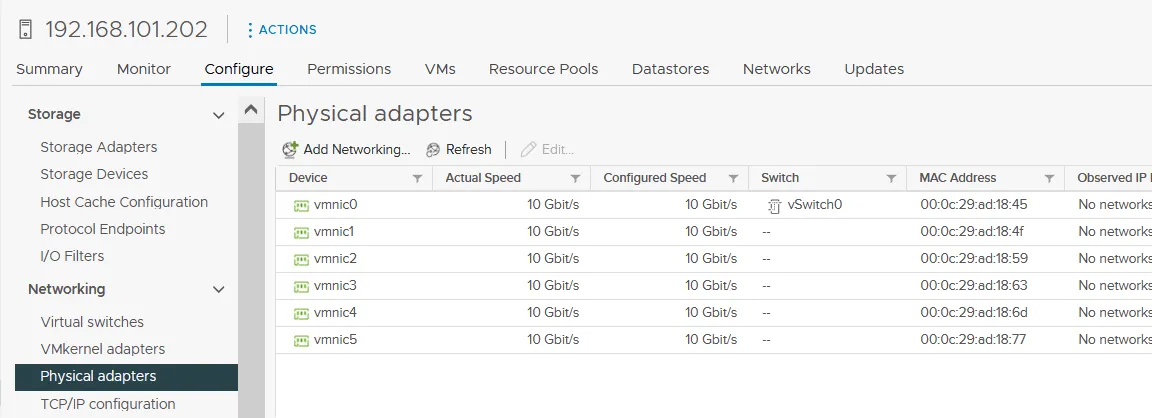
We have 6 physical network adapters connected to the ESXi host on which we are going to set up a vMotion network. The same number of network adapters is installed on another ESXi host used in our vSphere environment.
The configuration for the management network is as follows:
- ESXi host 1: 192.168.101.201
- ESXi host 2: 192.168.101.202
- vCenter: 192.168.101.103
- Network mask: 255.255.255.0
vMotion Network Configuration
To move a VM successfully with vMotion to another host, we need:
- A port group on a vSwitch enabled for vMotion
- A VMkernel adapter connected to the port group of the vSwitch and a physical uplink.
- vMotion network setup for the host
The steps to configure the vMotion network are similar to configuring iSCSI storage networks, with a few subtle differences. We complete all the actions in vCenter and use VMware vSphere Client (not VMware Host Client) because vCenter is required for vMotion anyway. We use standard virtual switches on two ESXi hosts managed by vCenter.
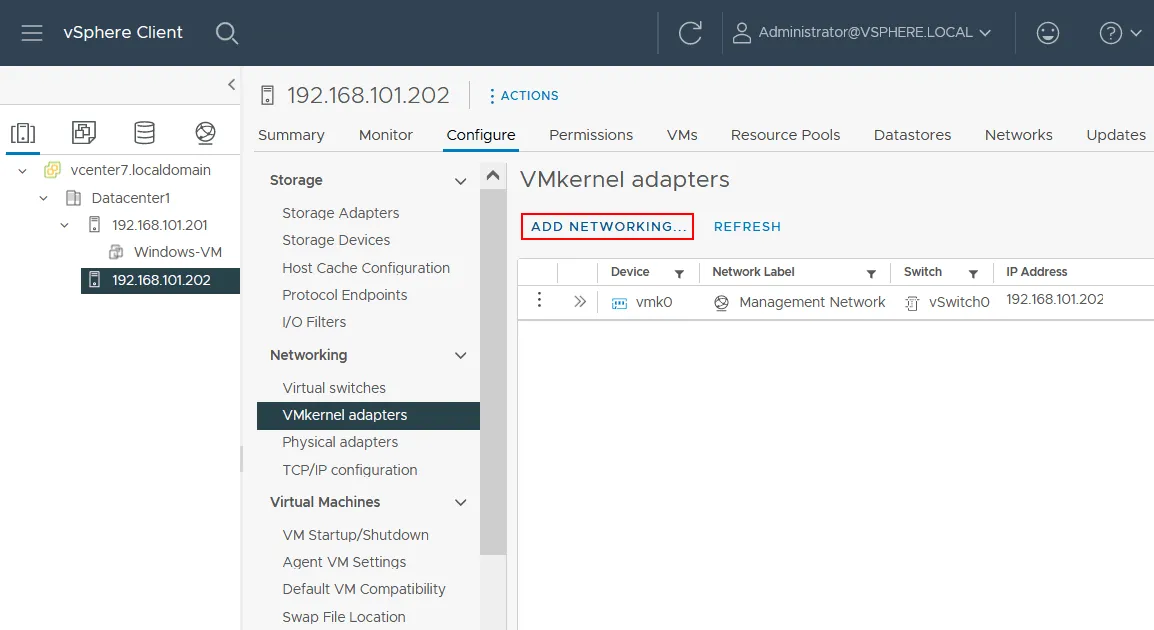
- To start vMotion network configuration, use the Hosts and Clusters view in vSphere Client to select the ESXi host in the navigation pane. Click the Configure tab, select VMkernel adapters in the Networking section, and click Add Networking.
The Add Networking wizard opens:
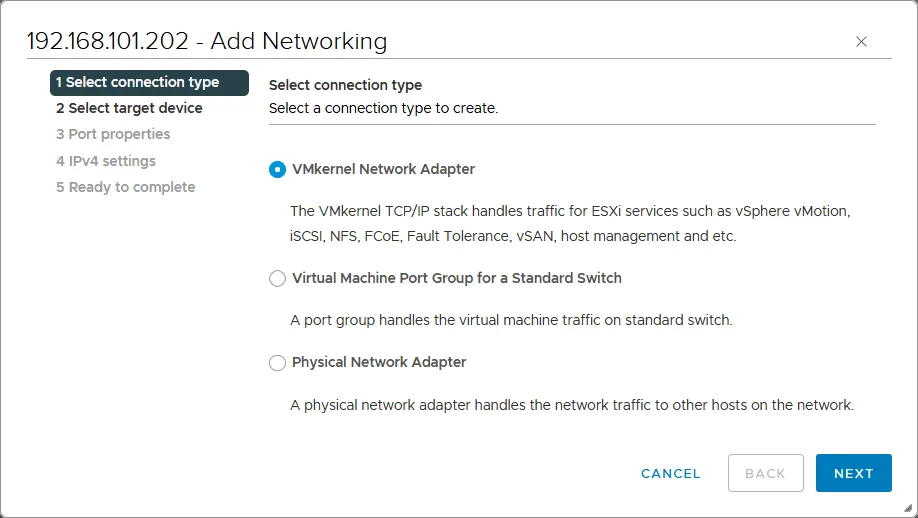
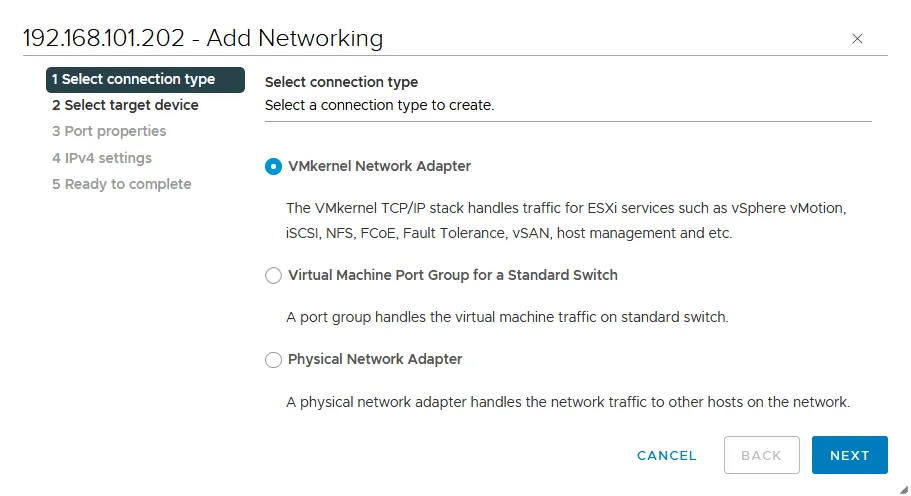
- Select connection type. Select VMkernel Network Adapter. This adapter will be used to set up vMotion. Click Next at each step of the wizard to continue.
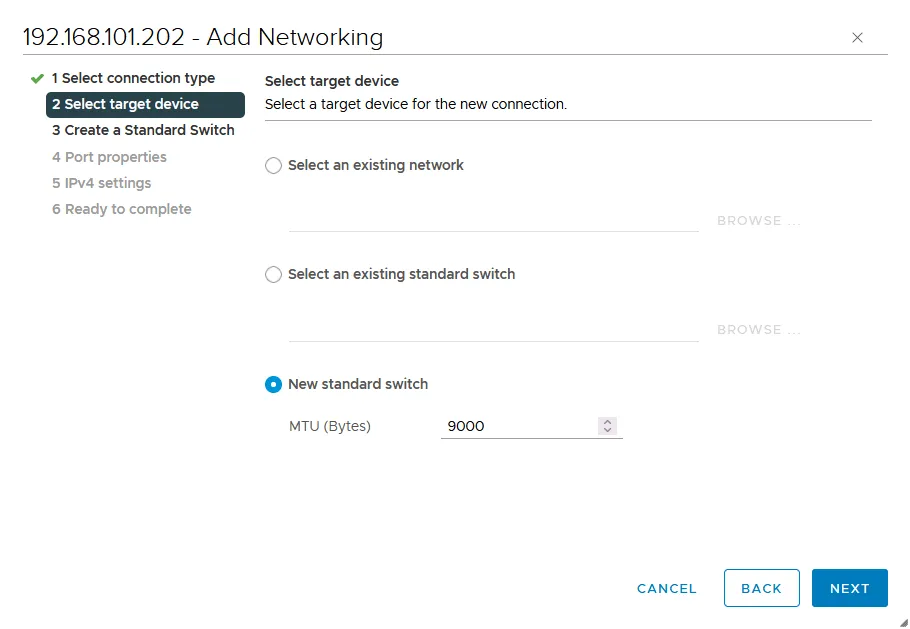
- Select target device. Select New standard switch. It is recommended that you change the default MTU value of 1500 to 9000 bytes. This way you can use jumbo frames and improve network performance when transferring vMotion traffic. Ensure that your network equipment (such as physical switches and network adapters) supports jumbo frames.
- Create a Standard switch. Click + to add physical network adapters (that are also called NICs – network interface controllers) to a virtual switch. You must connect a virtual switch to at least one physical network adapter to use vMotion and migrate VMs from one ESXi host to another. It is recommended that you add two physical network adapters for redundancy and better performance.
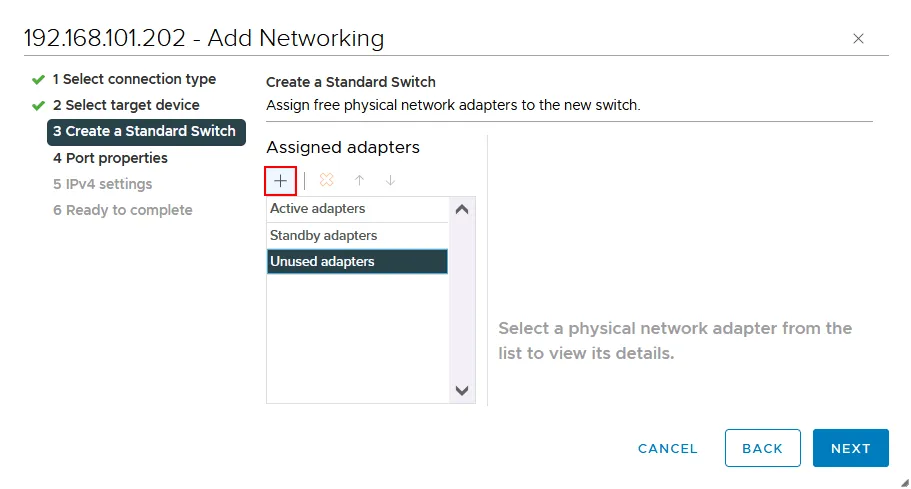
We select two physical network adapters at once: vmnic4 and vmnic5. The numbers of your adapters may differ.

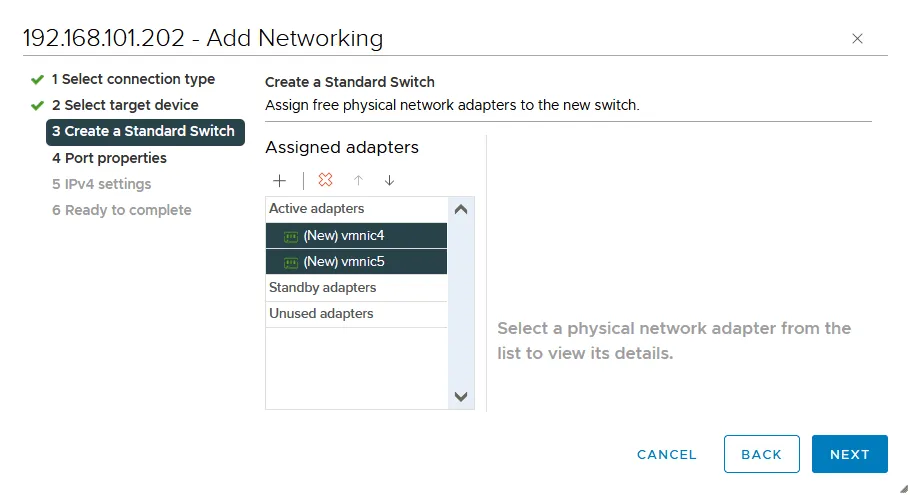
The two selected physical network adapters have been added as active adapters.
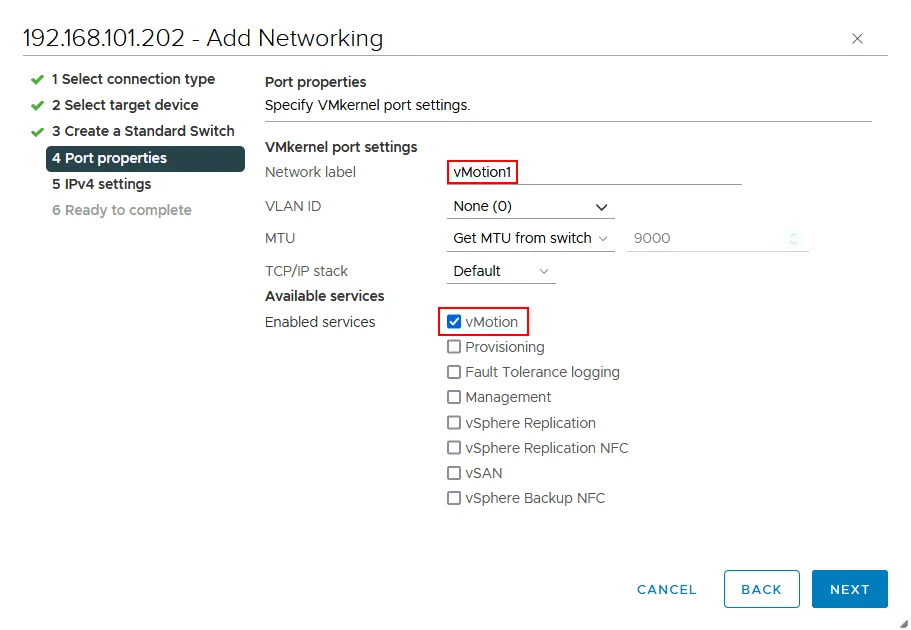
- Port properties. Enter a network label, for example, vMotion1 in VMkernel port settings to set the name for this adapter/port.
Select the vMotion checkbox in the Available services section to enable vMotion for this VMkernel port. Optionally, you can set the VLAN ID if you use VLAN for network segmentation on layer 2.
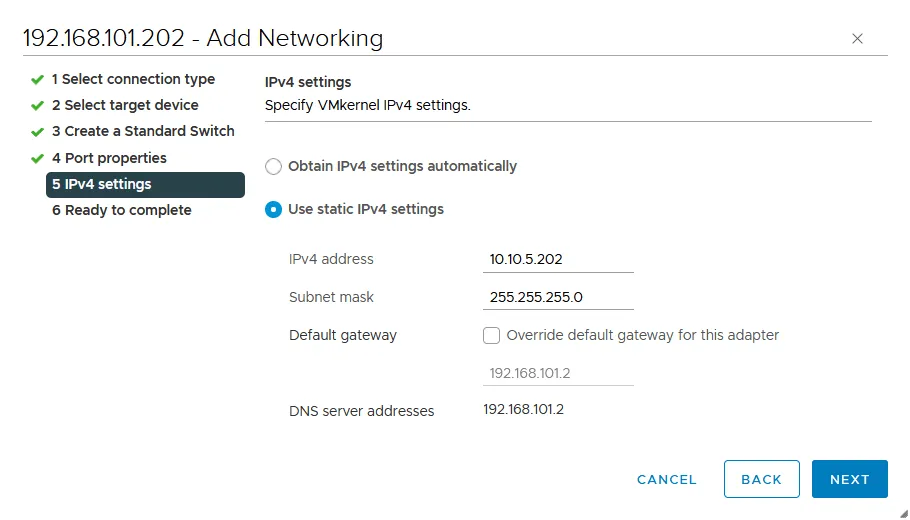
- IPv4 settings. It is recommended that you use static IPv4 configuration to set up vMotion. We add the following parameters at this step:
- IPv4 address: 10.10.5.202
- Subnet mask: 255.255.255.0
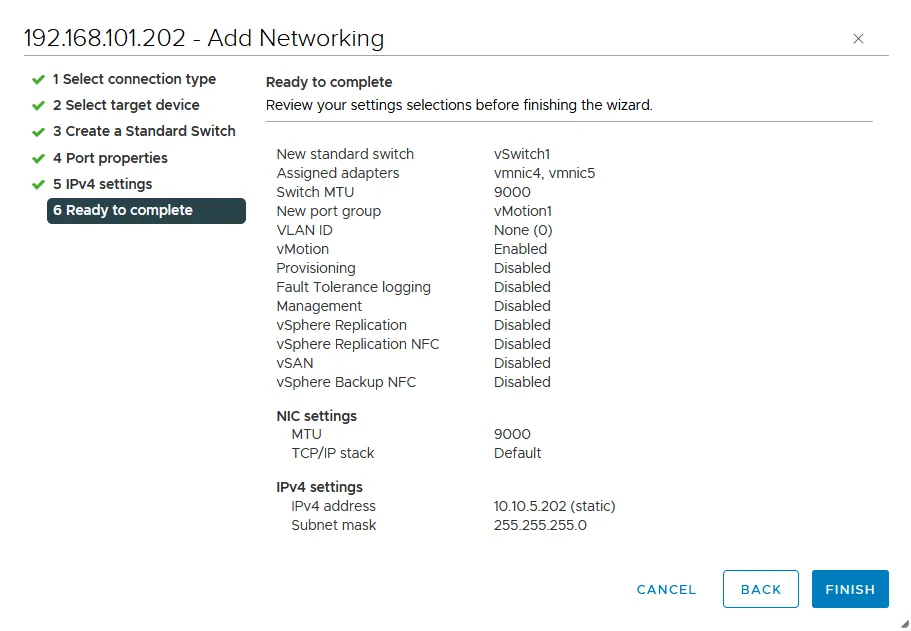
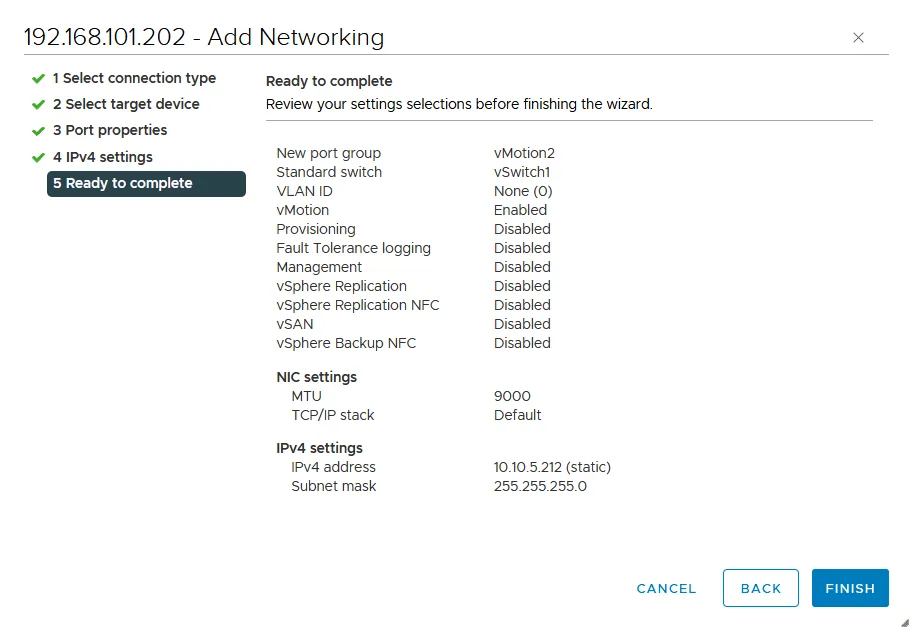
- Ready to complete. Check your settings and if everything is correct, click Finish to complete the wizard.
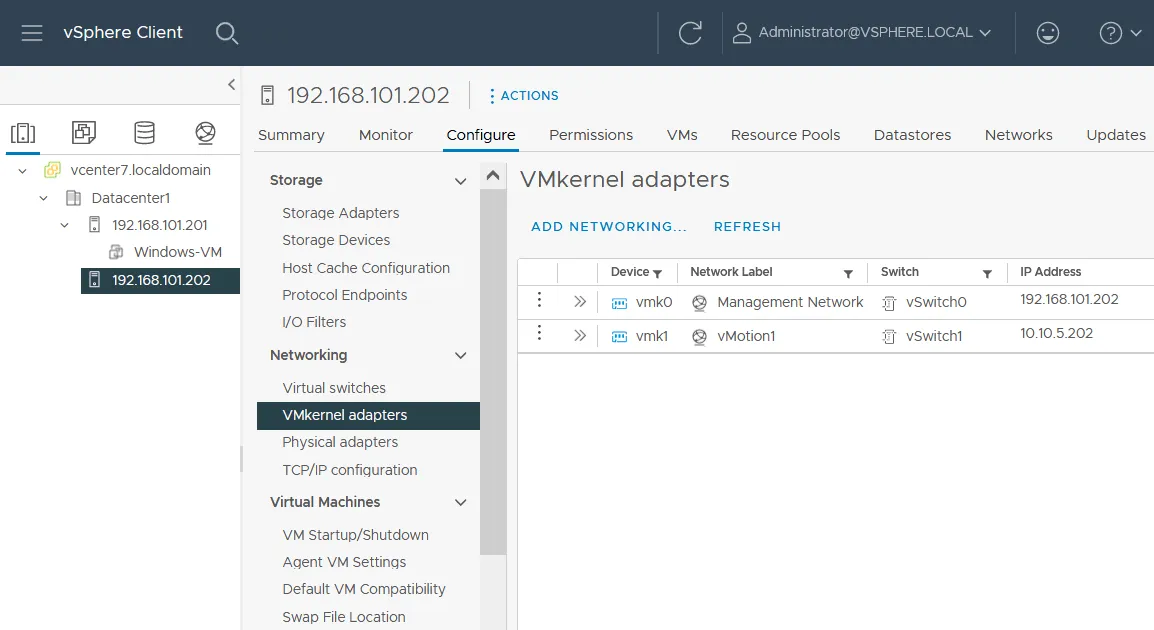
- A new VMkernel adapter (vmk1) connected to a new virtual switch (vSwitch1) is added.
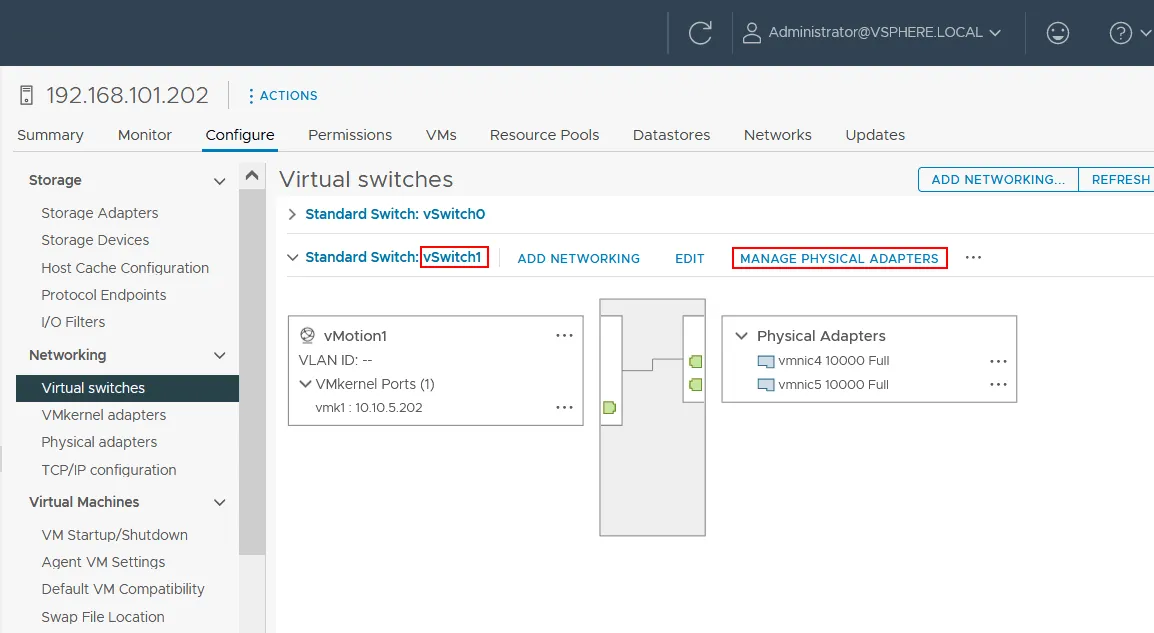
- Now, we need to edit the configuration of the physical network adapters in the properties of our vSwitch1.
Select your ESXi host, go to Configure > Virtual switches (under Networking) and select your virtual switch (vSwitch1 in our case). You can see the connection scheme of vSwitch1, including port groups, VMkernel adapters, and connected physical network adapters. Click Manage Physical Adapters.
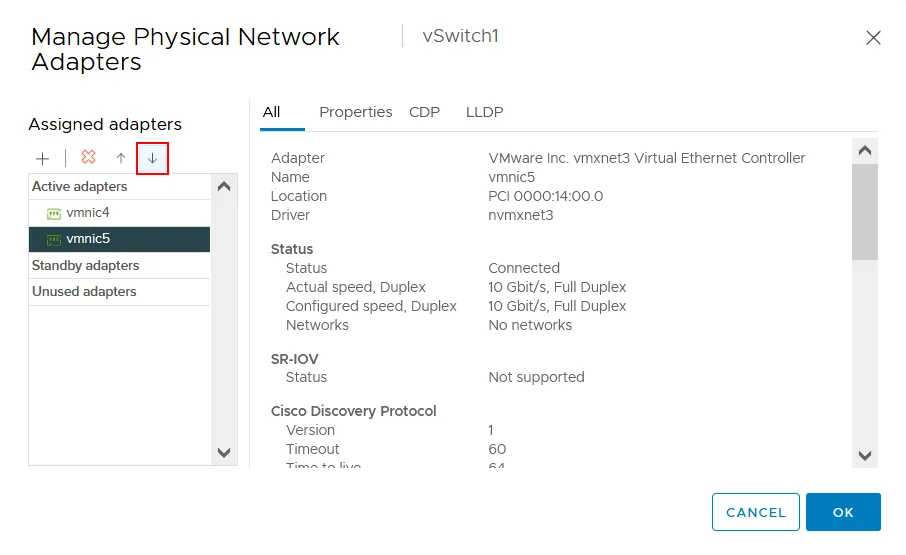
- We need to move one of the physical network adapters from Active adapters to Standby adapters. We leave vmnic4 as active and move vmnic5 down to make this adapter standby. Select the needed adapter and click the ↓ (down arrow) for this purpose.
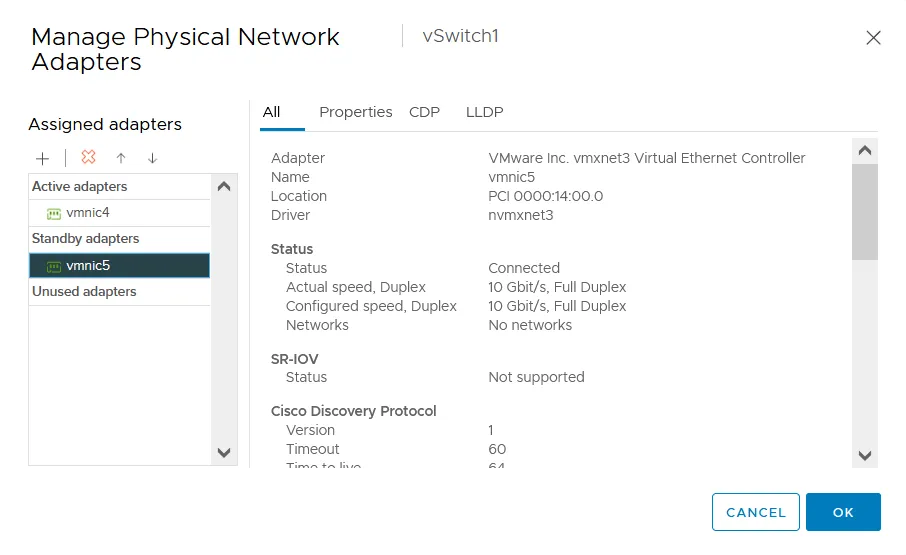
- As a result, we have the configuration as displayed on the screenshot below for vSwitch1 and the port group with vmk1 (vmnic4 is active and vmnic5 is standby). Click OK to save settings and close this window.
How to Enable Multi-NIC vMotion
Your vMotion network can work as is. However, for higher performance and reliability, you can enable multi-NIC vMotion (available from vSphere 5.1), which can provide load balancing for vMotion network traffic.
For this purpose, we will add the second VMkernel adapter and the appropriate port group to the existing vSwitch1 and edit active/standby settings for this port group used for the vMotion network.
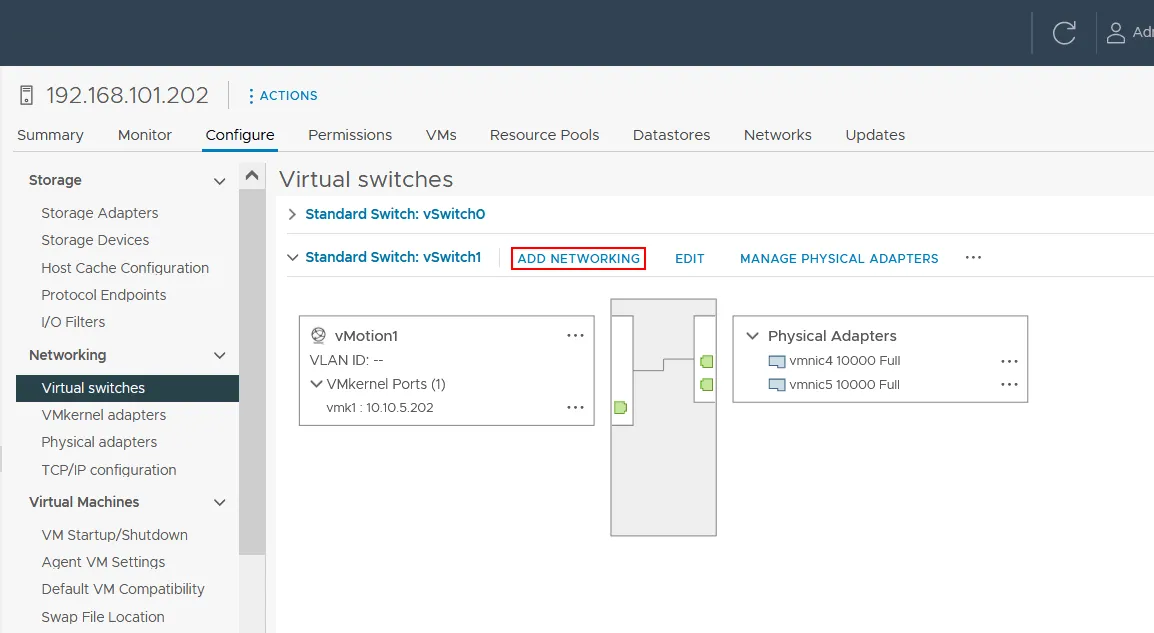
- To start, select your ESXi host, go to Configure > Virtual switches (under Networking), select your virtual switch (vSwitch1 in our case), and click Add networking.
The Add networking wizard is opened.
- Select connection type. Select VMkernel Network adapter, similarly as before.
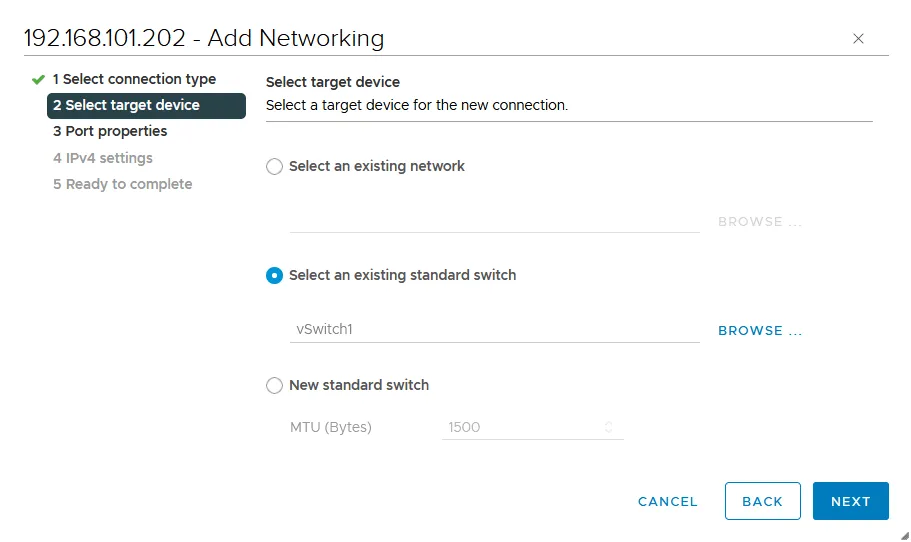
- Select target device. Select an existing standard switch (vSwitch1 in our case).
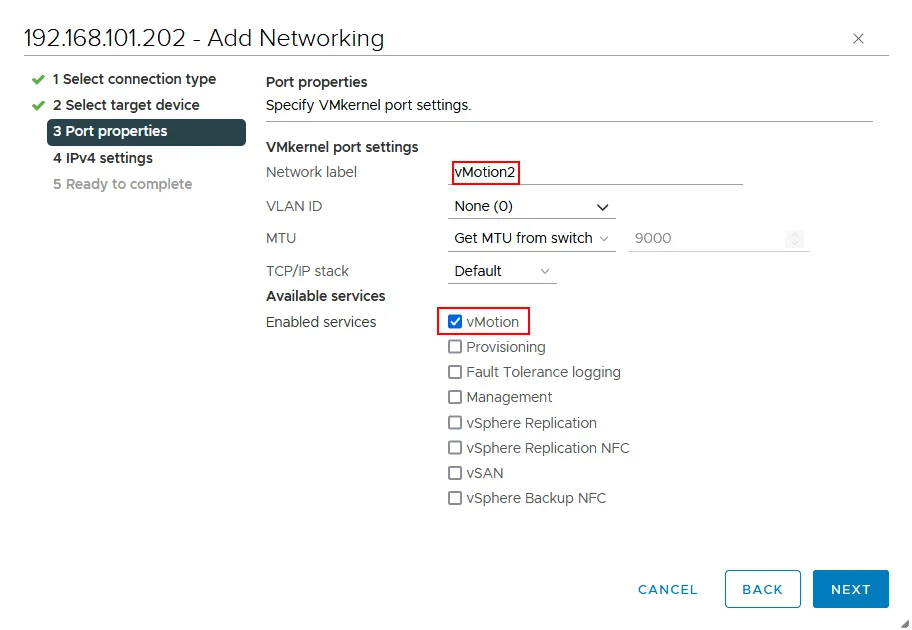
- Port properties. Enter a network label for the VMkernel port, for example, vMotion2. Select the vMotion checkbox in the Available services section to enable vMotion for this port.
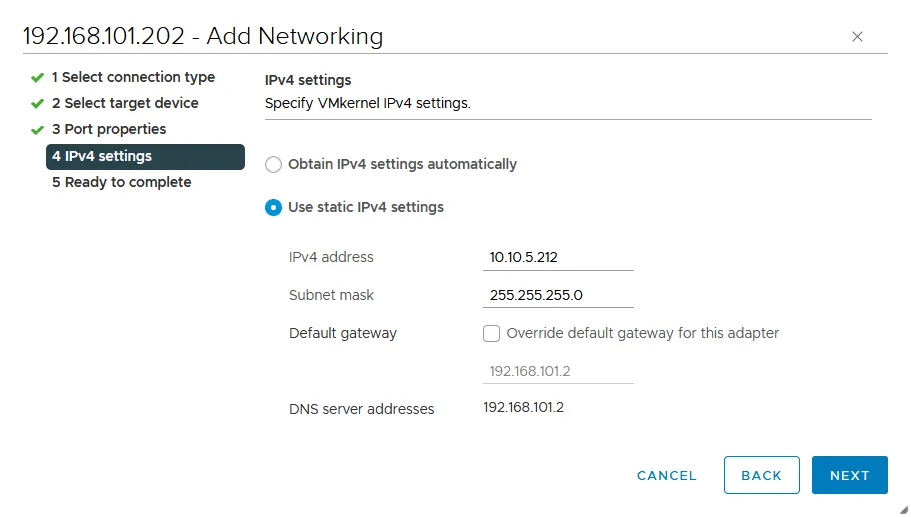
- IPv4 settings. Configure IP network settings for the VMkernel adapter. We use the following settings:
- IPv4 address: 10.10.5.212
- Subnet mask: 255.255.255.0
- Ready to complete. Check your configuration and, if everything is correct, hit Finish.
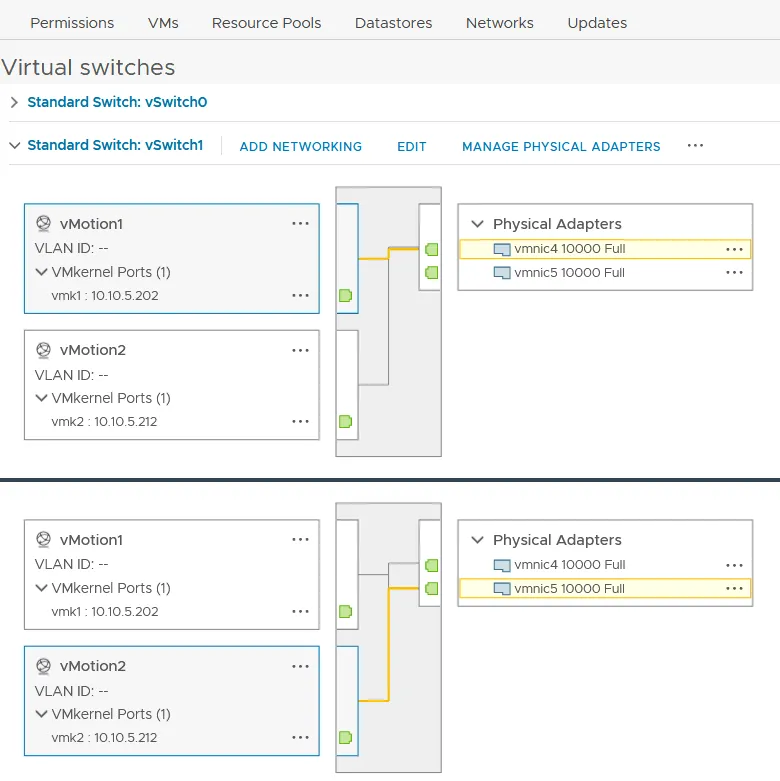
- Go back to the page with the vSwitch configuration (the Virtual switches page). Select vSwitch1 and click vMotion1 to see the network connection details.
As you can see in the screenshot below, the yellow line explains that vmk1 (VMkernel adapter) is connected to vmnic4 (physical network adapter). If we click vMotion2, we can see that vmk2 is also connected to vmnic4. Let’s change the connection settings for these two VMkernel adapters.
- Click vMotion1 and click Edit to change the settings.

- Select Teaming and failover in the left pane of the settings window. We must ensure that vmnic4 is an active adapter and vmnic5 is a standby adapter and select the Override checkbox. Click OK to save the settings.

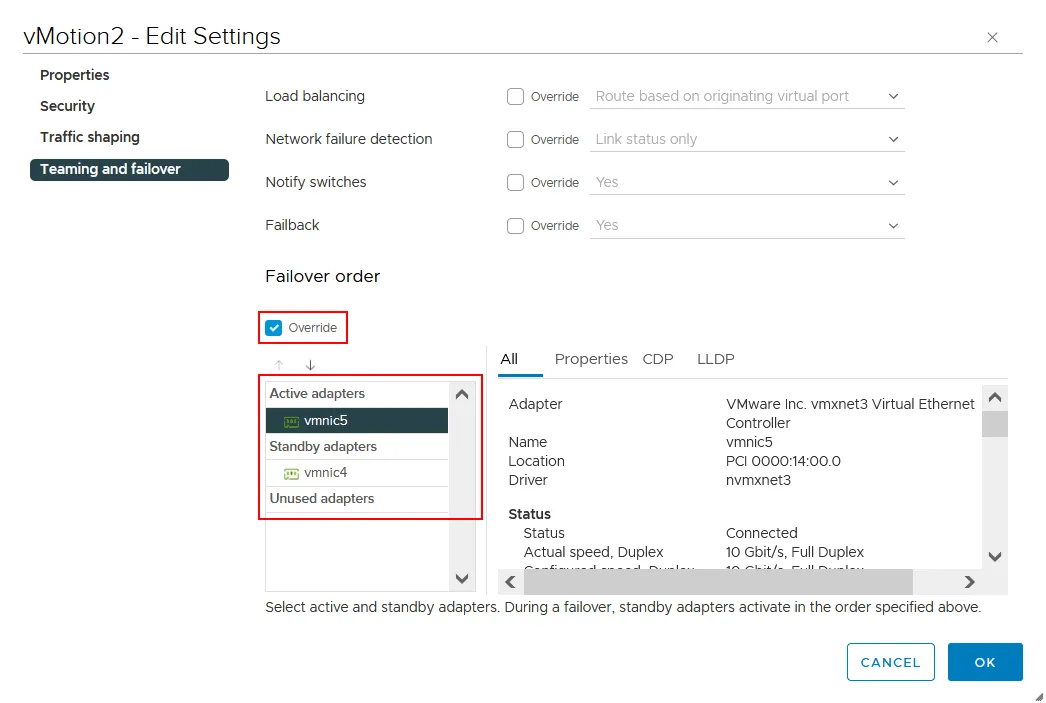
- Similarly, open the settings for vMotion2. Do the following actions in the Teaming and failover settings:
Make vmnic5 an active adapter and vmnic4 a standby adapter (opposite to the settings for vMotion1). Select the Override checkbox.
- Go back to the Virtual switches page and check the connection scheme for each VMkernel adapter and its port group. As we can see in the screenshot below, vmk1 is now connected to vmnic4 and vmk2 is connected to vmnic5.
The configuration of the first ESXi host is finished for the vMotion network. Configure other ESXi hosts of your datacenter or cluster in the same way. If you have the top vCenter license, you can use a distributed virtual switch to configure a vMotion network on a large number of ESXi hosts.
Conclusion
The vMotion network configuration includes creating a virtual switch with a VMkernel adapter and the appropriate port group that are connected to at least one physical network adapter, also called uplink. In creating the vMotion network, we use the VMkernel ports, making sure we enabled jumbo frames. We also set NIC teaming to use multiple network adapters during the vMotion process for better performance and load balancing. You can read more about ESXi networks and learn how to configure ESXi storage networks.
Keep in mind that you should protect your ESXi virtual machines with VM backups using a data protection solution like NAKIVO Backup & Replication.